
Subscribe to Our Youtube Channel
Summary of Contents for Burleigh Wagon Burleigh Wagon Series
- Page 1 Quick Start Guide Please keep this manual as it contains important information. Burleigh Wagon – Instruction and assembly manual For assembly instruction video visit: www.burleighwagon.com.au/pages/instruction-use-and-care-manual...
- Page 2 We are pleased to enclose the following instructions to help you get the most out of your Burleigh Wagon. By following this manual, you will be able to enjoy the Burleigh Wagon to its designed potential. Please note it is crucial to adhere to these instructions as damaged caused from failure to comply will not be covered under warranty.
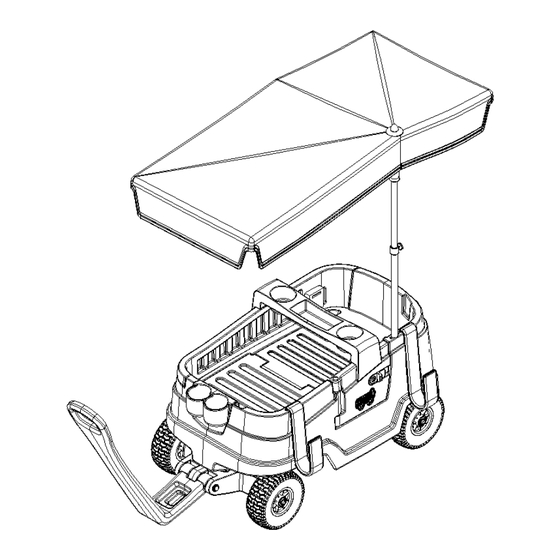
- Page 3 Quick Start Guide Please keep this manual as it contains important information. Included in the box • Instruction manual • Burleigh Wagon (body, small door, large door, cup holder, boot door) • 5th wheel • Handle • 4 wheels • 2 rods for wheels •...
- Page 4 Quick Start Guide Please keep this manual as it contains important information. Warnings – Do • PRIOR TO ASSEMBLY, THIS PACKAGE CONTAINS SMALL PARTS/HARDWARE WHICH IS A CHOKING HAZARD AND MAY CONTAIN SHARP EDGES AND SHARP POINTS. KEEP AWAY FROM CHILDREN UNTIL ASSEMBLED. •...
- Page 5 Quick Start Guide Please keep this manual as it contains important information. Step 1 - Attach tyres to 5 wheel. 1. Use star washer tool and mallet to install washer to 1 end of all 3 rods provided. Washer into groove, 5mm from end of rod. Axle Star washer Star washer tool...
- Page 6 Quick Start Guide Please keep this manual as it contains important information. Step 1 - (continued) 3. Turn on side, place block between floor and rod. Add spacer, tyre, and star washer to other side with ring spanner tool and hammer. Ring Spanner Block Step 2...
- Page 7 Quick Start Guide Please keep this manual as it contains important information. Step 3 - Attach 5 wheel to wagon Allen Key - M12 bolt - Washer - - tube - washer - nut - Ring Spanner Step 4 - Attach the handle to the 5 wheel bolt - Star...
-
Page 8: Care And Maintenance
Please keep this manual as it contains important information. Care and Maintenance The Burleigh Wagon was designed for easy care and maintenance. After each use we recommend to remove all salt water, sand, and dirt by hosing with fresh water or wiping down with a wet cloth. -
Page 9: 12 Month Limited Warranty
Burleigh Wagon will provide replacement parts or conduct repairs as determined fitting by the company. Burleigh Wagon reserves the right to exchange the item with a replacement part. Some parts may be replaced with newer model parts as the wagon is improved over time. - Page 10 Quick Start Guide Please keep this manual as it contains important information. BURLEIGH WAGON PTY LTD PO BOX 3124, ROBINA TOWN CENTRE, QLD 4220 AUSTALIA TEL: +61 439 989 054 EMAIL: INFO@BURLEIGHWAGON.COM.AU WWW.BURELIGHWAGON.COM.AU MODEL: THE BURLEIGH WAGON...
Need help?
Do you have a question about the Burleigh Wagon Series and is the answer not in the manual?
Questions and answers