
Related Manuals for Aerus SimpleMist KR003

Summary of Contents for Aerus SimpleMist KR003
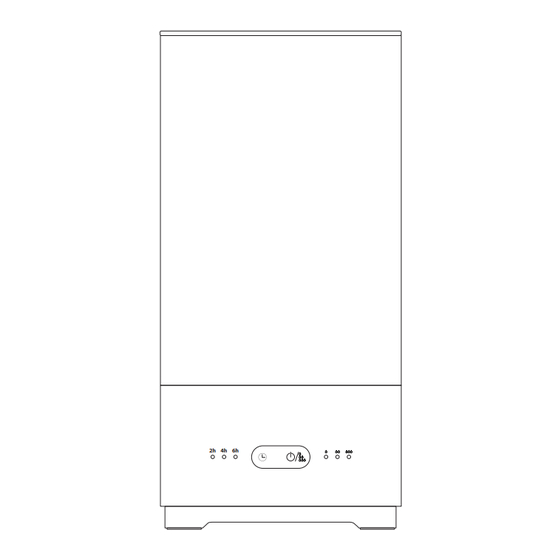
- Page 1 ™ 2h 4h 6h Ultrasonic Humidifier CAUTION: READ MANUAL CAREFULLY FOR PROPER PROCEDURES AND OPERATION.
-
Page 2: Table Of Contents
INTRODUCTION Thank you for purchasing your new SimpleMist Ultrasonic Humidifier! The SimpleMist Ultrasonic Humidifier is designed for both living and sleeping areas and humidifies areas up to 400 sq. ft. It features a timer for ease of use and aromatherapy to freshen up your living space. Please read this owner’s manual to fully understand all of the operational features and safety instructions for the unit. -
Page 3: Specifications
SPECIFICATIONS Model: SimpleMist KR003 Rated Voltage: DC 24V Rated Power: 20 W Operating Time: ≥17H Noise Levels (decibels): ≤38dB Coverage Area: Up to 400 sq. ft. (Up to 37m Weight : 3.5 lbs. (1.6 kg) Dimensions: 6.7” x 6.7” x 13.6” (17 x 17 x 34.5 cm) Water Tank Capacity: 1.3 gallons (5.0 L) -
Page 4: Important Safety Instructions
IMPORTANT SAFETY INSTRUCTIONS READ ALL INSTRUCTIONS BEFORE USING THIS PRODUCT WARNING: Important Safety Instructions to reduce the risk of fire, electrical shock, or injury. WARNING: Only use the SimpleMist Ultrasonic Humidifier indoors. Improper use can be hazardous for your health and can lead to injury. Your safety and the safe operation of this humidifier are very important to us. -
Page 5: Product Content & Features
PRODUCT CONTENT & FEATURES ACCESSORIES: Cover • Aromatherapy Cotton Pad (1) Mist Outlet • Cleaning Brush • Adapter – AC 100V ~ 240V • Water Level Float Water Tank • Ceramic Ball Water Softening Filter Water Level Indicator Base Control Panel FEATURES: CLEANABLE TIMER... -
Page 6: Operational Placement & Parts Diagram
OPERATIONAL PLACEMENT & PARTS DIAGRAMS Your safety and the safe operation of this humidifier are very important to us. All safety and operating instructions should be read, adhered to and followed before the unit is operated. Incorrect operation may cause harm or damage. Cover Water Level Float Ceramic... -
Page 7: Getting Started
GETTING STARTED NOTE: Before using your humidifier, remove all packaging from the filters. Notch faces up Press down here Step 1: Open the package; install the Water Level Float on the Water Level Float Bracket as shown. CAUTION: When installing the Water Level Float, make sure the Water Level Float Axis and the Water Level Float Bracket are in the correct direction according to the... - Page 8 GETTING STARTED (CONTINUED) Step 4: Place the Water Tank on top of the base and then fill the tank with clean water. Water Tank Pay attention to not exceed the maximum water level, which is marked on the side of the Water Tank.
-
Page 9: Control Panel/ Product Operation
CONTROL PANEL OPERATION NOTE: Indicator lights will only illuminate when the humidifier is plugged in and the power is turned on. POWER/MIST BUTTON Press the Power/Mist Button to turn on the humidifier. 1. Press the Power/Mist Button one time to set the humidifier to the low mist setting. -
Page 10: Water Level Indicator
WATER LEVEL INDICATOR Water Level Indicator Light With the humidifier powered on, press and hold the Timer Button for 1.5 seconds to turn the Water Level Indicator Lights ON. Press and hold again for 1.5 seconds to turn the Water Level Indicator Lights OFF. -
Page 11: Power Off/Storage
POWER OFF/STORAGE Press and hold the Power/Mist Button for 1.5 seconds to turn off the humidifier. NOTE: The Indicator Lights turn off immediately, but it takes several minutes to power off the fan. Power Adapter PROCEDURE FOR STORAGE OR AN EXTENDED PERIOD OF NON-USAGE: 1. -
Page 12: Product Maintenance
PRODUCT MAINTENANCE WARNING: Disconnect plug from power source! PREPARING THE HUMIDIFIER BASE FOR CLEANING: Detach the Water Level Float according to the diagram. NOTE: The included Cleaning Brush can be used for cleaning all parts of the humidifier. GENERAL CLEANING INSTRUCTIONS: 1. -
Page 13: Troubleshooting
TROUBLESHOOTING WARNING: Please do not disassemble the SimpleMist Humidifier or service yourself. If these corrective actions do not solve the problem, please contact Customer Service by calling toll free 1-888-236-7231 or our website at www.allergybuyersclub.com. FAULT CAUSE TREATMENT 1. Set to LOW mist level. 1. -
Page 14: Warranty
LIMITED 1 YEAR WARRANTY Customer should not repackage and ship the SimpleMist Humidifier due to possibility of irreparable damage. For warranty service, please contact Customer Service by calling 1-888-236-7231 or visit www.allergybuyersclub.com. WHAT IS COVERED BY THIS WARRANTY We warrant the SimpleMist Humidifier to the Customer, subject to the conditions herein, against defects in workmanship and material, for a period of one (1) year from the date of Customer’s original retail purchase. -
Page 15: Warranty
This entire warranty shall continue to be valid, legal, and enforceable in any jurisdiction where a similar determination has not been made. This warranty is provided by: Aerus Health Direct, LLC 300 East Valley Drive Bristol, VA 24201 (in US) SERVICE Every effort is made to ensure customers receive an up-to-date owner’s manual on the use of our products;... - Page 16 TV technician for help. ™ For information regarding this product visit www.allergybuyersclub.com (888) 236-7231 Aerus Health Direct, LLC 300 East Valley Drive, Bristol, VA 24201 Made in P.R.C ©Aerus Health Direct, LLC 2018 allergybuyersclub.com is owned and operated by Allergy Buyers Club, LLC...
Need help?
Do you have a question about the SimpleMist KR003 and is the answer not in the manual?
Questions and answers