Table of Contents
Advertisement
Advertisement
Table of Contents

Summary of Contents for Gemax Pro
-
Page 2: Table Of Contents
Table of Contents 1. Precaution…………………………………………….…3 2. Preparation……………………………………………..5 Standard Accessories……………………………5 Gems tools…………..……………………………6 Part Names & Functions………………………..7 3. key features…………………….….………..…….……8 4. Use the Microscope………..……….……..…………..9 Install Battery…………………….…..………….9 Insert a MicroSD Card…………..……….……10 Display Icons & Meanings…….……….….…...11 Turn on the Microscope…….……..…….……12 Turn off the Microscope…….…………………13 How to Capture………………..…..………….13 Take Photo &... - Page 3 TV Mode……………………………………….27 Frequency……………………………………….28 Format SD………………………………………28 Default Setting…………………………….…..29 Version…………………………………………...29 6. Specifications…………………..……………….…..…30 7. Computer System Minimum Requirement……….…30 8. Troubleshooting………………………………….……31 GemaxPortableCapturePro Software Introductions.32 Install Software………………………….…..……………..32 Start Microscope……………………………...……………33 Software Introduction..…..…………………...……………34 Capture Photo………………………………...34 Capture Video………………………………...34 Timer……………………………………………35 Calibration & Measurement…………………………….…36 Calibration….……………………………………36 Measurement.…………………………………40 Software Interface Instructions………………….……..…45...
-
Page 4: Precaution
Welcome Thank you for purchasing a Gemax Pro Digital Microscope. Please take a moment to read through this manual. Its contents will help you to get the best use of the smart microscope. 1. Precaution Before using the LCD Digital Microscope, please ensure that you read and understand the safety precautions described below. - Page 5 Take LCD Digital Microscope to the nearest authorized service center for repair. Never attempt to repair LCD Digital Microscope on your own. LCD Digital Microscope may become slightly warm during use. This does not indicate malfunction. If the exterior of LCD Digital Microscope needs cleaning, wipe it with a soft, dry cloth.
-
Page 6: Preparation
2. Preparation ■ Standard accessories LCD Digital Microscope Lithium Battery USB cable TV cable Calibration 4GB MicroSDHC Adaptor card card... -
Page 7: Gems Tools
■ Gems Tools Gems tweezers Ring holders Gems tray Background USB Gooseneck H & A Viewer LED light color paper set... -
Page 8: Part Names & Functions
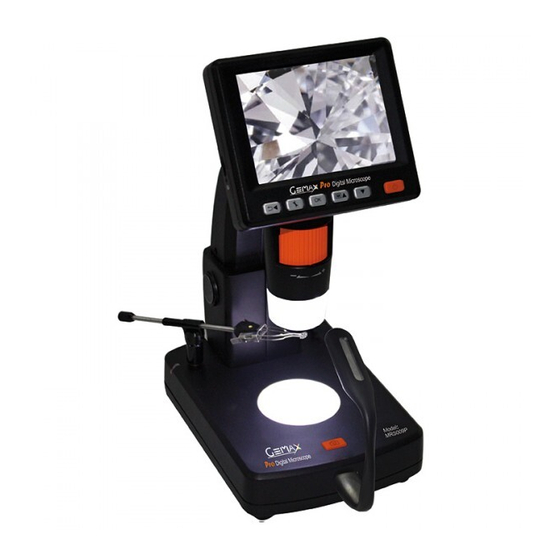
■ Parts Names & Functions Functions Functions 3.5” LCD display LED brightness dimmer B MicroSD card slot USB port Focus Wheel TV out Microscope tube 5v DC in Capture button Gems tweezer hold DC out Battery compartment LED brightness dimmer A Battery charging indicator Zoom +/-... -
Page 9: Key Features
3. Key Features 3.5 inches TFT panel 3.5M high quality image sensor (up to 14M by interpolation) 20x-220x magnification Photo & 720P Video Timer Measurement (when working on computer) Support MicroSDHC card up to 32GB Driver free to download for Windows XP SP2/ Vista/Win7/8 and Mac OS 10.6 or above (direct plug-in, driver installation not required) Rechargeable Lithium Battery... -
Page 10: Use The Microscope
4. Use the Microscope 4.1 Install battery 1). Open the battery door by sliding its door latch. 2). Insert the lithium battery to the battery compartment according to the polarities shown in the compartment. Note: Before using the microscope, you must charge its battery. -
Page 11: Insert A Microsd Card
4.2 Insert a MicroSD Card ( included) You must insert a MicroSDHC card to record and store your pictures and videos. Inserting the MicroSD memory card: 1) Turn off the microscope 2) Insert the MicroSDHC card into the MicroSDHC card slot; gently press in until card is latched. Note: Do not force the card into the slot;... -
Page 12: Display Icons & Meanings
4.3 Display Icons & Meanings ICON Meaning Still Image/Video Capture Status Exposure Value Image qty that can be captured Video duration that can be captured MicroSD Inserted (a cross on it if no SD inserted) Current Still Image Resolution Current Video Resolution Current Date Current Time Battery electricity indicator... -
Page 13: Turn On The Microscope
Note: The icon displays can be switched on/off by pressing Zoom Wheel⑵ downward vertically. 4.4 Turn on the Microscope Press Power on/off button to turn on the power. -
Page 14: Turn Off The Microscope
4.5 Turn off the Microscope 1) Press on/off button 2) By Power Save. Please refer to Section 5.2.2 for Auto Power Off. 4.6 How to Capture? - Page 15 1) Turn on the microscope, put object to be observed onto the light base or on the Gems tweezers. 2) Insert the USB Gooseneck LED Light into the front USB port to get better light source.. 3) Rotate focus wheel to get a fine focus, or contact to TV for the easy of getting best focusing.
-
Page 16: Take Photo & Record Video
4.7 Take Photo & Record Video Press Capture button to take a photo or record video. (1) Press Playback/Left to enter video mode as follows. There is video icon on the left corner. -
Page 17: Playback
(2) Press Capture button to start recording video. Press again to stop. 4.8 Play Back (1) Press Playback/Left to enter play back mode as follows. There is review icon on the left corner. (2) Press UP/DOWN to select among captured pictures and video clips. - Page 18 (3) Protect At play back mode, press to enter sub-menu as follows, then confirm protect pictures from delete. (4) Slide Show At play back mode, press to enter sub-menu as follows, select interval time, and then confirm by OK.
- Page 19 3) Color Mode At preview status, press to switch among Color/Positive/Negative! 4) Zoom in: push Zoom Wheel upward 5) Zoom out: push Zoom Wheel downward Note: The zoom ranges from 1x – 4.0x...
-
Page 20: Download To Computer
4.9 Download images from SDHC card to Computer 1) Connect the microscope to computer by USB cable. 2) Choose Mass Storage and then you can view stored photos & videos. They are saved in “DCIM”. 4.10 Preview on Computer 1) Connect the microscope to computer by USB cable. 2) Choose PC Camera mode 3) Start PortableCaptureLCDPro software. -
Page 21: Charge Battery
4.11 Charge the Battery Before using the microscope, you must charge its battery. Plug the small end of the power adaptor into the DC-in port located on the bottom side of the unit. Then plug the other end of the power adaptor into a standard AC outlet. -
Page 22: Menu Introductions
5. Menu Introductions 5.1 Main MenuⅠ Press to enter main menuⅠ as follows: Here you can setup Resolution/Timer/Quality/ Sharpness/Exposure/Date Stamp 5.1.1 Set Resolution 1) From the main menuⅠ, choose Resolution and select a resolution between WVGA/2M/3M/5M/8M/14M. 2) Press OK to confirm selection. -
Page 23: Time-Lapse Capture
5.1.2 Time-lapse Capture 1) From the main menu Ⅰ, choose Time-lapse Capture and then enter Timer setup: Lapse Num: input quantity of frames you want to take by UP/DOWN and LEFT ◄ buttons. Lapse Time: input interval time between frame capture by UP▲/DOWN▼... -
Page 24: Quality
For Time-lapse capturing the auto power off time should be longer than the time lapse set. 30 minutes setting is recommended. Please refer to section 5.2.2 You are suggested to use AC adaptor instead of battery for time-lapse capturing, to avoid low battery power termination. -
Page 25: Sharpness
5.1.4 Sharpness From the main menuⅠ, choose Sharpness and then select among Strong/Normal/Soft. 5.1.5 Exposure (Brightness) From the main menuⅠ, choose Exposure and then select a target value. -
Page 26: Date Stamp
5.1.6 Date Stamp From the main menuⅠ, choose Date Stamp and then select a target option. 5.2 Main Menu Ⅱ Press to enter main menu I, and then press LEFT◄ button to enter Main Menu Ⅱ as follows: Here you can setup Date/Time, Auto Power Off, Language, TV mode, Frequency, Format, Default Setting, and Version. -
Page 27: Date/Time
5.2.1 Date/time From the main menu Ⅱ, choose Date/Time to setup date and time. 1) Setup date and time by LEFT◄./UP▲/DOWN ▼buttons 2) Setup date mode among YY/MM/DD, DD/MM/YY, and MM/DD/YY. 5.2.2 Auto Power Off From the main menu Ⅱ, choose Auto Power Off and then select among the following a target time then press OK button, for the microscope to power off without key operation. -
Page 28: Language
5.2.3 Language From the main menu Ⅱ, choose Language and then select a target language by UP/DOWN. 5.2.4 TV Mode From the main menu Ⅱ, choose TV Mode and then select, between NTSC and PAL, the correct mode compatible with your TV. -
Page 29: Frequency
5.2.5 Frequency From the main menu Ⅱ, choose Frequency between 50Hz and 60Hz. 5.2.6 Format micro SD card From the main menu Ⅱ , choose Format SD to format the MicroSD card inserted. All the files in the card will be deleted after card formatting... -
Page 30: Default Setting
5.2.7 Default Setting From the main menu Ⅱ, choose Sys. Reset to reset the system back to default. 5.2.8. Version From the main menu Ⅱ, choose Version to view the current machine version. -
Page 31: Specifications
Input:100-240V, 50/60Hz; Output: 5V, 1A English/Germany/French/Spanish/Italian/ OSD languages: Portugese/Japanese/Chinese/Russian Software languages: English/Germany/French/Spanish/Russian/Italian/Po rtugese/Dutch/Polish/Japanese/Korean/Chinese Image Measurement: By software “Gemax Portable Capture Pro” bundled Size: L145mm*W106mm*H232mm Weight: 780 gm.(with battery) 7. Computer System Minimum Requirement Operating system Windows XP SP2/Vista/Win7,8 Mac 10.6 or above... -
Page 32: Troubleshooting
8. Troubleshooting Problems Solution The unit does not turn on. Charge the battery. Time-lapsecapturing Auto power off time setting shorter than lapse terminated time set. Refer to section 5.1.2 Ensure that the power is on. Charge the battery. The screen is blank. Verify that the item you want to magnify is Positioned correctly under the lens. -
Page 33: Gemaxportablecapturepro Software Introductions.32
Insert the driver CD into CD-ROM Drive and this will automatically display the following interface: 1. Install the PortableCaptureHD software Click Gemax Portable Capture Pro software and then reboot the system when asked. 2. You can also browse the User manual in PDF format and the CD contents by choosing the corresponding menus. -
Page 34: Start Microscope
Start the Microscope Connect your Microscope to your PC USB port as shown on Page21, start the software by clicking the icon generated on the desktop after installation and you will see the following screen pop up. -
Page 35: Software Introduction
Software functions ■ Capture Photo a. Click ‘Photo’ shortcut icon in the main menu bar. b. Click ‘Capture > Photo’. ■ Capture Video a. Click ‘Video’ shortcut icon in the main menu bar. b. Click ‘Capture > Video’. -
Page 36: Timer
■ Timer (Photo / Video) Click ‘Timer’ shortcut icon in the main menu bar. * Under Timer photo, you can set the start time, interval time and total picture number. * Under Timer video, you can set the start time, interval time and total video number. -
Page 37: Calibration & Measurement
■ Calibration and Measurement Please make calibration before measurement. Calibration Display XY Guide from ‘Options>XY Guide’’. It’s used to check the dial is parallel or not. 1. Focus microscope on the attached dial and then adjust the magnification till the picture is clear. Take a picture for the selected area when the dial is parallel to the crossing as below. - Page 38 2. Double-click on the picture to enter into measurement interface as below.
- Page 39 3. Click Calibration icon , and then move mouse to the picture. Click on the beginning and ending points across a known value. Now a dialog will popup as below and you need to enter the exact value of the measurement sample into ‘Actual dimension’.
- Page 40 during measurement. 4. Now you can use ‘Any angle Line’ under Measurement icon to measure the value again. If the value you measure by software is nearly the same as the exact value of the dial means the calibration finish.
-
Page 41: Measurement
Measurement Double-click on the picture to enter into measurement interface. Under the ‘Measurement’ icon , you can choose any desired options to measure. 1. Any Angle Line Measurement Simply click from one point and drag to the next point, and then release the click. - Page 42 Change Calibration If you need to change the magnification rate and adjust focus to capture picture, please calibrate the magnification rate again. 1. Double click to open the picture, Click ‘ > Reset magnification > Reset picture magnification’ as below. And then start calibration again (Calibration details please refer to page37).
- Page 43 2. Change the magnification rate and capture several pictures, click on the picture to enter into measurement interface. And click ‘ > Set magnification > Set picture magnification’, now a dialog will show up as below; enter the magnification rate into the dialog and click ‘OK’. 3.
- Page 44 capture pictures, just click ‘ > Set magnification >Set capture magnification’. Now all pictures will use the same magnification rate and you can start measurement directly. Draw and Text You can draw or add a text on the picture and save for later analysis.
- Page 45 2. Click icon and set the font for the text in the popup dialogue as below.
-
Page 46: Software Interface Instructions
6. Software Interface Instructions Main Interface Icons Capture photo – It’s used to capture photo one by one. Start / Stop record video. Timer for photo / video – Set the start time, interval time and total photo/video number. Full screen mode, Press ESC or double-click to exit. - Page 47 Main Menu File set the directory to store photos Photos Directory: taken; Videos Directory: set the directory to store video taken;...
- Page 48 Options Resolution: change preview size Date/Time: set to display system date/time on preview window Language: choose different OSD language XY Guide: display XY guide on preview window Fullscreen mode: enter into full screen. Click ESC or double click to exit...
- Page 49 Capture Photo: take a photo Video: record a video clip Measurement Interface Instructions Save as Redo Copy to Draw clipboard Copy file Text note...
- Page 50 Previous Measurement Next Calibration Undo Download This symbol on the product or in the instructions means that your electrical and electronic equipment should be disposed at the end of its life separately from your household waste. There are separate collection systems for recycling in the EU.
Need help?
Do you have a question about the Pro and is the answer not in the manual?
Questions and answers
why does it say mass storage on the scr