
Related Manuals for iLive ITP180B


Summary of Contents for iLive ITP180B
- Page 1 Bar Speaker for iPhone + iPod User Guide ITP180B Customer Helpline Number: 0844 481 5000 ITP180B User Guide...
- Page 2 Please read the warning section on page 18 carefully before using your bar speaker. You should have Bar Speaker with Dock for iPod Remote control iPod adapters x6 AV cables (x2) Wall mount fittings You may also need • Headphones • 3.5mm line in cable • 2x AAA batteries ITP180B User Guide...
-
Page 3: Table Of Contents
Compatibility information Troubleshooting Maintenance Technical specifications Warnings Need something else? There are a wide range of accessories and other products that can be ordered direct to your door from ASDA. For more information see www.asda.com Customer Helpline Number: 0844 481 5000 ITP180B User Guide... -
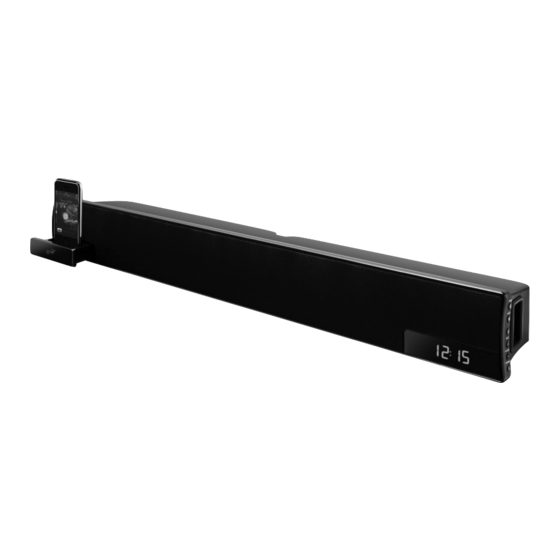
Page 4: Your Bar Speaker With Dock For Iphone And Ipod
Auxiliary inputs AV inputs R and L R and L FM antenna S-video outputs Video output Tip: Where a button that appears on both the radio and remote control is referenced in this guide you can use either button to use that function. ITP180B User Guide... - Page 5 Press to cycle through AUX, FM, and iPhone/ saved radio stations. iPod modes. iPod Press to switch to iPhone/ iPod mode. DISPLAY Press to view the clock on Press to save a radio station the display to the bar speaker’s memory. Customer Helpline Number: 0844 481 5000 ITP180B User Guide...
-
Page 6: Set Up
Setting up your Home Music system 1 Plug the power cable into a standard three pin wall socket and switch the power on at the wall. The display will illuminate to read 00.00 Note: Aerial positioning You may need to reposition the aerial for optimum reception. The best position is dependent on the station and the strength of the signal. ITP180B User Guide... - Page 7 3 Replace the battery cover. Setting the time 1 W ith the music system off, press the CLOCK button on your remote control. The time will begin blinking. 2 Press the MIN and HR buttons on the remote to adjust the minute and hour. 3 Wait 5 seconds to finish setting the clock. Customer Helpline Number: 0844 481 5000 ITP180B User Guide...
-
Page 8: Everyday Use
Listening to a saved station Once you have saved your preset stations you can scroll through them by pressing the MEMORY buttons on your remote control. Note: Volume You can select the desired volume using the VOLUME + and . Press the MUTE button to turn the sound off, press it again to return to the previous volume level. ITP180B User Guide... - Page 9 REV to search tracks Press the SLEEP button to select a time while listening. between 90 and 1 minute/s. Select 0 to turn the sleep function off. After the selected time has expired, the unit will turn itself off. Note: Charging your iPod While the power is on, the micro system will automatically charge your iPod. Customer Helpline Number: 0844 481 5000 ITP180B User Guide...
-
Page 10: Advanced Use
2-3 inches When placing the bar speaker on an entertainment center, bookshelf, or any type of enclosed space, be sure to allow at least 2-3 inches of space around the bar speaker for ventilation. If the bar speaker is enclosed in a tight space, without ventilation, heat generated from the bar speaker could produce a potential heat hazard. ITP180B User Guide... - Page 11 Press the MUTE button to turn the sound off, press it again to return to the previous volume level. STANDBY SOURCE LINE IN VOLUME PLAY/PAUSE iPod DRAWER External device External device Customer Helpline Number: 0844 481 5000 ITP180B User Guide...
- Page 12 Subwoofer Television Note: From video source Connecting an external video source You can connect an external video source such as a DVD, games console or digital decoder to your bar speaker using the VIDEO IN socket. This will allow the video source to be played trough a connected TV as described as above. To TV ITP180B User Guide...
-
Page 13: Mounting The Bar Speaker
You should have • 2x Large spacers (19mm)* • 2x Medium spacers (13mm)* • 2x Small spacers (6mm)* • 2x Mounting brackets • 4x Short screws • 4x Long screws • 6x Wall plugs * T he spacers may not be needed dependent on where you are mounting the speaker. If needed use one of the provided sets as required. You will need • Level • Manual or Power Screwdriver • Stud Finder • Pencil • Tape Measure Customer Helpline Number: 0844 481 5000 ITP180B User Guide... - Page 14 DRAWER 5 Use the LEVEL to level each of the hanging brackets, then DRILL the second screw into the bottom hole on both mounting brackets. 6 Slide the bar speaker onto the mounting brackets, and make sure there is a firm and stable connection before letting go of the bar speaker. Finally, use the LEVEL to confirm that the bar speaker is level. ITP180B User Guide...
-
Page 15: Ipod And Iphone Compatibility Information
Play and charge Included bracket Video out compatibility compatibility iPod mini 4GB 6GB iPod 4th generation 20GB, 40GB iPod 4th generation (colour display) 20GB 30GB iPod 4th generation (colour display) 40GB 60GB iPod shuffle 1st & 2nd generation 512MB 1GB iPod nano 1st generation 1GB 2GB 4GB iPod 5th generation (video) 30GB 60GB 80GB iPod nano 2nd generation (aluminium) 2GB 4GB 8GB iPod classic 80GB, 160GB (2007), 120GB 160GB (2009) iPod nano 3rd generation (video) 4GB 8GB iPod touch 1st generation 8GB 16GB 32GB iPod touch 3rd generation 32GB 64GB iPhone 4 16GB 32GB iPhone 4GB 8GB 16GB iPhone 3G 8GB 16GB iPhone 3GS 8GB 16GB 32GB iPod nano 4th generation (video) 8GB 16GB iPod touch 2nd generation 8GB 16GB 32GB 64GB iPod nano 5th generation (video camera) 8GB 16GB Customer Helpline Number: 0844 481 5000 ITP180B User Guide... -
Page 16: Troubleshooting
0844 481 5000 For more information visit your local store Monday - Friday 9am - 8pm, Saturday 9am - 5pm or find us online at www.asda.com Sunday 11am - 4pm. Calls charged at local rates. ITP180B User Guide... -
Page 17: Technical Specifications
Technical specifications 30” (W) x 5” (D) x 3.5” (H) Size 10W x 2 +30W Output Power <2w Standby power consumption Please see the name plate on the rear of your unit for full product description Customer Helpline Number: 0844 481 5000 ITP180B User Guide... -
Page 18: Warnings
• R epairs must only be performed by the responsibly to promote the sustainable reuse manufacturer or its service agent or similarly of material resources. To return your used qualified person. device, please use the return and collection • D o not immerse the main unit, the power systems or contact the retailer where the adapter or any accessories in water or any product was purchased. They can take this other liquid. product for environmental safe recycling. ITP180B User Guide... - Page 19 First call our Customer Helpline as they may Customer Helpline be able to help you with the problem. 0844 481 5000 If the problem can’t be resolved, you will receive a reference number. Monday - Friday 9am - 8pm, Saturday 9am - 5pm Take the reference number along with the Sunday 11am - 4pm. Calls charged at local rates. item, all its components and your receipt to your nearest store for a full refund. This does not affect your statutory rights. The contents of this guide were correct at the time of going to press but ASDA reserves the right to make subsequent modifications and changes to the product or this guide. ASDA is a registered trademark of Walmart Ltd. All other trademarks or product names are assigned to their relevant registered owners. Customer Helpline Number: 0844 481 5000 ITP180B User Guide...
- Page 20 © 2010 Digital Products International (DPI, Inc.) | All other trademarks appearing herein are the property of their respective owners. Specifications are subject to change without notice Manufactured for Asda Stores Ltd, Asda House, Southbank, Great Wilson Street, Leeds. LS11 5AD This symbol on the product or in the instructions means that your electrical and electronic equipment should be disposed at the end of its life separately from your household waste. There are separate collection systems for recycling in the EU. For more information, please contact the local authority or your retailer where you purchased the product.
Need help?
Do you have a question about the ITP180B and is the answer not in the manual?
Questions and answers