Table of Contents
Advertisement
Available languages
Available languages
Advertisement
Table of Contents

Related Manuals for LF DuraWorx DWX200

Summary of Contents for LF DuraWorx DWX200
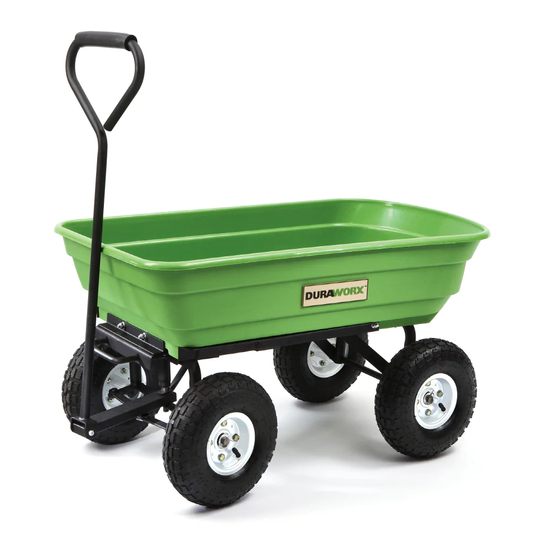
- Page 1 ® MODEL # DWX200 Durawox® is a registered trademark of LF, LLC. All Rights Reserved. Español p.10 Questions, problems, missing parts? Before returning to your retailer, call our customer service department at 1-800-867-6763, 9 a.m. - 4 p.m., CST, Monday-Friday.
-
Page 2: Package Contents
PACKAGE CONTENTS Part Description Quantity Tray Dump Lock Assembly Frame Rear Axle Assembly (includes left and right rear struts and rear axle frame) Front Axle Assembly Wheel Handle Hardware Kit (see Hardware Contents for details) -
Page 3: Hardware Contents
HARDWARE CONTENTS Picture Picture Description Description Part Quantity Part Quantity (Shown to size) (Shown to size) M8 x 20mm Cotter Pin Hex Head Bolt M8 x 20mm 5/8 in. Truss Washers Head Bolt M8 x 40mm Wheel Truss Spacer Head Bolt M8 x 40mm Phillips Flat Washer... - Page 4 ASSEMBLY INSTRUCTIONS Note: During assembly of each step of Fig. 1 assembly, assemble all hardware and hand tighten. Once all the hardware is installed for that particular step, tighten all the hardware. 1. Attach the rear axle frame of the rear axle assembly (D) to the tray (A) using two M8 x 40mm truss head bolts (CC), two M8 lock nuts (JJ), and two M8 washers (II).
- Page 5 ASSEMBLY INSTRUCTIONS Fig. 2 2. Attach the dump lock assembly (B) to the tray (A) using four M8 x 20mm truss head bolts (BB), four M8 lock nuts (JJ), and four M8 washers (II), as shown in Fig. 2. Hardware Used M8 x 20mm Truss Head Bolt M8 Lock Nut...
- Page 6 ASSEMBLY INSTRUCTIONS Fig. 3 3. Attach the front axle assembly (E) to the frame (C) using two M8 x 40mm Phillips flat head bolts (DD), two M8 lock nuts (JJ), and front axle two M8 washers (II). support arm Attach the front axle support arm to the frame (C) using two M8 x 20mm hex head bolts (AA), two M8 lock nuts (JJ), and two M8 washers (II) as shown in Fig.
- Page 7 ASSEMBLY INSTRUCTIONS Fig. 4 4. Attach the frame (C) to the tray (A) using two M8 x 20mm truss head bolts (BB), two M8 lock nuts (JJ), and two M8 washers (II), as shown in Fig. 4. Hardware Used M8 x 20mm Truss Head Bolt M8 Lock Nut M8 Washer...
- Page 8 ASSEMBLY INSTRUCTIONS Fig. 6 6. Attach the handle (G) to the yoke using the M8 x 60mm bolt (EE), M8 lock nut (JJ), and M8 washer (II), as shown in Fig. 6. Hardware Used M8 x 60mm Bolt M8 Lock Nut M8 Washer OPERATION INSTRUCTIONS 1.
-
Page 9: Replacement Parts List
REPLACEMENT PARTS LIST For replacement parts, call our customer service department at 1-800-867-6763, 9 a.m. - 4 p.m., CST, Monday-Friday. Part Description Quantity Dump Lock Assembly Frame Rear Axle Assembly (includes left and right rear struts and rear axle frame) Front Axle Assembly Wheel Handle... - Page 10 ARTÍCULO # 0288051 CARRITO PORTA-BASURA ® DE JARDÍN Duraworx® es una marca registrada de LF, LLC. MODELO # DWX200 Todos los derechos reservados. English p.1 ¿Preguntas, problemas, piezas faltantes? Antes de volver a la tienda, llame a nuestro Departamento de Servicio al Cliente al 1-800-867-6763, de lunes a viernes de 9 a.m. a...
-
Page 11: Contenido Del Paquete
CONTENIDO DEL PAQUETE Pieza Descripción Cantidad Bandeja Ensamble del seguro del porta-basura Estructura Ensamble del eje posterior (incluye puntales posteriores izquierdo y derecho y estructura del eje posterior) Ensamble del eje frontal Rueda Manija Kit de aditamentos (consulte la sección Aditamentos para obtener más detalles) -
Page 12: Advertencias Y Precauciones
ADITAMENTOS Imagen Imagen Descripción Descripción Pieza Cantidad Pieza Cantidad (tamaño real) (tamaño real) M8 x 20mm Pasador de Perno de cabeza chaveta hexagonal M8 x 20mm Arandelas Perno de cabeza de 5/8” segmentada M8 x 40mm Espaciador Perno de cabeza para las ruedas segmentada M8 x 40mm... -
Page 13: Instrucciones De Ensamblaje
INSTRUCCIONES DE ENSAMBLAJE Nota: Durante cada paso del ensamblaje, Fig. 1 ensamble todos los aditamentos y apriete a mano. Una vez que todos los aditamentos estén instalados según el paso correspondiente, apriételos. 1. Fije la estructura del eje posterior del ensamble del eje posterior (D) a la bandeja (A) con dos pernos de cabeza segmentada M8 x 40 mm (CC), dos contratuercas M8... - Page 14 INSTRUCCIONES DE ENSAMBLAJE Fig. 2 2. Fije el ensamble del seguro del porta-basura (B) a la bandeja (A) con cuatro pernos de cabeza segmentada M8 x 20 mm (BB), cuatro contratuercas M8 (JJ) y cuatro arandelas M8 (II), como se muestra en la Fig.
- Page 15 INSTRUCCIONES DE ENSAMBLAJE Fig. 3 3. Fije la estructura del eje frontal (E) a la estructura (C) con dos pernos Phillips de cabeza plana M8 x 40 mm (DD), dos Ensamble contratuercas M8 (JJ) y dos arandelas M8 (II). del eje frontal Fije el brazo de soporte del eje frontal a la estructura (C) con dos pernos de cabeza...
- Page 16 INSTRUCCIONES DE ENSAMBLAJE Fig. 4 4. Fije la estructura (C) a la bandeja (A) con dos pernos de cabeza segmentada M8 x 20 mm (BB), dos contratuercas M8 (JJ) y dos arandelas M8 (II), como se muestra en la Fig. 4. Aditamentos utilizados M8 x 20mm Perno de cabeza...
- Page 17 INSTRUCCIONES DE ENSAMBLAJE Fig. 6 6. Fije la manija (G) a la horquilla con el perno M8 x 60 mm (EE), una contratuerca M8 (JJ) y una arandela M8 (II), como se muestra en la Fig. 6. Aditamentos utilizados M8 x 60mm Perno Contratuerca M8 Arandela M8...
-
Page 18: Lista De Piezas De Repuesto
LISTA DE PIEZAS DE REPUESTO Para obtener piezas de repuesto, llame a nuestro Departamento de Servicio al Cliente al 1-800-867-6763, de lunes a viernes de 9 a.m. a 4 p.m., hora central estándar. Pieza Descripción Cantidad Ensamble del seguro del porta-basura Estructura Ensamble del eje posterior (incluye puntales posteriores izquierdo y derecho y estructura del eje posterior)
Need help?
Do you have a question about the DuraWorx DWX200 and is the answer not in the manual?
Questions and answers
what size tires does the model #DWX200 Garden Dump Cart use?
The LF DWX200 Garden Dump Cart uses 5/8 inch wheel truss spacers, but the exact tire size is not specified in the provided information.
This answer is automatically generated
@Ralph Enger
what is the wheel size on the garden cart
The wheel size of the LF DWX200 garden cart is not specified in the provided context.
This answer is automatically generated
where to get parts
You can contact the customer service department at 1-800-867-6763, available Monday to Friday from 9 a.m. to 4 p.m. CST, for replacement parts.
This answer is automatically generated
Looking to purchase replacement tires for DuraWorx lawn cart.
What size wheel can I buy to replace the wheels?
Need rear axel on durawork dump cart
can I order just part A