
Summary of Contents for Admiral AD3036
- Page 1 6 Quart Pressure Cooker Owner’s Manual PLEASE READ BEFORE OPERATING THIS PRODUCT. Model: AD3036...
-
Page 2: Important Safeguards
IMPORTANT SAFEGUARDS When using this appliance, basic safety precautions must always be followed, including the following: 1. Read all instructions before using this product. Be sure to follow the instructions. 2. This appliance generates heat during use. Do not touch hot surfaces. Always use handles or knobs when handling this pressure cooker. - Page 3 17. Always attach plug to appliance first, then plug cord into the 120V wall outlet. To disconnect, turn any control to “OFF”, then remove plug from wall outlet. 18. Do not operate this appliance when the power cord or plug damaged or if the appliance malfunctions, is dropped or has been damaged in any manner. Return it to the Authorized Service Station for examination, repair, electric or mechanical adjustment. 19. The use of accessory attachment not recommended by Admiral may result in fire, electric shock or injury to person. 20. Do not use pressure cooker for other than intended use. Misuse can cause injuries. 21. Do not use outdoors. 22. Intended for countertop use only. Keep 6 inches (15.2 cm) clear from the wall and on all sides including the top. Always use appliance on a dry, stable, level surface. 23. Take care to NOT PLACE the pressure cooker directly under your kitchen cabinets. When releasing steam it’s recommended to protect your cabinets by keeping the pressure cooker away from cabinets surfaces. 24. Do not let cord hang over edge of table and counter, or touch hot surface. 25. Do not place or near a hot gas or electric burner, or a heated oven, or flammable material. 26. When moving the product, Do not hang up the lid handle directly, please use the body handle in order to preventing the drop of it.
-
Page 4: Polarized Plug
POLARIZED PLUG 1. Your appliance is equipped with a polarized plug (one blade is wider than the other). 2. To reduce the risk of injury this plug must be inserted into a properly installed outlet. 3. If the plug does not fit fully into the outlet, reverse the plug. If it does not fit, please consult a qualified electrician. Do not attempt to defeat this safety feature by modifying the plug in any way. WARNING: Improper use of the power cord may result in electric shock. Consult a qualified electrician if necessary. PREPARATION FOR USE AC OPERATION Unwind the AC power cord and extend it to its full length. Insert the AC plug of the cord into any convenient 120V 60Hz household outlet. AC Outlet AC Plug Power source: 120V~ 60Hz, 1000W... -
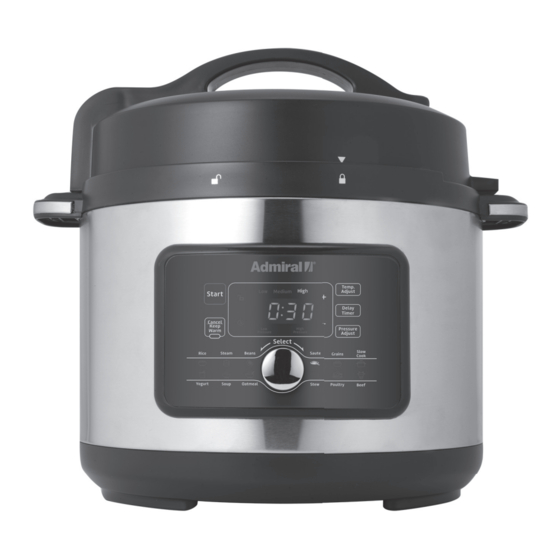
Page 5: Part Description
PART DESCRIPTION Steam release valve Lid handle Bobber valve Plastic lid Steaming rack Lid lock pin Cooking pot Gasket holder Condensation collector Anti-block cover Sealing Gasket Heating base Control panel Bobber valve SST lid Power cord CONTROL PANEL Display screen Lid warning lamp Temperature display and adjust key Start key... -
Page 6: Getting To Know Your Pressure Cooker
HOW TO USE YOUR ADMIRAL PRESSURE COOKER Getting started: Remove all packing, paper, and cardboard (including any located between the Cooking Pot and product Body/housing). Read and save the literature and be sure to read the service and warranty information. Assembly: • Place inner Cooking Pot into the Unit body • Place Lid upon Pressure cooker and align with To lock, twist counterclockwise, aligning with Open Lid To unlock, twist Lid clockwise and align with Locked Lid... - Page 7 The Pressure Cooker has been designed with safety in mind and has various safety measures. 1. Pressure will not build if the Lid is not shut correctly and has not sealed. 2. Always ensure Lid is in the completely locked position and the aligned with 3. Pressure will not build if the Steam Release Valve has not been switched to the Seal position. 4. Over filling may cause a risk of clogging the valves and developing excess pressure. 5. The gasket and the valves can be removed for cleaning. (See pages 21-23). 6. Once the pressure increases, the Lid should not be opened. Safety sensors ensure the pressure remains within the set range. Never force the Lid open. 7. The Steam Release Valve has an extended finger tab, designed to keep the hand away from the top of the valve. Always use a kitchen utensil when operating this tab. See RELEASING PRESSURE Instructions on pages 11-12. Steam Release Valve is designed to be...
-
Page 8: Getting Started
13. The TEMP ADJUST button is used to select desired temperature (HIGH, MEDIUM or LOW). The temperature may only be adjusted on the SLOW COOK, and BROWN/ SAUTÉ functions (see the Cooking Guide on page 15 for available adjustments). 14. Tap-touch the START button for more than 1 second to starts a cooking function. To stop a cooking function, tap-touch the CANCEL button for more than 1 second. Then change from one cooking function to another after cooking has begun. 15. The Display Screen shows how much longer the food needs to cook from the selected time in hours and minutes once the Pressure Cooker is preheated. While the Pressure Cooker is preheating, the display screen will show, “HEAT”. GETTING STARTED (NOTE: The Pressure Cooker beeps as each button is pressed.) 1. Add desired ingredients to Cooking Pot. Place Lid on top of Pressure Cooker and align with . To lock, twist counterclockwise, aligning with... -
Page 9: How To Use The Time Delay
8. To end a cooking function at any time, tap-touch the CANCEL button more than 1 second. 9. When finished, unplug the Pressure Cooker and wait for it to cool completely before attempting to clean. 10. CAUTION: The Cooking Pot and Heating Base will get very hot while using this Pressure Cooker. Do not touch hot surfaces. Always use pot holders or oven-mitts when using this Pressure Cooker. Always lift the Lid by tilting away from you to avoid the steam. HOW TO USE THE TIME DELAY This Pressure Cooker allows you to delay the start of your cooking so that cooking finishes when you need it. Note: The DELAY TIMER function is not available on the BROWN/SAUTÉ, KEEP WARM, or YOGURT settings. Note: Do not use the DELAY TIMER function when the recipe... -
Page 10: Cooking Pot Markings
COOKING POT MARKINGS Inside the removable Cooking Pot are markings to guide the fill level of the Cooking Pot. The word MAX indicates the maximum fill line. The 1/3, 1/2, and 2/3 markings are handy guides to use in your recipes. They are important to monitor especially with grains and dried legumes. CAUTION: Never load the Cooking Pot above the maximum ingredient level line marked MAX on the inside of the Cooking Pot. Foods that expand during cooking (e.g., rice, beans, dried vegetables, potatoes, carrots, etc.) should never go above the 1/2 mark. Note: The Pressure Cooker cannot pressure cook without liquid. Ensure a minimum of 8oz of liquid is used inside the removable Cooking Pot PRESSURE COOKING Pressure cooking is an ideal way to create quick, flavorful meals. Pressure cooking is a method of cooking food in liquid (water, stock, wine, etc.) in a sealed Cooking Pot. The sealed Pressure Cooker retains steam and builds pressure, raising the temperature of the liquid inside the pot above boiling point. The increased temperature of the liquid and the steam results in reduced cooking times. HIGH Pressure Setting is 6.5 - 10 PSI (45 - 70 kPa). It is suitable for a wide range of foods. LOW Pressure Setting is 3.3 - 6.5 PSI (23 - 45 kPa). It is more suited to delicate foods like chicken, fish and some tender vegetables. KEEP WARM Setting: When cooking time is completed, the Pressure Cooker automatically switches to the KEEP WARM setting to prevent overcooking and to keep your cooked food warm until serving - perfect for busy families, those on the run and those who need flexible meal times. - Page 11 Ideal Meals to Pressure Cook: Soups, stocks, casseroles, sauces (e.g., pasta sauces), meat, rice, firm vegetables (beetroot, potatoes) and desserts (e.g., pudding). Capacity: Never fill the Cooking Pot above the MAX line. Foods that expand during cooking should never go above the 1/2 mark. The Pressure Cooker cannot pressure cook without liquid. Ensure a minimum of 8oz of liquid is used inside the removable Cooking Pot. CAUTION: Never use the Quick Pressure Release Method when cooking foods high in liquid content, such as casseroles, stocks and soups. See RELEASING PRESSURE instructions on pages 11-12. Place the Pressure Cooker on a flat, level surface. Place Cooking Pot inside Heating Base. Plug the Pressure Cooker into a wall outlet. The Pressure Cooker will beep, and the Display Screen will illuminate with four dashes (- - - -). 1. Place your food and liquid inside the removable Cooking Pot. 2. Place the Lid onto the Pressure Cooker and align with To lock, rotate counterclockwise to the LOCKED position. 3. Using the finger tab, rotate the Steam Release Valve to the “Seal” position. 4. Scroll the FUNCTION KNOB to select the desired cooking function 5. Adjust the cooking time and pressure if necessary.
- Page 12 TIP: 1. The pressure cooking settings are in the Cooking Guide table on page 15. 2. If the lid is not shut correctly or if the Steam Release Valve is not in the “Seal” position, the Pressure Cooker cannot gain pressure and a NOTIFICATION message will appear in the Display Screen. Ensure that the Sealing Gasket is placed evenly in the lid. See the NOTIFICATION CODES chart on pages 25. 3. It is common for some steam to release through the Bobber Valve during the cooking cycle. This is part of normal operation of the unit. Note: The Pressure Cooker cannot pressure cook without liquid. Ensure a minimum of 8oz of liquid is used inside the removable Cooking Pot. CAUTION: During cooking, steam will build up in the Pressure Cooker, so when lifting the Lid use a kitchen glove or mitt to protect your hand. BOBBER VALVE When Bobber Valve is in the “UP” position, DO NOT attempt to open the Lid, as the Pressure Cooker is still under pressure. When the Bobber Valve is in the “DOWN” position, the pressure has released. “UP” position “DOWN” position Pressurized Not pressurized RELEASING PRESSURE AT THE END OF COOKING A. Natural Pressure Release Method: After cooking cycle is complete, let Pressure Cooker naturally release pressure through the Bobber Valve.
- Page 13 B. Quick Pressure Release Method: Using a long handled kitchen utensil, flick the tab on the Steam Release Valve to the “Release” setting. Steam will release rapidly from the Steam Release Valve. Do not place any part of your hand or body over the steam outlet on the top of the valve, as steam is very hot and can scald skin. CAUTION: Never use this method when cooking foods high in liquid content such as casseroles, beans, stews, stocks and soups. Never use this method when cooking rice, as rice tends to be very delicate. The pressure has been released when steam is no longer escaping, the Bobber Valve has dropped completely, and the Lid opens freely with minimal force. Please be patient: this can take up to 10-20 minutes. Never force the Lid open. CAUTION: 1. Do not force the Lid to open. If the Bobber Valve has not dropped completely and the lid does not open easily this means that the Pressure Cooker is still under pressure. 2. During cooking, steam will build up in the Pressure Cooker, so when lifting the Lid use a kitchen glove or mitt to protect your hand. 3. To avoid suction when removing or securing the Lid, turn the Steam Release Valve to the “Release” (open) position. Pressure Release Valve Valve OPEN (“Release”) Valve REMOVE Valve CLOSED (“Seal”)
-
Page 14: Slow Cooking
USING THE LID AND STEAM RELEASE VALVE STEAM RELEASE FUNCTION PRESSURE COOK LID REQUIRED VALVE POSITION Rice Seal Steam Seal Beans Seal Sauté Do not use Lid Grain Seal Slow Cook Release Yogurt Release Soup Seal Oatmeal and Hot Seal cereals Stew Seal... - Page 15 USING THE SLOW COOK FUNCTION The SLOW COOK function does not use pressure in the cooking process, but some pressure can build inside the unit during cooking. When using this function, ensure the Steam Release Valve is in the “Release” position. This function will cook similarly to standard slow cookers, using lower temperatures and longer cooking times to achieve tender, flavorful meals. Place the Pressure Cooker on a flat, level surface. Place Cooking Pot inside Heating Base. Plug the Pressure Cooker into a wall outlet. The Pressure Cooker will beep, and the Display Screen will illuminate with four dashes (- - - -). 1. Place your food and liquid inside the removable Cooking Pot. 2. Place the Lid onto the Pressure Cooker and align with . To lock, rotate counterclockwise to the LOCKED position. 3. Using the finger tab, rotate the Steam Release Valve to the “Release” position. Note: Although this setting will not use pressure in the cooking process, some pressure can build inside the unit during cooking. This is why it’s important to keep the Steam Release Valve in the “Release”...
-
Page 16: Cooking Guide
COOKING GUIDE Function Pressure Temperature Cook time Delay cooking select timer Rice 12 minutes, can not adjust. Steam Default: 10 minutes Can adjust from 3 minutes to 1 hour Beans Default: 20 minutes Can adjust from 5 minutes to 2 hour Sauté... -
Page 17: Using The Steam Function
USING THE STEAM FUNCTION Place the Pressure Cooker on a flat, level surface. Place Cooking Pot inside Heating Base. Plug the Pressure Cooker into a wall outlet. The Pressure Cooker will beep, and the Display Screen will illuminate with four dashes (- - - -). 1. Add 8oz of water to the bottom of the removable Cooking Pot and insert the cooking rack. Ensure water is just under the wires of the rack so that food is not touching water. 2. Place your food on the cooking rack. 3. Place the Lid on and lock by rotating counterclockwise to the LOCKED position. 4. Using the finger tab, flick the Steam Release Valve to the “Seal” position. 5. Scroll the FUNCTION KNOB and select STEAM function and adjust the time and pressure as needed. -
Page 18: Steaming Chart
STEAMING CHART Amount Food Amount Pre-prep Cooking Time of water Vegetables Asparagus 1 lb 1 cup Whole/trimmed 4 - 5 minutes Broccoli 1 bunch 1 cup 2-inch florets 2 - 3 minutes Baby carrots or 1 1 lb 1 cup Peeled and trimmed 2 - 3 minutes inch pieces... -
Page 19: Rice Cooking
SAUTÉ can be used for each of the following: A. Brown (sear) meats for casseroles and soups. Browning meat prior to pressure cooking and slow cooking not only gives your food great color, but it also seals in the juices and flavors and keeps the meat tender. B. Sauté onions or mirepoix (mixture of chopped onion, carrot, and celery), among many other foods, often used in pressure cooker and slow cooker recipes. Sautéing onions allows caramelization which contributes to flavor and color in the end dish. Capacity: When the Pressure Cooker is used to brown or sauté it may be best to cook in batches to ensure the food is evenly cooked. RICE COOKING When cooking rice, use the RICE or Grain function. This is suitable for all types of rice, including white and/or brown rice. The RICE and Multi Grain function cooks under pressure for faster cooking. Capacity: Since rice and grains expand during cooking, do not fill Cooking Pot above the 1/2 mark when using the RICE and Multi Grain function. - Page 20 5. Place the Lid on and lock by rotating counterclockwise to the LOCKED position. 6. Using the finger tab, flick the Steam Release Valve to the “Seal” position. 7. Scroll the FUNCTION KNOB and select RICE or GRAIN function and adjust the time and pressure as needed. Note: See the Cooking Guide on page 15 to find the possible time and pressure adjustments. 8. Once you have made the desired adjustments, if any, tap-touch START for more than 1 second. 9. The Pressure Cooker needs to gain pressure before pressure cooking can begin. When the Pressure Cooker is gaining pressure, “HEAt” will appear on the Display Screen and the time will not count down. When pressure has been reached, “HEAt” will disappear on the Display Screen, and the time will begin to count down. 10. After the set cooking time has elapsed, the Pressure Cooker will beep and will automatically switch to the KEEP WARM setting.
-
Page 21: Making Yogurt
MAKING YOGURT Place the Pressure Cooker on a flat, level surface. Place Cooking Pot inside Heating Base. Plug the Pressure Cooker into a wall outlet. The Pressure Cooker will beep, and the Display Screen will illuminate with four dashes (- - - -). 1. Put milk and yogurt starter into cooking pot, mix them well. inside the removable Cooking Pot. Capacity: The ideal fill level for your ingredients is between the 1/2 and 2/3 marks. Never fill the Cooking Pot above the MAX line. 2. Place the Lid onto the Pressure Cooker and align with . To lock, rotate counterclockwise to the LOCKED position. 3. Scroll the FUNCTION KNOB and select YOGURT function and adjust the time and as needed. Note: See the Cooking Guide on page 15 to find the possible time and temperature adjustments. 4. Tap-touch START for more than 1 second. The time will begin to count down. 5. After the set cooking time has elapsed, the Cooker will beep and will turn off. KEEP WARM This is a manual keep warm function. Place the Pressure Cooker on a flat, level surface. Place Cooking Pot inside Heating Base. Plug the Pressure Cooker into a wall outlet. The Pressure Cooker will beep, and the Display Screen will illuminate with four dashes (- - - -). -
Page 22: To Change A Setting
TO CHANGE A SETTING It’s easy to switch functions during cooking. Tap-touch the CANCEL button more than 1 second and then scroll the FUNCTION KNOB select the new desired cooking function. A new timer will flash on the Display Screen, and the selected function will also flash. Select the desired time, pressure, and/or temperature. Tap-touch the START button more than 1 second and the new function will begin preheating. To Change the Cooking Time: You can change the cooking time before cooking begins by tap-touching the + and - buttons before tap-touching START. Tap-touch and release to change slowly. Tap-touch and hold to change time quickly. If you pass the desired temperature or time, press the opposite button. To Change the Pressure: You can change the pressure on certain pre-set functions before cooking begins by tap-touching the PRESSURE ADJUST button before tap-touching START. To Change the Temperature: You can change the temperature on certain functions before cooking begins by tap-touching the TEMP ADJUST button before tap-touching START. CARE AND CLEANING Cleaning should only be carried out when the the Pressure Cooker is cool and unplugged. Allow the Pressure Cooker to completely cool before cleaning. Do not use the removable Cooking Pot on the stovetop, inside a microwave oven or inside an oven. Use the pot only inside the Heating... - Page 23 Empty any collected water from the Condensation Collector after each use. Wash in warm, soapy water. Lid and Sealing Gasket Always examine the gasket before each use. Remove Sealing Gasket for cleaning as needed. Hand clean using warm, soapy water, dry thoroughly, and replace Sealing Gasket in Lid before use. Ensure the Sealing Gasket is smoothly and securely in place in the gasket holder. If the Sealing Gasket is not in the correct position the Lid will not be able to form a seal and will not be able to gain pressure. Leave the Lid upturned for storage, as this will also extend the life of the gasket. The silicon Sealing Gasket on the inside of your Pressure Cooker Lid may deteriorate over time. Sealing Gasket may need to be replaced every 1 – 2 years depending on regular use. Contact the Admiral customer service to order replacement parts. Steam Release Valve Ensure the Steam Release Valve is clear from debris before you begin using the Pressure Cooker. Remove the valve and gently clean. Ensure it is completely dry before replacing.
- Page 24 Steam Release Valve Cover Valve REMOVE The Steam Release Valve Cover is on the underside of the Lid. Ensure it is clear from debris before you begin using the Pressure Cooker. To clean, carefully pull the cover off and clean using warm, soapy water. Press the cover back into its place after cleaning is complete. UNDERSIDE OF LID Bobber Valve Steam Release Valve Cover Bobber Valve Gently press the valve up and down 2-3 times and ensure it is clear from debris before you begin using the Pressure Cooker. Lid Lock Pin Gently press the pin and ensure it is clear from debris before you begin using the Pressure Cooker.
-
Page 25: Troubleshooting
TROUBLESHOOTING Subject Question Solution Power My Pressure Cooker will not Make sure outlet is functioning properly. turn on Check that the Pressure Cooker is plugged in. Doneness of My food was undercooked Make sure you selected the proper cooking setting. food Make sure the Lid is properly placed and locked, and that Steam Release Valve in “Seal”(closed) position. - Page 26 NOTIFICATION CODES Notification Solution “LOCK” lamp Ensure that the Lid is closed completely and in the LOCKED position, blinking aligning with Display “E1” The Pressure Cooker will stop the cooking cycle. Unplug Pressure Cooker and contact customer service center. Display “E2” The Pressure Cooker will stop the cooking cycle.
- Page 27 DISPOSAL: Do not dispose this product as unsorted municipal waste. Collection of such waste separately for special treatment is necessary. Note: Any other servicing should be performed by an authorized service representative.
- Page 28 To answer questions on your product, Please contact Admiral at 1-888-312-7219 Monday to Friday 8:30 a.m. to 5:00 p.m. EST Manufacture and distributed by Admiral Corporation of America, Inc. AD3036-IB-E0JN1-A0US 1160 NW 163rd Drive, Miami, Florida 33169, U.S.A. PRINTED IN CHINA...
Need help?
Do you have a question about the AD3036 and is the answer not in the manual?
Questions and answers