
Related Manuals for MOOVYOO MIRACLE V396

Summary of Contents for MOOVYOO MIRACLE V396
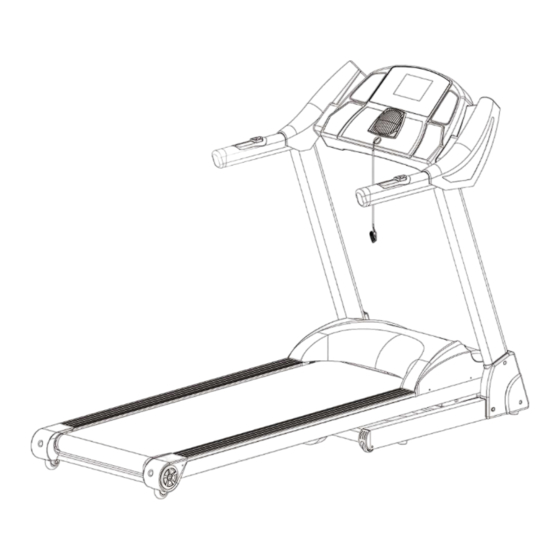
- Page 1 MOOVYOO TAPIS ROULANT MIRACLE V396 Read all instructions carefully before assembly and using this product. Retain this owner’s manual for future reference:...
-
Page 2: Important Safety Precautions
IMPORTANT SAFETY PRECAUTIONS 1. Plug the power cord of the treadmill directly into a dedicated grounded circuit. This product must be grounded well. If it has breakdown, grounding provides a path of least resistance for electric current to reduce the risk of electric shock. 2. - Page 3 IMPORTANT SAFETY PRECAUTIONS 9. Always attach the safety pull pin rope to your clothing when using the treadmill. If the treadmill should suddenly increase in speed due to an electronics failure or the speed being inadvertently increased, the treadmill will come to a sudden stop when the pull pin is disengaged from the console. 10.
- Page 4 ASSEMBLY INSTRUCTIONS Caution: Read the assembly instruction carefully, and follow the instruction while assembling. When you open the carton, you will find the below spare parts Spare parts list: DESCRIPTION SPEC DESCRIPTION SPEC Main frame computer Left upright Right upright Upright cover L Upright cover R Left bottom cover...
-
Page 5: Assembly Steps
ASSEMBLY STEPS Notice: Do not turn power on before assembly is done. Step 1: Open the carton,get out the above spare parts, put the MAIN FRAME on the ground. Attention: Before assemble the back cover, make sure all the above procedures finished strictly and all the bolts locked tightly Step 2: Insert the left upright (3) into the... - Page 6 Step 4: Connect the computer up wire (122) to the middle wire (123a) in the right upright(4). Then use the 5# Allen wrench (121), bolt M8*52 (98)and lock washer (97) to lock the computer onto the upright (3)(4) Caution: make sure all the steps be finished strictly and then you can turn Caution: make sure all the steps be finished strictly and then you can turn Caution: make sure all the steps be finished strictly and then you can turn Caution: make sure all the steps be finished strictly and then you can turn...
-
Page 7: Folding Instruction
FOLDING INSTRUCTION Pulling up: 1、Hold the place A, and pull up the main frame as the arrow showing till you hear the sound from pedal hook Pulling down: 2. Hold place A, and trample the pedal hook (place B), then the main frame will decline automatically... -
Page 8: Technical Parameter
TECHNICAL PARAMETER BUILT UP 1990*920*1350 POWER AS ORDER REQUIRE SIZE(mm) FOLDABLE MAX OUTPUT 960*920*1770 AS ORDER REQUIRE SIZE(mm) POWER RUNNING 1520*510 INPUT CURRENT AS ORDER REQUIRE BOARD(mm) NET WEIGHT 116KG SPEED RANGE 1.0-20KM/h MAX USE’S INCLINE LEVELS SECTIONS 125KG WEIGHT ONE LCD SPEED TIME DISTANCE CALORIES PULSE INCLINE DISPLAY... - Page 9 OPERATION GUIDE WINDOW DISPLAY: 1. This product is with touch-screen operation way, the operation interface is very convenient for the user to do the function operation. 2. Turn on the power, attach the safety key onto the keypress board to enter the system into the stand-by status.
-
Page 10: Button Function
“SPEED” window: Speed range: 1.0-20KM/H; 2.“TIME”Window: Show running time. Turn data per 5 seconds, and relevant direction light will light .Display the exercise time positive direction clock from 0:00-99:59,To 99:59 spill over from 0:00 to reset,count down from the setting time to 0:00,When It to 0:00, then the actual exercise time from the positive direction to start to count down. - Page 11 Program Manual Button: Press this button to enter into the pre-set program window. There are 15 pre-set programs P1-P15, 3 user’s manual programs U1-U3, 3 heart rate control programs HRC1-HRC3 and 3 count down mode MODE1-MODE3 (MODE1: Time count-down mode, MODE2: Distance count-down mode, Calorie count- down mode MODE3).
- Page 12 STOP Button: While running the treadmill, press this button at any to stop the treadmill and return all the data back to 0. Go Back Button: Press this button to go back the previous display interface. Display window switch button: This button has the following 2 functions: a, Press this button till you hear the sound “Bi”...
-
Page 13: Program Chart
1. COUNT-DOWN PROGRAM OPERATION INSTRUCTION: (1).”MODE1”: Press this button to enter the Time count-down mode, and the “TIME” window will display 15:00 and glitter. Press “+”’ “-“ to set the running time. The range is 5:00 --- 99:00. (2).”MODE2” Press this button to enter the Distance count-down mode, and the “DISTANCE” window will display “1.0”... - Page 14 SPEED INCLINE SPEED INCLINE (1).The system is with 15 pre-set programs P1 – P15. On the program interface, you can choose the program as you like. When you see “TIME” glittering, press “+” & ” -” over the preset time 15:00 to set up the time that you need, then press “START” to start the treadmill. After that, the inferface to go back to the first display window and you can see the chosen program data shown on the top left corner.
- Page 15 the main operation display window, and HRC1, HRC2, or HRC3 will be shown on the left of the window which means that the system is working under the HRC program. (4).Under the HRC program, you can press “INCLINE+”, “INCLINE –“, “SPEED+”, “SPEED –” button to change the speed and incline level, but the system will still do adjustment of the speed and incline level automatically to meet with your target heart rate.
- Page 17 PROGRAM RANGE: PROGRAM BEGIN SET UP RANGE DISPLAY RANGE TIME(MIN:SECOND) 0:00 15:00 5:00-99:00 0:00-99:59 INCLINE(%) 0-20 0-20 SPEED(K/h) 1.0-20 1.0-20 DISTANCE(K) 1.0-99.9 0.00-99.9 PULSE(hypo/min) 50-200 CALORIE(THERM) 20-999 0-999 MEDIA OPERATION INSTRUCTION: 1, Music Playing Operation: Music Playing Display Window Internal Saver External SD Card Saver External USB Saver Music File Name...
- Page 18 Video Playing Display Window The color of the file will change into red color after it is chosen. Video operation is the same as the music operation. Press the playing symbol after you chose the Video file that you want to play, and then enter into the Video Window shown as below: Full Screen Playing Keypress : Previous,...
-
Page 19: Safety Lock Function
Attention: 1. Some special Music & Video files are not able to be played, such as non-standard Audio and Video formats, or the size of the file is too big. 2. When playing the picture, the playing reaction speed will be different according to the resolution of the picture. - Page 20 2. E01—Communication failure: The probable reason is that the communication from the console to the bottom control board is stuck. Check every single connection part of the wires from the console to the bottom control board and make sure that all the wires are connected well. If the problem is caused by the defective wires, do the replacement by the new wires.
-
Page 21: Exercise Instructions
EXERCISE INSTRUCTIONS 1. The Warm Up Phase This stage helps get the blood flowing around the body and the muscles working properly. It will also reduce the risk of cramp and muscle injury. It is advisable to do a few stretching exercises as shown below. Each stretch should be held for approximately 30 seconds, do not force or jerk your muscles into a stretch - if it hurts, STOP. - Page 22 To tone muscle while on your Treadmill you will need to have the resistance set quite high. This will put more strain on our leg muscles and may mean you cannot train for as long as you would like. If you are also trying to improve your fitness you need to alter your training program.
-
Page 23: Walking Belt And Deck Lubrication
CLEANING General cleaning or the unit will greatly prolong the treadmill. Keep treadmill clean by dusting regularly. Be sure to clean the exposed part of the deck on either side of the walking belt and also the side rails. This reduces the build up of foreign material underneath the walking belt. -
Page 24: Exploded Drawing
EXPLODED DRAWING... -
Page 25: Parts List
PARTS LIST NAME SPEC. QUAN NO. NAME SPEC. QUAN COMPUTER ASSEMBLY MOTOR FRONT COVER LEFT UPRIGHT DC MOTOR RIGHT UPRIGHT MOTOR SEAT ADJUST SUBASSEMBLY SLIDE PIECE SUPPORT FRAME SUBASSEMBLY PLASTIC BEARING BASE FRAME TUBE STOPPER PEDAL SUBASSEMBLY TAPER CUSHION MAT MAIN FRAME SLIDE RAIL AXIS STRENGTH TUBE ASSEMBLE... - Page 26 IRON SHEET OF THE SAFETY KEY PULSE UPWIRE SPRING BALL BOLT M10*30 SAFETY KEY SENSOR BOLT M10*90 SCREW ST2.9*9.5 PEDAL BUSHING SCREW ST4.2*12 BOLT M8*40 COOLING FAN BOLT M6*22 SCREW ST2.9*6.5 BOLT M8*65 BUTTON OVERLAY REAR ROLLER SCREW ST2.9*8 BOLT M5*8 5# Allen wrench SCREW...
Need help?
Do you have a question about the MIRACLE V396 and is the answer not in the manual?
Questions and answers