Table of Contents
Advertisement
Available languages
Available languages
Quick Links
KLIMMZUGSTANGE
PULL-UP BAR
BARRE DE TRACTION
KLIMMZUGSTANGE
Bedienungsanleitung
BARRE DE TRACTION
Notice d'utilisation
TYČ NA SHYBY
Návodu k použití
BARRA DE EXERCÍCIOS
Manual de instruções
IAN 287910
PULL-UP BAR
Instructions for use
PULL UP BAR
Gebruiksaanwijzing
BARRA DE TRACCIÓN
Manual de instrucciones
Advertisement
Table of Contents

Summary of Contents for Crivit Pro 287910
- Page 1 PULL-UP BAR BARRE DE TRACTION KLIMMZUGSTANGE PULL-UP BAR Bedienungsanleitung Instructions for use BARRE DE TRACTION PULL UP BAR Notice d’utilisation Gebruiksaanwijzing TYČ NA SHYBY BARRA DE TRACCIÓN Návodu k použití Manual de instrucciones BARRA DE EXERCÍCIOS Manual de instruções IAN 287910...
-
Page 8: Table Of Contents
Inhaltsverzeichnis/Contents/Table des matieres/Inhoudsopgave Lieferumfang (Abb. A) ........10 Scope of delivery (fig. A) ......... 17 Technische Daten ..........10 Technical data ........... 17 Bestimmungsgemäße Verwendung ....10 Correct use ............17 Sicherheitshinweise ........10 - 11 Safety notes ..........17 - 18 Verletzungsgefahr! ...... - Page 9 Obsah/Indice/Índice Rozsah dodávky (obr. A) ......... 38 Alcance del suministro (fig. A) ......44 Technická data ..........38 Technická data ..........44 Použití ke stanovenému účelu ......38 Uso destinado ........... 44 Bezpečnostní pokyny ....... 38 - 39 Indicaciones de seguridad ...... 44 - 45 Bezpečnostní...
-
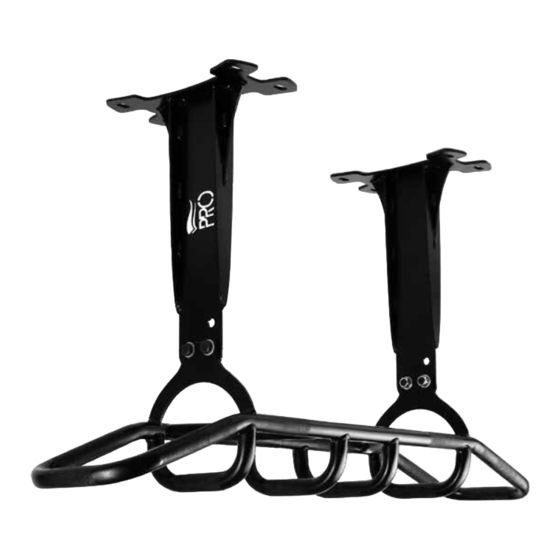
Page 10: Lieferumfang (Abb. A)
Sicherheitshinweise Herzlichen Glückwunsch! Mit Ihrem Kauf haben Sie sich für einen hochwer- Verletzungsgefahr! tigen Artikel entschieden. Machen Sie sich • Konsultieren Sie Ihren Arzt, bevor Sie mit dem vor der ersten Verwendung mit dem Artikel Training beginnen. Stellen Sie sicher, dass Sie vertraut. -
Page 11: Besondere Vorsicht - Verletzungsgefahr Für Kinder
• Nicht geeignet zum Anbringen dynamischer Achtung! Der Artikel ist nur für massive Beton- Teile, wie z.B. Schaukeln. wände geeignet. Verwenden Sie nur geeignete • Keine Übungen durchführen, bei denen der 10 mm Bolzenanker oder Langdübel für ent- Kopf zum Boden zeigt. sprechende Baustoffe und Decken sowie für ein •... -
Page 12: Montage Des Artikels
Material (siehe Abschnitt 4. Bohren Sie mit der Bohrmaschine die Löcher „Geeignetes Montagematerial“). Achten Sie in die Wand. Achten Sie hierbei auf den rich- darauf, dass das Crivit Pro-Logo nach außen tigen Bohrdurchmesser und die korrekte sichtbar ist. Bohrtiefe. -
Page 13: Allgemeine Trainingshinweise
Allgemeine Trainingshinweise Übungsvorschläge Trainingsablauf Im Folgenden werden Ihnen einige von vielen Übungen dargestellt. • Tragen Sie bequeme Sportbekleidung und Turnschuhe. Klimmzug Obergriff zur Brust • Wärmen Sie sich vor jedem Training auf und (Abb. F) lassen Sie das Training allmählich abklingen. Hauptmuskelgruppe: Rückenmuskulatur •... - Page 14 6. Die Arme sind auf Spannung und so weit Hängende Beine heben gebeugt/ oben, dass sich der Nacken auf der Höhe der gestreckt (Abb. I) Mittelstange des Artikels befindet. Hauptmuskelgruppe: Bauchmuskulatur 7. Der Kopf ist in Verlängerung der Wirbelsäule Anfangsposition und darf nicht überstreckt werden.
-
Page 15: Dehnen
Wichtig: Führen Sie die Bewegung 6. Bleiben Sie einen Moment in dieser Position langsam durch und halten Sie und gehen Sie dann wieder in die durchgehend die Körperspannung. Ausgangsposition zurück. 7. Wiederholen Sie die Übung 10 bis 15 Mal à Hängender ‚L‘-Sitz (Abb. -
Page 16: Pflege Und Lagerung
Dies gilt auch für ersetzte und reparierte Teile. Nach Ablauf der Garantie anfallende Repara- Pflege und Lagerung turen sind kostenpflichtig. Den Artikel immer trocken und sauber in einem IAN: 287910 temperierten Raum lagern. Nie mit scharfen Service Deutschland Pflegemitteln reinigen, nur mit einem trockenen Tel.: 0800-5435111 Reinigungstuch sauber wischen. -
Page 17: Scope Of Delivery (Fig. A)
Safety notes Congratulations! With your purchase you have decided on a high- Risk of injury! quality product. Get to know the product before • Consult with your doctor before you begin you start to use it. training. Please ensure that your health is Carefully read the following instructions suitable for the training. -
Page 18: Particular Caution - Risk Of Injury For Children
Particular caution – Risk of Suitable mounting material injury for children! The wall or ceiling material must be determined before mounting the product. • Do not allow children to use the product without Corresponding assembly materials must be supervision. Instruct them regarding the correct selected for mounting if the mounting location is use of the product and supervise them. -
Page 19: General Training Notes
1. Measure the correct height of the product on materials (see the section ‘suitable mounting the wall and place the drilling template (6) at material’). Make sure that the Crivit Pro logo is this position (fig. B). visible on the outside. -
Page 20: Exercise Suggestions
Arms and shoulders Starting position 1. Stand with your back to the product. 1. Interlock your hands behind your back and pull 2. Grip both ends of the product from below, as them carefully upwards. If you bend your upper shown. - Page 21 Hanging leg lifts, bent and straight Hanging ‘L’-sit (fig. K) (fig. I) Main muscle group: Stomach muscles Starting position Main muscle group: Stomach muscles 1. Stand with your back to the product. Starting position 2. Grip both ends of the product from above, as 1.
-
Page 22: Stretching
Repairs after the your right hand is between your shoulder warranty are subject to a charge. blades. IAN: 287910 3. Grasp your right elbow with your left hand and Service Great Britain pull it backwards. Tel.: 0871 5000 720 4. -
Page 23: Contenu De La Livraison (Fig. A)
Consignes de sécurité Félicitations ! Vous avez acquéri un produit de haute qualité. Risque de blessure ! Apprenez à connaître le produit avant sa premiè- • Veuillez consulter votre médecin avant de re utilisation. commencer l‘entraînement. Assurez-vous que Lisez pour cela attentivement le notice votre état de santé... -
Page 24: Soyez Particulièrement Prudent
• Ne convient pas à la pose d‘éléments dyna- Utilisez uniquement des boulons d‘ancrage ou des miques, comme les balançoires par exemple. chevilles 10 mm pour les matériaux de construc- • Ne pas effectuer d‘exercice où la tête est tour- tion et les plafonds correspondants ainsi que pour née vers le sol. -
Page 25: Montage De L'article
Montage de l‘article Indication : veillez à ce que les vis (3) soient bien serrées et que la barre de traction (1) soit Vous pouvez monter l‘article au mur ou au pla- fermement montée sur les supports (2). fond. Suivant le lieu où l‘article sera fixé, montez la barre de traction (1) sur les supports (2). -
Page 26: Échauffement
• Faites tous les exercices de manière régulière, 2. Croisez les pieds et pliez légèrement les jambes sans brusquerie ni précipitation. vers l‘arrière. • Veillez à respirer de manière régulière. Position finale Expirez pendant l‘effort et inspirez pendant la 3. Contractez les muscles des fessiers, des bras et relaxation. - Page 27 Important : effectuez ce mouvement 5. Tirez les genoux vers vous et tendez les jambes lentement et maintenez le corps tendu en vers le haut. Gardez les épaules basses et continu. maintenez la contraction des abdominaux. 6. Les bras sont contractés et les jambes près du Traction en supination étroite buste.
-
Page 28: Étirement
Position finale Position de départ 3. Contractez les muscles des fessiers, des bras et 1. Placez-vous devant l‘article et descendez en abdominaux. flexion. 4. Tendez les jambes et soulevez-les devant vous 2. Restez avec les jambes à 90 ° et gardez les vers le haut à... -
Page 29: Entretien Et Rangement
Muscles des jambes Nos employés du service client vous indiqueront la marche à suivre le plus rapidement possible. 1. Mettez-vous droit debout et soulevez un pied Nous vous renseignerons personnellement dans du sol. tous les cas. 2. Décrivez lentement des cercles dans un sens La période de garantie n‘est pas prolongée par puis dans l‘autre. - Page 30 à compter de la découverte du vice. Les pièces détachées indispensables à l’utilisation du produit sont disponibles pendant la durée de la garantie du produit. IAN : 287910 Service France Tel. : 0800 919270 E-Mail : deltasport@lidl.fr Service Belgique Tel.
-
Page 31: In Het Leveringspakket Inbegrepen (Afb. A)
Veiligheidsinstructies Hartelijk gefeliciteerd! Met de aankoop hebt u gekozen voor een hoog- Gevaar voor blessures! waardig product. Maak u daarom voor de eerste • Raadpleeg uw arts voordat u met de training ingebruikname vertrouwd met het product. begint. Vergewis u dat uw gezondheid de Lees hiervoor deze gebruiksaanwijzing training toelaat. -
Page 32: Uiterste Voorzichtigheid - Gevaar Voor Blessures Bij Kinderen
• Niet geschikt voor het aanbrengen van dyna- Gebruik uitsluitend geschikte 10 mm boutankers mische onderdelen, zoals bv. schommels. of lange pluggen voor de betreffende bouwma- • Geen oefeningen doen, waarbij het hoofd naar terialen en plafonds en tevens voor een dragend de grond wijst. -
Page 33: Montage Van Het Artikel
(6) op deze (zie paragraaf „Geschikt montagemateriaal“). plaats (afb. B). Let erop dat het logo van Crivit Pro aan de 2. Neem een waterpas en corrigeer eventueel buitenzijde zichtbaar is. de positie van de boormal (6) totdat deze 6. -
Page 34: Opwarmen
• Train als beginner nooit met een te hoge Eindpositie belasting. Voer de trainingsintensiteit langzaam 3. Span uw zitvlak-, arm- en buikspieren aan. 4. Trek uw bovenlichaam langzaam naar boven • Doe alle oefeningen gelijkmatig, niet plotseling en trek uw schouderbladen naar uw wervel- en snel. - Page 35 Klimtrek nauwe onderhandse greep Belangrijk: doe de beweging langzaam en handhaaf doorlopend de lichaams- naar de kin (afb. H) spanning. Hoofdspiergroepen: rug- en bicepsspieren Beginpositie Hangend been omhoog opzij links/ 1. Grijp het artikel zoals afgebeeld langs onder in rechts (afb. J) het midden van de voorste stang vast.
-
Page 36: Stretchen
Stretchen Hangende schouder terugtrekken (afb. L) Neem na elke training voldoende tijd om te Hoofdspiergroepen: rug- en monnikskapspieren stretchen. Hierna beschrijven wij in dit verband Beginpositie enkele eenvoudige oefeningen. 1. Grijp het artikel zoals afgebeeld langs boven U dient de betreffende oefeningen telkens drie aan de uiteinden vast. -
Page 37: Opmerkingen Over Garantie En Serviceafhandeling
Dit geldt ook voor vervan- gen en gerepareerde delen. Na afloop van de garantieperiode dienen even- tuele reparaties te worden betaald. IAN: 287910 Service België Tel.: 070 270 171 (0,15 EUR/Min.) E-Mail: deltasport@lidl.be... -
Page 38: Rozsah Dodávky (Obr. A)
• Výrobek není vhodný pro děti do 14 let, protože Srdečně blahopřejeme! Vaší koupí jste se neumí odhadnout potenciální nebezpečí. rozhodli pro jakostní produkt. Před uvedením do Výrobek kromě toho obsahuje drobné díly, které provozu se nejdříve seznamte s celým produktem. děti mohou spolknout. -
Page 39: Nebezpečí Způsobené Opotřebením
Stěnové upevnění musí udržet zatížení v tahu Nebezpečí způsobené 200 kg (2000 N) na každý šroub. opotřebením Upevňovací materiál: • Výrobek smí být používán pouze v bez • Dlouhá hmoždinka Ø 10/120 pro beton a vadném stavu. Před každým použitím výrobek nosné... -
Page 40: Všeobecné Pokyny K Tréninku
(2). 6. Upevněte držáky (2) pomocí odpovídajícího Všeobecné pokyny k tréninku materiálu (viz oddíl „Vhodný montážní materiál“). Dbejte na to, aby Crivit Pro-Logo Průběh tréninku bylo z vnějšku viditelné. • Noste pohodlné sportovní oblečení a tenisky. -
Page 41: Návrhy Cviků
Návrhy cviků Shyb s úzkým dolním úchopem k bradě (obr. H) Dále Vám představíme několik z mnoha cviků. Hlavní svalové skupiny: Svalstvo zad a bicepsů Shyb s horním úchopem ke hrudi Výchozí pozice (obr. F) 1. Uchopte výrobek jak znázorněno zespoda ve Hlavní... - Page 42 Zvedání nohou doleva/doprava Tažení zpět zavěšeného ramena (obr. J) (obr. L) Hlavní svalová skupina: břišní svalstvo Hlavní svalové skupiny: Zádové a trapézové Výchozí pozice svalstvo 1. Postavte se k výrobku zády. Výchozí pozice 2. Uchopte výrobek jak znázorněno na koncích 1.
-
Page 43: Protahování
1. Postavte se zpříma a zvedněte jednu nohu ze a opravené díly. Opravy prováděné po vypršení země. záruční lhůty se platí. 2. Začněte pomalu kroužit nejprve jedním a IAN: 287910 potom druhým směrem. Servis Česko 3. Po chvíli nohy vystřídejte. Tel.: 800143873 Důležité... -
Page 44: Alcance Del Suministro (Fig. A)
Indicaciones de seguridad ¡Enhorabuena! Con la compra de este artículo ha adquirido un ¡Riesgo de lesiones! producto de excelente calidad. • Consulte a su médico antes de empezar el Antes de utilizarlo por primera vez, entrenamiento. Asegúrese de que su estado de familiarícese con él leyendo salud le permite realizar el entrenamiento. -
Page 45: Para Niños
• No apto para colocar piezas dinámicas, como Pida asesoramiento a un especialista antes del p. ej., columpios. montaje. • No practique ejercicios en los que la cabeza Lugar de montaje adecuado señale hacia el suelo. El montaje del artículo puede realizarse en pa- •... -
Page 46: Montaje Del Artículo
2. Tome un nivel de burbuja de aire y corrija la adecuado“). Tenga cuidado de que el logoti- posición de la plantilla para taladrar (6) si po Crivit Pro pueda verse desde fuera. es necesario hasta que se encuentre en posici- 6. Sujete la barra de dominadas (1) por el ón horizontal respecto a la pared. -
Page 47: Calentamiento
• Realice pausas lo suficientemente largas entre Posición inicial los ejercicios y beba bastante. 1. Sujete el artículo como se muestra por los • Si es principiante no entrene demasiado duro. extremos de la parte superior. Vaya aumentando paulatinamente la 2. - Page 48 8. Permanezca un momento en esta posición y Posición final descienda el tronco lentamente. 4. Tense los músculos abdominales, de los brazos 9. Repita el ejercicio entre 5 y 10 veces en tres y de los glúteos. tandas. 5. Acerque las rodillas hacia usted y estire las Importante: realice el movimiento piernas hacia arriba.
-
Page 49: Estiramientos
L-sit en el aire (fig. K) 7. Repita el ejercicio entre 10 y 15 veces en tres tandas. Grupo muscular principal: músculos abdominales Importante: realice el movimiento Posición inicial lentamente y mantenga la tensión 1. Colóquese de espaldas al artículo. corporal de forma constante. -
Page 50: Cuidado Y Almacenamiento
Proteja el artículo Las reparaciones realizadas una vez transcurrido de las temperaturas extremas, el sol y la humedad el periodo de garantía se deberán pagar. Indicaciones para la IAN: 287910 eliminación Servicio España Tel.: 902 59 99 22 Elimine el artículo y el material de embalaje... -
Page 51: Material Fornecido (Fig. A)
Indicações de segurança Muitos Parabéns! Com a sua compra optou por um produto de alta Risco de lesões! qualidade. Antes de o utilizar pela primeira vez, • Consulte o seu médico antes de iniciar o treino. familiarize-se o com o produto. Certifique-se de que está... -
Page 52: Cuidados Especiais - Risco De Lesão Para Crianças
• Não execute exercícios, nos quais a cabeça Local de montagem adequado fique virada para o chão. O artigo pode ser montado numa parede ou teto • O artigo destina-se apenas ao uso privado. de betão maciço, assim como em paredes de •... -
Page 53: Indicações Gerais De Treino
(fig. B, C) (consulte a secção „Material de montagem 1. Meça a altura do artigo certa para si na adequado“). Certifique-se de que o Crivit Pro- parede e coloque o gabarito (6) neste local Logo está virado para fora. -
Page 54: Aquecimento
Aquecimento 5. Os braços estão contraídos e de tal forma elevados que o tórax está à altura da barra Reserve tempo suficiente para fazer o central do artigo. aquecimento antes de cada treino. A seguir, 6. A cabeça está alinhada com a coluna vertebral apresentamos alguns exercícios simples para o e não deve estar demasiado esticada. - Page 55 Posição final 2. Agarre o artigo pelas extremidades a partir da 3. Contraia os músculos dos braços, glúteos e parte de cima, tal como indicado. 3. Cruze os pés. abdominais. Posição final 4. Levante lentamente o tronco e puxe as 4.
-
Page 56: Alongamentos
Alongamentos Recuar os ombros em suspensão (fig. L) Após cada treino, reserve tempo suficiente para Grupos musculares principais: Músculos das fazer alongamentos. A seguir, mostramos alguns costas e trapézio exercícios simples para o efeito. Posição inicial Faça cada exercício 3 vezes de cada lado, 1. -
Page 57: Indicações Sobre A Garantia E O Processamento De Serviço
Segundo a DL 67/2003, com a troca do aparel- ho dá-se início a um novo prazo de garantia. Depois de expirada a garantia, eventuais repa- rações implicam o pagamento de custos. IAN: 287910 Assistência Portugal Tel.: 70778 0005 (0,12 EUR/Min.) E-Mail: deltasport@lidl.pt... - Page 60 DELTA-SPORT HANDELSKONTOR GMBH Wragekamp 6 DE-22397 Hamburg GERMANY 06/2017 Delta-Sport Nr.: KS-3345 IAN 287910...
Need help?
Do you have a question about the 287910 and is the answer not in the manual?
Questions and answers