
Related Manuals for Steren COM-595


Summary of Contents for Steren COM-595
- Page 1 COM-595 Lector de códigos de barras USB COMPUTA V2.0 Manual de instrucciones 0915m...
- Page 2 Lector de códigos de barras USB. Por favor, revíselo completamente para estar seguro de cómo utilizar apropiadamente el producto. Para apoyo, compras y todo lo nuevo que tiene Steren, visite nuestro sitio web: www.steren.com La información que se muestra en este manual sirve únicamente como referencia sobre el producto.
- Page 3 IMPORTANTE alcance de los niños. salpicaduras. Para evitar daños en los ojos y lesiones, no mire directamente al láser. No apunte el láser directamente...
- Page 4 CARACTERÍSTICAS El lector de código de barras con conector USB tiene interruptor tipo gatillo de alto rendimiento (50 millones de operaciones) para desplegar el láser y tomar la lectura de los códigos de barras, el LED indicador se enciende al momento de detectar o reconocer un código de barras, y en conjunto con el buzzer indicador de lectura de datos le permiten o no se pueden leer.
- Page 5 PA P P RTE R R S A) Indicador LED de funcionamiento B) Lector láser C) Gatillo D) Entrada RJ45 F) Cable USB – RJ45...
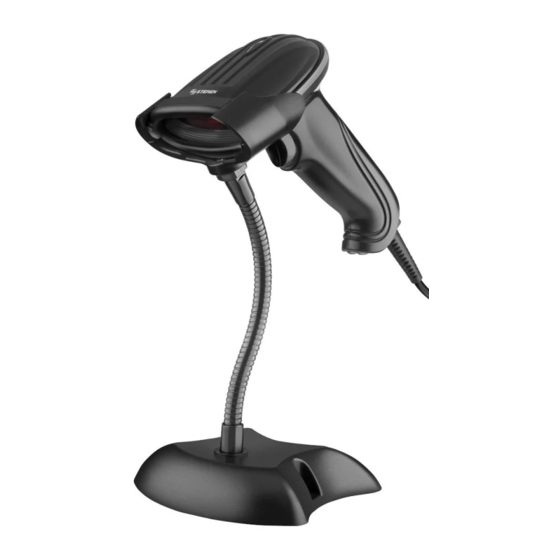
- Page 6 CÓMO ARMAR L R A L L BASE 1. Ensamble las piezas como se muestra en el diagrama. á n i l ó i necesidades. Tornillo Base Brazo flexible Soporte Tuerca mariposa...
- Page 7 CONEXIÓN 1. Utilice el cable USB – RJ45 para conectar el lector a una PC. Automáticamente se actualizarán los controladores y podrá empezar a utilizar el lector. siguientes páginas los códigos de programación. 3. Ponga el lector frente al código de barras, presione el gatillo para activar el láser y efectuar la lectura.
- Page 8 ÁNGULO DE LECTURA • ó barras. • No ponga el lector en un ángulo de 90°; podría afectar la lectura. • El láser debe cubrir completamente un solo código de barras a la vez, de lo contrario, podría ocurrir un error. una lectura correcta.
-
Page 9: Ajuste De Funciones
AGREGAR UN ID DE CÓDIGO DE BARRAS Ajuste de funciones Modo de salida VERSIÓN DE INFORMACIÓN RESTABLECER VALORES PREDETERMINADOS TECLADO WEDGE SERIE... - Page 10 Buzzer BUENA LECTURA SONIDO APAGADO BUENA LECTURA SONIDO ENCEDIDO BUENA LECTURA SONIDO BAJO...
- Page 11 Modo de lectura ESCANEO INDIVIDUAL ESCANEO INDIVIDUAL SIN GATILLO ESCANEO MÚLTIPLE...
- Page 12 ESCANEO MÚLTIPLE SIN GATILLO ESCANEO CONTINUO PULSO...
- Page 13 Imagen HABILITAR INHABILITAR...
- Page 14 ENVIAR CÓDIGO DE IDENTIFICACIÓN COMO PREFIJO ENVIAR CÓDIGO DE IDENTIFICACIÓN COMO PREFIJO INHABILITADO ENVIAR CÓDIGO DE IDENTIFICACIÓN COMO SUFIJO ENVIAR CÓDIGO DE IDENTIFICACIÓN COMO SUFIJO INHABILITADO...
- Page 15 Idioma INGLÉS ALEMÁN FRANCÉS REINICIAR...
- Page 16 Mayúscula/Minúscula MAYÚSCULA MINÚSCULA REINICIAR...
-
Page 17: Velocidad De Transmisión
Ajustes de los parámetros del modo de serie Velocidad de transmisión 2400 4800 9600 19200... -
Page 18: Hand Shake
Hand shake NINGUNO XENCENDIDO/APAGADO RTS/CTS... - Page 19 ACK/NAK HAND SHAKE TIMEOUT - 2 SEGUNDOS HAND SHAKE TIMEOUT- 5 SEGUNDOS...
- Page 20 Bits de datos Bits de parada...
- Page 21 Comprobar dígitos NINGUNO IGUALAR MARCA DE VERIFICACIÓN DE DÍGITOS...
- Page 22 ESPACIO REINICIAR de código de barras CANCELAR SUFIJO TERMINACIÓN CHAR-CR...
- Page 23 TERMINACIÓN CHAR-ESPACIO TERMINACIÓN CHAR-TAB TERMINACIÓN CHAR-TAB/CR TERMINACIÓN CHAR-CR+CR...
- Page 24 TODOS LOS CÓDIGOS DE PREÁMBULO-STX TODOS LOS CÓDIGOS DE PREÁMBULO-ETX OCULTAR EL PRIMER CARACTER OCULTAR EL ÚLTIMO CARACTER...
- Page 25 Código 11 CÓDIGO 11/ENCENDIDO CÓDIGO 11/APAGADO CARACTER ID “m”...
- Page 26 CARACTER ID “z” CÓDIGO 11 HABILITAR REDUNDANCIA CÓDIGO 11 INHABILITAR REDUNDANCIA...
- Page 27 Código 93 CÓDIGO 93/ENCENDIDO CÓDIGO 93/APAGADO CARACTER ID “h”...
- Page 28 CARACTER ID “z” CÓDIGO 93 HABILITAR REDUNDANCIA CÓDIGO 93 INHABILITAR REDUNDANCIA...
- Page 29 Código 39 CÓDIGO 39/ENCENDIDO CÓDIGO 39/APAGADO CÓDIGO 39 TODO ASCII - ENCENDIDO...
- Page 30 CÓDIGO 39 TODO ASCII - APAGADO GUÍA DE CARACTER - NINGUNO GUÍA DE CARACTER “+”...
- Page 31 ENVIAR INICIAR/PARAR HABILITAR- CARACTERES ENVIAR INICIAR/PARAR INHABILITAR- CARACTERES CARACTER ID “a”...
- Page 32 CARACTER ID “z” CÓDIGO 39 HABILITAR REDUNDANCIA CÓDIGO 39 INHABILITAR REDUNDANCIA...
- Page 33 Código 128 CÓDIGO 128/ENCENDIDO CÓDIGO 128/APAGADO CARACTER ID “g”...
- Page 34 CARACTER ID “z” CÓDIGO 128 HABILITAR REDUNDANCIA CÓDIGO 128 INHABILITAR REDUNDANCIA...
- Page 35 CODABAR CODABAR/ENCENDIDO CODABAR/APAGADO ENVIAR INICIAR/PARAR HABILITAR- CARACTERES ENVIAR INICIAR/PARAR INHABILITAR- CARACTERES...
- Page 36 CARACTER ID “k” CARACTER ID “z” CODABAR HABILITAR REDUNDANCIA...
- Page 37 CODABAR INHABILITAR REDUNDANCIA BAR WIDTH GAP PERMITIR-HABILITAR BAR WIDTH GAP PERMITIR-HABILITAR...
- Page 38 Intercalado/ITF25 INTERCALADO/ITF25 ENCENDIDO INTERCALADO/ITF25 APAGADO CARACTER ID “l”...
- Page 39 CARACTER ID “z” ITF25 HABILITAR REDUNDANCIA ITF25 INHABILITAR REDUNDANCIA...
- Page 40 Industrial 25 INDUSTRIAL 25/ENCENDIDO INDUSTRIAL 25/APAGADO CARACTER ID “k”...
- Page 41 CARACTER ID “z” INDUSTRIAL 25 HABILITAR REDUNDANCIA INDUSTRIAL 25 INHABILITAR REDUNDANCIA...
- Page 42 MSI/PLESSEY MSI - ENCENDIDO MSI - APAGADO CARACTER ID “f”...
- Page 43 CARACTER ID “z” HABILITAR REDUNDANCIA INHABILITAR REDUNDANCIA...
- Page 44 UPC-A UPC-A/ENCENDIDO UPC-A/APAGADO CONVERTIR UPC-A EN EAN13 HABILITAR...
- Page 45 CONVERTIR UPC-A EN EAN13 INHABILITAR TRANSMITIR BIT DE SISTEMA HABILITAR TRANSMITIR BIT DE SISTEMA INHABILITAR...
- Page 46 TRANSMITIR VERIFICACIÓN DE DÍGITO HABILITAR TRANSMITIR VERIFICACIÓN DE DÍGITO INHABILITAR CARACTER ID “b”...
- Page 47 CARACTER ID “z” UPC-E UPC-E/ENCENDIDO UPC-E/APAGADO...
- Page 48 CONVERTIR UPC-E EN UPC-A HABILITAR CONVERTIR UPC-E EN UPC-A INHABILITAR TRANSMITIR BIT DE SISTEMA HABILITAR...
- Page 49 TRANSMITIR BIT DE SISTEMA INHABILITAR TRANSMITIR VERIFICACIÓN DE DÍGITO HABILITAR TRANSMITIR VERIFICACIÓN DE DÍGITO INHABILITAR...
- Page 50 CARACTER ID “C” CARACTER ID “z” EAN-13 EAN-13/ENCENDIDO...
- Page 51 EAN-13/APAGADO CONVERTIR EAN-13 A ISBN HABILITAR CONVERTIR EAN-13 A ISBN INHABILITAR...
- Page 52 TRANSMITIR BIT DE SISTEMA HABILITAR TRANSMITIR BIT DE SISTEMA INHABILITAR TRANSMITIR VERIFICACIÓN DE DÍGITO HABILITAR...
- Page 53 TRANSMITIR VERIFICACIÓN DE DÍGITO INHABILITAR CARACTER ID “e” CARACTER ID “z”...
- Page 54 EAN-8 EAN-8/ENCENDIDO EAN-8/APAGADO TRANSMITIR BIT DE SISTEMA HABILITAR...
- Page 55 TRANSMITIR BIT DE SISTEMA INHABILITAR TRANSMITIR VERIFICACIÓN DE DÍGITO HABILITAR TRANSMITIR VERIFICACIÓN DE DÍGITO INHABILITAR...
- Page 56 CARACTER ID “d” CARACTER ID “z” ISBN ISBN/ENCENDIDO...
- Page 57 ISBN/APAGADO CARACTER ID “f” CARACTER ID “z”...
- Page 58 UPC/EAN UPC/EAN INHABILITAR SUPLEMENTOS UPC/EAN SUPLEMENTOS - 2 DÍGITOS UPC/EAN SUPLEMENTOS - 5 DÍGITOS...
- Page 59 UPC/EAN SUPLEMENTOS - 2 Y 5 DÍGITOS UPC/EAN HABILITAR REDUNDANCIA UPC/EAN INHABILITAR REDUNDANCIA...
- Page 60 CÓDIGO 32 CÓDIGO 32/ENCENDIDO CÓDIGO 32/APAGADO 0 C001 AGREGAR PREFIJO...
- Page 61 2. Escanear los códigos de los caracteres que desea agregar (máximo 10). Ahora “MG” se agregará al inicio de los códigos de barras escaneados. PRUEBA arriba. 0 C002 AGREGAR SUFIJO...
- Page 62 2. Escanee los códigos de los caracteres necesarios (máximo 10). orden. PRUEBA arriba. Ocultar los caracteres frontales (este paso borra los ajustes previos). 0 C003 OCULTAR CARACTERES FRONTALES...
- Page 63 2. Escanee el número de caracteres que necesite ocultar (máximo 10). Ahora los dos caracteres frontales estarán ocultos cuando escanee el código de barras. 123456789 Ocultar los caracteres de atrás (este paso borra los ajustes previos). 0 C004 OCULTAR CARACTERES DE ATRÁS...
- Page 64 2. Escanee el número de caracteres que necesite ocultar (máximo 10). Ahora tres caracteres de atrás estarán ocultos cuando escanee el código de barras. 987654321...
- Page 65 0 C001 0 C002 AGREGAR PREFIJO AGREGAR SUFIJO 0 C003 0 C004 OCULTAR CARACTERES OCULTAR CARACTERES FRONTALES DE ATRÁS NUL/SP...
-
Page 66: Bs/Back Space
BS/BACK SPACE HT/TAB... - Page 67 CR/ENTER...
- Page 68 ESC/ESC...
- Page 69 ”...
- Page 70 &...
- Page 73 < >...
- Page 83 L SHIFT ON L SHIFT OFF R SHIFT ON R SHIFT OFF L ALT ON L ALT OFF R ALT ON R ALT OFF...
- Page 84 L CTRL ON L CTRL OFF R CTRL ON R CTRL OFF / (KP) * (KP) _ (KP) + (KP)
- Page 85 . (KP) ENTER (KP) 0 (KP) 1 (KP) 2 (KP) 3 (KP) 4 (KP) 5 (KP)
- Page 86 6 (KP) 7 (KP) 8 (KP) 9 (KP) INSERTAR BORRAR INICIO...
- Page 87 PÁGINA ARRIBA PÁGINA ABAJO ARRIBA ABAJO IZQUIERDA DERECHA INSERTAR...
- Page 88 BORRAR INICIO PÁGINA ARRIBA PÁGINA ABAJO ARRIBA ABAJO IZQUIERDA...
- Page 89 DERECHA BLOQUEAR NÚMEROS BLOQUEAR MAYÚSCULAS BLOQUEAR DESPLAZAMIENTO...
- Page 90 MANTENIMIENTO Y LIMPIEZA Z Z • Antes de realizar cualquier operación de limpieza ú é t desconectado y apagado. • c i l ñ ú limpiar el equipo. • Nunca utilice solventes u otros productos químicos para limpiarlo.
-
Page 91: Especificaciones
ESPECIFICACIONES Tipo de iluminación: 650 nm diodo de láser visible Tipo de uso: instalación para mano o soporte Promedio de bits de error (BER):1/5 millones Rendimiento de seguridad: Cumple con los estándares de grado II para seguridad Láser UPC-A, UPC-E, Code 39, Code 93, Interleaved 2 de 5, Matriz 2 de 5, MSI, Chino, etc. - Page 92 1.- Para hacer efectiva la garantía, presente esta póliza y el producto, en donde fue adquirido o en Electrónica Steren S.A. de C.V. 2.- Electrónica Steren S.A de C.V. se compromete a reparar el producto en caso de estar defectuoso sin ningún cargo al consumidor. Los gastos de transportación serán cubiertos por el proveedor.
- Page 93 COM-595 USB bar code reader COMPUTA V2.0 Instruction manual 0915m...
- Page 94 USB barcode reader COM-595 Thank You on purchasing your new Steren product. This manual includes all the feature operations and troubleshooting necessary to install and operate your new Steren´s USB barcode reader. Please review this manual thoroughly to ensure proper installation and operation of this product.
- Page 95 IMPORTANT Do not expose the device to extreme temperatures. Do not use or store in places where there are dripping or splashing. To prevent eye damage and injuries, do not look directly into the laser. Do not point laser directly at persons or...
- Page 96 HIGHLIGHTS The barcode reader with USB connector type trigger switch has high performance (50 million operations) to display the laser and make reading the bar codes, the LED indicator lights when detecting or recognizing a code of bars, and together with the buzzer indicator reading data allow you to quickly identify if the codes are incorrect, or are unreadable.
- Page 97 PA P P RT R R S A) Operating LED indicator B) Laser Scanner C) Trigger D) Input RJ45 E) Hole to release cable F) USB Cable - RJ45 Insert a paper clip into the hole to release and remove the cable...
- Page 98 HOW T W O ASSEMBLY L L THE BASE 1. Assemble parts as shown in the diagram. 2. Adjust the angle according to your needs. Screw Base Flexible arm Support Wingnut...
- Page 99 CONNECTION 1. Use the USB cable - RJ45 to connect the player to a PC. Drivers are updated automatically and you can start to use the reader. o l l programming codes. 3. Put the reader in front of the barcode, press the trigger to activate the laser and perform the reading.
-
Page 100: Reading Angle
READING ANGLE • Keep a distance between the reader and the barcode. • Do not put the reader at an angle of 90 °; could affect the reading. • The laser must cover one barcode at a time, otherwise, could occur an error. -
Page 101: Function Setting
ADD A BAR CODE ID Function setting Output mode VERSION INFO RESET FACTORY DEFAULTS KEYBOARD WEDGE SERIAL... - Page 102 Buzzer GOOD READ BEEP SOUND-OFF GOOD READ BEEP SOUND-ON GOOD READ BEEP SOUND-LOWER...
-
Page 103: Reading Mode
Reading mode SINGLE SCAN SINGLE SCAN NO TRIGGER MULTISCAN... - Page 104 MULTISCAN NO TRIGGER CONTINUOUS SCAN PULSE...
- Page 105 Image ENABLE DISABLE...
- Page 106 Code ID SEND CODE ID AS PREFIX SEND CODE ID AS PREFIX-DISABLE SEND CODE ID AS SUFFIX SEND CODE ID AS SUFFIX-DISABLE...
- Page 107 Language ENGLISH GERMAN FRENCH RESET...
- Page 108 Character Capital/Lower CAPITAL LOWER CASE RESET...
- Page 109 Serial mode parameter settings Baud rate 2400 4800 9600 19200...
- Page 110 Hand shake NONE XON/OFF RTS/CTS...
- Page 111 ACK/NAK HAND SHAKE TIMEOUT - 2 SECONDS HAND SHAKE TIMEOUT- 5 SECONDS...
- Page 112 Data bits Stop bits...
-
Page 113: Check Digits
Check digits NONE EVEN MARK CHECK DIGIT... -
Page 114: Termination String Setup Bar Codes
SPACE RESET Termination string setup bar codes CANCEL SUFFIX TERMINATION CHAR-CR... - Page 115 TERMINATION CHAR-SPACE TERMINATION CHAR-TAB TERMINATION CHAR-TAB/CR TERMINATION CHAR-CR+CR...
- Page 116 ALL CODES PREAMBLE-STX ALL CODES PREAMBLE-ETX HIDE THE FIRST CHAR HIDE THE LAST CHAR...
-
Page 117: Barcode Setting
Barcode setting Code 11 CODE 11/ON CODE 11/OFF ID CHARACTER “m”... - Page 118 ID CHARACTER “z” CODE 11 REDUNDANCY ENABLE CODE 11 REDUNDANCY DISABLE...
- Page 119 Code 93 CODE 93/ON CODE 93/OFF ID CHARACTER “h”...
- Page 120 ID CHARACTER “z” CODE 93 REDUNDANCY ENABLE CODE 93 REDUNDANCY DISABLE...
- Page 121 Code 39 CODE 39/ON CODE 39/OFF CODE 39 ALL ASCII - ON...
- Page 122 CODE 39 ALL ASCII - OFF GUIDE CHARACTER - NONE GUIDE CHARACTER “+”...
- Page 123 SEND START/STOP CHARS-ENABLE SEND START/STOP CHARS-DISABLE ID CHARACTER “a”...
- Page 124 ID CHARACTER “z” CODE 39 REDUNDANCY ENABLE CODE 39 REDUNDANCY DISABLE...
- Page 125 Code 128 CODE 128/ON CODE 128/OFF ID CHARACTER “g”...
- Page 126 ID CHARACTER “z” CODE 128 REDUNDANCY ENABLE CODE 128 REDUNDANCY DISABLE...
- Page 127 CODABAR CODABAR/ON CODABAR/OFF SEND START/STOP CHARS-ENABLE SEND START/STOP CHARS-DISABLE...
- Page 128 ID CHARACTER “k” ID CHARACTER “z” CODABAR REDUNDANCY ENABLE...
- Page 129 CODABAR REDUNDANCY DISABLE BAR WIDTH GAP ALLOWED-ENABLE BAR WIDTH GAP ALLOWED-DISABLE...
- Page 130 Interleaved/ITF25 INTERLEAVED/ITF25-ON INTERLEAVED/ITF25-OFF ID CHARACTER “l”...
- Page 131 ID CHARACTER “z” ITF25 REDUNDANCY ENABLE ITF25 REDUNDANCY DISABLE...
- Page 132 Industrial 25 INDUSTRIAL 25/ON INDUSTRIAL 25/OFF ID CHARACTER “k”...
- Page 133 ID CHARACTER “z” INDUSTRIAL 25 REDUNDANCY ENABLE INDUSTRIAL 25 REDUNDANCY DISABLE...
- Page 134 MSI/PLESSEY MSI - ON MSI - OFF ID CHARACTER “f”...
- Page 135 ID CHARACTER “z” REDUNDANCY ENABLE REDUNDANCY DISABLE...
- Page 136 UPC-A UPC-A/ON UPC-A/OFF CONVERT UPC-A INTO EAN13 ENABLE...
- Page 137 CONVERT UPC-A INTO EAN13 DISABLE TRANSMIT SYSTEM BIT ENABLE TRANSMIT SYSTEM BIT DISABLE...
- Page 138 TRANSMIT CHECK DIGIT ENABLE TRANSMIT CHECK DIGIT DISABLE ID CHARACTER “b”...
- Page 139 ID CHARACTER “z” UPC-E UPC-E/ON UPC-E/OFF...
- Page 140 CONVERT UPC-E INTO UPC-A ENABLE CONVERT UPC-E INTO UPC-A DISABLE TRANSMIT SYSTEM BIT ENABLE...
- Page 141 TRANSMIT SYSTEM BIT DISABLE TRANSMIT CHECK DIGIT ENABLE TRANSMIT CHECK DIGIT DISABLE...
- Page 142 ID CHARACTER “C” ID CHARACTER “z” EAN-13 EAN-13/ON...
- Page 143 EAN-13/OFF CONVERT EAN-13 INTO ISBN ENABLE CONVERT EAN-13 INTO ISBN DISABLE...
- Page 144 TRANSMIT SYSTEM BIT ENABLE TRANSMIT SYSTEM BIT DISABLE TRANSMIT CHECK DIGIT ENABLE...
- Page 145 TRANSMIT CHECK DIGIT DISABLE ID CHARACTER “e” ID CHARACTER “z”...
- Page 146 EAN-8 EAN-8/ON EAN-8/OFF TRANSMIT SYSTEM BIT ENABLE...
- Page 147 TRANSMIT SYSTEM BIT DISABLE TRANSMIT CHECK DIGIT ENABLE TRANSMIT CHECK DIGIT DISABLE...
- Page 148 ID CHARACTER “d” ID CHARACTER “z” ISBN ISBN/ON...
- Page 149 ISBN/OFF ID CHARACTER “f” ID CHARACTER “z”...
- Page 150 UPC/EAN UPC/EAN SUPPLEMENTS DISABLE UPC/EAN SUPPLEMENTS - 2 DIGITS UPC/EAN SUPPLEMENTS - 5 DIGITS...
- Page 151 UPC/EAN SUPPLEMENTS - 2 & 5 DIGITS UPC/EAN REDUNDANCY ENABLE UPC/EAN REDUNDANCY DISABLE...
-
Page 152: Add Prefix
Code 32 CODE 32/ON CODE 32/OFF 1. Scan the set-up code below (this step will clear the pre-set 0 C001 ADD PREFIX... -
Page 153: Add Suffix
2. Scan the needed character codes (maximum add 10 characters) Now “MG” will be added when scanning the normal bar codes. TEST 1. Scan the set-up code below (this step will clear the pre-set 0 C002 ADD SUFFIX... - Page 154 2. Scan the needed character codes (maximum add 10 characters) Now “ok” will be added when scanning the normal bar codes. TEST Hide the front characters 1. Scan the set-up code below ( this step will clear the previous settings ). 0 C003 HIDE THE FRONT CHARACTERS...
- Page 155 2. Scan the number needs to be hidden (maximum de 10 characters). Now two front characters will be hidden when scanning the normal bar codes. 123456789 Hide the behind characters 1. Scan the set-up code below ( this step will clear the previous settings ).
- Page 156 2. Scan the number needs to be hidden (maximum de 10 characters). Ex. To hide three behind characters, scan the set-up code Now three behind characters will be hidden when scanning the normal bar codes. 987654321 Scan the above testing bar code,...
- Page 157 0 C001 0 C002 ADD PREFIX ADD SUFFIX 0 C003 0 C004 HIDE THE FRONT HIDE THE BEHIND CHARACTERS CHARACTERS NUL/SP...
- Page 158 BS/BACK SPACE HT/TAB...
- Page 159 CR/ENTER...
- Page 160 ESC/ESC...
- Page 161 ”...
- Page 162 &...
- Page 165 < >...
- Page 175 L SHIFT ON L SHIFT OFF R SHIFT ON R SHIFT OFF L ALT ON L ALT OFF R ALT ON R ALT OFF...
- Page 176 L CTRL ON L CTRL OFF R CTRL ON R CTRL OFF / (KP) * (KP) _ (KP) + (KP)
- Page 177 . (KP) ENTER (KP) 0 (KP) 1 (KP) 2 (KP) 3 (KP) 4 (KP) 5 (KP)
- Page 178 6 (KP) 7 (KP) 8 (KP) 9 (KP) INSERT DELETE HOME...
- Page 179 PAGE UP PAGE DOWN DOWN LEFT RIGHT INSERT...
- Page 180 DELETE HOME PAGE UP PAGE DOWN DOWN LEFT...
- Page 181 RIGHT NUM LOCK CAPS LOCK SCROLL LOCK...
-
Page 182: Maintenance And Cleaning
MAINTENANCE AND CLEANING • Before performing any cleaning or maintenance, make sure the reader is disconnected and off. • equipment. • Never use solvents or other chemicals for cleaning. -
Page 183: Specifications
SPECIFICATIONS Lighting source: 650 nm visible laser diode Use type: handheld or bracket-held installation Bit error rate (BER): 1/5 million Safety performance: Complying with grade II national standards for Laser safety Barcode types: UPC-A, UPC-E, Code 39, Code Interleaved 2 of 5, Matrix 2 of 5, MSI, Chinese, etc. -
Page 184: Warranty
Part number: COM-595 Brand: Steren WARRANTY This Steren product is warranted under normal usage against defects in workmanship and materials to the original purchaser for one year from the date of purchase. CONDITIONS 1.- This warranty card with all the required information, invoice, product box or package, and product, must be presented when warranty service is required. - Page 186 Este instructivo puede mejorar con su ayuda, llámenos al: Help us to improve this instruction manual, call us to: 01 800 500 9000 Centro de servicio a clientes Customer Service Center...
Need help?
Do you have a question about the COM-595 and is the answer not in the manual?
Questions and answers