Table of Contents
Advertisement
All manuals and user guides at all-guides.com
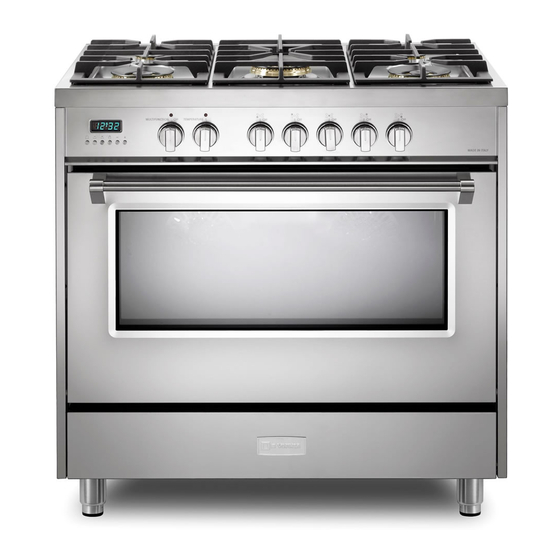
Freestanding
Dual Fuel Ranges
Owner’s Manual and Installation Instructions
Safety
Instructions
Operating Instructions
Care and Cleaning
Installation Instructions
Troubleshooting Tips
Write the model and serial
numbers here:
Model #
Serial #
IMPORTANT:
Read and save these instructions.
IMPORTANT:
Installer:
H o m e o w n e r :
Advertisement
Table of Contents

Related Manuals for FratelliOnofri FREV905D

Summary of Contents for FratelliOnofri FREV905D
- Page 1 All manuals and user guides at all-guides.com Freestanding Dual Fuel Ranges Owner’s Manual and Installation Instructions Safety Instructions Write the model and serial numbers here: Operating Instructions Model # Serial # Care and Cleaning IMPORTANT: Read and save these instructions. IMPORTANT: Installer: H o m e o w n e r :...
- Page 2 All manuals and user guides at all-guides.com Before you start... Your safety and the safety of others are very important. DANGER You can be killed or seriously injured if you don't immediately follow instructions. WARNING You can be killed or seriously injured if you don't follow instructions.
-
Page 3: Important Safety Information
All manuals and user guides at all-guides.com IMPORTANT SAFETY INFORMATION. READ ALL INSTRUCTIONS BEFORE USING. WARNING! WARNING CAUTION:... - Page 4 All manuals and user guides at all-guides.com WARNING! WARNING WARNING WARNING...
-
Page 5: Safety Precautions
All manuals and user guides at all-guides.com SAFETY PRECAUTIONS. WARNING: COOK MEAT AND POULTRY THOROUGHLY... - Page 6 All manuals and user guides at all-guides.com SAFETY PRECAUTIONS CAUTION: OVEN WARNING!
- Page 7 All manuals and user guides at all-guides.com WARNING! LITE...
-
Page 8: Flooring Under The Range
All manuals and user guides at all-guides.com FLOORING UNDER THE RANGE LEVELING THE RANGE WARNING! SAVE THESE INSTRUCTIONS... -
Page 9: Using The Surface Burners
All manuals and user guides at all-guides.com USING THE SURFACE BURNERS LITE In case of a power failure, LITE Use extreme caution when lighting burner this way. Surface Burner Controls To light a Surface Burner After Lighting a Burner Automatic electric ignition. Ignition of burners equipped with safety thermocouple In this way the safety valve will be started up. - Page 10 All manuals and user guides at all-guides.com How to Select Flame Size For safe handling of cookware, never let the flame extend up the sides of the cookware. Top of Range Cookware Heatproof Glass Ceramic: Aluminium: Stainless Steel: Cast-iron: Enamelware: Glass:...
- Page 11 All manuals and user guides at all-guides.com Using the electric oven Throughout this manual, features and appearance may vary from your model. Twin cavity model ovens and BROIL. The standard conformation consists of a multifunction oven on the left and a static oven on the right. All the functions mentioned below switch the oven internal light on.
-
Page 12: Using The Electric Oven
All manuals and user guides at all-guides.com Using the electric oven MULTIFUNCTION OVEN MULTIFUNCTION OVEN The electric oven is equipped with a bottom element, a top element, a circular heating element surrounding the fan and a BROIL. When you turn the control knob to this position, the light The thermostat switches the elements on and off to will be on for all the following operations. - Page 13 All manuals and user guides at all-guides.com Using the electric oven Automatic use with cooking time and end time setting Food Poisoning Hazard Do not let food sit in oven more than one hour before or after cooking. Doing so can result in food poisoning or sickness. Minutes counter Electronic cooker programmer Features:...
-
Page 14: Using The Oven
All manuals and user guides at all-guides.com Using the oven Oven Shelves Bump To remove the shelves from the oven, To replace, Oven Shelf Positions B, C, D, E Oven Vents The type of margarine will affect baking performance! - Page 15 All manuals and user guides at all-guides.com Using the oven for baking How to Set the Oven For Baking OVEN OVEN TEMP TEMP Type of food Shelf Position Preheating Baking Pans Pan Placement...
- Page 16 All manuals and user guides at all-guides.com Using the oven for baking Cookies Oven Shelves Pies Cakes Aluminum foil Don’t Peek...
- Page 17 All manuals and user guides at all-guides.com Using the oven for roasting How to Set the Oven For Roasting OVEN TEMP OVEN TEMP...
- Page 18 All manuals and user guides at all-guides.com Using the oven for broiling How to Set Your Oven for Broiling BROIL Use of Aluminum Foil Broiling Guide Time in Shelf Minutes Amount or Food Comments Position First Side Second Side Thickness Bacon Ground Beef Beef Steaks...
-
Page 19: Care And Cleaning Of The Range
All manuals and user guides at all-guides.com CARE AND CLEANING OF THE RANGE WARNING! How to Remove the Range for Cleaning and Servicing NOTE: Changing the rear oven lamp: Control Panel and Knobs NB: Only use 25 W 110 V lamps type E-14, T300°C, available from our After-Sales-Service. - Page 20 All manuals and user guides at all-guides.com Care and cleaning of the range Burner Grates To remove burned-on food Burners You should clean the surface burners routinely, especially after bad spillovers, Before putting the surface burner back Oven Shelves Broiler Pan and Grid...
- Page 21 All manuals and user guides at all-guides.com Care and cleaning of the range Lift-Off Oven Door TO CLEAN THE DOOR: Slot Inside of door: Upper hinge arm hinge lock To remove the door: Lower hinge arm To replace the door: Upper hinge arm Lower...
-
Page 22: Installation Of The Range
All manuals and user guides at all-guides.com INSTALLATION OF THE RANGE Read these instructions completely and carefully. BEFORE YOU BEGIN IMPORTANT: NOTE TO INSTALLER: NOTE TO CONSUMER: If you smell gas:... -
Page 23: Tools You Will Need
All manuals and user guides at all-guides.com Installation of the range. Read these instructions completely and carefully TOOLS YOU WILL NEED ADDITIONAL MATERIALS YOU MAY NEED: WARNING! IMPORTANT:... - Page 24 All manuals and user guides at all-guides.com Read these instructions completely and carefully WARNING! MUST NEVER MUST NEVER BE LESS THAN 24 INCHES (610 mm). BE LESS THAN 24 INCHES (610 mm). CAUTION:...
-
Page 25: Dimensions And Clearances
All manuals and user guides at all-guides.com DIMENSIONS AND CLEARANCES WARNING! Cabinet 30'' (762 mm) Minimum Install with 0'' (0 mm) clearance sides and back 18'' (457 mm) Minimum... - Page 26 All manuals and user guides at all-guides.com Installation of the range Read these instructions completely and carefully. Step Recommended gas and electric supply location *NOTE: Note: CAUTION:...
- Page 27 All manuals and user guides at all-guides.com Read these instructions completely and carefully. Step WARNING! To fix the cooker to the rear wall WARNING -...
-
Page 28: Step 3 Gas Conversions
All manuals and user guides at all-guides.com Step 3 GAS CONVERSIONS Skip to Step 4 if conversion is not necessary. To Convert Gas Pressure Regulator Explosion Hazard Use a new CSA International approved gas supply line. Install a shut-off valve. Securely tighten all gas connections. - Page 29 All manuals and user guides at all-guides.com To Convert Standard Surface Burners Attention: LP Gas Orifice Spud Chart for Standard Surface Burners Table D WARNING: the range can have a different burners disposition on the work-top. To identify the burners on the work-top, see table D, where there are the diameters of their head.
-
Page 30: Natural Gas Conversion
All manuals and user guides at all-guides.com Natural Gas Conversion Gas pressure regulator Tip Over Hazard A child or adult can tip the range and be killed. Connect anti-tip bracket chains, behind the range, to the wall. Reconnect the anti-tip bracket chains, if the range is moved. Failure to follow these instructions can result in death or serious burns to children and adults. - Page 31 All manuals and user guides at all-guides.com To Convert Standard Surface Burners Attention: Table D WARNING: the range can have a different burners disposition on the work-top. To identify the burners on the work-top, see table D, where there are the diameters of their head. MAX.
- Page 32 All manuals and user guides at all-guides.com Installation of the range Read these instructions completely and carefully. Step BACK SIDE RANGE Appliance connector 1/2" NPT Explosion Hazard Use a new CSA International approved gas supply line. Install a shut-off valve. Securely tighten all gas connections.
- Page 33 All manuals and user guides at all-guides.com Installation of the range Read these instructions completely and carefully. IMPORTANT: IMPORTANT: Type of Gas Natural gas: LP gas conversion:...
-
Page 34: Natural Gas
All manuals and user guides at all-guides.com Gas Supply Line Gas Pressure Regulator Natural gas: LP gas: is a registered trademark of E.I. Du Pont De Nemours and Company. Flexible metal appliance connector: Gas: Burner Input Requirements Rigid pipe connection: Gas Supply Pressure Testing Line pressure testing above ½... - Page 35 All manuals and user guides at all-guides.com Make Gas Connection Typical flexible connection Complete Connection Typical rigid pipe connection...
- Page 36 All manuals and user guides at all-guides.com Attention: To light a Surface Burner LITE If the “ low” flame needs to be adjusted: Check Operation of Cooktop Burners LITE If burners do not light properly: • Complete Installation • • •...
-
Page 37: Electrical Requirements - U.s.a. Only
All manuals and user guides at all-guides.com Installation of the range Read these instructions completely and carefully. Step Electrical Requirements - U.S.A. Only If connecting to a 4-wire system: WARNING: Electrical Connection 4-wire receptacle (14-50R) - Page 38 All manuals and user guides at all-guides.com If connecting to a 3-wire system: 3-wire receptacle (10-50R)
- Page 39 All manuals and user guides at all-guides.com Electrical Connection - U.S.A. Only Power Supply Cord 3. Assemble strain relief on the power supply cord. Securely tighten screws "1" and "2". WARNING Electrical Shock Hazard Disconnect power before servicing. Use a new 40 amp power supply cord. Plug into a grounded outlet.
- Page 40 All manuals and user guides at all-guides.com 4. Complete installation following instructions for your 4. Connect the neutral (center) wire to the center type of electrical connection: terminal connector using one of the hex washer 4-wire (recommended) head screws. Securely tighten screw for proper 3-wire (if 4-wire is not available) electrical connection.
-
Page 41: Adjust Leveling Legs
All manuals and user guides at all-guides.com Step Unpack Range Adjust Leveling Legs If range height adjustment is necessary, use a WARNING wrench or pliers to loosen the 4 leveling legs. This may be done with the range on its back or with the range supported on 2 legs after the range Excessive Weight Hazard has been placed back to a standing position. -
Page 42: Step 7 Lift-Up Cooktop
All manuals and user guides at all-guides.com Read these instructions completely and carefully. Step Lift-Up Cooktop Warning: Use protective gloves to raise and move the work-top Your range, like many other household items, is heavy and can settle into soft floor coverings such as cushioned vinyl or carpeting. -
Page 43: Before You Call For Service
All manuals and user guides at all-guides.com Before You Call For Service What to do Problem Possible Causes Top burners do not Plug on range is not light or do not burn completely inserted in the evenly electrical outlet. Burner holes on the side or around the top of the burner may be clogged. - Page 44 All manuals and user guides at all-guides.com Cod. 536638 (12- 07)
Need help?
Do you have a question about the FREV905D and is the answer not in the manual?
Questions and answers