
Related Manuals for Target LCD Multizone CC16G60DAB

Summary of Contents for Target LCD Multizone CC16G60DAB
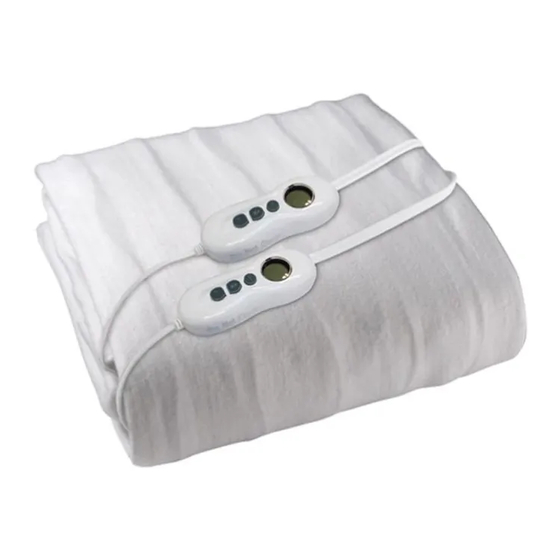
- Page 1 ELECTRIC BLANKET INSTRUCTIONS LCD Multizone Model Numbers CC16G60DAB - Queen CC16i60DAB - King Note: The specifications and/or components of this product are subject to change without prior notice...
-
Page 2: Table Of Contents
IMPORTANT SAFEGUARDS ..............3 Connecting the Controller/s..............5 Securing Your Electric Blanket ............6 Features ....................7 Using The Controller ................8 Heat Settings – LCD screen ................. 9 Foot and Body Zone Setting ................ 9 Timer Settings – 12 Segments ..............11 Overheat Protection ................ -
Page 3: Important Safeguards
Thank you for purchasing our Electric Blanket. Each unit is manufactured to ensure safety and reliability. Before using for the first time, please read the instruction manual carefully and keep it for future reference. 1 IMPORTANT SAFEGUARDS • Before connecting and switching on the blanket, ensure that the voltage indicated on the rating label corresponds to the mains voltage in your home. - Page 4 • Do not tuck the edges of the blanket in. • Do not use the blanket rucked or folded. • Keep the control away from an open window. • Do not use pins as these may damage the electric wiring. •...
-
Page 5: Connecting The Controller/S
2 Connecting the Controller/s Turn Off Power and Remove the Plug from the Wall Socket *The controller socket/s are located on the underneath of the blanket* • To fit the controller plug, simply hold the socket with one hand and push the controller plug all the way until the locking tab locates over the lug on top of the controller plug. -
Page 6: Securing Your Electric Blanket
3 Securing Your Electric Blanket Note: Your electric blanket must be placed directly onto the mattress. If using a mattress protector, this goes over the electric blanket. IMPORTANT: • With the controller/s exiting out the side of the skirt, place the blanket onto the mattress with the controller connection/s at the Foot End of the bed. -
Page 7: Features
• The blanket top should not be tucked in at the sides. • Make your bed in the usual manner. • When you are satisfied that the blanket is fitted correctly, plug the controller/s into the wall power socket and turn on. IMPORTANT: DO NOT COVER THE CONTROLLERS AT ANY TIME NOTE: This label is attached to the blanket to remind you of the correct direction in which the blanket must be fitted to the mattress. -
Page 8: Using The Controller
5 Using The Controller • Use your Electric Blanket with Detachable Controller Model GW281 Only. • Do not use any other controller for this blanket. • The push buttons will be illuminated when pressed and the backlight will time out after approximately 5 to 10 seconds. -
Page 9: Heat Settings - Lcd Screen
5.1 Heat Settings – LCD screen Will appear on the LCD display when connected to available power supply or when the controller has reached its preset time off. are suitable for all night use, A1 being the lowest through to A5 the highest recommended all night setting. - Page 10 • Ensure the main switch, located on the back of the controller, is in the On position. • When you first supply power to the controller, the controller display will show “oF’ meaning “Off”. BODY • To set the required temperature for the Body Zone, press the Body Zone button.
-
Page 11: Overheat Protection
5.3 Timer Settings – 12 Segments • Your electronic controller has a factory “Off Time” default setting of approximately 12 hours. • When you first set the heat setting, the 12 segment around the LCD display will blink showing that there is approximately 12 hours until the controller automatically turns off. -
Page 12: Recommended Cleaning Instructions
7 Recommended Cleaning Instructions Ensure all controllers are unplugged from the power point and from the electric blanket before cleaning Never Use Hot Water as the blanket may shrink and will void your warranty. 7.1 Treatment For Localised Soiling Never Use Hot Water as the blanket may shrink and will void your warranty. •... -
Page 13: Machine Washing
7.3 Machine Washing • Remove the controller/s and place your Blanket in the washing machine with either a natural wool detergent or with mild soap flakes. • Set your machine to the Delicate Wool or Gentle cycle (without Spin Dry) and set the water temperature to warm (30°C Max). -
Page 14: Servicing Your Blanket And Controller/S
8 Servicing Your Blanket and Controller/s NOTE: There are no user serviceable parts in this blanket. • The blanket should be examined frequently for signs of wear, either of the blanket, controller or flexible cord. If wear is visible or if any abnormality or defect in operation in the blanket is observed, discontinue use immediately and consult a qualified and registered person for service. -
Page 15: Troubleshooting Table
10.1 Troubleshooting Table Problem Cause Remedy The Main Switch of the controller may be in the Off Slide the switch (located on the back of the controller) Position to the ON Position. The Power Plug may not be plugged in to the power Ensure the power plug is inserted into the powerpoint No Power to point and switched on.
Need help?
Do you have a question about the LCD Multizone CC16G60DAB and is the answer not in the manual?
Questions and answers