Advertisement
Quick Installation Guide for TL-WR703N
Wireless Nano AP Router Pre-Installed with DD-WRT
Firmware
Table of Contents:
1.1
1.2
2.1
2.2
2.3
2.4
2.5
2.6
Advertisement
Table of Contents

Summary of Contents for TP-Link TL-WR703N
-
Page 1: Table Of Contents
2. Quick Installation Hardware Installation Setup you Computer Connect your Computer to TL-WR703N Configuration on TL-WR703N 2.4.1 Log In to TL-WR703N 2.4.2 Select Your Language 2.4.3 Dial Up Visit Internet (Connect your PC to TL-WR703N Again) Wireless Encryption 3. Advanced Configuration... -
Page 2: Basic Information
Quick Installation Guide for TL-WR703N 1. Basic Information Basic Product Log In information 1.1.1 Log in Information You can log into the interface of this Nano WIFI router with the following information: IP Address: 192.168.1.1 User Name: admin Pass Word: admin Important Notice 1.2.1 We are responsible for the quality warranty if this product... -
Page 3: Hardware Installation
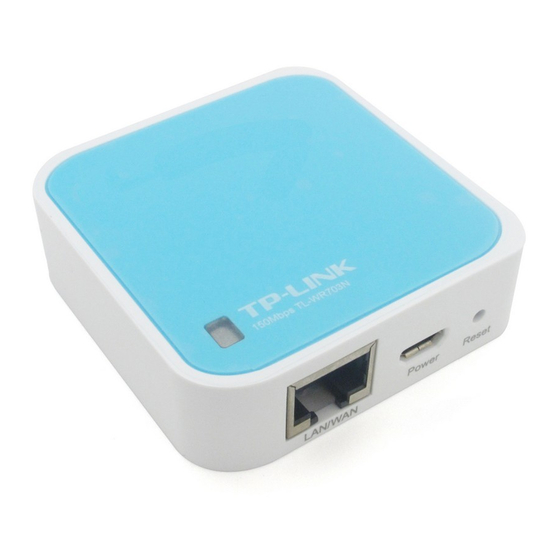
2.1.2 Connect the Cables and Power Supply Step 1: Connect one end of the provided USB cable to micro USB port of TL-WR703N. Step 2: Connect the other end of the provided USB cable to the power adapter or the USB Port of your PC. - Page 4 LAN/WAN: This port works as WAN in AP Router mode. Power: This port is used to connect the provided power adapter. Reset:It is used to reset the TL-WR703N to its factory defaults. How to reset this wireless router? Please use a small pin to press this reset button and hold it for 5~7 seconds.
-
Page 5: Setup You Computer
installed with DD-WRT firmware. For checking if this router is workable or not, please disconnect the power supply to the router and give power supply to it again. If the LED blinks 1~2 times when you plug on the power supply to it, it means the router is workable. - Page 6 2.2.3 Select “Obtain an IP address automatically” and select “Obtain DNS server address automatically” and then click “OK”...
-
Page 7: Connect Your Computer To Tl-Wr703N
Connect your Computer to TL-WR703N Below we will tell you how to connect your PC to your wireless router wirelessly, please make sure that your PC has wireless adapter. 2.3.1 Please note that the default SSID of your wireless router is “dd-wrt”, this wireless router is default as no wireless... -
Page 8: Configuration On Tl-Wr703N
2.3.3 If you can see Connected as shown in the screen below, you’ve successfully connected to the wireless network. Configuration on TL-WR703N 2.4.1 Log In to TL-WR703N Step 1: Please open your Internet Explorer, in the place of address bar please input “192.168.1.1”... - Page 9 Step 3: You would see the screen below: 2.4.2...
-
Page 10: Select Your Language
Here it is in English interface, you can select other languages. Please click “Administration” as below. Please select your language as below: At the bottom of the interface, please click “Save”, and then click “Apply Settings”. -
Page 11: Dial Up
Now you can use one of the above languages for configuring your router. Here we take English as example. 2.4.3 Dial Up Please click “Setup” as below: In the place of “WAN Connection Type”, please select your WAN connection type. Please note that this choice is depending on the Internet connection type you are using. - Page 12 your router is configured and able to connect to the Internet. 2.4.3.2 For “PPPoE” This is usually for dialing up ADSL. If your Internet connection type offered by your ISP is “PPPoE”, please select “PPPoE”. In the interface above, please input “User Name” and “Password” which is offered by your ISP (Internet Service Provider).
-
Page 13: Visit Internet (Connect Your Pc To Tl-Wr703N Again)
After the above steps, your wireless router is connected to Internet. Now, you need to connect to your PC to wireless router again for Internet connection. Visit Internet (Connect your PC to TL-WR703N Again) 2.5.1 Click the wireless icon at the bottom of your desktop. -
Page 14: Wireless Encryption
2.5.2 If Wireless Security is enabled, you need to enter the Security key you’ve setup in the configuration. Please enter the password your setup in the screen below. (Please note that this wireless router is default as no encryption.) 2.5.3 All configuration are finished, you are able to visit your wireless Internet now! Wireless Encryption This wireless router is default as no wireless encryption. - Page 15 recommend you to setup encryption to protect your wireless network. You can do this as below: 2.6.1 Log into the interface of the router. 2.6.2 Click “Wireless” as below: 2.6.3 Click “Wireless Security” as below: 2.6.4 In the place of “Security Mode”, you can select one of the below encryption modes.
-
Page 16: Advanced Configuration
choose “WEP” Security mode. And please note that WPA and WPA2 have higher level of security than WEP. 2.6.6 Here we take “WPA2 Personal” as example. Choose “WPA2 Personal” in the above interface, and then you will send the interface below. In the place of “WPA Algorithms”, please choose “AES”. - Page 17 DD-WRT is an open sourced, editable, continual upgradable third party firmware. We are not responsible for the quality problem caused by upgrading this router with other version of DD-WRT firmware by the buyer/end-users himself/herself. Thanks for your buying! Please enjoy using your TP-Link Wireless Router!


Need help?
Do you have a question about the TL-WR703N and is the answer not in the manual?
Questions and answers