Table of Contents
Advertisement
Advertisement
Table of Contents

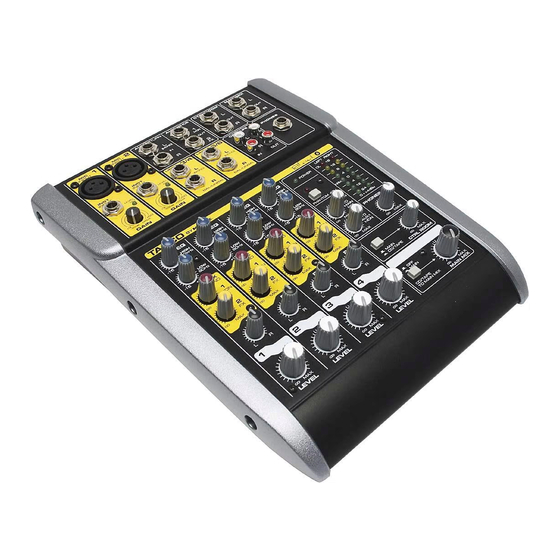
Summary of Contents for Tapco Blend 6
- Page 1 owner’s manual...
-
Page 2: Safety Instructions
13. Servicing — The user should not attempt to service this product beyond those means described in this operating manual. All other servicing should be referred to the Tapco Service Department. 14. To prevent electric shock, do not use this polarized plug with an extension cord, receptacle or other outlet unless the blades can be fully inserted to prevent blade exposure. -
Page 3: Table Of Contents
® Your new TAPCO Blend 6 mixer is designed to set up quickly and operate easily. We know it’s often seen as a sign of weakness to read a manual, along with asking for directions when lost, but maybe you can read the rest when nobody is looking. -
Page 4: Getting Started
Getting Started The following steps will help you set up your mixer, and get the levels and adjustments just right. ZERO THE CONSOLE: 1. Turn everything off, including the mixer’s POWER switch and PHANTOM POWER switch. 2. Turn down the channel strip GAIN, AUX 1, AUX 2, and LEVEL controls. -
Page 5: A Few Precautions
INPUT INPUT INPUT INPUT INST INST INPUT INPUT INPUT INPUT LEVEL LEVEL GAIN GAIN HIGH 1 2kHz 80Hz SEND SEND LEVEL LEVEL A FEW PRECAUTIONS: • Never listen to loud music for prolonged periods. Please see the Safety Instructions on page 2 for information on hearing protection. -
Page 6: Introduction
Introduction Thank you for choosing a TAPCO Blend 6 mixer by Mackie. The TAPCO family of mixers hails back to the days of TAPCO Corporation, Greg Mackie’s fi rst company. TAPCO revolutionized the audio industry back in 1969 with the very fi rst 6-channel mixer specifi cally designed for keyboards and rock ‘N’... -
Page 7: Hookup Diagrams
Hookup Diagrams Small Club Gig Mono in/Stereo out Reverb (optional) Microphones 1 and 2 INPUT INPUT INPUT INPUT INST INST INPUT INPUT INPUT INPUT LINE IN LEVEL LEVEL LEVEL LEVEL GAIN GAIN BAL /UNBAL Keyboard Computer set-up Mono in/Stereo out Reverb (optional) Microphone INPUT... -
Page 8: Blend 6 Features
GAIN GAIN CHANNEL INPUTS 1. MIC (MICROPHONE) INPUTS The Blend 6 is equipped with two rugged, low- noise, phantom-powered microphone preamplifi ers, providing up to 50 dB of crystal-clear amplifi cation. Their balanced circuitry rejects all manner of extraneous interference. Professional condenser, dynamic, and ribbon mics all sound excellent through these XLR inputs. -
Page 9: Channel Controls
CHANNEL CONTROLS Channel strips 1 and 2 allow adjustment of EQ, Pan and Level for mono signals. Channel strips 3/4, and 5/6 allow adjustment of stereo or mono signals. The output from each strip passes onto the left and right main mixes. -
Page 10: Aux Return Inputs
INPUT INPUT INPUT INPUT INST INST INPUT INPUT INPUT INPUT LINE IN LEVEL LEVEL LEVEL LEVEL GAIN GAIN 12. AUX RETURN INPUTS Connect the outputs of an external parallel effects device into these inputs. When connecting a mono device (just one cord), always use the left (mono) input and plug nothing into the right input. -
Page 11: Master Section
MA X MAIN MIX battery-powered). With the switch pushed in, the Blend 6 provides +48 VDC phantom powering on XLR pins 2 and 3. If you have ribbon mics, tube mics, or dynamic mics that do not require phantom power, leave the PHANTOM POWER switch out. -
Page 12: Output Connections
AC power supply to provide AC power to the mixer. Connect the external power supply to the Blend 6 fi rst, then plug the power supply into a suitable and properly rated AC outlet. WARNING: Make sure you use the correct external power supply capable of providing 9 VDC at 1.5 amps. -
Page 13: Appendix A: Service Information
• Our favorite question: Is the POWER switch on? • Is the external power supply securely plugged into the POWER IN connector on the back of the Blend 6? • Is the external power supply plugged into an AC power strip? Make sure the power to the power strip is turned on. -
Page 14: Appendix B: Connections
Appendix B: Connections XLR Connectors Channels 1 and 2 use 3-pin female XLR connectors on the MIC inputs. They are wired as follows, according to standards specifi ed by the AES (Audio Engineering Society). SHIELD COLD SHIELD COLD XLR Balanced Wiring: Pin 1 = Shield Pin 2 = Hot (+) Pin 3 = Cold (–) -
Page 15: Appendix C: Blend 6 Specifi Cations
Appendix C: Blend 6 Specifi cations Frequency Response Mic Input to any Output (Trim at 0 dB): +0, –1 dB, 20 Hz to 20 kHz –3 dB, 10 Hz to 80 kHz Distortion THD and SMPTE IMD; 20Hz to 20kHz Mic Input to Main Output: <... -
Page 16: Ac Power Requirements
AC Power Requirements External Power Supply output: 9.0 VAC @ 1500 mA (2.5 mm AC coaxial power connection) External Power Supply AC input U.S. 120 VAC, 60 Hz Europe 240 VAC, 50 Hz Japan 100 VAC, 50/60 Hz Korea 220 VAC, 60 Hz Physical Dimensions and Weight Height: 2.6 in/66.7 mm... -
Page 17: Block Diagram
Block Diagram This shows an outline of the strange goings on inside the mixer. -
Page 18: Track Sheets
Track Sheets Use these sheets to record some of your favorite settings. TAPCO Blend 6 -22dB +25dB -22dB +25dB GAIN GAIN HIGH HIGH 12kHz 12kHz 80Hz 80Hz SEND SEND SEND SEND LEVEL LEVEL TAPCO Blend 6 -22dB +25dB -22dB +25dB... -
Page 19: Tapco Limited Warranty
B. Failure to register online or return the product registration card will not void the one-year warranty. C. Service and repairs of TAPCO products are to be performed only at the factory, or a factory- authorized service center. Unauthorized service, repairs, or modifi... - Page 20 tapcogear.com...


Need help?
Do you have a question about the Blend 6 and is the answer not in the manual?
Questions and answers