Table of Contents
Advertisement
Quick Links
User Manual
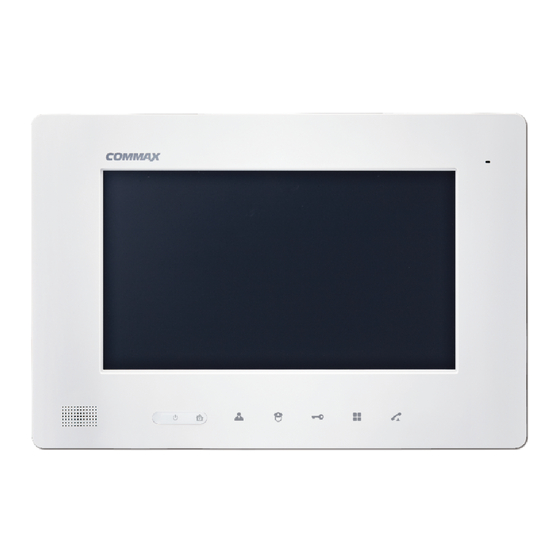
GATE VIEW PLUS MONITOR (CAV-1020IG+)
• Thank you for purchasing COMMAX products.
• Thank you for purchasing COMMAX products.
• Please carefully read this User's Guide (in particular, precautions for safety) before using a product and follow
• Please carefully read this User's Guide (in particular, precautions for safety) before using a product and follow
instructions to use a product exactly.
instructions to use a product exactly.
• The company is not responsible for any safety accidents caused by abnormal operation of the product.
• The company is not responsible for any safety accidents caused by abnormal operation of the product.
Advertisement
Table of Contents

Subscribe to Our Youtube Channel
Related Manuals for Commax CAV-1020IG+


Summary of Contents for Commax CAV-1020IG+
-
Page 1: User Manual
User Manual GATE VIEW PLUS MONITOR (CAV-1020IG+) • Thank you for purchasing COMMAX products. • Thank you for purchasing COMMAX products. • Please carefully read this User’s Guide (in particular, precautions for safety) before using a product and follow • Please carefully read this User’s Guide (in particular, precautions for safety) before using a product and follow instructions to use a product exactly. -
Page 2: Table Of Contents
11. Miscellaneous ··················································································· 12. Specification····················································································· 1. Greetings Thank you very much for purchasing of COMMAX products. Please read carefully this user manual and follow its rules. This intercom can be used in offices, and shopping outlets, and provide convenience to use communication on long distances. -
Page 3: Warnings And Caution
1. Warnings and caution Please follow the things described below in order to prevent any danger or property damage. Prohibition. Warning It may cause a serious damage or No disassembly injury if violated. No touch Must follow strictly. Caution Shows plugging out the power cord It may cause a minor damage or without an exception injury if violated. - Page 4 Warning Please don’ t disassemble, If an abnormal sound, burning Please don’t insert any Please use only the designated repair or rebuild this product smell or smoke is coming out metallic or burnable materials batteries for the products of arbitrarily (please contact the of the product, please plug out into the ventilation hole.
-
Page 5: Part Name And Function
2. Part name and Function Description Description Description MENU button LCD monitor Away button Talk button Speaker Monitoring button On/Off Switch Microphone Guard call/ paging elevator button External wiring connection Power indicator LED Door release button socket ① LCD monitor : menu, visitor display ②... -
Page 6: Usage Instruction
3. Usage instruction 3-1. Call from the individual entrance When the visitor presses the call button, an electronic chime sound rings and ① the visitor’s image appears on the monitor. Conversation with the individual entrance will begin when you presses the call ②... -
Page 7: How To Use Lobby Phone
Display with Door camera Display with no Door camera By pressing monitor button, display above appears. If you press button of your desired space (monitoring[ ], guard[ ] ), you can monitor according space. (Door, Lobby,) - Monitoring (DOOR/LOBBY)function time is 30secs - You can talk by pressing call button while monitoring(DOOR/LOBBY) - You can monitor only certain lobby with pre-set ID 3-5. -
Page 8: Installation Method
3-6. Away and security function Away and security function enabled by connecting to Security 1(magnetic sensor) and Security 2(PIR sensor) (1) How to set Away set When you press the 'away' button in standby mode, the "beep" sound occurs and the whole front ①... -
Page 9: User Setting
3-9. ALARM2(Gas) function When sensor 2 detects gas release, security2 (Hospital alert tone)alert tone occurs at monitor and guard station device After checking alert situation is terminated, press away button twice. (One time: release/ two times: return), after return, front LED blinking and security 2 alert tone stops 3-10. - Page 10 ※ how to set After moving to menu with your desired MENU from ‘DOOR VIDEO SET’, press SELECT button to move to the menu below (you can control ‘LOBBY VIDEO SET’ while you are talking with lobby.) (4) RESET: reset display setting ※...
-
Page 11: System Setting
5. System Setting You can set HOME SET(Household information setting) and AWAY SET(Go Out setting), SENSOR SET(Use of Security 2), INFORMATION(Product information check) after pressing menu button for 3 seconds in stand by mode 5-1. HOME SET (Household information entry) Move to HOME SET from System setting mode and select below HOME ID : Setting Building No. - Page 12 5-2. AWAY SET (GO OUT MODE SETTING) Move to AWAY SET from system setting and select below (1) AWAY WAIT-SET : SET the stand by time till sensor detection of household. It’s setting for time of leaving the house after setting AWAY MODE.
- Page 13 5-3. SENSOR SET (Security 2. use setting) Move to SENSOR SET from system setting mode and select below BURGLAR2 : Setting Security 2. And initial setting is “ON” ON : Use Security 2.function OFF : Do Not Use Security 2.function ※...
-
Page 14: How To Use Lobby Phone
6. How to use lobby phone 1) When paging the household Enter theHousehold Number. Press the page button. ● Enter the household number you want to cal.1 ex) unit 101 A paging tone will sound. ex) household 101 1, 0, 1 ●... -
Page 15: Installation Method
7. Installation method 1. Installation Method of camera monitor Note ① Avoid the range of direct sunlight 주의사항 스크류 M3(1EA) ② Recommended height is pertinent ① 직사광선이 비치는 곳은 피하십시오. from 1450 ~ 1500mm ② 설치높이는 145~150Cm 정도가 스크류 T4(4EA) ③... -
Page 16: Wiring Method
9. Wiring method ※ Cautions for wiring If it is to be installed near high voltage line, please use coaxial cable for grounding Keep the cable out of the sheath exposure to prevent to be shorted Be sure to turn off the monitor before you connect the monitor with cameras. - Page 17 Be careful of the polarity of the cable when you connect the monitor with cameras Security 1.(Magnetic Sensor) It should be connected with lead switch. If you don't want to use this function, connect 2 wires each other or security sensor 1 & away mode will be deactivated. Security 2.
-
Page 18: Instructions For Use
10. Instructions for use 1. Turn on the power switch. 2. Please contact your local agent for product maintenance when you have a problem in use of CAV-1020IG+ 3. For your safety, power switch with a safety device must be used in your building 4. - Page 19 513-11, Sangdaewon-dong, Jungwon-gu, Seongnam-si, Gyeonggi-do, Korea 513-11, Sangdaewon-dong, Jungwon-gu, Seongnam-si, Gyeonggi-do, Korea Int’l Business Dept. Tel. : +82-31-7393-540~550 Fax. : +82-31-745-2133 Int’l Business Dept. Tel. : +82-31-7393-540~550 Fax. : +82-31-745-2133 Web site : www.commax.com Web site : www.commax.com Printed In Korea / 2016.10.104...
Need help?
Do you have a question about the CAV-1020IG+ and is the answer not in the manual?
Questions and answers