Table of Contents
Advertisement
Quick Links
Advertisement
Table of Contents

Subscribe to Our Youtube Channel
Related Manuals for Sequentix CIRKLON

Summary of Contents for Sequentix CIRKLON
- Page 1 SEQUENTIX MUSIC SYSTEMS Ltd. CIRKLON SEQUENCER OPERATION MANUAL V1.11 © 2015...
- Page 2 Sequentix Music Systems Cirklon Sequencer User Manual...
-
Page 3: Table Of Contents
Sequentix Music Systems Table Of Contents Table Of Contents ........................... 1-3 Getting Started with Cirklon ......................1-9 The Cirklon Concept......................1-10 Song Play Mode ........................1-12 The Main Pages ........................2-1 Using more than 16 tracks...................... 2-3 Track Muting and Status ......................2-4 Changing Song Values ...................... - Page 4 MIDI configuration......................... 7-1 Port Configuration ........................7-1 soft thru ........................... 7-1 thru FTS ........................... 7-2 record enable ........................... 7-2 mclk send ..........................7-3 MIDI Clock Reception ......................7-4 MTC – MIDI Time-code ......................7-4 MIDI Options ..........................7-5 Cirklon Sequencer User Manual...
- Page 5 Delete Doubles ........................10-20 First Step and Pattern Rotate ..................... 10-20 CK Event List Edit ......................11-1 Real- and Step-time record ....................12-1 CK Pattern Record ........................12-1 P3 Record........................... 12-4 P3 Step-time record (Arp capture) ..................12-5 Cirklon Sequencer User Manual...
- Page 6 Global Control ........................13-28 Loading and Saving Data ....................14-1 Wipe Songs ..........................14-1 Card SAVE ..........................14-2 Card LOAD ..........................14-7 MIDI Sysex ..........................14-10 Factory Reset / Memory Initialisation................... 14-11 Firmware update ......................15-1 Cirklon Sequencer User Manual...
- Page 7 Sequentix Music Systems Cirklon Sequencer User Manual...
-
Page 8: Cirklon Sequencer User Manual
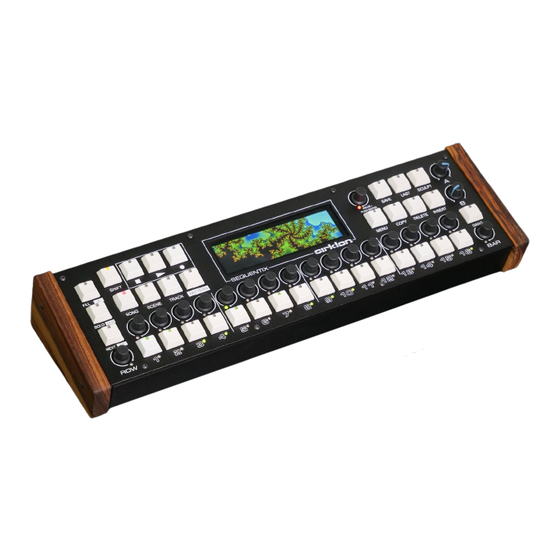
Sequentix Music Systems Cirklon Sequencer front panel Cirklon Sequencer User Manual... -
Page 9: Getting Started With Cirklon
Sequentix Music Systems Getting Started with Cirklon In order to follow these instructions for the Cirklon sequencer, it will help to familiarise yourself with the layout of the front panel, and the names of the various controls. Refer to the diagram on the previous page. -
Page 10: The Cirklon Concept
All the patterns which make up one piece of music are grouped together in a SONG. Multiple songs can be loaded in Cirklon’s memory, but only one can play at a time. As well as the patterns, each song also has an instrument assignment for each track, and a set of SCENES. - Page 11 The tracks are part of the sequence engine, which controls pattern playback and generates all the outgoing MIDI events. The instrument definitions describe the real instruments which Cirklon is to control, most importantly the MIDI port and channel to which the instrument is connected.
-
Page 12: Song Play Mode
You may also set a scene loop, which will cause playback to loop round a number of consecutive scenes in the song. By default, Cirklon will enter song play mode whenever you are on the SONG page. Cirklon Sequencer User Manual... - Page 13 In order to get to the stage of having a first song play on a new Cirklon, we’ll need to cover the following tasks: creating and assigning some instruments...
-
Page 15: The Main
The LED in the SONG key will be lit to show you are on the SONG page. Note: In the event that Cirklon’s memory has been wiped and there are no songs present, the SONG page may look like this: In this case, you’ll need to create a new song. - Page 16 The lower left of the display above shows the current edit track is number 1. This will also be shown by a green LED, just below and left of track encoder 1: Cirklon Sequencer User Manual...
-
Page 17: Using More Than 16 Tracks
You may also change bank along with the edit track selection by turning the BAR encoder. The single green track encoder LED will scroll across the tracks, and continue into the next bank as you go past the end. Cirklon Sequencer User Manual... -
Page 18: Track Muting And Status
– see the later section on user config. Changing Song Values Changes to the main values on each of the play pages are made using the VALUE encoder. The selected value is shown with an inverse or highlighted background. Cirklon Sequencer User Manual... - Page 19 Adjustment of tempo will be in steps of 10 BPM. Now hold SHIFT, and turn VALUE back two steps to the right. The highlight will now cover all the digits, and you will find tempo will change by steps of 0.1 BPM. Cirklon Sequencer User Manual...
- Page 20 Swing has a range of 0 (off) to 16, and adds a 16 note shuffle feel to the playback of patterns. If you select the song name, then press VALUE/ENTER, you will see a display like this: Cirklon Sequencer User Manual...
- Page 21 To confirm the edited text, press ENTER (the VALUE encoder). To exit without affecting the stored name, press the MENU key. This mode of text entry is used for naming a number of objects, such as songs, scenes, patterns and instruments. Cirklon Sequencer User Manual...
-
Page 22: Creating And Assigning An Instrument
As on the song page, to move the selection highlight turn the VALUE encoder. Turn the VALUE encoder clockwise, until the instrument field is highlighted. The instrument field will show “ - - - “ where no instrument is assigned. Then press VALUE/ENTER to access the instrument list: Cirklon Sequencer User Manual... - Page 23 The MIDI port should match the port the instrument is connected to. This can be one of the 5 standard MIDI ports, one of 6 ‘virtual’ ports on the USB MIDI interface, or the CV port, which is used to route note and controller output to the optional CVIO expansion for CV/gate output. Cirklon Sequencer User Manual...
- Page 24 128 internal sounds. When either bank select CC is enabled and a value is in use, it will be transmitted and stored along with the program change message, as described in the later chapter on Track Values. Cirklon Sequencer User Manual 2-10...
- Page 25 For the example song, we would continue to create the instruments synth 2, drum mch and vsti 1. As each new instrument is defined, they will appear in the instrument list, along with their port and channel values, like this: Cirklon Sequencer User Manual 2-11...
-
Page 26: Deleting An Instrument
A two-step confirmation page will appear to make sure you don’t do this by accident. Also, if the instrument is used by any loaded songs, you will be prompted to choose an alternative instrument with which to replace the existing assignments. Cirklon Sequencer User Manual 2-12... -
Page 27: Creating And Assigning A Pattern
Normally the pattern list will show only the patterns that were created on the current track. You can expand the list to include all patterns in the song by holding SHIFT as you press ENTER to bring up the selection list. Cirklon Sequencer User Manual 2-13... - Page 28 As well as protecting against unexpected changes to a song, this behaviour also simplifies the creation of incrementally changing versions of a pattern over the course of a number of scenes. Cirklon Sequencer User Manual 2-14...
-
Page 29: Fill Patterns
The vertical position of each block on the four lines, labelled auto, active, mute or no fill shows the fill mode for that track. Change the mode by turning the encoder above each track key. The behaviour for each mode is as follows: Cirklon Sequencer User Manual 2-15... - Page 30 The fill pattern on the current edit track will play continually while you are editing or recording it if the user config option “play fills in edit/record” is enabled – see the section on “Play Mode Menu” for details of setting user config options. Cirklon Sequencer User Manual 2-16...
-
Page 31: Pattern Edit
(duration of each step as a division of the master tempo) the current bar number and bar length of the pattern The lower part of the display shows all the current values for a single step of the pattern This is the step view. Cirklon Sequencer User Manual... -
Page 32: What's In A P3 Pattern
These values make up the rows of the matrix: STEPs 10 11 12 13 14 15 16 ROWs note velo length delay aux A aux B aux C aux D gate / tie / skip / X aux status * 4 Cirklon Sequencer User Manual... -
Page 33: Editing Pattern Values
In a newly created pattern, the step keys will be assigned to the gate flags, and the encoders to the note values. Turn on some of the steps by pressing the step keys. Then press the RUN key to start Cirklon running. Cirklon Sequencer User Manual... - Page 34 The LEDs in the step keys will now show the status for the selected flag. The current gate status will appear on the LEDs just below the step keys, so you can still see which steps are active as you decide where to apply ties, skips and X’s. Cirklon Sequencer User Manual...
- Page 35 Since the length value can cover a wide range, from fractions of a step up to whole numbers, the width of the bars is used to indicate whether the length is one or more steps long. Cirklon Sequencer User Manual...
-
Page 36: Editing Multiple Steps
Gang mode is enabled in pattern edit using the GANG key, just above the BAR encoder. The gang function allows you to link a number of pattern steps together, so that any adjustment made using the encoder for one of the ganged steps will affect all ganged steps equally. Cirklon Sequencer User Manual... - Page 37 The gap between steps 14 and 16 is 2 steps, so every other step a multiple of 2 steps from steps 14 and 16 will also be ganged. In this case, that means every even step. Cirklon Sequencer User Manual...
- Page 38 Sequentix Music Systems Try it with other patterns. Note that holding GANG and pressing two adjacent steps will gang every step. Cirklon Sequencer User Manual...
-
Page 39: Slope Edit
However, since step 5 was held, all the values between step 5 and step 9 will form a straight line: As there are 4 steps from step 5 to step 9, and a difference of 4 between the first and last step values, each new value changes by 1 from step to step. Cirklon Sequencer User Manual... -
Page 40: Pattern Level Values
VALUE encoder, then press to edit the value. Both values use a selection list, so the new value selection does not take effect until VALUE/ENTER is pressed to select it. You can cancel without changing the selection using the MENU key. Cirklon Sequencer User Manual 3-10... -
Page 41: Directions
It could go either way. Note that steps with skip set are skipped in all direction modes. References in the above table to step 1 really mean the lowest numbered step without skip active. Cirklon Sequencer User Manual 3-11... -
Page 42: Timebase
As with direction, changes to the timebase value take effect immediately, but the pattern will be flagged for re-sync with the global bar. Last Step Although each bar of a P3 pattern has up to 16 steps, you may want to use fewer for a shorter pattern. Cirklon Sequencer User Manual 3-12... -
Page 43: Bar Length
The BAR encoder LED will also turn red. You can use the same gesture (press, hold & turn BAR) to deactivate it again. Bar follow will be deactivated automatically if you turn any of the step encoders. Cirklon Sequencer User Manual 3-13... -
Page 44: Bar Edit
The encoder LEDs indicate the current bar selected for editing in green. You can press either the step keys or encoders to change the current bar selection. The COPY and DELETE keys also light to show that they are active for use in bar edit. Cirklon Sequencer User Manual 3-14... -
Page 45: Bar Copy
GBAR, with one of each value for every bar in the pattern. These values are edited using the step encoders for each bar number. You can select which row of values to edit by turning the ROW encoder. Cirklon Sequencer User Manual 3-15... -
Page 46: Bar Loops
For example, if we loop bars 3 and 4 of a 4 bar pattern, the value display would look like this: - the larger marks around bars 3 and 4 indicates the loop limits. The bar 4 marks are filled to show it’s the current playback position. Cirklon Sequencer User Manual 3-16... -
Page 47: More On Step Editing
Or you can return to play mode to select another pattern for editing if you wish to copy steps from one pattern to another. To insert the clipboard contents into a pattern, press the INSERT key. Cirklon Sequencer User Manual 3-17... - Page 48 When copying steps to the clipboard, if you select a last step before the first step, the selected steps are copied to the clipboard in reverse order. Small sections, or the pattern can be reversed in this way. Note that bar values are not copied using step copy and insert. Cirklon Sequencer User Manual 3-18...
-
Page 49: Sculpting And Randomisation
If you hold a step encoder, then press the step key below it, the note value on that step will be sent to the assigned instrument, so you can confirm the note selection by ear. Cirklon Sequencer User Manual 3-19... -
Page 50: Configuring The Aux Rows
For the other MIDI message types and the aux events, there is a second level selection to access groups of all possible aux assignments. Press, hold and turn the ROW encoder to access the first level selection list. Once in the list, press, hold and turn ROW a second time. Cirklon Sequencer User Manual 3-20... - Page 51 In the MIDI Send group, the options are: NRPN messages require one or two parameter selection numbers (MSB and LSB), so if you choose the NRPN option, an extra step is required to configure those values: Cirklon Sequencer User Manual 3-21...
-
Page 52: P3 Edit Menu Options
Press the step key for the step you wish to become the new first step of the pattern, and all steps will move around accordingly. To cancel the operation before selecting a new step, press the MENU key. Cirklon Sequencer User Manual 3-22... -
Page 53: Resync
The accumulator config page allows you to alter pattern settings related to advanced use of aux events. Please refer to the later section on aux events. Having covered just about everything in pattern edit for P3 patterns, let’s get back to some higher level operations. Cirklon Sequencer User Manual 3-23... -
Page 54: Saving Patterns
This option reverses all changes made to the pattern since it was saved. Finally, the “lose+ exit” option will undo the most recent changes to a pattern, end exit from pattern edit mode. This will be equivalent to “undo edits” if there have been changes made Cirklon Sequencer User Manual 3-24... - Page 55 Sequentix Music Systems since you entered pattern edit, but it will restore the saved version of the pattern if no changes had been made. Cirklon Sequencer User Manual 3-25...
-
Page 57: Using Scenes
Once you are working with a stored scene, you will be able to change the name here, but the workscene cannot be renamed. Cirklon Sequencer User Manual... -
Page 58: Gbar
There are a number of preset scales to choose from, and also space for 8 user defined scales. The user scales are stored at the song level – that is, each is accessible only to the song it is defined in. Cirklon Sequencer User Manual... - Page 59 The option “No FTS” in the instrument definition allows you to disable force-to-scale for any such instrument. You can also disable FTS on any step of a P3 pattern, by using the transpose defeat, or X, flag. Cirklon Sequencer User Manual...
-
Page 60: Xpose
This is intended to simplify the progress of the initial building of a song. Once a number of scenes have been added, you can switch to song play mode by switching to the SONG page, or manually enabling song play. Cirklon Sequencer User Manual... -
Page 61: Mute Hold
A brief message will confirm the pending scene change. Mute Hold As each scene is recalled during a song, the initial active or muted status for each track is also recalled. The Mute Hold feature allows you to over-ride this behaviour if you wish. Cirklon Sequencer User Manual... - Page 62 OFF LOCK - for all scenes recalled, the current mute status will carry over As you change the mute hold setting, a popup message on screen will confirm the new mode. Cirklon Sequencer User Manual...
-
Page 63: The Scene List
Using the VALUE encoder, you can scroll to any scene on the song, then press to recall that scene on the next global bar loop, or immediately if Cirklon is stopped. The arrow just before the scene name indicates the current scene playing. -
Page 64: Move Scene
Normally in song play mode, a song will start at the first scene, play through all scenes, and then repeat the final scene indefinitely. A scene with all tracks muted can be saved as last scene to set a definite end to a song if required. Cirklon Sequencer User Manual... -
Page 65: Recall / Copy To Workscene
You can delete the currently selected scene in the list by pressing the DELETE key. A confirmation screen will follow. Note that only the scene itself is deleted. Any patterns assigned in the scene will remain in memory, whether they are used in other scenes or not. Cirklon Sequencer User Manual... -
Page 66: Change View / Scene Select View
The “change view” menu option is used to switch between the two views. Your choice of view is stored permanently. An example of how Cirklon might look in scene select is shown below: This example song has a total of 10 scenes, not numbered contiguously as some scenes have been edited and saved-as, while others have been deleted. - Page 67 The later scene will be set as the scene loop end. This mode may be preferable to the basic scene list for improvising the structure of a song in real-time, rather than sticking to a pre-determined scene order. Cirklon Sequencer User Manual 4-11...
-
Page 68: Editing A Saved Scene
The step encoders under the three options will light red. You can: over-write save the changes to the scene save as new save the altered scene to a new scene back return to the scene page without saving Cirklon Sequencer User Manual 4-12... -
Page 69: Pattern "Saved" Status
New patterns will have their names auto-generated based on the existing name. If you are choosy about your pattern names, remember to edit the name and save your patterns manually when you finish working on the pattern itself. Cirklon Sequencer User Manual 4-13... -
Page 71: Creating Another Song
You may find it useful to create an empty song or songs, with instruments assigned to the tracks as you prefer, but no scenes or patterns, to be used as a template for new songs. Cirklon Sequencer User Manual... - Page 72 Sequentix Music Systems The “import instruments” option is found on the play mode menu, as described in the following section. Cirklon Sequencer User Manual...
-
Page 73: Play Mode Menu
It will send a MIDI note C 4 on any active track. This is to give owners of unstable analogue synthesizers a fighting chance of keeping them in tune. MIDI Reset While Cirklon is stopped, this option will send MIDI all-notes-off messages on all channels, to clear any hanging notes. Cirklon Sequencer User Manual... -
Page 74: Card / Sysex
“import instrs” allows you to copy the instrument assignments from any other song in memory. The MIDI port config, MIDI options, CVIO Config and drum trig config pages will be described in detail in the following sections. Cirklon Sequencer User Manual... -
Page 75: User Configuration
The “accidentals” option allows you to choose whether note names are shown as sharps or flats. This is a song-level setting. The “set date & time” option allows you to adjust the internal real-time clock, used by Cirklon for time-stamping files saved to SD-card. - Page 76 MIDI stop if master - when running from its internal tempo clock, Cirklon will normally stop in response to an incoming MIDI STOP message. With this option enabled, it wont.
- Page 77 SHIFT+[trk] mutes active - holding SHIFT and pressing a track key to “arm” a track for unmuting will also apply to active tracks, muting them at the next global bar loop. Cirklon Sequencer User Manual...
-
Page 79: Midi Configuration
The MIDI port configuration page (accessed via the play mode “more” menu described in the previous section) looks like this: There are a total of twelve MIDI ports in Cirklon. These are 5 standard serial MIDI ports, the CV port for communication with the internal CVIO option, and 6 virtual ports on the USB port (which acts as a class-compliant USB MIDI slave device). -
Page 80: Thru Fts
MIDI OUT port. This option might be used with an instrument that has a two-way connection to a Cirklon port and local-control turned off, so that the keyboard always controls its internal sound generation, but with the messages routed through Cirklon for real-time recording. -
Page 81: Mclk Send
This option configures out-going MIDI clock. MIDI clock can be sent whether Cirklon is acting as tempo master, or slaved to another device. There are a number of options for clock transmission to support manual pausing and re- synchronisation of slaved devices using the transport keys. -
Page 82: Midi Clock Reception
There is no setting to enable MIDI clock reception for a MIDI input port, as it is handled automatically. If Cirklon is stopped, and a MIDI clock START message is received at any input port, Cirklon will switch to MIDI clock slave mode and start running in time with the incoming tempo. -
Page 83: Midi Options
“more” menu. Latency matching delay In a situation where Cirklon is sequencing both hardware instruments connected via the hardware MIDI, CVIO or drum trigger ports, and virtual instruments running on a PC or Mac connected via the USB MIDI port, the inevitable audio latency of the virtual instruments will cause their audio output to be delayed relative to the proper instruments. - Page 84 All ports must use the same frame rate. The frame-rate setting is included in the MTC messages, so incoming frame-rate can be detected automatically. The out-going frame rate will be changed automatically to match the frame rate received from an external source. Cirklon Sequencer User Manual...
-
Page 85: Cvio And Drum Trig Configuration
Each CV output can generate a voltage proportional to the note, velocity or controller values, or a variable combination of all three. You can think of the CVIO as a MIDI to CV convertor built into Cirklon, without the bandwidth limit of a serial MIDI connection. -
Page 86: Cv Output Settings
There are two rows of six settings for each CV output. The row is selected by turning the ROW encoder (or encoder 5). All values in the selected row are highlighted, and the six encoders below the display used to adjust the setting above. Cirklon Sequencer User Manual... - Page 87 ‘fixed rate’ slide. The time value determines the time taken to slide over a fixed range of notes. It will take 12 times as long to slide over a full octave as it does to slide over one semitone. Cirklon Sequencer User Manual...
- Page 88 - allows the use of a CV output as a gate output As the CV outputs are capable of outputting a higher voltage than the gate outputs, the gate option can be used to drive synths which need a higher level gate voltage than 5 volts. Cirklon Sequencer User Manual...
- Page 89 In the CVIO config view, you can manually adjust the value by turning the encoder, but this is slow, and not easily done by ear. If you press the encoder, you will enter the CV Calibration page: On the calibration page, the encoders below the display have the following functions: Cirklon Sequencer User Manual...
- Page 90 You shouldn’t need to worry about the technicalities of this too much, as long as you can get your synths to play in tune. When both reference notes are in tune, press the MENU key to return to the main CVIO Config page, with the new values for the output set. Cirklon Sequencer User Manual...
-
Page 91: Gate Port Settings
It is also possible to set a gate output to work independently of the CV outs, responding to any notes played on a chosen MIDI channel. To do this, adjust the value for cv-num beyond 16 – the label will switch to chan, with channel numbers 1 to 16 now available for selection. Cirklon Sequencer User Manual... - Page 92 Run gives a constant “on” signal when the sequencer is running. Rst gives a short pulse when playback is started. Note that the mclk send settings for the CV port must be configured on the MIDI port config page for clock outputs to work. Cirklon Sequencer User Manual...
-
Page 93: Drum Trig Config
The frame size sets the total number of triggers to be transmitted in each burst. The drum mux module has 16 accent/trigger output pairs, with a further 3 trigger channels used for the DIN sync output, so the default frame size is 19. Cirklon Sequencer User Manual... - Page 94 The default pulse length of 16 is therefore equal to 2ms. The maximum length is 240, equivalent to 30ms. Turning the length value as if to select zero will select “gate” mode, where the trigger output Cirklon Sequencer User Manual 8-10...
- Page 95 Although the pulse lengths are stored internally in Cirklon’s memory, it is the drum mux module which controls the precise timing of the trigger pulses, so it also holds the pulse length configuration in EEPROM.
- Page 96 Although any new pulse length value for an output is sent to the dmux module as it is changed, this option can be used to force an update of all stored values according to the current settings held in Cirklon’s memory. It is strongly recommended that you run the refresh plengs function after loading a different dmux configuration file from flash or card.
- Page 97 Once configured with the correct frame start pos, each board will respond to pulse length adjustments according to its own trigger number range. The pulse length values are edited with all modules connected. Cirklon Sequencer User Manual 8-13...
-
Page 99: Track Values
The display is divided into six ‘slots’ that can each hold a track value. The encoders under the display are used to edit the actual values while on this page, and the six encoder LEDs light red as a reminder of this. Cirklon Sequencer User Manual... - Page 100 The top line shows the track value will be added to the instrument “synth1”, in slot 1. Press ENTER to open the select list for the value type: Then press ENTER again to pick a CC number: Cirklon Sequencer User Manual...
- Page 101 The text “modwh” is a preset label for CC #1, as this CC is most commonly used for modulation wheel control, as defined by the MIDI standard. There are preset labels for some other CCs – “vol”, “pan”, “bankM” and “bankL” will appear for CCs 7, 10, 0 and 32 respectively. Cirklon Sequencer User Manual...
- Page 102 Press SAVE to return to the track values, and you’ll see this CC has no preset label: Since “cc# 2” is a bit boring, and “synth1” maps this CC to vcf cutoff, let’s give it a custom label. Cirklon Sequencer User Manual...
- Page 103 To move beyond the last populated row, hold SHIFT while turning the ROW encoder one step clockwise. This will take you to an empty row, where you can INSERT new values. Once the first value is inserted on a row, that row will be accessible without using SHIFT. Cirklon Sequencer User Manual...
-
Page 104: Assigning Knobs A & B
An indicator line will appear to show the (inactive) knob position until the current value is passed. Saving Track Values Track values can be saved at the song or scene level, to allow re-call of chosen settings during the course of a song. Cirklon Sequencer User Manual... - Page 105 Once a value has been saved, a new label will appear above it. Here, for example, the current “modwh” (CC #1) value has been saved at the SONG level, and the “vcf” (CC #2) value at the SCENE: Cirklon Sequencer User Manual...
-
Page 106: Track Control Values
Track control values can also have knobs A or B assigned to control them directly, with appropriate scaling of the knob position for those controls with wide value ranges. And their values can be saved at the SONG or SCENE levels, as with the MIDI values. Cirklon Sequencer User Manual... - Page 107 0 to 127 events in P3 patterns. The effects of some of these controls will be fairly obvious. Others are best experimented with, to see what uses you may find for them. Cirklon Sequencer User Manual...
-
Page 108: Track Mixer Page
If the same instrument is assigned with the same MIDI channel to more than one track, you will notice that the value for each of its tracks change together when any is edited. Cirklon Sequencer User Manual 9-10... - Page 109 When the current value matches the stored value, the display will show filled bars: To remove a value, hold the DELETE key and press the track encoder. The delete process will remove the edited/current value, then any stored value in the same way as the normal track values. Cirklon Sequencer User Manual 9-11...
-
Page 111: 10. Ck Patterns
Sequentix Music Systems 10. CK patterns As mentioned briefly in the section “Creating and Assigning a Pattern”, Cirklon has two different pattern types. A P3 pattern is made up of between 1 and 16 bars, each bar holding 16 steps of the various row values described in the P3 pattern edit section. -
Page 112: Drum Grid Edit
Drum Grid Edit The primary reason for the addition of the CK pattern type in Cirklon was to overcome the limitations of the P3 Sequencer for creating polyphonic drum patterns. Therefore the main pattern edit mode for a CK pattern takes the form of a drum grid editor which borrows heavily from some of the classic Japanese drum machines of the 1980s. - Page 113 You will return to the grid view, with the bottom row of the grid now labelled, “C 4”. This row of the grid is also highlighted, to show it is the current row for editing: Cirklon Sequencer User Manual 10-3...
- Page 114 Now let’s add the row for another note, using the MENU, “add/edit rows” option as before. This time, select note “G 4”. After adding the new row, you will see the label for “G 4” appear above the first note, and the selection highlight moves to the new row. Cirklon Sequencer User Manual 10-4...
-
Page 115: Row View
Turn one of the step encoders while on the G 4 row, and you should see a display something like this: Cirklon Sequencer User Manual 10-5... - Page 116 Turning the ROW encoder while in the row view will step through the velocity, length and delay values for each note in turn, with the current value highlighted: Cirklon Sequencer User Manual 10-6...
- Page 117 Note that a tail for a long note will be truncated where it overlaps a following note on that row. Cirklon Sequencer User Manual 10-7...
-
Page 118: Quick Note Number Edits
To the right of the numbers, the edit bar selection and playback position are shown graphically. For a pattern longer than 8 bars, the graphic will show the pattern in blocks of up to 8 around the edit bar. The bar currently playing is shown as a solid line. Cirklon Sequencer User Manual 10-8... -
Page 119: Last Step
It is possible to vary the number of steps in each bar of a CK pattern, from 1 to 16. This is done by holding the LAST key then pressing the step key number for the desired length. Cirklon Sequencer User Manual 10-9... -
Page 120: View And Signature Timebase
You can select any of the timebase values available in P3 patterns by turning the VALUE encoder. Let’s look at what happens if you change the view timebase for our example pattern from 16 to 32, by turning the VALUE encoder one step clockwise: Cirklon Sequencer User Manual 10-10... -
Page 121: Changing The Signature Timebase
As you adjust the view timebase setting, the grid view will divide the view of the bar into as many sections as it needs to show the full bar in whole signature timebase steps. This may mean odd time signatures are shown in sub-bars of uneven lengths when zoomed. Cirklon Sequencer User Manual 10-11... -
Page 122: Ganging Notes In Ck Edit
The GANG key will remain lit, and the encoder LEDs above steps 1, 3 and 9 should also be lit in green, or amber for a ganged step which was already the current edit step. Cirklon Sequencer User Manual 10-12... -
Page 123: Ganging By Step Or Row
GANGing by Step or Row To quickly gang all the notes on a single step, hold GANG and press the encoder for that step. To gang every note on the current row, hold GANG then press the ROW encoder. Cirklon Sequencer User Manual 10-13... -
Page 124: Clearing The Ganged Selection
Depending on your typical use of the gang function, you may find that you always want to have the gang selection cleared when you exit gang mode. This can be enabled with the user config option, “ck edit, auto clear gang”, described in the play mode menu section. Cirklon Sequencer User Manual 10-14... -
Page 125: Copying, Deleting And Inserting Notes
As an example, let’s copy the notes from step 3 to step 5. Press step key 3 to select the start of the copy range. The display will change to show: The vertical marker on the grid shows the start position for the copy. Cirklon Sequencer User Manual 10-15... - Page 126 Press the INSERT key. The LED will flash, and the top of the display will show: Now press step key 9. The display will confirm the notes have been inserted, and the new notes will appear on the grid: Cirklon Sequencer User Manual 10-16...
-
Page 127: Copying By Bar Or Ganged Selection
BAR to delete all notes in the current view bar, or GANG to delete all currently ganged notes. When selection is complete, the notes will be copied to the clipboard and removed from the pattern. Cirklon Sequencer User Manual 10-17... -
Page 128: Fixing And Labelling Rows
VALUE encoder to select note C 4 in the list. The display should look like this: Encoders 8, 9 and 10 are active here for setting a 3 character label to replace the note name. Characters A to Z, 0 to 9, <flat>, <sharp>, backslash and dash can be used. Cirklon Sequencer User Manual 10-18... -
Page 129: Other Edit Menu Functions
Quantisation is most likely to be used in conjunction with real-time recording, where note events are not quite “on the beat”. Remember that patterns may also be left un-quantised, with real-time quantisation applied using the “quant%” track control value. Cirklon Sequencer User Manual 10-19... -
Page 130: Delete Doubles
This function clears out all muted notes, freeing the memory used and tidying up the un- filled bars from the row view. Copy & Double This function appends a copy of the entire pattern after the last bar of the pattern, doubling the bar length as it does so. Cirklon Sequencer User Manual 10-20... -
Page 131: 11. Ck Event List Edit
You can freely move an event around in the pattern by editing its step or tick values. The other lit encoders edit the remaining event values. Cirklon Sequencer User Manual 11-1... - Page 132 Use the INSERT key as before to insert the new event type in the current step period. Event list edit would be a laborious way to create a pattern from scratch, but can be very useful for making minor changes to patterns recorded by real-time input. Cirklon Sequencer User Manual 11-2...
-
Page 133: 12. Real- And Step-Time Record
The soft-thru behaviour in record is also affected by the “record enable” options in the MIDI Config page – the thru option must be enabled at the port level for soft-thru to work. See the MIDI Configuration section for details. Cirklon Sequencer User Manual 12-1... - Page 134 Turning the encoder will pop-up a more detailed list of the event types. You can scroll through the list, and press the encoder to enable or disable recording of each event type: Scroll down to [done] or press the MENU key to hide the filter selection list. Cirklon Sequencer User Manual 12-2...
- Page 135 The velocity of the new notes is set by the position of knob A and their length is set by the duration of the keypress. Cirklon Sequencer User Manual 12-3...
-
Page 136: P3 Record
MIDI master keyboard. Cirklon Sequencer User Manual 12-4... -
Page 137: P3 Step-Time Record (Arp Capture)
There are three different modes for step-time input, selected by pressing encoder 6 – the MODE option on the menu. Turn the encoder then press to select one of the other options. A selection menu will appear: Cirklon Sequencer User Manual 12-5... - Page 138 Or you could use some of the other P3 direction modes for a more random or varied arpeggio pattern. Cirklon Sequencer User Manual 12-6...
- Page 139 The “tie” function will cause the most recently entered note to be copied to the next step, and the two steps tied for a longer note. To exit step-time record, press the record key, or exit from P3 pattern edit mode. Cirklon Sequencer User Manual 12-7...
-
Page 141: 13. P3 Patterns & Aux Events
Aux events first appeared in the Sequentix P3 Sequencer. The implementation in Cirklon is very similar, though subtly different in some ways. The same can be said of this section of the manual, so it is worth reading through in case you miss the differences. - Page 142 the ”Rndmz note” event is first in the group, so just press ROW to select it Now you can enter some values for the event. So you can hear the effect right away, start Cirklon running if it isn’t already. In a new pattern, the aux values in every step will be zero.
-
Page 143: How Events Work
All will add a random number between 0 and the aux value to the chosen pattern value. For the status values, gate, tie, X and the aux flags, the randomize events are a little different. Cirklon Sequencer User Manual 13-3... - Page 144 a high value means a high probability of the gate being active For example, if you set a value of 25% on a “Rnd mask …” event, the status value on that step will be active once in every four times that the step plays. Cirklon Sequencer User Manual 13-4...
- Page 145 – there’s not much point randomizing the length of a note if the sound has a long release time that will mask the change. Things like subtle randomization of velocity can add a degree of interest to an otherwise static pattern. Cirklon Sequencer User Manual 13-5...
-
Page 146: Inter Track Events
Set up example pattern A on track 1, and example pattern B on track 2, as shown below. Example pattern A: Step Note Velocity Length Gate Example pattern B: Step Note Velocity Length Gate Cirklon Sequencer User Manual 13-6... -
Page 147: A Quick Grab
To demonstrate an Inter Track event, let’s use the first event in the group – “grab”. Having entered both of the example patterns above: start Cirklon running, if it isn’t already ensure track 1 is active – it will be playing pattern A ... - Page 148 The notes grabbed by track 1 are different every time – but always randomly chosen from the selection of notes in the pattern on track 2. This can be a much more selective way of randomising notes in a pattern than using the basic “Rndmz note” event. Cirklon Sequencer User Manual 13-8...
-
Page 149: Target Values For Grab, Swap And Push
(current note value plus any bar transpose) vel+A (current velocity value plus any accumulator offset) aux B aux C aux D xD+A (current aux D value plus any accumulator offset) Cirklon Sequencer User Manual 13-9... -
Page 150: Transpose By Events
enable aux A with a value of 2 on every step of pattern A change the timebase on pattern B to 1 This will show a useful feature of the way aux events work. Cirklon Sequencer User Manual 13-10... - Page 151 The “xpose by trk n+B” event is much the same as “xpose by trk n”. The “+B” is there because the note value used from the target track is taken after any bar transpose is applied. Cirklon Sequencer User Manual 13-11...
-
Page 152: Aux Notes
set the aux B value on step 1 to G5 set the aux C value on step 1 to B5 When the pattern step plays, the four note chord C5, E5, G5, B5 will be sent. All notes share the same velocity value. Cirklon Sequencer User Manual 13-12... -
Page 153: Chord Memory
Then you can set the root note of your chord using the normal note value, and activate the gate. Polyphonic Real-time Record If you have configured some of the auxes in a P3 pattern with any of the aux note events, you can record polyphonic patterns directly from an attached keyboard. Cirklon Sequencer User Manual 13-13... -
Page 154: Accumulator Events
Whenever the note and velocity values are used to send a MIDI note: the number held in the note accumulator is added to the note value the number held in the velocity accumulator is added to the velocity value Cirklon Sequencer User Manual 13-14... -
Page 155: Putting An Accumulator To Work
Normally, the accumulators have no effect. This is because, whenever Cirklon is started, or a new pattern is selected on a track, the accumulators are reset to zero. So unless you choose to change the values in the accumulators, they remain at zero, and have no effect. - Page 156 The “offset note abs” event puts the aux value into the note accumulator. At step 3 in the example pattern, a value of 5 is put into the note accumulator. This value will remain in the accumulator until a new pattern is selected, or Cirklon is restarted.
-
Page 157: Relative Accumulation
Note Accumulator Played Note C#5 F5 G#5 C#6 D5 F#5 A5 D6 D#5 G5 A#5 D#6 Each time the “offset note rel” event on step 1 occurs, the note accumulator value is increased by 1. Cirklon Sequencer User Manual 13-17... -
Page 158: Accumulator Configuration
Press the MENU key, then encoder 11, under the “accum conf” label. This should present you with a display that looks like this: Encoder 6, labelled “accum”, is used to select which accumulators settings are to be edited. Cirklon Sequencer User Manual 13-18... - Page 159 The clip behaviour is the simplest – the accumulator value won’t exceed the limit, it just sticks there once the limit is reached. The reverse options will need a little more explanation. Each accumulator has a reverse switch. Cirklon Sequencer User Manual 13-19...
- Page 160 The notes start shifting downward by an octave each time. This will continue until the accumulator value reaches zero. Cirklon Sequencer User Manual 13-20...
- Page 161 Experimentation, as ever, is the way to learn how to use these best. The last setting for accumulator config, out, determines what happens when the result of adding the accumulator value to the pattern value is out of range. Cirklon Sequencer User Manual 13-21...
-
Page 162: Auxiliary Value Scaling - No More
D accumulator for the “Accumulator Mask” events. Auxiliary Value Scaling – No More One significant difference between the behaviour of aux events on P3 and Cirklon is that the aux value scaling that applied in P3 no longer applies. -
Page 163: The Accumulator Events
The last two events in the group allow the aux D accumulator to be used to modify the length and delay settings for each step. add dAcc to leng add aux D accumulator to length no value add dAcc to dlay add aux D accumulator to delay no value Cirklon Sequencer User Manual 13-23... -
Page 164: Accumulator Mask Events
The second de-activates the status unless the knob value is within plus or minus 3 of the aux value. The third de-activates the status unless the knob value is less than the aux value. The knob controlled mask events are: Cirklon Sequencer User Manual 13-24... -
Page 165: Knob Grab Events
C value with current value of knob n knob n to auxD replace aux D value with current value of knob n Cirklon Sequencer User Manual 13-25... -
Page 166: Set Step Value Events
So, a rep*2 will divide the step in two equal parts, and each note will play for a proportion of their half of the step based on the length value for that step. rep*3 will divide the step in three equal parts, and rep*4 into four. Cirklon Sequencer User Manual 13-26... - Page 167 +/- 127 One event new to Cirklon allows you to retain the length value as normal, by specifying the repeat time in terms of the standard P3 tbase settings – rep*n tbase This event must be used in conjunction with rep*n by length.
-
Page 168: Redirect Aux Events
This group allows you to modify global settings. mute trk n deactivate track n range: 1 - 32 un-mute trk n activate track n range: 1 - 32 set tempo sets the global tempo, temporarily over-riding the tempo knob Cirklon Sequencer User Manual 13-28... - Page 169 Sequentix Music Systems set scene xpos sets the scene transpose value, over-riding the current setting. Cirklon Sequencer User Manual 13-29...
-
Page 171: 14. Loading And Saving Data
Sequentix Music Systems 14. Loading and Saving Data Cirklon has a number of options to load and save song data, instrument definitions and configuration information on internal flash memory or a standard FAT format SD-card in the rear panel slot. -
Page 172: Card Save
If a file with that name already exists in the current folder, you will be prompted to replace the existing file, or cancel the save operation. If you choose to cancel, you will be returned to Cirklon Sequencer User Manual 14-2... - Page 173 If the internal flash storage is selected, the label IN: will appear. The single backslash shows you are looking at the root folder. In this case, there are no other folders on the SD card. Cirklon Sequencer User Manual 14-3...
- Page 174 The [..] label represents the parent of the current folder. Selecting it here will return to the root folder of the card, showing the newly created SONGS folder as the only other choice: Cirklon Sequencer User Manual 14-4...
- Page 175 On selecting this option, you then select the instrument to save, with the option to save all of them at the top: After selecting the instrument to save, a filename and path page similar to the song save page allows you to alter the filename and save path if required. Cirklon Sequencer User Manual 14-5...
- Page 176 This method is best for making a full backup that can be used to restore your Cirklon to the exact state it was in at the time the file was saved.
-
Page 177: Card Load
Below is a list of sub-folders and .CKS (song) files in the current folder. Folder names are shown in square brackets. You can navigate to another folder by selecting it, or select the [..] label for the parent folder. Cirklon Sequencer User Manual 14-7... - Page 178 If any instruments used have been deleted or renamed, you may see the following display: In order to continue loading the song, a dummy instrument is created with default settings – a ‘placeholder’. Once the load operation is complete, you will need to resolve any missing instruments. Cirklon Sequencer User Manual 14-8...
- Page 179 * Note that the entire contents of memory will be cleared before a SYX file is loaded, even if loading of the file is not successful. A confirmation page will appear to make sure this doesn’t happen by accident: Cirklon Sequencer User Manual 14-9...
-
Page 180: Midi Sysex
MIDI Sysex Due to the amount of data that can be stored in Cirklon’s memory, sysex backup can be a time-consuming process. The use of flash storage is strongly recommended. If you must use sysex, dumps can be sent and received either via MIDI port 1, or USB MIDI port 1. -
Page 181: Factory Reset / Memory Initialisation
All being well, the previously saved data should re-load. Factory Reset / Memory Initialisation If you need to completely re-initialise Cirklon’s memory, you can do this as follows. With the power off, hold down the SONG key. Turn the power on, continuing to hold down the SONG key until you see the confirmation page with the text “Wiping ALL data”... -
Page 183: 15. Firmware Update
It is not possible for a failed OS update to leave Cirklon in an unusable state. You will always be able to access update mode to try again if there is a problem with an OS update. - Page 184 The display should show the progress as the file is loaded into the program flash memory inside your Cirklon CPU: Once the update is complete, Cirklon will boot straight into the new version of the OS. A check of all data in memory is performed on every boot. If there are no problems indicated, it may be OK to start using your existing data, but the recommended approach is to re-load the backed-up data.
Need help?
Do you have a question about the CIRKLON and is the answer not in the manual?
Questions and answers