Table of Contents
Advertisement
Quick Links
INSTALLATION INSTRUCTIONS
HB0046
WCB3I SERIES
!
!
INTENDED FOR DOMESTIC COOKING ONLY
READ AND SAVE THESE INSTRUCTIONS
INSTALLER: LEAVE THIS MANUAL WITH HOMEOWNER.
HOMEOWNER: USE AND CARE INFORMATION ON PAGES 12 AND 13.
BEST; Hartford, Wisconsin www.BestRangeHoods.com 800-558-1711
BEST; Drummondville, QC, Canada www.BestRangeHoods.ca 866-737-7770
23865 rev. 05
Advertisement
Table of Contents

Related Manuals for Best WCB3I Series


Summary of Contents for Best WCB3I Series
- Page 1 INTENDED FOR DOMESTIC COOKING ONLY READ AND SAVE THESE INSTRUCTIONS INSTALLER: LEAVE THIS MANUAL WITH HOMEOWNER. HOMEOWNER: USE AND CARE INFORMATION ON PAGES 12 AND 13. BEST; Hartford, Wisconsin www.BestRangeHoods.com 800-558-1711 BEST; Drummondville, QC, Canada www.BestRangeHoods.ca 866-737-7770 23865 rev. 05...
- Page 2 (i.e.: Crêpes Suzette, Cherries Jubilee, 9. To reduce the risk of fire and electrical shock, the Best WCB3I Peppercorn Beef Flambé). Series models should only be installed with its own built-in c) Clean ventilating fans frequently.
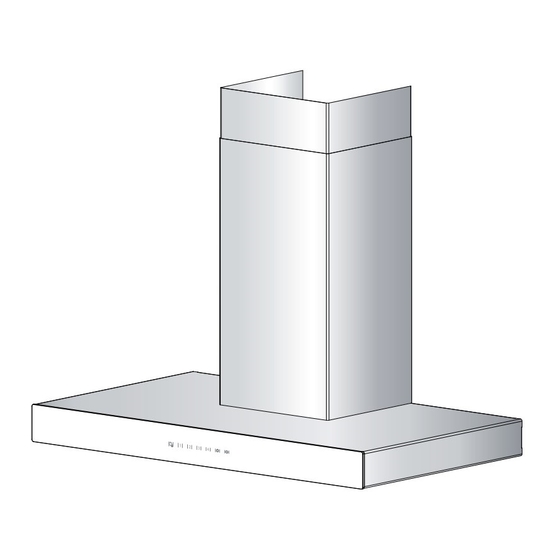
- Page 3 WCB3I SERIES RANGE HOOD SYSTEM ODEL ODEL ODEL (3¼" 10" (3¼" 10" PTIONAL 3¼" 10" LBOW PPER ECORATIVE (3¼" 10" TANDARD OWER ECORATIVE 3¼" 10" DAPTER AMPER SUPPLIED WITH HOOD FOR HORIZONTAL OR VERTICAL DISCHARGE HL0226...
-
Page 4: Table Of Contents
The ducting from this fan to the outside of the building has a strong effect on the airflow, noise and energy use of the fan. Use the shortest, straightest duct routing possible for best performance, and avoid installing the fan with smaller ducts than recommended. 3¼”... -
Page 5: Prepare The Installation
2. PREPARE THE INSTALLATION WARNING When performing installation, servicing or cleaning the unit, it is recommended to wear safety glasses and gloves. NOTE: Before proceeding to the installation, check the contents of the box. If items are missing or damaged, contact the manufacturer. Make sure that the following items are included: - Hood - Accessories... -
Page 6: Install Glass Panel
5. INSTALL GLASS PANEL (SBN MODELS ONLY The SBN hood models decorative glass panel is sold separately and has to be installed before completing the hood installation. CREW LOCATIONS 1. Using a Robertson or a Phillips no. 2 screwdriver, remove the 5 screws retaining the electrical compartment cover. -
Page 7: Blower Removal
BLOWER REMOVAL ( HORIZONTAL DISCHARGE ONLY These range hoods are factory shipped with the blower mounted for a vertical discharge configuration. For a horizontal discharge configuration, disassemble the blower from the inner top of the hood (see procedure below). It will be assembled to the inner back of the hood once the hood is mounted on the wall. -
Page 8: Wiring Installation
9. WIRING INSTALLATION WARNING Improper grounding can result in a risk of electric shock. Consult a qualified electrician if the grounding instructions are not completely understood, or if there is any doubt as to whether the appliance is properly grounded. Do not use an extension cord. -
Page 9: Install Hood Mounting Bracket
11. INSTALL UPPER FLUE MOUNTING BRACKET Center the upper flue mounting bracket with the center line previously EILING drawn in step 10 and place it flush with the ceiling. Use the upper flue mounting bracket as a template to mark the position of its screws. -
Page 10: Duct Connection
14. DUCT CONNECTION (VERTICAL DISCHARGE ONLY) 1. Plug hood power cord into the outlet. 2. Slide the duct over the adapter/damper on the hood. 3. Use metal foil duct tape to seal the joint. NOTE: If a transition to 7” or 8” round duct is used (not included), it is recommended to place it at least 18”... -
Page 11: Install The Decorative Flue
16. INSTALL THE DECORATIVE FLUE 1. To prevent the flue from moving, affix the included foam squares on both sides near the front edge of the blower box (as illustrated at right). HO0192 2. Carefully slide in place decorative lower flue (notches end first) on top of the hood (1) until flue notches completely fit in hood slots (2). -
Page 12: Led Lighting
Do not touch lamps during or soon after operation. Burns may occur. Cannot be replaced by any other type of light bulb or LED module. The lighting of WCB3I Series range hood is produced by two LED modules (included). 19. CARE... -
Page 13: Operation
20. OPERATION Always turn your hood on before you begin cooking to establish an airflow in the kitchen. Let the blower run for a few minutes to clear the air after you turn off the range. CAUTION After a power failure or during the range hood power up, a 5-second booting sequence is executed. Wait for the control backlighting to turn off before use. -
Page 14: Wiring Diagram
21. WIRING DIAGRAM WARNING Risk of electric shock. Electrical wiring must be done by qualified personnel in accordance with all applicable codes and standards. Before connecting wires, switch power off at service panel and lock service disconnecting means to prevent power from being switched on accidentally. COLOR CODE BLACK BLUE... -
Page 15: Service Parts
22. SERVICE PARTS HL0227 HOOD WIDTH ESCRIPTION 30” 36” SV09955XX* G 30" LASS ANEL SV09956XX* G 36" LASS ANEL SV22427 LECTRONIC ONTROL SV09022 RANSFORMER 62612 LED M ODULE SV62053 15.875" 14" 0.5" (1) YBRID ILTER SV08582 NTERNAL LOWER 62248 LED D RIVER AND ONNECTION ARNESS... -
Page 16: Warranty
All illustrations and specifications in this catalog are based on the latest product information available at time of production. Broan-NuTone, LLC and BEST® reserves the right to make changes at any time, without notice, in prices, colors, materials, equipment, specifications and models, place of manufacture and to discontinue models or equipment.
Need help?
Do you have a question about the WCB3I Series and is the answer not in the manual?
Questions and answers