Table of Contents
Advertisement
Quick Links
English
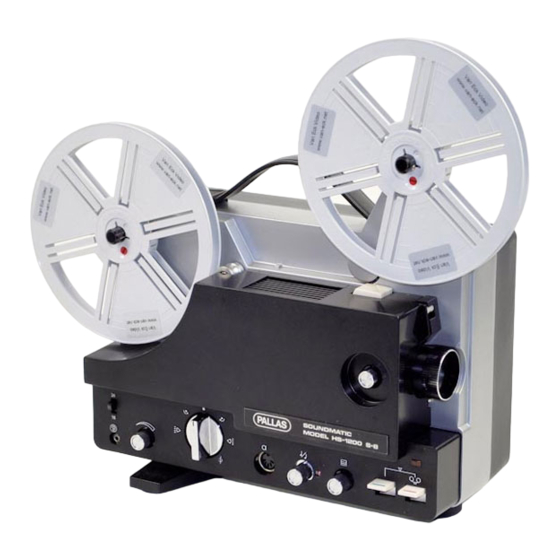
Pallas Soundmatic hs-1200 (model LSP-510)
Instructions how to replace the belts
Required:
motor belt, top belt, front arm belt
•
Pallas HS-1200 Soundmatic S-8 (LSP-510)
projector - 3 belt set: order via:
http://winkel.van-
eck.net/snaren/pallas/p-1a/BT-0129--
snaren.html
Screwdrivers, tweezers.
•
1. Top belt
Dutch
Pallas Soundmatic hs-1200 (model LSP-510)
Instructie voor het vervangen van de snaren
Benodigd:
motor snaar, snaar tussen spoelarmen,
•
voorste spoelarmsnaar voor de
Pallas HS-1200 Soundmatic S-8 (LSP-510)
projector - 3 snaren set, te bestellen via:
http://winkel.van-
eck.net/snaren/pallas/p-1a/BT-0129--
snaren.html
Schroevendraaiers, pincet.
•
1. snaar tussen spoelarmen
Advertisement
Table of Contents

Summary of Contents for Pallas Soundmatic HS-1200
- Page 1 English Dutch Pallas Soundmatic hs-1200 (model LSP-510) Pallas Soundmatic hs-1200 (model LSP-510) Instructions how to replace the belts Instructie voor het vervangen van de snaren Required: Benodigd: motor belt, top belt, front arm belt motor snaar, snaar tussen spoelarmen, •...
- Page 2 Open the projector on the backside (4 Open de projector (4 schroeven achterkant) screws)
- Page 3 Remove component (one screw) Verwijder component (1 schroef) Remove Printer Circuit Board Verwijder printplaat 2 screws front 2 schroeven voorkant...
- Page 4 remove plate (2 screws) Verwijder plaatje (2 schroeven) remove 1 screw under plate Verwijder de schroef onder het plaatje.
- Page 5 gently slide board Draai de printplaat Place the center gearwheel to the left now there is Verplaats het middelste Tandwiel naar links enough space to remove the belt zodat er ruimte onstaat om de snaar te verwijderen...
- Page 6 Place the center gearwheel to the right Verplaats het middelste tandwiel naar rechts en and remove the belt. verwijder de snaar. Sometimes these are dissolved. The old Soms is deze verteerd/opgelost. Eventuele oude junk can be removed using thinner or resten hiervan kunnen met thinner / alcohol alcohol.
- Page 7 Loosen up screws on small circuit board (PCB). Maak de schroeven op het kleine printplaat los. Pull PCB a bit to the left to make space to replace Schuif het printplaatje wat naar links om ruimte belt. te maken om de snaar te vervangen. Replace belt.
Need help?
Do you have a question about the Soundmatic HS-1200 and is the answer not in the manual?
Questions and answers