Table of Contents
Advertisement
Advertisement
Table of Contents

Summary of Contents for Ohio Medical 263748-C
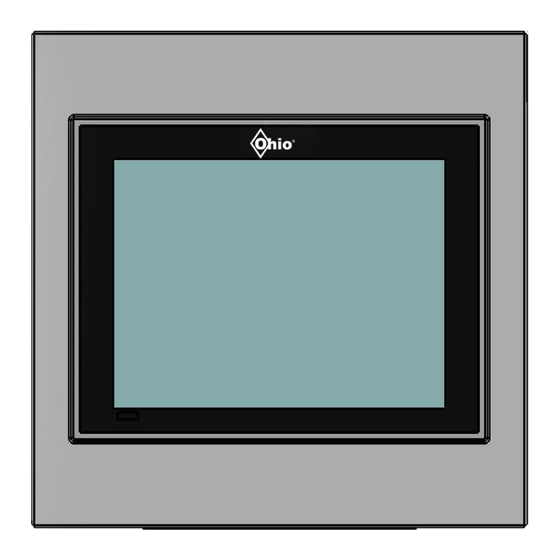
- Page 1 ® 12.1” Touchscreen Master Alarm Service Manual...
-
Page 2: Table Of Contents
Master Alarm Service Manual Table of Contents 1.0 Responsibilities ....................... 3 1.1 Installer Responsibilities ......................3 1.2 User Responsibilities ......................3 2.0 Alarm System Description & Functions ................3 2.1 Description of Basic Alarm & Functions ...................3 2.2 Normal, Alarm & Maintenance Mode Condition Views ...............4 2.3 Alarm Banners &... -
Page 3: Responsibilities
PLEASE NOTE THE FOLLOWING DEFAULT PASSWORD (PW) = “1111” Note: The unit’s password may be changed anytime. Please contact Ohio Medical Customer Service if your password is forgotten. A Factory Reset will need to be performed. Upon a Factory Reset, ALL user-customized information/settings will need to be re-entered. Given this, please store your password in a secure location. -
Page 4: Normal, Alarm & Maintenance Mode Condition Views
Master Alarm Service Manual An AP will be displayed in three different ways: 1. Normal Alarm Condition: An AP will display with a green background and white text (as shown below) if conditions on the source equipment are operating within normal operating parameters. 2. -
Page 5: Alarm Banners & Silence Alarm Conditions
Master Alarm Service Manual 2.3 Alarm Banners & Silence of Audible Alarm Conditions The audible alarm will sound under any of the following key conditions: 1. An alarm condition exists for one or more APs. 2. The user adjustable Silence Duration time elapsed and any alarm condition is still present. 3. -
Page 6: Installation
Master Alarm Service Manual 3.0 Installation The alarm is shipped fully wired, tested and calibrate d . For ease of assembly in walls, the alarm is shipped in two sections; the Box and Front Panel assemblies. The box is installed in the drywall, then the front panel is attached. Finally, box wiring and sensor inputs/outputs are configured . -
Page 7: Installation Instructions Prior To Drywall Plaster
Master Alarm Service Manual 3.3 Installation Instructions Prior to Drywall Plaster It is important to mount the box between the wall studs at the required height for its intended use. Check all federal, local, and building codes prior to installation. Adjustable wall-mounted brackets are provided to accommodate for wall thickness after dry walling, plastering, or other means of wall finishing. -
Page 8: Box Wiring & Drywall/Plaster Preparation
Master Alarm Service Manual 3.4 Box Wiring & Drywall/Plaster Preparation For safety, the circuit breaker must be in the OFF position prior to electrical connections. ON Position OFF Position pushed and locked in fully extended out Strip ½” of insulation and connect the ground wire to the green ground terminal block. Ground Lead Location Strip ½”... -
Page 9: Instructions After Drywall & Plaster
Master Alarm Service Manual Figure 3.4.5 Take the cardboard dust cover and remove the two sides at the perforations. Note: If a dust cover is not provided or lost, a piece of cardboard may be cut to cover the alarm box during the drywalling or plastering. [FIGURE 3.4.5] Perforations Figure 3.4.6... -
Page 10: Sensor Connections To Master Alarm Input Terminal(S)
Master Alarm Service Manual Figure 3.5.3 Mount the front panel hinge assembly to the box assembly using the two screws that held the cardboard dust cover on during the drywalling/plastering procedures. [FIGURE 3.5.3] Hinge & Screws Figure 3.5.4 To attach the restraining lanyard (black plastic cable) from the front panel to the box, remove the nut from the stud inside the right side of the box assembly. - Page 11 Master Alarm Service Manual A corresponding OUTPUT terminal strip is provided to send AP conditions to the Building Management System (BMS). Figure 3.6A Master Alarm [Labeled] Input & Output Terminal Blocks Note: Wiring to be 18-22 gauge, shielded, twisted and supplied by the installer. Length may be up to 5,000 feet (1,524 meters) and to be in a good repair with properly stripped ends (to avoid shorts).
-
Page 12: Master Alarm Outputs
Master Alarm Service Manual 3.7 Master Alarm OUTPUTS If using dry contacts to connect the APs to a BMS, use the same wiring method/logic as with the INPUTS. It is important that the wiring for each alarm point OUTPUT correlates to the wiring for the alarm point INPUT. See Figure 3.7 below. Example: MA 1 INPUT connection corresponds to INPUT P1 on the display. -
Page 13: Set-Up & Programming
Master Alarm Service Manual [FIGURE 3.7.2] 3.7.2 Setting Up Modbus Net ID • From the Main Screen Press Menu • Press Settings • Enter Password and Enter • Press Communications Options • Press Configure Network Settings • Next to MODBUS Net ID enter 2 Note: The BMS configuration will need to match this setting. -
Page 14: Initial Set-Up
Master Alarm Service Manual 4.2 Initial Set-Up Note: The following steps/photos are for reference only. Set-up may not correlate with the pictures below. Turn on the alarm and verify that the Select Language Screen is displayed. Press the English button and press the arrow to move to the next screen (bottom right of screen). -
Page 15: Programming, Configuration & Setting Up Alarm Points
Master Alarm Service Manual 4.3 Programming, Configuration & Setting-Up Alarm Points a) Press the Menu button. Press the Settings button. Enter the Password then Enter. Press the Configure Alarm Points button. b) Press the blue box to the right of the Number of Alarms to set or change the total number of APs to be displayed (See Figure 4.3) on the screen (may enter 1 –... - Page 16 Master Alarm Service Manual Creating a Custom AP Label A custom label may be created from scratch by pressing the blue ASSIGN button next to Create Custom Label at the top of each list of preprogrammed label options. Creating a custom label may require a different name length for 10, 20 and 30 Alarm Point Screen-Viewing.
-
Page 17: Alarm Event Log
Master Alarm Service Manual How to Place an AP into Maintenance Mode The Maintenance Mode option allows maintenance to be performed on selected APs - canceling the audible alarm for a particular AP. An alarm point placed into Maintenance Mode is displayed on the Main Screen in black lettering with a yellow background. Once the root cause is fixed –... -
Page 18: View Single Ap Log
Master Alarm Service Manual Clear Log for ALL APs To clear the history of ALL the APs, press the blue Clear Log button in the upper right hand of the HMI. This clears all history, and the history for individual points will no longer be available View Single AP Log Pressing the VIEW LOG button to the left of INPUT point name will show the event history of that individual AP. -
Page 19: Other Settings (Display, Factory Reset, Scroll Time)
Note: If any input sustains an alarm condition, the scroll feature will be disabled. Screens will only be allowed to scroll if all alarm conditions are corrected, or if all alarm inputs in an alarm condition are placed in Maintenance Mode. Factory Reset: Please contact Ohio Medical for Factory Reset. 5.0 Specifications General ‚... -
Page 20: Dimensions
263651 HMI/PLC, 12.1” Color Touchscreen 263652 Ethernet Card Alarm, Master, HMI 30 Point with 263654 I/O Module, Snap-In 3V Digital 263748-C Dry Contacts 263660 Adapter, I/O Expansion Module Alarm, Master, HMI 30 Point with 263668 Battery, Lithium, Button Cell, 3V... -
Page 21: Battery Replacement
Master Alarm Service Manual 8.0 Battery Replacement The battery is provided within the HMI to maintain user settings in the event of a power loss. When replacing the battery, ensure the unit is powered on. Open the battery cover in the back of the HMI (See Figure 8.0). Remove the old battery and replace with the appropriate battery. -
Page 22: Troubleshooting
Master Alarm Service Manual 9.0 Troubleshooting The table below lists potential problems that the user may encounter when operating the Ohio Medical Gas Color LCD Touch Screen Master Alarm along with corresponding potential causes and solutions. If further assistance is required, please contact Ohio Medical Customer Service at (800)-448-0770. -
Page 23: Wiring Diagram
Master Alarm Service Manual 10.0 Wiring Diagrams 550731 (Rev. 2.1) 11/19... - Page 24 © 2019 Ohio Medical LLC. This document contains information that is proprietary and confidential to Ohio Medical LLC. Use of this information is under license from Ohio Medical LLC. Any use other than that authorized by Ohio Medical LLC is prohibited. Ohio Medical, the Ohio Medical logo, are registered trademarks of Ohio Medical LLC.
Need help?
Do you have a question about the 263748-C and is the answer not in the manual?
Questions and answers