Table of Contents
Advertisement
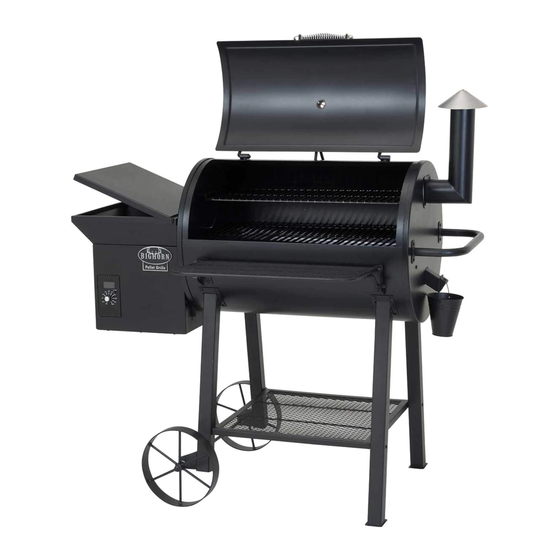
Lifestyle Big Horn Pellet Grill/BBQ Smoker
Assembly Instructions & User's Manual
Model No.:SRPG1093L/LFS256
WARNING
PLEASE READ THIS ENTIRE MANUAL BEFORE INSTALLATION AND USE
OF THE PELLET FUEL-BURNING APPLIANCE. FAILURE TO FOLLOW
THESE INSTRUCTIONS COULD RESULT IN PROPERTY DAMAGE, BODILY
INJURY OR EVEN DEATH.
CONTACT LOCAL BUILDING OR FIRE OFFICIALS ABOUT RESTRICTIONS
AND INSTALLATION INSPECTION REQUIREMENTS IN YOUR AREA.
SAVE THESE INSTRUCTIONS.
Advertisement
Table of Contents

Summary of Contents for Lifestyle SRPG1093L
- Page 1 Lifestyle Big Horn Pellet Grill/BBQ Smoker Assembly Instructions & User’s Manual Model No.:SRPG1093L/LFS256 WARNING PLEASE READ THIS ENTIRE MANUAL BEFORE INSTALLATION AND USE OF THE PELLET FUEL-BURNING APPLIANCE. FAILURE TO FOLLOW THESE INSTRUCTIONS COULD RESULT IN PROPERTY DAMAGE, BODILY INJURY OR EVEN DEATH.
- Page 2 WARNING A MAJOR CAUSE OF FIRES IS FAILURE TO MAINTAIN REQUIRED CLEARANCES (AIR SPACES) TO COMBUSTIBLE MATERIALS. IT IS OF UTMOST IMPORTANCE THAT THIS PRODUCT BE INSTALLED ONLY IN ACCORDANCE WITH THESE INSTRUCTIONS. Before proceeding, make certain that you understand the IMPORTANT INFORMATION sections of this manual.
- Page 3 WARNING: Never move the grill while it is operating, or when it contains hot pellets or ashes. ● Always open the grill lid carefully. The heat and steam inside grill body is hot. ● Before using the grill, be sure that it has been completely assembled, and all parts ●...
- Page 4 Exploded View - A...
- Page 5 Exploded View - B...
-
Page 6: Parts List
Parts List Front Left Leg Back Left Leg Smokestack Gasket Front Shelf Smokestack Hopper Gasket Cooking Chamber Front Shelf Bracket L Hopper-Bottom Assembly Chamber Right Bracket Protection Guard Grease Bucket Bracket Hopper-Top Side Handle Hopper-Lid Grease Bucket Flame Tamer Front Shelf Bracket R Hopper Latch Bottom Shelf Power Cord Bracket... - Page 7 Parts List Part # Description Picture Part # Description Picture Auger Motor Hopper Inner Auger Blower Fan Circuit Board Box Rubber Ring Auger Housing Hopper-Bottom Fire Pot Rubber Sealer Hot Rod Digital Controller Power Cord Controller Knob Grill Probe Hopper Bottom Panel...
-
Page 8: Tools Required
Hardware Hardware # Description Picture M6 x 55 Bolt M6 x 12 Bolt M6 Nut M12 Flat Washer M4 Cap Nut M4 x 8 Bolt M5 x 10 Bolt M12 Lock Nut Tools Required Phillips Head Screwdriver (Not included) Adjustable Wrench (Not included) - Page 9 Assembly Instructions Choose a suitable, clear area for assembly. Ask a friend for help as some parts are heavy or difficult for one person to hold and assemble. To help protect the smoker’s finish, cover the area with cardboard. Step 1 Step 1 Remove the lid from the cooking chamber by removing bolt and washer and sliding...
- Page 10 Assembly Instructions Step 3 Attach bottom shelf (13) to legs with (4) M6 x 55 bolts (AA) and (4) M6 nuts (CC) as illustrated. Tighten all leg hardware. Hardware Used M6 x 55 Bolt 4pcs M6 Nut 4pcs Step 4 Step 4 Insert the wheel axle (17) through the bottom holes in the "Front Left"...
- Page 11 Assembly Instructions Step 5 Step 5 With assistance, turn the cooking chamber assembly to be horizontal. Attach chamber right bracket (8) onto cooking chamber right endcap inside with (2) M6 x 12 bolts (BB) and (2) M6 nuts (CC). Fix grease bucket bracket (9) on the square tube end of chamber right bracket (8) with (1) M6 x 12 bolt (BB) as illustrated.
- Page 12 Assembly Instructions Step 7 Step 7 Connect hopper-top (25) to hopper-bottom assembly (23) with (4) M5 x 10 bolts (GG) as illustrated. Note: Insert all 4 bolts before tightening completely. Hardware Used 4pcs M5 x 10 Bolt Step 8 Step 8 Install protection guard (24) into the hopper assembly with (2) M5 x 10 bolts (GG).
- Page 13 Assembly Instructions Step 9 Step 9 Slide hopper gasket (21) over auger housing. Then place the pellet hopper assembly onto the cooking chamber (7) by inserting the auger housing through the left endcap. While holding the hopper assembly away from the endcap, insert grill probe (49) through the endcap wall.
- Page 14 Assembly Instructions Step 11 Step 11 Attach front shelf bracket L (22) to the front of cooking chamber (7) near the left leg with (2) M6 x 12 bolts (BB) and (2) M6 Nuts (CC). Connect front shelf (20) to front shelf bracket R (12) by inserting the shelf hooks through the bracket.
- Page 15 Assembly Instructions Step 13 Step 13 Place grease tray (30) on the chamber right side bracket and chamber left side bracket as illustrated. Right Side Left Side Tray should fit into chamber left bracket Chamber Left Side Bracket Step 14 Step 14 Place cooking grates (33) onto cooking chamber grid brackets/rails as illustrated.
- Page 16 Assembly Instructions Step 15 Step 15 Insert warming rack brackets (31) into the mounting tabs found on cooking chamber endcaps. Step 16 Step 16 Place warming rack (3) onto warning rack brackets (31) so that it securely rests in bracket.
- Page 17 Assembly Instructions Step 17 Step 17 Reconnect cooking chamber lid (2) by sliding the hinge pins into the hinges. Secure it with the washer and bolt removed in Step 1. Screw temp gauge (1) fully into the lid (2). Adjust the orientation and lock the gauge into position using the pre-attach nut.
-
Page 18: Controller Instructions
Controller Instructions NOTE: The maximum temperature that the pellet grill can achieve is influenced by the ambient temperature. In colder weather, the grill may not be able to achieve the highest set temperature and it will continually feed pellets into the fire pot attempting to reach the set temperature. There might be some discrepancy between the digital temperature displayed and the temperature observed on the analog lid gauge. -
Page 19: Preparation For Use & Lighting Instructions
Preparation for Use & Lighting Instructions PLACE THE GRILL OUTDOORS ON A HARD, LEVEL, NON-COMBUSTIBLE SURFACE AWAY FROM ROOF, OVERHANG OR ANY COMBUSTIBLE MATERIAL. NEVER USE ON WOODEN OR OTHER SURFACES THAT COULD BURN. PLACE THE GRILL AWAY FROM OPEN WINDOWS OR DOORS TO PREVENT SMOKE FROM ENTERING YOUR HOUSE. -
Page 20: Automatic Method
Preparation for Use & Lighting Instructions Step 6 Plug the power cord into a properly grounded 230V electrical outlet. DO NOT use if the ground tip has been removed from the power cord. DO NOT use an extension cord or ungrounded outlet. Step 7 Turn the control knob to ‘High' in temperature controller. -
Page 21: Manual Method
Lighting Instructions & Shut Down LIGHTING INSTRUCTIONS MANUAL METHOD 1. With the grill properly setup and located for operation, plug the power cord into a 230V grounded electrical outlet. (Refer to SETUP PROCEDURE for more information.) DO NOT use if the ground tip has be removed from power cord. DO NOT use an extension cord or ungrounded electrical outlet. -
Page 22: Cooking Instructions
Operating Instructions CURING THE GRILL Before initial use, it is recommended to cure the grill to remove manufacturing oils or paint residue and minimize smoke odors or unnatural flavors from being added to food. Follow “Setup Procedure” to ensure the grill is safe for operation. Follow “Lighting Instructions”... - Page 23 Operating Instructions COOKING INSTRUCTIONS Set Temperature Once the controller has been set to a desired temperature, the target temperature will be displayed along with “COOK”, which indicates the controller is set to standard cooking mode. Actual Temperature The internal temperature of the grill, as measured by a separate “P”...
- Page 24 Operating Instructions COOKING INSTRUCTIONS The following table represents the preset smoking modes showing the relation of smoke produced with the cooking temperature. A higher preset level will produce more smoke, but a lower cooking temperature. Smoke Mode Smoke Cooking Setting Produced Temperature HIGH...
- Page 25 Operating Instructions IMPORTANT: Never move your pellet grill while it is hot or in use. Make sure the flame tamer and grease tray are properly installed. If not properly installed, a grease fire could result. Adjust the chimney cap height for added temperature control. Upward decreases the temperature and downward increases.
-
Page 26: Wood Pellets
Grill Cooking Tips WOOD PELLETS ONLY USE wood pellets made for barbecue.Barbecue wood pellets should be 100% all natural wood and come in a variety of types of wood that will add flavor to whatever food you are grilling or smoking. If possible, always use fresh wood pellets for each cooking session to ensure they burn properly giving off the correct amount of heat and smoke flavor. -
Page 27: Care And Maintenance
Care and Maintenance GRILLING TIPS & CLEANLINESS If you pre-cook meat or poultry, do so immediately before grilling. Never defrost meat at room temperature or on a countertop. Refrigerate leftovers within 2 hours of taking off the grill. Always wash hands thoroughly with soap and hot water prior to handling food and after handling raw meat, uncooked poultry or seafood. - Page 28 Care and Maintenance Paint and Corrosion Never apply paint to interior surfaces. Rust spots on the interior can be buffed, cleaned and then lightly coated with vegetable oil or vegetable oil spray. Maintaining a light coat of oil will help minimize rusting.
-
Page 29: Troubleshooting
Troubleshooting PROBLEM CAUSE SOLUTION The grill Power Verify there is power at the outlet. won’t ignite Verify there are pellets in the Pellet Hopper and Pellets aren’t Pellet Hopper is empty or pellets failed to fall they are not stuck on the side walls. If they are into auger tube. - Page 30 Troubleshooting PROBLEM CAUSE SOLUTION Grill is getting Operating temperature set too high. Adj u st too hot Auger continuously runs. Excess smoke Grease fire Some smoke is normal, but if excess smoke is from chamber observed and the temperature has increased, or chimney.
- Page 31 Troubleshooting PROBLEM CAUSE SOLUTION Ensure unit is plugged in. Grill will not start Power Verify there is power at the IEC standard socket If igniter not working, check 3 amp fuse found on the back of the control. Replace if necessary. Ensure control knob is in OFF position.
- Page 32 Troubleshooting Control Board Back View Board Wire Harness Connection Grill Probe connections Igniter Auger Motor AC Hot Input 3 amp 230 Volt Fuse w/ Housing Fast-Blow Cartridge Fuse The circuit board is equipped with a 3 amp, 230 volt fast-blow fuse to help protect against power surges and electrical shorts.
Need help?
Do you have a question about the SRPG1093L and is the answer not in the manual?
Questions and answers
Where can I find the P setting on/off times?