Table of Contents
Advertisement
Quick Links
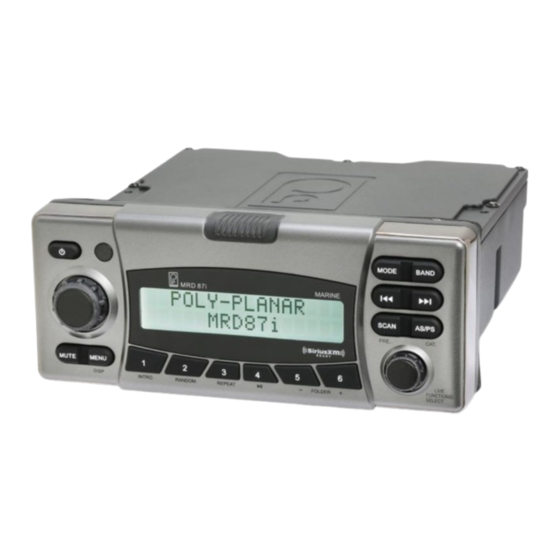
Poly-Planar IPX6 Marine Grade digital media entertainment
system with ultimate audio 4X45 sound.
•
SiriusXM-Ready™
Disclaimer
•
Sirius,XM and all related marks and logos are trademarks of Sirius XM Radio Inc. All rights reserved.
•
iPad, iPhone, iPod, iPod classic, iPod nano, iPod touch, and Retina are trademarks of Apple Inc., registered in the U.S. and
other countries. iPad Air, iPad mini, and Lightning are trademarks of Apple Inc
OWNER'S MANUAL
MRD87i IPX6 Marine Radio
(SiruisXM Connect Tuner and Subscription required)
• Made For iPhone®/iPod®
• USB music player & USB charger
• SD card reader
• AM/FM digital tuner
• NOAA weather band
• USB and 3.5mm aux input inside drawer/dock
• Front and rear RCA line out
• NMEA 2000® certified
• Remote control interface
• Bluetooth
Version 5.0
Advertisement
Table of Contents

Related Manuals for poly-planar MRD87i IPX6

Summary of Contents for poly-planar MRD87i IPX6
- Page 1 Version 5.0 OWNER’S MANUAL MRD87i IPX6 Marine Radio Poly-Planar IPX6 Marine Grade digital media entertainment system with ultimate audio 4X45 sound. • SiriusXM-Ready™ (SiruisXM Connect Tuner and Subscription required) • Made For iPhone®/iPod® • Bluetooth • USB music player & USB charger •...
-
Page 2: Table Of Contents
T A B L E O F C O N T E N T S Installation Wiring Diagram Button Description Basic Operation Radio Operation SiriusXM® Operation iPod®/iPone® Operation Bluetooth Operation Auxiliary Operation USB Operation SD Card Operation Compatible Accessories Troubleshooting Technical Specifications Warranty Information Warranty Registration... -
Page 3: Installation
I N S T A L L AT I O N IMPORTANT! Before mounting be sure there is sufficient room to accommodate the unit and that there is sufficient ventilation. Before installing the unit, connect the wiring temporarily making sure the system works properly. - Page 4 Optional Mounting Techniques Optional gimbal mount bracket installation Model # GM-MRD80 Optional Overhead / Under Dash mount installation Model # RM-10...
-
Page 5: Wiring Diagram
W I R I N G D I A G R A M SiriusXM® Tuner (Tuner and Subscription sold separately) MR45R (Blue) … Wiring Details: Use the wired plug end (Pigtail) provided to make power and speaker connections according to the diagram below. Using this connector will make it easy to disconnect the radio for adding additional features or service. - Page 6 Wire Color Function Yellow B+ (+12VDC) Green w/stripe Rear Left Speaker- Green Rear Left Speaker+ ACC (+12VDC) White w/stripe Front Left Speaker- White Front Left Speaker+ Blue Relay Trigger Gray w/stripe Front Right Speaker- Gray Front Right Speaker+ Black 10 Ground (Neg) Violet w/stripe 11 Rear Right Speaker- Violet...
-
Page 7: Button Description
• The Yellow, Red and Black power wires should be 14AWG or larger depending on the length to the battery. NEVER operate the unit without the proper power and ground wire. • NEVER ground the speaker leads and NEVER allow the speaker leads to come in contact with each other. -
Page 8: Basic Operation
1. Volume UP/DOWN Knob - Power Button 3. IR Receiver 4. Front Panel Latch Button 5. LCD Display 6. MODE - Mode Button 7. BAND – Band Button – Control Button 9. MUTE – Mute Button 10. MENU/DISP – Menu/Display Button 11. - Page 9 pass full range for conventional speaker power or low pass for MS56 subwoofer RLineOut (Rear Line Out) – can be set to variable or fixed as required by amplifier EQUALIZER SETTING Press volume knob repeatedly until EQUALIZER menu appears then rotate the volume knob to select EQUALIZER setting selection.
-
Page 10: Radio Operation
Note: Firmware version level will also be displayed RESET FUNCTION Open front panel to display reset button. Use a ballpoint pen to press the reset button. The reset function is used in the following situations: All the function buttons do not operate. Error sign on the display. -
Page 11: Siriusxm® Operation
3. Repeat steps 1 and 2 to program additional stations. SCAN FUNCTION Press SCAN button to scan a station. The unit will keep on scanning every 7 seconds until you press the SCAN button again to stop scan function. S i r i u s X M ® O P E R A T I O N Please Note: You need SiriusXM®... - Page 12 Some button functions are different when in SiriusXM® mode: Faceplate button function assignments SiriusXm® Function of buttons: Live - push to Play/Pause, hold to return to Live play |<< - Track Back (Replay Function), hold to Rewind >>| - TrackUp or Live if is playing last track, hold to Fast Forward ASPS - Display (change displaying info Ch#/Name ->...
- Page 13 Press AS/PS to change metadata to Artist Press AS/PS to change metadata to Song Press AS/PS to change metadata to Info Press AS/PS to change metadata to Category...
- Page 14 Press and hold BAND for Direct Tune then use the Function/Select Knob to select the digits Press and hold AS/PS to select category, use Function/Select Knob to navigate category then press Function/Select Knob to enter in selected category and browse channels using Function/Select Knob Press SCAN to scan all channels...
- Page 15 Press and hold SCAN to scan channels in current category Press MENU to enter then use Function/Select Knob to navigate through the available 5 options: New Password, Lock, Unlock All Ch and Signal Strength.
- Page 16 To enter password, rotate Function/Select Knob to the left to change current digit then push to go to next digit If password is wrong, there is a Wrong password warning ADVISORY MESSAGES: Check tuner advisory message...
- Page 17 Check antenna advisory message No signal advisory message Subscription update advisory message Channel unavailable advisory message...
- Page 18 Channel unsubscribed advisory message Channel locked advisory message SELECTING A TRACK Press button to select a track in Replay buffer. Press and Hold button to go faster. HOW TO DIRECT TUNE Press and hold AS/PS button “Select: 000” will show on the display. Rotate FUNCTION/SELECT knob to change current digit, push to go to next digit.
- Page 19 then push left encoder to go to next digit and rotate to get 5, then push left encoder again and rotate to get 1. Press FUNCTION/SELECT knob to confirm and play. SELECT A CHANNEL BY CATEGORY Press and hold AS/PS button to enter category selection menu. Use the FUNCTION/SELECT knob to navigate to all the categories available then when done selecting a category press FUNCTION/SELECT knob once to confirm.
- Page 20 TO UNLOCK A CHANNEL Tune to desired locked channel by entering the correct password. Then press MENU button to enter in the menu and select “Unlock Channel” then enter code again to permanently unlock channel. TO UNLOCK ALL LOCKED CHANNEL Enter in menu and select “Unlock All Ch”.
-
Page 21: Ipod®/Ipone® Operation
1) Make sure you are close enough to MRD87i 2) Open Bluetooth setting on your device 3) Choose “Poly-Planar” from the list of available Bluetooth link 4) Enter “0000” as the Bluetooth password (if required) 5) Once connected, you can now start playing your favorite music from your music device. -
Page 22: Auxiliary Operation
SELECTING SONGS Press button or rotate Function/Select knob to select a song. PAUSING/PLAYING Press 4 button to pause the playing. Press 4 button again to resume playing. A U X O P E R AT I O N This unit can be connected to any portable music devices such as MP3 Player, TV and DVD through the AUX IN located at the back of the unit. - Page 23 DISPLAY INFORMATION (music files only) First line is showing mode information and the second line is displaying the song name. When browsing by rotating right functional key a folder name will be shown at the first line and track name at the second line of the display PREVIEWING ALL TRACKS Press 1 button to play all songs in intro mode.
-
Page 24: Sd Card Operation
CAUTION If there are important files in the USB device, do not connect it to the main unit to play. Any wrong operation may cause file loss. Our company assumes no responsibility for lost files or directories. Media type USB (can support USB2.0 but the speed is USB1.1.) Capacity up to 2000 songs S D C A R D O P E R AT I O N... - Page 25 Refer USB operation on pages for further instructions. REMOVING THE SD CARD Firmly press the card into the slot and release it. The card should pop partially out of the slot. IMPORTANT NOTE: Some Memory Card devices may not be compatible with the unit. Some Memory Card devices may take more than 45 seconds to initiate after plugging in.
-
Page 26: Compatible Accessories
C O M P AT I B L E A C C E S S O R I E S ( s o l d s e p a r a t e l y ) MR45R Wired Remote Control – connect to the back of the unit labeled “TO MR45R”. -
Page 27: Troubleshooting
T R O U B L E S H O O T I N G PROBLEM CAUSE CORRECTIVE ACTION No power Blown fuse, power Check the fuse and wires disconnected power wire or ground wire connection No sound Mute is on, Volume set Turn Mute to off, adjust at minimum, wiring is volume to a desired... - Page 28 SiriusXM Connect Vehicle Tuner. Inspect the antenna cable for damage and kinks. Replace the antenna if the cable is damaged. SiriusXM products are available at your local car audio retailer or online at www.shop.siriusxm.com. Check The radio is having difficulty communicating with the Tuner SiriusXM Connect Vehicle Tuner.
-
Page 29: Technical Specifications
T E C H N I C A L S P E C I F I C AT I O N S TUNER(AM) Frequency Range 530-1710 KHz Usable Sensitivity 32 dBuV TUNER(FM) Frequency Range 87.5-107.9 MHz Channel Step 200KHz Sensitivity 2.8 uV Stereo Separation 30dB... -
Page 30: Warranty Information
Warranty is subject to proper installation and operation within the published specifications. Except as provided below, Poly-Planar will repair or replace, at its discretion, any unit returned prepaid to our facility with proper documentation and determined to be defective in normal use. - Page 31 NOTES:...
Need help?
Do you have a question about the MRD87i IPX6 and is the answer not in the manual?
Questions and answers