Table of Contents
Advertisement
Advertisement
Table of Contents

Summary of Contents for Macas MACES7C-300-90-00 Series
-
Page 1: Service Manual
Service Manual MACES7C-300-90-00 Series Guangzhou Macas Electronic Technology Co.,Ltd. Add:Room 603,Building C,Yushu Industrial Zone, Luogang, Huangpu District Guangzhou City Email: kevin@icoffee-tea.com Website: http://www.icoffee-tea.com Tel:+86-20-82557460... -
Page 2: Table Of Contents
Contents Service Manual ........................1 Before use ......................... 4 ABOUT THIS MANUAL ......................4 IMPORTANT SAFTY ADVICE ....................4 WEAR PARTS ........................... 5 PACKAGING MATERIAL DISPOSAL ..................5 MACHINE OUT OF ORDER ..................... 5 ABOUT THIS MACHINE....................6 MACHINE CHARACTERISTICS ....................6 2.1.1 MECHANICAL ........................ - Page 3 7.6.1 DOOR OPEN AND CLOSE....................34 7.6.2 CLENING THE CONTAINERS ..................34 7.6.3 CLEAN THE MIXERS ...................... 35 7.6.4 CLEAN THE AIR CHAMBER ................... 36 7.6.5 CLEAN THE NOZZLE AND OUTLETS ................37 7.6.6 PURIFICATION THE BREWERS..................38 7.6.7 CLEAN THE BREWERS ....................39 7.6.8 CLEAN DRIP TRAY ......................
-
Page 4: Before Use
Information and advice for easier use Note: Caution: MACAS Guangzhou is not liable for any personal damage or damage to the machine, if it has occurred by not (strictly) following the safety regulations and advice or by careless transport, installation, set up, programming, maintenance and repair of the machine and possible spare parts.. -
Page 5: Wear Parts
13) Maintenance, cleaning and repair works other than specifically addressed to the user may only be performed by trained service personnel from MACAS! 14) For your own safety, and to ensure a long life for your machine, you are advised to only use the... -
Page 6: About This Machine
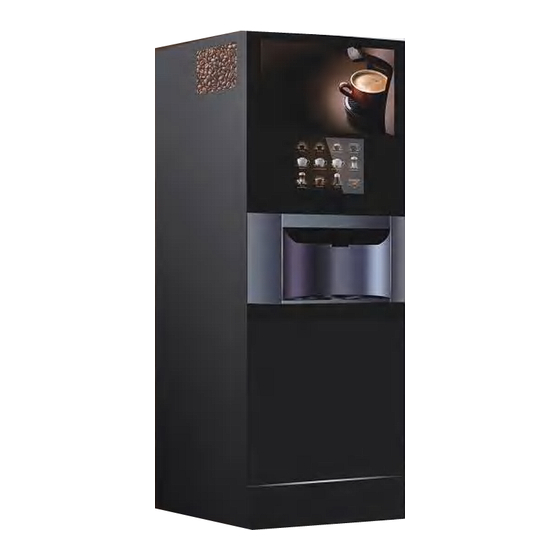
2 ABOUT THIS MACHINE 2.1 MACHINE CHARACTERISTICS 2.1.1 MECHANICAL SIZE, 1830 x 664 x 700 (UNIT: mm) WEIGHT: 160~170 KG (NO OPTIONAL MODULE INCLUDED) FULLY AUTOMATIC CUP (300 PCS) MAXIMUM CUP HEIGHT (110mm) OPTIONAL CUP RIM DIAMETER: 90mm MINIMUM CUP QUANTITY: 300 PIECES CUP DETECTION: YES COFFEE BEAN AND GROUND COFFEE DETECTABLE VARIABLE DOSAGES... - Page 7 Exterior view advertising screen 27" 14" touch panel Small door Observation window The handle The glass panel Cosmetic cover Interior View Door Contact The power switch Coffee bean box Plastic tube Grinder Ingredient canister Brewer Mixer Beverage outlet Cup system waste cake bin Connecting cup system waste bucket...
-
Page 8: Machine Configurations
User interface Company logo Description: Small company logo. Information button: shows service contact information. Cup Detection status, it will highlight in blue color when machine detect a cup in dispensing area. Operator menu button, enable when door open, entry for operator menu. Current time Card-reader status icon, shown when card-reader device presents, green when card inserts... -
Page 9: Machine Layout
2.2.1 Machine layout MACES7C-300-90-00 2.2.2 Machine hydraulics plan Service Manual MACES7C-300-90-00... -
Page 10: Transport And Storage
For assertion of any claims, it must be checked for any damage or loss immediately on receipt and the carrier has to sign it on the consignment note. MACAS is not liable for any damage or loss detected at a later stage. -
Page 11: Switch Off The Machine
In order to avoid this kind of damage: Only run the machine at temperatures between +5° C and +35° C Only run the machine at humidity between 10% and 90%. Always store the machine in a dry and dust free environment, the temperature should be in range of 0°... -
Page 12: Drinks Sales Price
4.3 DRINKS SALES PRICE A different price can be programmed for each selection; the standard setting foresees the same sales price for all selections. The NS1000 drinks machines have been designed for the commercial dispensation of hot drinks. The compact built allows the machine to be set up in offices, manufacturing sites, cafeterias, conference rooms and canteens. -
Page 13: Installation
Note: You will receive this machine ready to use. A tube for drinking water supply is not included in the delivery, but you can additionally buy one from MACAS Steps for first use Unpack the drinks vending machine. -
Page 14: Unpack The Machine
5.1 UNPACK THE MACHINE 5.1.1 Transport the machine with a fork lift Machine with package Fork Lift 5.1.2 Unscrew the feet from the bottom of the machine by spanner Feet 5.1.3 Remove the wooden pallet, and mount the screw feet back. Service Manual MACES7C-300-90-00... -
Page 15: Put The Machine Down To Ground
5.1.4 Put the machine down to ground 5.1.5 Unpack the package and remove the belt, carton box and bottom plates. Put on cosmetic cover Adjust the feet’s height (min. 26mm) 5.1.6 Service Manual MACES7C-300-90-00... -
Page 16: Putting Up
After electrify opens the door to the machine and check machine interior for any abnormal Note: Only under the condition of electricity can open the machine door! MACAS Guangzhou is not liable for any personal damage or damage to the machine which has been caused by neglecting these safety instructions and notes. -
Page 17: Connect The Machine To Water Mains
Check machine interior for any abnormal. 5.4 CONNECT THE MACHINE TO WATER MAINS Important Health hazards through soiled water supply! Only use permissible mains with drinking water safe for drinking. Rinse the drinking water mains thoroughly before connecting it to the machine. Connect the machine with an easily accessible drinking water supply: ... -
Page 18: Fill & Refill Cup Dispenser
Important: The products may only be filled in loosely. Avoid any compression. Note: When the machine has been replenished for the first time or has been replenished after being entirely empty (cleaning), a couple of test dispensations must be run to allow the dispenser coils inside the con- tainers to fill up completely with products. -
Page 19: Put Waste Bins On To The Machine
Fill cups from top side of cup magazine Important: The cups may only be filled in loosely, avoid any compression. Less than 25 cups is not allowed for each cup stack while refilling. For paper cups, please don’t refill 75 cups once drop, it will cause the cups’ deform. 5.7 PUT WASTE BINS ON TO THE MACHINE Waste cake bin Waste water bin... -
Page 20: Switch On The Machine
Note: Make sure the water full detect pins are be inside water bin 5.8 SWITCH ON THE MACHINE Make sure all of above procedures are correct, and then switch on machine by pressing power on switch. It will take a few minutes for system start and boiler heating up. 5.9 FILL THE BOILER The machine will start to fill boiler automatically when the system start working. -
Page 21: Calibrate The Grinder
5.10.1 Calibrate the grinder Note: Adjust the grinder before, please prepare (low value) electronic scale! Screw the adjusting nut in a clockwise direction to ensure that the nut is not loosened. Put in coffee beans. To enter the grinder machine debugging interface, reset the brewing chamber,open the grinder. - Page 22 Danger of wrong dosage! Before each calibration, a 3 times test-dosage must be performed to make sure the dispenser coils are filled. Calibration must be performed for each container. Note: When changing a container, motor or product, you must always calibrate again as every new component has different weight and dispensation characteristics.
-
Page 23: Set The Drink Recipe
Demount the component underneath the container you wish to calibrate (brewing unit or mixer) and dissemble it. Have a vessel ready to catch the ingredient amount and to weigh it. Have a suitable scale (with tenth-grams-Display 00.0) ready and zero it with the empty vessel. ... - Page 24 To change the recipe settings, password level 100 is required. Open machine door with RFID card Pressing “recipe” button Pressing the “product” that you want to change. Pressing the ingredients and changing the recipe by moving the bar Service Manual MACES7C-300-90-00...
- Page 25 Press “Test Product” button to make a test Service Manual MACES7C-300-90-00...
-
Page 26: Set Machine Vending Mode
5.10.4 Set machine vending mode Open machine door Press “setting” button Pressing “options” button Service Manual MACES7C-300-90-00... - Page 27 Press the “Credit” button, then set “free vend” to “ON” or “OFF” Back to main page by pressing upper right “arrow” button and back to customer interface. Check the upper right “Vend mode” area Service Manual MACES7C-300-90-00...
-
Page 28: Use The Machine (End User)
Company logo 6 USE THE MACHINE (END USER) 6.1 Get the drink from machine Note: Customer can use own cup or use a cup from machine. If use a own cup, place the cup on mug cup table before choose a product If use a pot, push the mug cup table to the right or left. -
Page 29: Cleaning And Maintenance
Only a well looked-after machine can function perfectly! When designing these series, the company MACAS has considered all vital criteria to enable the person who runs the machine to thoroughly clean and maintain it with as little time and cost as possible. The service of the automatic cleaning program is one of these advantages. -
Page 30: Safety Regulations For Cleaning And Maintenance
Attention: If the cleaning temperatures are too high, they can damage plastic parts! When plastic machine parts are cleaned in the dishwasher, too high cleaning temperatures can cause damage. The cleaning temperature may not exceed 65 ° C! Designer parts made of aluminum must not be cleaned in the dishwasher! 7.1 SAFETY REGULATIONS CLEANING... -
Page 31: Hygiene
7.2 HYGIENE Only if you carefully clean and maintain it at the advised intervals and with the suggested methods, can an impeccably hygienic hot drinks quality and optimum functionality of the machine be guaranteed. In order to keep it clean and fully functional, there are three instructed cleaning intervals for drinks vending ma-chines (see “Cleaning works”). - Page 32 Clean with a Sanol dampened cloth (1 part Sanol, 50 parts water) Clean with a Sanol-solution applied with an atomizer (1 part Sanol 50 parts water) Soak in Limades-solution (± 3 hours)(1 part Limades, 100 parts water) Soak in Limades-solution (3 to 8 hours)(1 part Limades, 1 part water) Replace with new one Refilling with new consuming material...
- Page 33 unit Drive for fresh brewing ESFB,BTCFB,2x unit ESFB,BTCFB,2x Sieve table ESFB,BTCFB,2x Filter ESFB,BTCFB,2x Sealing ring ESFB,BTCFB,2x Wiper arm ESFB,BTCFB,2x Wiper leaf ESFB,BTCFB,2x Shower head ESFB,BTCFB,2x Pusher ESFB,BTCFB,2x Cylinder ESFB,BTCFB,2x Nipple ESFB,BTCFB,2x Brewer tube Sugar channel (door) 2xES, ESFB Cup slide cover All range Cup table drip tray All range...
-
Page 34: Cleaning Instructions
7.6 CLEANING INSTRUCTIONS 7.6.1 DOOR OPEN AND CLOSE OPEN THE DOOR BY RFID CARD Put on the RFID card in front of the machine around & towards the RFID card receiver position. Input the password to dialogue will show on the touch panel. ... -
Page 35: Clean The Mixers
Move container upwards a little (5mm) Take out the containers Empty the container Cleaning the container according to Cleaning & Maintain List Put them back to the machine 7.6.2.1 CLEANING THE SUGAR CHANNEL Attention: Please make sure the channel and container must be dry after cleaning. 7.6.3 CLEAN THE MIXERS Service Manual MACES7C-300-90-00... -
Page 36: Clean The Air Chamber
THE MIXER 1. Remove the blender main body and cover 2. The mixer outlet 45 degrees clockwise twist, pull out 3. Separate blender main body and cover 7.6.4 CLEAN THE AIR CHAMBER Remove all instant containers from the machine Unscrew the middle plate and take out the middle plate Service Manual MACES7C-300-90-00... -
Page 37: Clean The Nozzle And Outlets
Instant Containers Middle plate Take out the air chamber plate for cleaning Air chamber pipes inside 7.6.5 CLEAN THE NOZZLE AND OUTLETS 7.6.5.1 Clean the outlets , outlets bracket, and the nozzle arm. Rotate the knob and pull out the nozzle bracket Pull out the nozzle outlet together with mixer and tubes... -
Page 38: Purification The Brewers
7.6.6 PURIFICATION THE BREWERS Open OUI and click the “program” button. Put cleaning agents into brewer, then click “start”. Service Manual MACES7C-300-90-00... -
Page 39: Clean The Brewers
Wait for automatically cleaning process ready. Close and back to OUI. Attention: Please purification the brewers once a week or after 2000 vends. 7.6.7 CLEAN THE BREWERS Service Manual MACES7C-300-90-00... - Page 40 7.6.7.1 CLEAN ES BREWER Disassembly the ES brewer from brewer driver. Un-plug the connector of the PTC heater Rotate the hook to left a little and push it down to bottom Pull out the brewing unit from the driver Service Manual MACES7C-300-90-00...
- Page 41 Unplug the water inlet tube from the brewer Step 1, Press the end part of the push-in fitting Step 2, Pull out the white water inlet tube Take out the brewer from the driver Service Manual MACES7C-300-90-00...
- Page 42 7.6.7.2 NORMAL CLEANING THE BREWER INSIDE THE MACHINE Change the brewer status to position underneath the grinder outlet Clean the polluted area with clothe or brush according to real situation Rotate the coffee outlet nipple a little and pull out the nipple together with coffee pipe Note: The frequency to do normal cleaning to brewer is not a must but depends on the pollution status.
- Page 43 7.6.7.3 DEEP CLEANING TO THE ES BREWER Dispatch the brewing unit from the brewer driver Unscrew the screw underneath the upper filter Take out the upper filter sheet Service Manual MACES7C-300-90-00...
-
Page 44: Clean Drip Tray
Yearly or 25000 vends, Planned Predictive Maintenance Procedure by experienced operators or technicians 2Years or 50000 vends, Revision of brewer and drive units by MACAS 7.6.8 CLEAN DRIP TRAY Rotate the knob Pull out the drip tray for cleaning... -
Page 45: Maintain Instructions
7.7 MAINTAIN INSTRUCTIONS 7.7.1 HOT WATER SYSTEM If the hot water system have problems with function, normally it caused by component life duration and scale inside the valves, boilers and fittings. Disassemble the hot water system from the machine. Unscrew the water system cover. Disconnect the tubes from valve chains Disconnect the tubes from ES brewer Disconnect the DC&AC connectors. -
Page 46: Reset Inlet Valve
7.7.2 RESET INLET VALVE Disconnect overflow tubes and release the water inside tube, then put the tube back to inlet valve. The inlet valve will back to work. Attention: PLEASE DON’T MOVE THE MACHINE BEFORE EMPTY AIR BREAK AND BOILER 7.7.3 EMPTY THE BOILER Turn off machine water supply. - Page 47 Service Manual MACES7C-300-90-00...
-
Page 48: Empty Air Break
7.7.4 EMPTY AIR BREAK Repeat the steps of empty air break Service Manual MACES7C-300-90-00... -
Page 49: Programming
8 PROGRAMMING There are 3 items: System backup System restore System update 8.1 SYSTERM BACKUP Open machine door Plug in USB disk into USB connector behind of touch screen Pressing “Setting” button Pressing “backup” button Service Manual MACES7C-300-90-00... -
Page 50: Systerm Restore
8.2 SYSTERM RESTORE make backup from the machine into a USB stick, the *.bak file run Restore.exe in PC(ask MACAS after sales for this program) Use "Load" to open the *.bak file, the configuration of the machine is shown. Edit the configuration. -
Page 51: Connection Plan Of Door System
Main board (STUM module) Cabinet IO board Cup IO board Brewer board Grinder/Boiler relay board Those boards are located in either machine cabinet or machine door. Except those board, there are, LCD driver board 27” Touch panel driver board 3G or Wi-Fi driver board 9.1 Connection plan of door system JP301 J503... -
Page 52: Connection Plan Of Cabinet
9.2 Connection plan of cabinet 10026186 J1001 J802 J801 J105 J105 J104 J106 J1001 NOZZLE&SEESAW DC 24V POWER SUPPLY Nozzle 75628 _01_ Cabinet _I/O ye/gn DC24V/320W JAC906 10026183 JAC903 Hall 10025969 JAC905 ye/gn 75463_01 10025954 J901 10025968 10026271 Nozzle 10025923(03) Motor GRINDER 1 JAC901... -
Page 53: Ce Conformity Declaration
10 CE conformity declaration European directives: 2002/95/EC (RoHS) 98/37/EC 73/23/EC + 93/68/CE repealed by 2006/95/CE 89/336/EC + 92/31/CE + 93/68/CE repealed by 2004/108/EC 90/128/EC repealed by 2002/72/CE 80/590/EEC and 89/109/EEC repealed by EC 1935/2004 Harmonized standards Technical specifications: CEI EN 60335-1 : 2002 + A11:20005 + A1:2005 + A12:2006 + A2:2006 CEI EN 60335-2-75 : 2004 + A1:2005 + A11:2006 EN 50366:2003 + A1:2006 EN ISO 11201 and EN ISO 3744... -
Page 54: Appendix
11 Appendix 11.1 Error Code 11.2 Default Settings 11.3 IPD Designer Manual 11.4 Menu Editor manual 11.5 Spare parts list Service Manual MACES7C-300-90-00...
Need help?
Do you have a question about the MACES7C-300-90-00 Series and is the answer not in the manual?
Questions and answers