
Summary of Contents for ePropulsion Side Mount Control
- Page 1 Side Mount Control User Manual 2019.04 Version 1.0 Copyright © 2019 ePropulsion. All Rights Reserved...
-
Page 3: Acknowledgement
By using this product, you hereby agree that you have fully read and understood all contents of this manual. ePropulsion accepts no liability for any damage or injury caused by operations that contradict this manual. -
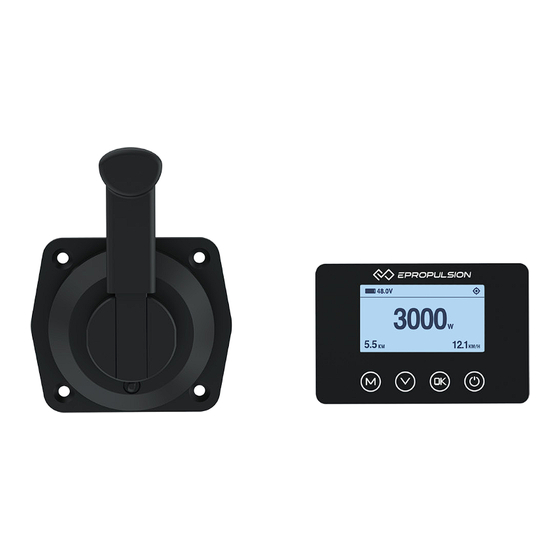
Page 4: Product Identification
Product Identification Below picture indicates the serial numbers of Side Mount Control and Display Panel. Please note the position of the serial numbers and record them for access to warranty services and other after-sales services. Do not remove or alter the identification label, otherwise the product warranty will be invalid. -
Page 5: Table Of Contents
Table Content Acknowledgement ..................1 Using This Manual ..................1 Symbols ......................1 Product Identification ..................2 Table Content ....................3 1 Product Overview ..................5 1.1 In the Package ................... 5 1.2 Specification ..................7 1.3 Important Notes ................. 7 1.4 Declaration .................. - Page 6 4.2.2 Recalibration ................31 4.3 Use of Kill Switch................33 4.4 Checklist before Use ............... 34 4.5 Starting the Motor ................35 4.6 Stopping the Motor ................36 5 Warning Messages .................. 37 6 Warranty ....................42 6.1 Warranty Policies ................42 6.2 Out of Warranty ................
-
Page 7: Product Overview
1 Product Overview Side Mount Control is a wired throttle control handle with a display panel. It is compatible with NAVY, SPIRIT outboards (excluding SPIRIT 1.0 with tiller) and Pod Drives. 1.1 In the Package When you receive a set of Side Mount Control, unpack its package and check if all the items below are included in the package. - Page 8 1 Set Quick Start & Fixing Guide Save ePropulsion original package for transport and storage. Be attention to distinguish the communication ports in the Side Mount Control. Please using a communication cable to connect the motor or the battery to the connector with the sign "...
-
Page 9: Specification
Storage Temperature -20°C ~ 60°C (-4°F ~ 140°F) 1.3 Important Notes 1. Check the status of the Side Mount Control and battery level before each trip. 2. Only adults who have fully read and understood this manual are allowed to operate this product. -
Page 10: Declaration
1.4 Declaration Object of the declaration: Product Description: Side Mount Control Model: Side Mount Control, Side Mount Control-NAVY, Side Mount Control-SPIRIT Company Name: Dongguan ePropulsion Intelligence Technology Limited Company Address: Room 202, Bldg.17A, Headquarter No.1, 4th XinZhu Road, SongShan Lake District, Dong Guan City, Guang Dong Province,... -
Page 11: Mounting
2.1 Mounting the Throttle Follow the instructions below to fix the throttle of the Side Mount Control to the boat. It can be mounted from the back side or front side. -
Page 12: Mounting From The Front Side
② Fix the throttle to the side of the boat referring to the figure 2-2. M6 Screw Figure 2-2 2.1.2 Mounting from the front side ① Drill holes on the hull through the fixing guide referring to the figure 2-3. Figure 2-3... -
Page 13: Mounting The Display Panel
② Fix the throttle to the side of the boat referring to the figure 2-4. M6 Tapping Screw Figure 2-4 2.2 Mounting the Display Panel Follow the instructions below to fix the display panel of the Side Mount Control to the boat. It can be mounted from the back side or front side. 2.2.1 Mounting from the back side ①... -
Page 14: Mounting From The Front Side
② Fix the display panel to the boat referring to the figure 2-6. M6 Screw Seal Figure 2-6 2.2.2 Mounting from the front side ① Drill holes on the hull through the fixing guide referring to the figure 2-7. Figure 2-7... - Page 15 ② Tear the film of the display panel, then fix the display panel to the boat referring to the figure 2-8. Seal M4 Tapping Screw Figure 2-8 ③ Paste a new film which is in the package.
-
Page 16: Connection
Please follow the steps below to complete the connection: 1. Connect the throttle and display panel with a communication cable; 2. If using a NAVY battery, connect the Side Mount Control to the battery with a communication cable; If not using a NAVY battery, connect the Side Mount Control to the motor with a communication cable;... - Page 17 Please using a communication cable to connect the motor or the battery to the connector with the sign " " on the Side Mount Control and use another communication cable to connect the display panel to the other connector with the sign "...
-
Page 18: Version Setting
2.4 Version Setting Side Mount Control is Spirit1.0 version by default, which is suitable for SPIRIT 1.0R and SPIRIT 1.0C outboards. If you need to connect to NAVY outboard or Pod Drive, please switch to a different version according to the following steps: The option with a "... -
Page 19: Port Or Starboard Side Setting
2.5 Port or Starboard Side Setting Make sure the handle side setting is done correctly before use. The Side Mount Control is in starboard (right) side mode by default. If you need to switch between the port (left) or starboard (right) side, please refer to the following process for setting. - Page 20 Throttle Figure 2-12 Starboard (right) Side Throttle Figure 2-13 Port (left) Side...
-
Page 21: Features Of Components
3 Features of Components The Side Mount Control is connected to the motor by wire, and used for starting and stopping the motor, adjusting the motor speed, configuring the battery parameters, displaying the system information and messages, etc. 3.1 Detachable Throttle 3.1.1 Detach the Handle... -
Page 22: Display Panel
3.2 Display Panel Buttons Functions 1. When the display panel is turned off, press and hold the power button to power on the display panel. "Power" 2. When the display panel is turned on, press and hold the power button to power off the display panel. On setting pages, press the "... - Page 23 Icons Functions Indicating accurate current battery voltage / battery level percentage which is 48.0V configurable in preference setting page. Battery voltage For example: / level 100% : indicates current battery voltage. 48.0V : indicates current battery level. 100% Hidden: no satellite signal is received or GPS does not work.
- Page 24 Icons Functions Time 9:59 Displaying real time travel time. display : Remaining distance or time that Travelled outboard can travel. distance/time : Travelled distance or time. or remaining Set units (MILE, KM (kilometer) and NM distance/time (nautical mile)) in preference setting page. Displaying real time input power to the 6000 Throttle Power...
-
Page 25: Operation Guide
4.1 System Settings 4.1.1 Version Setting Side Mount Control is Spirit1.0 version by default, which is suitable for SPIRIT 1.0R and SPIRIT 1.0C outboards. If you need to connect to NAVY outboard or Pod Drive, please switch to other versions according to the following steps: The option with a "... -
Page 26: Power Limit
4.1.2 Power Limit Power Limit Process LCD Displaying PowerLimit Step1: In power-on state, press the " " UnitSetting BatterySetting button and hold for 3s to enter the preference Throttle setting page. Version Step2: When the arrow points to "PowerLimit", Forward: press the "... -
Page 27: Navy Preference Settings
4.1.3 NAVY Preference Settings If the version setting is in Navy 3.0, Navy 6.0 or Pod 3.0, it's advised to set display preference by these steps before operation. The option with a " " pattern on the right is the option in use. NAVY Preference Settings LCD Displaying PowerLimit... -
Page 28: Battery Configuration
When not using ePropulsion Batteries, users should manually configure the batteries via Side Mount Control at the first time use, so the battery level will display more accurate. - Page 29 Battery Setting Process LCD Displaying PowerLimit UnitSetting Step2: Press the " " button to switch to BatterySetting "BatterySetting" . Throttle Version Type: Voltage: Step3: Press the " " button to enter the Capacity: battery setting page. Step4: When the arrow points to "Type", then press the "...
- Page 30 Battery Setting Process LCD Displaying Type: Step7 : Press the " " button to return to Voltage: Capacity: previous setting page, and press the " " button to switch to "Capacity". Step8 : Press the " " button to enter the battery capacity setting.
- Page 31 Lithium batteries, lead acid batteries and lithium iron phosphate batteries are recommended to use with NAVY outboard or Pod Drive 3.0. Other types of battery may fail to make the motor work properly. When you use the below batteries, please set battery type and rated voltage value based on the parameters in the following table.
-
Page 32: Throttle Operation
4.2 Throttle Operation 4.2.1 Power Adjusting Side Mount Control is used to adjust the input power of the motor. When the battery is properly connected, power on the motor, and then start the Side Mount Control. When the throttle is in the neutral position, first pull the handle away from its base plate along a horizontal direction, then rotate the handle forward or backward to increase the power. -
Page 33: Recalibration
4.2.2 Recalibration The throttle position sensor should be recalibrated if the below error code displays. WARNING! Figure 4-3 Before calibration, if there is no handle side setting, please refer to 2.5 Handle Side Setting to set the handle side and then carry out the throttle calibration procedures. - Page 34 Recalibration process LCD Displaying Push forward Step5: Press the " " button to enter to the end calibration setting page. then press OK Step6: Push the throttle to the maximum Pull to the neutral forward power position, and then press the then press OK "...
-
Page 35: Use Of Kill Switch
4.3 Use of Kill Switch Locate the kill switch to the right place on the Side Mount Control and tie its lanyard to your wrist or life jacket. Stop the outboard in emergency by detaching the kill switch. Kill Switch... -
Page 36: Checklist Before Use
4.4 Checklist before Use 1. Ensure the Side Mount Control and steering wheel are installed in proper position before turning on the power. 2. Ensure the Side Mount Control travels smoothly with no obstructions. 3. Before connecting the battery, check and make sure there is no poor contacts or defects in cables. -
Page 37: Starting The Motor
4.5 Starting the Motor 1. Complete the check list. 2. Remove the kill switch from the Side Mount Control. 3. Set the throttle in the neutral position. 4. Connect the battery to the motor. 5. If using the outboard, fix the outboard with a proper trim angle. -
Page 38: Stopping The Motor
Control. 3) The main power switch is off, while using a NAVY outboard or Pod Drive 3.0. 4) The communication between Side Mount Control and the motor breaks. 5) The connection between battery and the motor breaks. 6) Failure exists in the control system (e.g. motor is blocked or the low battery voltage level is detected). -
Page 39: Warning Messages
5 Warning Messages Before conducting warning checks, please check the version of the motor in use. When the motor is running in abnormal conditions or out of order, a warning message with an error code will display on the display panel. Figure 5-1 is an example. - Page 40 Code Cause Solution Please check whether the version of Side Mount Control corresponds to the motor version first. Battery If not, please refer to 2.4 Version Setting for Communication version switching. Fault If the version is correct, turn off the motor and reconnect the battery cable.
- Page 41 Fault problematic battery. If the problem persists, please consult your ePropulsion authorized dealer for assistance. b.Warning Messages (Navy3.0, Navy6.0 & Pod3.0 Version) The following error codes and solutions are applicable only to NAVY 3.0, NAVY 6.0 outboard motor and Pod Drive 3.0.
- Page 42 Abnormality of Current Please contact the dealer for help. Sensor Please check whether the version of Side Mount Control corresponds to the motor version first. If not, please refer to 2.4 Version Setting for version switching. Driver Communication If the version is correct, check the...
- Page 43 The operating power is suggested to be lower than two thirds of full power. Please fully charge the battery after use. If the problem persists, please consult your ePropulsion authorized dealer for assistance.
-
Page 44: Warranty
6 Warranty The ePropulsion limited warranty is provided for the first end purchaser of an ePropulsion product. Consumers are entitled to a free repair or replacement of defective parts or parts which do not conform with the sales contract. This warranty operates in addition to your statutory rights under your local consumer law. -
Page 45: Out Of Warranty
1. Fill in the Warranty Card correctly and completely in advance. Then make your warranty claim by sending it to your authorized ePropulsion service partner together with valid proof of purchase. Usually these documents are required when making a warranty claim: the Warranty Card, ex-factory serial number, and evidence of purchase. - Page 46 4. In case your warranty claim be rejected, an estimated repair charge with round trip delivery cost will be sent for confirmation. ePropulsion authorized service point will conduct maintenance accordingly only after your confirmation.
- Page 48 Thanks for reading this user manual. If you have any concerns or find any problems while reading, please don't hesitate to contact us. We are delighted to offer service for you. Dongguan ePropulsion Intelligence Technology Limited Website: www.epropulsion.com Email: service@epropulsion.com...
Need help?
Do you have a question about the Side Mount Control and is the answer not in the manual?
Questions and answers