Table of Contents
Advertisement
Quick Links
P/N 01-1040855 | REV. E 02/18 | INSTRUCTION SHEET
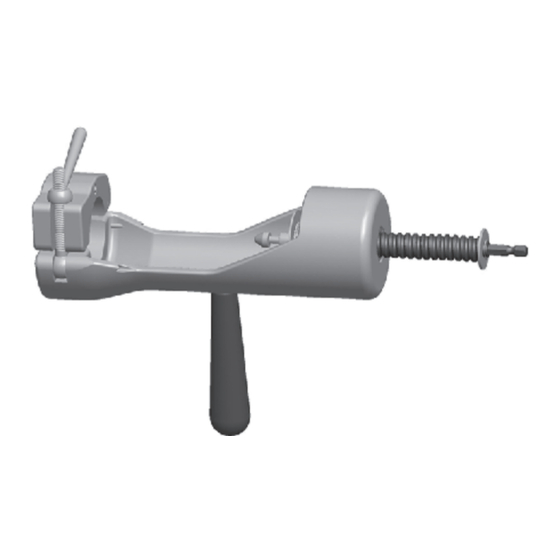
PrimeLock
Fitting Handheld
Insertion Tool
Insert installation instructions for
⁄
",
⁄
",
⁄
", 1", 1
⁄
", 1
3
1
3
1
8
2
4
4
CAUTION: Dirty and scratched mandrels can
damage and contaminate the fitting. Likewise,
contamination on the clamp surface may cause
tube slippage during installation. Clean mandrels
and clamps frequently to prevent damage and
assure proper installation.
• Clean rubber-lined clamps with IPA wipe.
• Soak metal clamps in IPA for a minimum of 12
hours, and scrub clean with a stiff, nylon brush.
• Clean mandrels with IPA wipe and inspect
regularly for nicks and scratches; replace if
nicked or scratched.
Must be free of nicks and scratches
INSTRUCTIONS
—
For 3⁄8" to 1 1 ⁄2" PrimeLock
NOTE: Verify the mandrel is fully retracted by rotating
the handle counterclockwise until it stops.
Verify the correct size mandrel and clamp inserts are
installed for the desired tube size. Refer to PrimeLock
Accessories on www.entegris.com.
NOTE: The mandrel is removed by pulling the retaining
pin and sliding it off the tool.
®
⁄
",
1
4
⁄
", and 40 mm sizes
1
2
Fittings
®
1. Slide the insert onto the mandrel as shown.
2. Verify the insert has been properly placed onto
the mandrel. The installation indication lines on the
insert are closest to the shoulder of the mandrel.
Installation
indication lines
Correct installation of insert.
Incorrect installation of insert.
Installation
indication lines
Advertisement
Table of Contents

Summary of Contents for entegris PrimeLock
- Page 1 Verify the correct size mandrel and clamp inserts are installed for the desired tube size. Refer to PrimeLock Incorrect installation of insert. Accessories on www.entegris.com. NOTE: The mandrel is removed by pulling the retaining...
- Page 2 Slide quick couple back and remove handle from the hand tool. Quick couple Hand tool Handle ii. Attach a variable speed drill with minimum torque level of 25 in•lb to the hand tool. Drill Hand tool P/N 01-1040855 | Rev. E 02/18 | Entegris, Inc.
- Page 3 Reverse the drill’s direction and slowly Verify the correct size mandrel and clamp inserts are depress the drill trigger counterclockwise installed for the desired tube size. Refer to PrimeLock Accessories on www.entegris.com. until the mandrel is free from the tube assembly.
- Page 4 8. Rotate the handle clockwise, driving the insert into the tube until the tube contacts the mandrel shoulder. Mandrel shoulder CAUTION: Failure to follow 1⁄4" insert instructions may result in the insert remaining on the mandrel after installation. P/N 01-1040855 | Rev. E 02/18 | Entegris, Inc.
- Page 5 2. Start by hand-tightening the nut. Correct installation of insert. Correct installation of insert. 3. Place the PrimeLock wrench over the ribs of the fitting nut and rotate clockwise. Tighten the nut until the connection verification ring creates audible clicks and the leading edge of the nut travels under the connection verification ring.
- Page 6 30°C (86°F) or in a pressurized condition. When reassembling the fitting, tighten the nut an additional 1⁄4- to 1⁄3-turn beyond the initial tightening position, or until a leak-free seal is made. P/N 01-1040855 | Rev. E 02/18 | Entegris, Inc.
- Page 7 fitting body If the insert remains on the nose of the PrimeLock fitting, carefully remove the insert without damaging the fitting nose and discard. Install a new insert into the tube.
- Page 8 Visit entegris.com and select the Contact Us link to find the customer service center nearest you. TERMS AND CONDITIONS OF SALE All purchases are subject to Entegris’ Terms and Conditions of Sale. To view and print this information, visit entegris.com and select the Terms & Conditions link in the footer.
Need help?
Do you have a question about the PrimeLock and is the answer not in the manual?
Questions and answers