Table of Contents
Advertisement
Quick Links
Advertisement
Table of Contents

Summary of Contents for Memak STELLA COMBINE
- Page 1 INSTALLATION AND USER MANUAL FOR STELLA COMBINE OVEN...
- Page 2 memak.com...
- Page 3 STELLA COMBINE FIRIN KURULUM VE KULLANIM KILAVUZU INSTALLATION AND USER MANUAL FOR STELLA COMBINE OVEN...
-
Page 4: Table Of Contents
Conditions Not to Use the Oven Conditions Required for Correct Machine Operation Pre-operation Control Areas Initial Operation TOUCH CONTROL PANEL SIGNALS Device Definition Manual Cooking Stone Base Yeast Chamber Interface Definition Recipe Interface Definition Recipe Creating Display Language Option Failure Reporting Phase Sequence Failure memak.com... - Page 5 Steam Injection Oven Glass Replacement Itermediate Level (Stone Base) Glass Replacement Yeast Chamber Glass Replacement Door Seal Replacement Door Mechanism Lubricating Lamp Replacement Door Lock Replacement PERIODIC MAINTENANCE CALENDAR POSSIBLE FAILURES AND CAUSES INSTALLATION AND USER MANUAL FOR STELLA COMBINE OVEN...
-
Page 6: Introduction
All figures given in this manual are exemplary. • It may show differences according to the current device. The company reserves its rights for technical modifications for development! ©2018 MEMAK TECHNICAL SERVICE. All Rights Reserved. Transfer of product-specific information to third parties is prohibited. memak.com... -
Page 7: Warning Signs Used
High Voltage Attention, Death Risk Door, glass and its vicinity reach high temperatures when High Temperature the oven is operating. Operating Do not perform maintenance or repair work on moving Mechanical Parts parts. INSTALLATION AND USER MANUAL FOR STELLA COMBINE OVEN... -
Page 8: Warranty
Failure to comply with the rules specified in the instructions for use. • MemakMakine cannot be held responsible for failures or problems caused by the use of the oven by a person who does not know how to use the oven. memak.com... -
Page 9: Manufacturer Company
+90 332 345 36 26 Web: www.memak.com E-Mail: memak@memak.com Product Information LABEL INFORMATION Manufacturer company information Serial number Machine type CE mark Machine weight Operating voltage Machine model Operating frequency Production date Operating power INSTALLATION AND USER MANUAL FOR STELLA COMBINE OVEN... -
Page 10: About The Machine
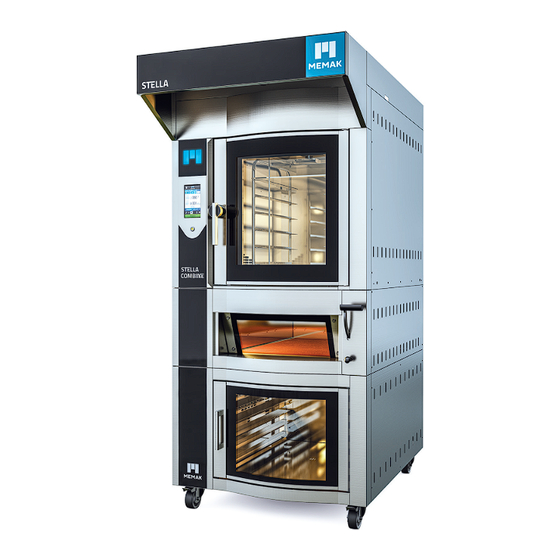
About the Machine Our Combine series ovens manufactured by MEMAK MAKİNA are electric convection rotary type ovens used in restaurants, hotels and patisseries. Compact designed for narrow use areas, prescription recording and easy operation with touch control panel. It provides easy cleaning with internal evenings. -
Page 11: Manufacturing Site Design
Machine’s electrical components should be closed to prevent dust formation. Water should be prevented from entering electrical panels. 20. Machine parts such as fan, motor should be accessibly mounted. Motor and other auxiliary equipment should be placed not to touch the floor. INSTALLATION AND USER MANUAL FOR STELLA COMBINE OVEN... -
Page 12: Product Dimensions
Machine’s dimensions are as follows (Figure 1) COMBİNE 1291 DEPTH ( A ) mm / inc 1560 (A1) mm / inc WIDTH ( B ) mm / inc ( H ) mm / inc HEIGHT (H1) mm / inc (H2) mm / inc 1150 memak.com... -
Page 13: Product Technical Detail
Tray capacity for 60*40 size Electricity Power Weight STONE BASE ROOM MODEL TYPE COMBİNE Ceiling capacity for 60*40 size Cooking area Layer dimensions 60*80 Layer entry dimensions 60*21 External dimensions 100*130*33 Electrical power Weight INSTALLATION AND USER MANUAL FOR STELLA COMBINE OVEN... -
Page 14: Product Commissioning
Dispose of the packaging material in accordance with the applicable legal regulations when the machine is fully installed. • Store the materials used for lifting the machine in a suitable place for future use. Unpacking procedure is illustrated in (Figure 2). memak.com... - Page 15 DO NOT EVER ACCEPT PRODUCTS WITH DAMAGED, CRUSHED, STRIPED PACKAGE. ALSO IF SUCH EVENT OCCURS PLEASE TAKE A PHOTOGRAPH AND WRITE A BRIEF NOTE BRIEFING THE SITUATION AND NOTIFY TO THE MANUFACTURER COMPANY. INSTALLATION AND USER MANUAL FOR STELLA COMBINE OVEN...
-
Page 16: Rules On Stockpiling The Machine
The vehicle to be transported must have the required lifting capacity. (Please see machine’s technical information chart.). Furthermore, vehicle’s minimum loading areas should be as follows. Lifting device used to raise the machine; should have sufficient lifting capacity and fork length. memak.com... -
Page 17: General Rules For Lifting And Transporting The Machine
When the machine is loaded and moving, do not climb over or pass under. • Make sure that the lifting capacity of the machine is sufficient for the lifting and transport of the machine. Machine lifting operation is illustrated under (figure 3) and (figure 4). INSTALLATION AND USER MANUAL FOR STELLA COMBINE OVEN... - Page 18 (Figure3) (Figure4) WARNING: Take necessary cautions during transport! Start with the lifting procedures after ensuring that hangers are fully installed. memak.com...
- Page 19 The packaging structure of the product is made according to the world and European norms. It is made ready for the shipping procedure by placing into cases packed with nylon and design in compliance with standards by compressing with nylon with bubble pack. INSTALLATION AND USER MANUAL FOR STELLA COMBINE OVEN...
-
Page 20: Product Installation
If there is no previous layout of the furnaces, the oven is placed properly. IMPORTANT: Between the oven and the wall should be at least 500 mm (half meter). (figure 7) (Figure7) NOTE: The machine is taken on the scale after its distances have been adjusted. (Figure 8) memak.com... -
Page 21: Fresh Water Installation
If necessary, install a manually controlled valve in order to shut down the system suddenly. After using the oven on the first day, check whether the filters are dirty or not. Fresh water installation connection form shall conform to (Figure 9). (Figure9) INSTALLATION AND USER MANUAL FOR STELLA COMBINE OVEN... -
Page 22: Waste Water Installation
Waste Water Installation Waste water installation form shall conform to (Figure 10). (Figure10) memak.com... -
Page 23: Electrical Connection Rules
• Make sure that the power supply is disconnected at the moment of the electrical connection. • Cable locations are determined and these areas are covered to prevent damage to the contact. INSTALLATION AND USER MANUAL FOR STELLA COMBINE OVEN... -
Page 24: Operating The Oven
Operation in the event of an explosion or environmental hazard • Use in a fire-free environment • Use in unprotected areas • Use when the electromagnetic interlock is disabled • Without safety and protection equipment • The use of specified values and specifications is prohibited. • memak.com... -
Page 25: Conditions Required For Correct Machine Operation
Take precautions to prevent leaks and blockages in the fuel hoses in natural gas operated Stellas. • Take precautions to prevent blockages in the installation hoses. (Can prevent clogging with lime solvent. INSTALLATION AND USER MANUAL FOR STELLA COMBINE OVEN... -
Page 26: Initial Operation
Keep the oven area and the inside clean and do not work in mass. • Check the oven cooking compartments for debris. • Press the oven switch. • Turn off the water connection valve of the oven. • Disconnect the oven from the mains. memak.com... -
Page 27: Touch Control Panel Signals
TOUCH CONTROL PANEL SIGNALS INSTALLATION AND USER MANUAL FOR STELLA COMBINE OVEN... -
Page 28: Device Definition
Thanks to these windows, errors can be easily detected and can be removed with the help of relevant personnel. • Since the oven controller is designed as a single piece, which is easy to install on the panel, the assembly time is minimized. memak.com... -
Page 29: Manual Cooking
However, it is not allowed to change the values on the screen this time. Because these values are special values of the recipe, they can only be changed with the “recipe edit” command. INSTALLATION AND USER MANUAL FOR STELLA COMBINE OVEN... - Page 30 If these buttons are active during preheating, it can be set in the Service Menu Cooker tab. Yeast chamber button. It allows shifting to yeast chamber control display. Settings button. Used to change the control settings of the oven. memak.com...
- Page 31 It is the button that starts the cooking process according to the set values. If the cooking has not started yet, it will be restarted. If it is started, it will be stopped, so it will resume. It is used to stop the cooking procedure. INSTALLATION AND USER MANUAL FOR STELLA COMBINE OVEN...
-
Page 32: Stone Base
“Manual Cooking”. The same screen will appear when any recipe is selected from the recipe screen. However, it is not allowed to change the values on the screen this time. Because these values are special values of the recipe, they can only be changed with the “recipe edit” command. memak.com... - Page 33 It is the symbol button of the heating elements at the bottom of the oven. Indicates that the resistances shown on the left are passive. Figure on the right shows that the resistors are active. INSTALLATION AND USER MANUAL FOR STELLA COMBINE OVEN...
-
Page 34: Yeast Chamber Interface Definition
The time set value and active time value is indicated in the middle. In the lower part, humidity set-point and active humidity value are specified. The bottom temperature and humidity button allows you to activate or deactivate heating and humidification. memak.com... - Page 35 The humidity button activates the humidification when it is colored. Humidification is disabled when the button is off. It is the button that starts the fermentation process according to the set values. Used to stop fermentation. INSTALLATION AND USER MANUAL FOR STELLA COMBINE OVEN...
-
Page 36: Recipe Interface Definition
Recipes can be accessed here and the description can be deleted, or set values can be changed. After selecting the recipe, click on the tick () button at the bottom of the screen and the set values of the relevant recipe will display the cooking screen. memak.com... - Page 37 Used to return to the manual cooking screen (main screen). Back button is used to return to the main screen (manual cooking screen) from the recipe screen. Clock showing time. Indicates clock data for information purposes. INSTALLATION AND USER MANUAL FOR STELLA COMBINE OVEN...
-
Page 38: Recipe Creating Display
Consists of 4 separate set values. These are temperature, time, steam and valve values. Each value has steppes. A maximum of 5 steps can be entered. The set step and set values can be registered with the ( ) button. memak.com... - Page 39 Recipe having entered set value with the approval button is recorded to the memory. Back button is used to return to the recipe list screen. INSTALLATION AND USER MANUAL FOR STELLA COMBINE OVEN...
-
Page 40: Language Option
Language Option When this button is Pressed on Manual Cooking Display A Display ( ) Like the Following shall be displayed on the Screen. (Figure6) memak.com... -
Page 41: Failure Reporting
Failure Notices Phase sequence failure (Figure7) THIS FAILURE NOTICE INDICATES THAT THE MACHINE’S ELECTRICAL CONNECTION IS REVERSE. IT IS NEEDED TO SHIFT DIRECTIONS OF THE PHASES IN THE MAIN SUPPLY FUSE. INSTALLATION AND USER MANUAL FOR STELLA COMBINE OVEN... -
Page 42: Phase Thermal Failure
Phase Thermal Failure (Figure8) IN THIS FAILURE NOTICE, MOTOR PROTECTION THERMAL BLOWS OUT TO PROTECT MOTOR DURING MOTOR OVERLOAD AND FAILURE. IT IS NEEDED TO FIX AND CORRECT THE FAILURE. memak.com... -
Page 43: Fuse Failure
Fuse Failure (Figure9) THIS FAILURE NOTICE GIVES WARNING WHEN THE PHASE N THE MAINS FALCUTATES. PHASES IN THE MAINS SHOULD BE CHECKED TO CORRECT THIS FAILURE. INSTALLATION AND USER MANUAL FOR STELLA COMBINE OVEN... -
Page 44: Settings Window
Cooking complete alarm is the field that allows us to set whether or not the alarm buzzers when cooking is complete. The cooking-ready signal is the field that allows us to adjust the duration of the signal to be given when preheating is complete. memak.com... -
Page 45: Settings> Oven Window
Maximum steam value indicates how many seconds the maximum steam time can be. There are parameters related to the operation of the oven under Settings> Oven tab. INSTALLATION AND USER MANUAL FOR STELLA COMBINE OVEN... -
Page 46: Settings> Cooking Window
Right turn time indicates how many seconds the cooking tray will turn left. Dwell time indicates how many seconds to wait while changing direction during periodic rotation. There are parameters related to the operation of the oven under Settings> Oven tab. memak.com... -
Page 47: Settings> Power Window
Only in the main screen, the panel switches to this mode. Display does not turn off when you are on other screens. There are parameters related to the oven’s operation during cooking under Settings> Power tab. INSTALLATION AND USER MANUAL FOR STELLA COMBINE OVEN... -
Page 48: Settings> Aspirator Window
Aspirator fan setting is used to activate the aspirator fan. Aspirator fan time indicates how many seconds the aspirator fan will run when the oven door is opened. There are parameters related to the operation of the aspirator fan of the oven under Settings> Aspirator tab. memak.com... -
Page 49: Settings> Yeast Window
There are parameters related to the operation of the yeast chamber under Settings> Yeast tab. INSTALLATION AND USER MANUAL FOR STELLA COMBINE OVEN... -
Page 50: Safety
320 ° C when it is changed due to any faults. (Connection place; is connected to T and TI terminals in the front panel). (Location: in 3rd layer from bottom, next to the pool drain in the layer). memak.com... -
Page 51: Personnel Protective Equipment
• Manufacturer is not liable for work accidents or damage to the machine caused by failure to observe the safety and warning signs or the removal of these plates from the machine. INSTALLATION AND USER MANUAL FOR STELLA COMBINE OVEN ... -
Page 52: General Cleaning
Areas requiring cleaning are listed below. Food Areas Oven trays, oven stone, oven cells and yeast chamber. Spray Areas Glass cover part and accessories Out of Food Area Any area outside the cooking chamber where there is no contact with the product. memak.com... -
Page 53: Water Installation Cleaning
When the door is opened, make sure that the basket direction is at the front. • The sheet on the bottom of the basket is removed from the bed by lifting the pin in the middle of the piece. (Figure 2) INSTALLATION AND USER MANUAL FOR STELLA COMBINE OVEN... - Page 54 (Figure3) • By lifting the basket up slightly, the fixing is removed from the segment in the sheet piece and the basket is pulled out forwards. (Figure 3) (Figure 4) (Figure4) memak.com...
-
Page 55: Periodic Cleaning Calendar
Clean door glasses. Use hot water or any glass cleaner. Clean electronic display part. Clean button panel with a neutral detergent. EVERY MONTH Check the steam function. Use anti-scale for water installation connections. INSTALLATION AND USER MANUAL FOR STELLA COMBINE OVEN... -
Page 56: Maintenance And Setting
Routine Maintenance Lubrication and cleaning are routine maintenance procedures. Anyone with a basic knowledge of lubrication and cleaning can do it with ease. Extraordinary Maintenance Extraordinary maintenance is performed by the manufacturer’s technical service personnel. memak.com... -
Page 57: Routine Procedures
Use compressed air to clean and remove the filter Reinstall the filter and replace the seal if damaged Steam Injection Treatment water is recommended. To prevent calcification of the connection installations. Healthy vaporization is carried out. INSTALLATION AND USER MANUAL FOR STELLA COMBINE OVEN... -
Page 58: Oven Glass Replacement
Oven Glass Replacement (Figure1) • Open the oven’s door. • Remove the 3 pieces of bolts on the cover and remove the sheet piece. • Glass is supported with one hand and the glass is removed. (Figure 1) (Figure 2) (Figure2) memak.com... -
Page 59: Itermediate Level (Stone Base) Glass Replacement
Open the closed glass in horizontal position. • 4 special bolts on glass are removed by hand or tool. (Fig. 3) (Figure4) • The glass is pulled forward and removed. (Figure 4) INSTALLATION AND USER MANUAL FOR STELLA COMBINE OVEN... -
Page 60: Yeast Chamber Glass Replacement
(Figure5) • Open the yeast chamber’s door. • Remove the 3 pieces of bolts on the cover and remove the sheet piece. • Glass is supported with one hand and the glass is removed. (Figure 5) (Figure 6) (Figure6) memak.com... -
Page 61: Door Seal Replacement
As shown in the figure, it is removed from the seal groove by hanging from the corner. (Figure 7) (Figure8) • Seal inserted to the Groove by pressing as shown in the drawing. (Figure 8) INSTALLATION AND USER MANUAL FOR STELLA COMBINE OVEN... -
Page 62: Door Mechanism Lubricating
Machine Mechanism Lubricating (Figure9) (Figure10) memak.com... -
Page 63: Lamp Replacement
When replacing the lamp, remove the glass cover inside the oven. • Remove the socket from the back of the lamp and remove the lamp from the outside. • When installing the new one, the process is carried out internally. (Figure 12) INSTALLATION AND USER MANUAL FOR STELLA COMBINE OVEN... -
Page 64: Door Lock Replacement
Door Lock Replacement (Figure13) • Open oven’s door to reach the lock point. (Figure 13) • Bolts in the lock point of the oven are removed with the appropriate wrench. (Figure 14) • (Figure14) memak.com... -
Page 65: Periodic Maintenance Calendar
If the period set on the control Increase steam duration gradually until panel is short requested condition is met. If solenoid valve does not function Replace solenoid valve. correctly. Steam discharge valve open. Turn steam discharge valve off. INSTALLATION AND USER MANUAL FOR STELLA COMBINE OVEN... - Page 66 Check socket electrical connection. lighting is not correctly made. functional Control panel failure Repair the control panel Zaman içerisinde, makinede oluşabilecek arızalardan dolayı makinenin performansında düşme görülebilir. Bu arızaların makineye zarar vermemesi için bir an önce tamir edilmesi gerekmektedir. memak.com...
- Page 67 INSTALLATION AND USER MANUAL FOR STELLA COMBINE OVEN...
- Page 68 memak.com...
Need help?
Do you have a question about the STELLA COMBINE and is the answer not in the manual?
Questions and answers