
Related Manuals for alphatronics AlphaVision ML


Summary of Contents for alphatronics AlphaVision ML
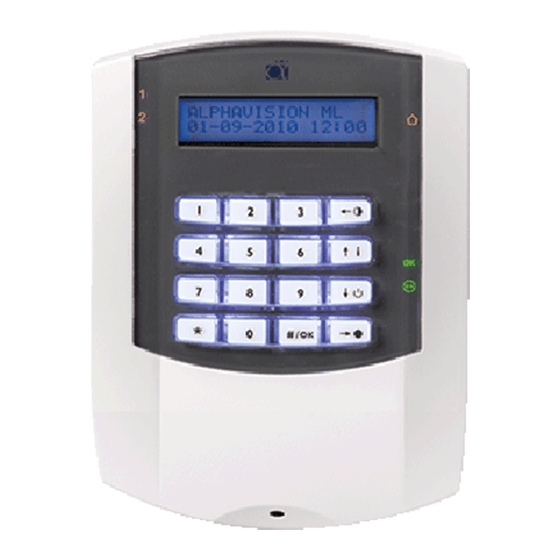
- Page 1 Service Manual for the installer Alphatronics b.v. – Watergoorweg 71 – 3861 MA Nijkerk – Tel: +31 33 2459944 – Fax: +31 33 2453149 www.alphatronics.eu...
-
Page 2: Table Of Contents
Applying power to the AlphaVision ML ..................14 Connections on the AlphaVision ML main board ................16 Explanation about jumpers, LED’s and fuses on the AlphaVision ML ..........17 Connecting the AlphaVision ML to a LAN connection ..............18 Connecting the AlphaVision ML to a analog (PSTN) telephone line ..........18 Connecting hard-wired inputs to the AlphaVision ML control panel .......... - Page 3 Proximity Reader ..........................38 Arming- and disarming via the external Proximity Reader............. 39 Access control via the external Proximity Reader ................39 Acoustic signals of the AlphaVision ML ..................39 PROGRAMMING ............................ 40 USER MENU ............................41 Date and Time ..........................42 Time switch (V3.20 and above) ......................
- Page 4 Private telephone reporting ......................80 Private telephone number ......................80 Protocol............................81 Dial attempts ..........................81 Stop dial sequence for private reporting (v2.00 and higher) ............81 Alarm messages ..........................81 Central station messages ........................ 81 Installer manual AlphaVision ML Rev. 3.60 01-01-2015...
- Page 5 Download code ..........................94 SPEECH RECORDING ..........................94 REPORTING TO PRIVATE (MOBILE) TELEPHONE ................94 MAINTENANCE ............................95 View open zones ..........................96 Zone walktest ..........................96 View zones ............................97 Field strength explanation ......................97 Installer manual AlphaVision ML Rev. 3.60 01-01-2015...
- Page 6 INSTALLATION CODE ........................98 RESET INSTALLER AND SUPERVISOR CODE ..................99 DIAGNOSE TOOL ..........................99 EVENT LOG ............................99 Firmware upgrade (bios flash) of the AlphaVision ML ..............100 DEFAULT PROGRAMMING ALPHAVISION ML ..................105 Codes ............................105 Installation menu .......................... 105 APPENDIX A: DETECTOR DEPLOYMENT ..................
-
Page 7: Introduction
014), the security grade and the environmental class is mentioned. For the synthetic casing of the AlphaVision ML the label is placed on the inside of the lid. For the keypad the label is placed on the inside of the rear shell. For the metal casing of the AlphaVision ML and the I/O module the label is placed on the rear inside of the cabinet. - Page 8 LCD/PROX keypads to be able to enroll proximity tag’s (may not be used in grade 2 installations). Keyfobs: Optional 8 pieces wireless keyfobs for arming/disarming the AlphaVision ML if it is equipped with a wireless expansion module.
- Page 9 Identification: On the inside of the casing a label is applied so that the device can be identified. The label contains the name of the manufacturer, the type number, a batch number (starting with a capital B, for example B014 for batch number 014), the security grade and environmental class. Installer manual AlphaVision ML Rev. 3.60 01-01-2015...
- Page 10 The value of the fuse in the 230V terminal block is S1.6A L250V (1.6 A slow 5x20mm). The value of the fuse in the red battery wire is F5A 250V (5A fast 6x32mm). The AlphaVision ML, I/O module and associated boards apply with the following European standards: EMC omission...
- Page 11 15mA. For extra details, see the chapter on power consumption and cabling . The main board of the AlphaVision ML is equipped with an integrated IP dialer, 12 hard-wired inputs (zones 1 to 12) and 4 outputs. The four outputs are composed of two potential free relay contacts and two open collector outputs.
-
Page 12: General Guidelines
The RS-485 bus of the AlphaVision ML is a 4-wire bus. A 4-core FTP cable is always composed of two pairs (for example: red + blue twisted together and green + yellow twisted together), make sure that a pair (for example red and blue) is used for power (+12 V and 0V) and the other pair (for example yellow and green) for data communication (A and B). -
Page 13: Guidelines Grade 2
Consult regularly the Alphatronics website for the latest tips and instructions and any additional guidance on grade 2. These can be found on www.alphatronics.nl / security installers under "Service and Support”. Installer manual AlphaVision ML Rev. -
Page 14: Installation
Attach the unit firmly against the surface using screws. Applying power to the AlphaVision ML The AlphaVision ML comes with a switching power supply 230VAC/16VDC, 1,9A and a NiMH batterypack (min. 1600mAh, for grade 2 a 2700mAh batterypack is required) . - Page 15 To calculate the total power consumption, see chapter "Battery power and consumption". When applying power to the AlphaVision ML a tamper alarm will occur if the cabinet is opened. This can be prevented by setting dipswitch 4 to ON or pressing the tamper switch and holding it closed when powering up.
-
Page 16: Connections On The Alphavision Ml Main Board
Connections on the AlphaVision ML main board Alarm output AL (Potential free contact NO/NC, 12 hardwired selectable by jumpers below) RS-485 bus inputs EOL OC3 (Tamper switch OC4 (200mA) collector) (Alphn) (Alphn) RS-232 connector Connectors for PSTN plug-on (Alphn) Tamper switch... -
Page 17: Explanation About Jumpers, Led's And Fuses On The Alphavision Ml
Explanation about jumpers, LED’s and fuses on the AlphaVision ML The AlphaVision ML board is equipped with several jumpers, LED’s and fuses. In the drawing below this is explained. F5 polyfuse J43: Flash / Run J24 and J25, RS-LAN F3 polyfuse... -
Page 18: Connecting The Alphavision Ml To A Lan Connection
The AlphaVision ML is equipped with an integrated IP dialer for alarm reporting to a central station. Connect a network cable between the LAN connector of the AlphaVision ML print and a free network (LAN) port on the modem / router of the ISP (Internet Service Provider). Make sure the LAN connection is made directly on the modem /router of the ISP and not on a switch somewhere in the network. -
Page 19: Inputs With Eol
Connecting outputs on the AlphaVision ML The AlphaVision ML control panel has four outputs. Outputs 1 and 2 (terminals AL and C) are floating relay contacts (max. 30VDC/750mA), outputs 3 and 4 (terminals OC3 and OC4) are open collector outputs (max. -
Page 20: Ls Output
Speech plug-on board The AlphaVision ML can be expanded with a speech plug-on board. The speech board is used for reporting (only PSTN and GSM) voice messages to private telephone numbers, for vocal support of the users and for 2-way voice connections with the AlphaVision ML. -
Page 21: Keypads For The Alphavision Ml
1.7 and above two extra (5 and 6) dipswitches have been added, these dipswitchs have no function in combination with the AlphaVision ML panel. Each keypad should be set to its own address. By default, all keypads are factory default set to address 1. See Appendix E “Dipswitch settings” for the correct address. -
Page 22: Connecting Led Keypads To The Alphavision Ml
Connecting LED keypads to the AlphaVision ML The AlphaVision ML can also be equipped with a LED keypad, currently there are two brands of LED keypads that are supported: the Key-7 SA840-AXX and the Roger PRA80XX. Both keypads can work as a normal “LED keypad”... -
Page 23: Connecting An External Proximity Reader To The Alphavision Ml
Connecting an external Proximity Reader to the AlphaVision ML The AlphaVision ML can be extended with 1 external proximity reader. Using the proximity reader the system can be totally (TOTAL) armed or disarmed and also provide simple access control for personnel. -
Page 24: Changing Address Settings Of The Proximity Reader
The AlphaVision Input + 8 o.c. module has 8 hard-wired INPUTS and 8 open collector (transistor) OUTPUTS. The open collector outputs 1 through 4 are linked to the 4 outputs on the AlphaVision ML control panel. Activation of the open collector outputs 1 through 4 are synchronized with outputs AL1 to OC4 on the AlphaVision ML control panel. -
Page 25: Connecting An Alphavision I/O Module Including A Power Supply
Input + 8 o.c. module, output AL2 on AlphaVision ML runs concurrently with output 2 on the Input + 8 o.c. module, output OC3 on the AlphaVision ML runs concurrently with output 3 of the Input + 8 o.c. module and output OC4 on the AlphaVision ML runs concurrently with output 4 of the Input + 8 o.c. - Page 26 The I/O module also has a speaker output (LS), where a 4-8 ohm speaker can be connected. The speaker output on the I/O module is driven synchronously with the LS output on the AlphaVision ML main board. Depending on the programming in the AlphaVision ML an alarm will activate the LS output of the I/O module.
-
Page 27: Wireless Expansion Module (Wireless Detectors And Keyfobs)
Besides wireless detectors you can also enroll up to 8 keyfob transmitters (Secure Code) or keypads (MCM- 140) to be able to arm and disarm the AlphaVision ML. The Alpha Vision ML wireless expansion module has no address setting required and is powered directly from the main board. -
Page 28: Pstn Expansion
For alarm transmission via GSM the GSM/GPRS module must be equipped with a SIM card. It is strongly advised not to use Prepaid cards as the AlphaVision ML cannot detect that the calling credit has expired. The GSM signal strength is displayed on the top line of the LCD display on the far right hand side. The strength is indicated with a value between 1 and 9, where 9 is optimal and 1 is very poor. -
Page 29: Replacing An Alphavision Ng For A Alphavision Ml
AlphaVision NG control panel. Remove the AlphaVision NG pcb board and install the AlphaVision ML pcb board in the same location in the cabinet. Two of the four mounting holes on the ML pcb board deviate slightly from the NG pcb board. -
Page 30: Power Consumption And Battery Calculations
POWER CONSUMPTION AND BATTERY CALCULATIONS Power consumption For larger AlphaVision ML installations it is extremely important to calculate the total power consumption to ensure that the security system continues working during a mains failure. Furthermore it is important to know if the capacity of the batteries is sufficient to keep the security system running for the prescribed number of hours during a mains failure. -
Page 31: Example Calculation For Minimal Battery Capacity
Example 2 AlphaVision ML control panel (133mA) with 8 detectors (8 * 17mA), 2 LCD keypads (2 * 15mA), 1 Input + 8 o.c. module (58mA) with 4 magnetic contacts and 4 detectors (4 * 17mA) and 1 wireless expansion module (15mA): total power consumption is 440mA in idle state. -
Page 32: Maximum Distance Between An Expansion Module And Its Power Supply
100 meters. Keypads The AlphaVision ML LCD keypad has a current consumption of 15mA in idle state. This is with the LCD backlight + LEDs programmed as 'Off', see system programming. When using the recommended cable (art.nr. 008653), this is equivalent to a voltage drop of 0.12 V per 100m. On an LCD keypad in the worst case situation (no mains supply and minimal battery voltage) the incoming supply voltage must not be below 8V. - Page 33 1200m. PSTN plug-on dialer The AlphaVision ML can be extended with a PSTN plug-on dialer that is powered directly from the main board. The power consumption of the PSTN dialer is approx. 10mA. Installer manual AlphaVision ML Rev.
-
Page 34: Battery Test And Mains Failure
"Information present" message must be read and erased twice. Once the first message is read and erased, the AlphaVision ML will send a command to the I/O module to perform an automatic battery test. If the battery voltage is sufficient, the second time reading and deleting the message will ensure the message does not appear again. -
Page 35: Operating The Alphavision Ml
/ battery pack on the main board of the AlphaVision ML. The AlphaVision ML main board contains a boxed header (J32). The boxed header is an RS-232 port and can be found directly under the RS-485 terminals on the main board. Connect the programming cable (art.nr. -
Page 36: Incorrect Or Incomplete Code (V2.00 And Above)
Incorrect or incomplete code (V2.00 and above) Conforms European standards the AlphaVision ML contains a security mechanism for entering an incorrect or incomplete user code. If an incorrect user code is entered ten (10) times the keypad will be locked for 90 seconds. -
Page 37: Description Of The Led's On The Keypad
If the LED illuminates constantly, the voltage (230V) is present If the LED flashes, there is a mains failure. Mains failure will also be shown by the red information (i) LED flashing and the text "Information Available" on the LCD display. Installer manual AlphaVision ML Rev. 3.60 01-01-2015... -
Page 38: Lcd/Proximity Keypad
“Information present” message will reappear. LCD/Proximity keypad If the AlphaVision ML is installed with a LCD/PROX keypad then the system can be armed and disarmed with a proximity tag. Up to 90 proximity tag’s can be enrolled: 1 supervisor tag and 89 user tag’s. -
Page 39: Arming- And Disarming Via The External Proximity Reader
(blue wire) of the proximity reader is activated for 3 seconds to open the door. The external proximity reader is equipped with a 2-colour LED that serves as an optical aid during arming and disarming the AlphaVision ML system. The following options are present:... -
Page 40: Programming
PROGRAMMING The AlphaVision ML is entirely freely programmable via an LCD or LCD/PROX keypad. The control panel can also be programmed locally/remotely using a PC/laptop with the AlphaTool software. The Alpha Vision ML has a user friendly menu structure. The four buttons on the right hand side of the keypad serve as navigator keys <... -
Page 41: User Menu
CHANGE VOLUME: LOW LEVEL STORED NORMAL LEVEL LOUD LEVEL SPEECH OPTION SPEECH FUNCTION: STORED DOORBELL OPTION DOORBELL FUNCTION: STORED TO PREV. MENU ? OPEN ZONES NO OPEN ZONES Go to the next screen Installer manual AlphaVision ML Rev. 3.60 01-01-2015... -
Page 42: Date And Time
NTP time server function is active or not active. In the LAN / GPRS dialer programming under submenu 'Various LAN / GPRS Settings the settings for up to two NTP servers can be programmed. Installer manual AlphaVision ML Rev. 3.60 01-01-2015... -
Page 43: Time Switch (V3.20 And Above)
P18: 25 S12.. N The AlphaVision ML will disarm section 1 and 2 every weekday at 08:30. At 18:25 on every weekday a pre- arming signal will be heard through the speaker, the pre-arming signal will be heard every minute (18:26 , 18:27 , etc. - Page 44 When presenting a level 5 tag to the external proximity reader the sections that are assigned to the user code (tag) must be disarmed before the o.c. output of the proximity reader will be activated. Level 6 is not present in the ML. Installer manual AlphaVision ML Rev. 3.60 01-01-2015...
-
Page 45: Guard Code
Tuesday, Wednesday, Thursday, Friday, Saturday. Sections For each user it should be determined which section (s) the user can arm and disarm. The AlphaVision ML has up to four sections which are designated by the numbers 1 through 4. After all the options above have been programmed, press the button to jump to the user name field. -
Page 46: Telephone Number
"w" program in front of the telephone number if the control panel is connected to a telephone exchange system and an outside line must first be chosen first. The AlphaVision ML will wait 2 seconds and call whether a dial tone is detected or not (example: 0w0332459944). -
Page 47: Open Zones
Maintenance In the user menu of the AlphaVision ML there is also a "Maintenance" submenu present which is both accessible for the installer through the installer menu as the supervisor through the user menu. For the supervisor only specific features are accessible. In order to gain access to all features the installer must access the "MAINTENANCE"... -
Page 48: View Open Zones
During the walk test the buzzer of the keypad will sound four long tones to indicate that the zone was activated. This is an acoustic aid for the installer. If the AlphaVision ML has been expanded with a plug-on speech board and a keypad with integrated speakers and a microphone, an external 4-8 ohm speaker of a speaker then the voice prompt ‘Zone open’... -
Page 49: Bypassing
If the error has not been solved, a new ‘Information present’ message will appear. When the AlphaVision ML is expanded with an AlphaVision I/O module with power supply (art.nr. 004312) and a power failure or low battery event occurs for the AlphaVision I/O module the information present message must be read and deleted twice. -
Page 50: Installer Menu
To open the cabinet of the control panel without causing a tamper alarm and thus activating the connected sirens or flashlights, please enter the installer menu first before opening the cabinet. ►! The installer menu will automatically be aborted if no key is pressed for 60 minutes Installer manual AlphaVision ML Rev. 3.60 01-01-2015... -
Page 51: Inputs Menu
When the correct zone number is shown in the display, press <OK> to select it and jump to the following programming options: Zone name Zone type Zone options Zone characteristics Installer manual AlphaVision ML Rev. 3.60 01-01-2015... - Page 52 CHOOSE OPTION: NOT ACTIVE END OF LINE (N.C) NORMALLY CLOSED SAVED END OF LINE (N.O.) TO PREV. MENU ? NORMALLY OPEN EOL NC ANTIMASK EOL NO ANTIMASK WIRELESS KNX INPUT 1 KNX INPUT 16 Installer manual AlphaVision ML Rev. 3.60 01-01-2015...
-
Page 53: Zone Type
Zone name For each zone, a zone name (text) needs to be defined. The AlphaVision ML offers a standard library of 27 pre-defined zone names which can be used for one or more zones. Next to standard zone names it is also possible to program unique zone names (with a unique speech text if required) to each of the 100 zones. - Page 54 A 24-hour zone is always triggered, regardless if the control panel is armed or not. The AlphaVision ML control panel has a 24H silent and a 24H loud zone type. Only with the 24H loud zone type the outputs programmed to alarm will be activated.
-
Page 55: Zone Options
A keyswitch (fixed or latched) input can be used to arm/disarm the AlphaVision ML control panel with an external key switch or device. Any of the 44 inputs can be programmed as a keyswitch. The keyswitch input works as a fixed or latched principal, which means that the sections programmed to the zone defined as keyswitch are armed when the input is activated and disarmed when the zone is deactivated. -
Page 56: Bypass
From software version 3.50 and above it is also possible to generate a doorbell signal through the loudspeaker (LS) output on a I/O module wirh power supply (art.code 004312). If the AlphaVision ML is equipped with a speech plug-on board and this is also connected to a keypad with integrated speakers (art.nr. -
Page 57: Enroll Wireless Zones
Enroll wireless zones Wireless detectors are enrolled through the menu "Enroll wir. zones". To enroll wireless detectors the AlphaVision ML must be equipped with a wireless expansion module. First select the desired zone number using the keys or just typing in the 2-digit zone number. -
Page 58: Enroll Wirelesss Keyfobs
“WIR. KEYFOB ERASED”. Keyfob name In the AlphaVision ML it is possible to give each keyfob or commander a username. When arming / disarming the system with the commander or keyfob the programmed name will be stored in the historical log. -
Page 59: Wireless Options
Default this option is set to solely tamper. In existing systems it may be helpful to enroll new or existing components by means of the tamper signal. In this way other wireless components cannot influence the enrolling procedure. Installer manual AlphaVision ML Rev. 3.60 01-01-2015... -
Page 60: Output Menu
BUZZER SECTION 8 PARTIALLY COMPLETELY FIRE RESET SAVED TRIGGER OUTPUT SECTION 1 ARM/DI Go to next screen SECTION 8 ARM/DI SECTION 1 ALARM SECTION 8 ALARM FIRE TESTMODE FOLLOW INPUT 1 FOLLOW INPUT 100 Installer manual AlphaVision ML Rev. 3.60 01-01-2015... -
Page 61: Ls Output
SAVED KNX OUTPUT TEST KNX OUT 1 ON The AlphaVision ML main board has 2 potential free relay contacts (AL1 en AL2), 2 open collector outputs (OC.3 en OC.4) and a speaker output (LS). LS output The Alpha Vision ML main board is equipped with a loudspeaker (LS) output where a 4-8 ohm speaker can be connected to. -
Page 62: Entry/Exit Buzzer
The doorbell function can be switched on and off by the user via the user menu. Entry/Exit buzzer The AlphaVision ML LCD and LCD/PROX keypads have an integrated buzzer. The buzzer can be activated as an Entry/Exit buzzer for delayed zones and can be programmed per keypad. This makes it possible to activate the buzzer of some keypads and some not (for example in the bedroom). -
Page 63: Open Collector Output 3 And 4
The available programming options are identical to the options for outputs 1 to 4. The activation for outputs 1-4 on an expansion module run in parallel with the outputs 1 to 4 on the AlphaVision ML mainboard. KNX outputs (V3.50 and above) A total of 50 virtual KNX outputs can be programmed. -
Page 64: Activate Trigger Output Via A Pin-Code, Keyfob Or (Mobile) Phone
(mobile) phone to activate/deactivate the output. When using this option the AlphaVision ML must be equipped with a speech plug-on board (art.code 004162). The activation time of the trigger output "depends on the time programmed in the submenu 'Timers'. There are two options available: Installer manual AlphaVision ML Rev. 3.60 01-01-2015... - Page 65 If the ‘trigger output’ is activated by a (mobile) phone remotely, after the user has established a connection with the AlphaVision ML he/she can use DTMF key 7 or 8 to activate the ‘trigger output’ for about 3 seconds.
- Page 66 AUX BUTTON CHOOSE AUX BUT.: STATUS ARM WITHOUT DEL. SAVED OUTPUT LCD + LEDS ACTIVATION BY: ALWAYS ON SAVED OFF AFTER 20 SEC. ARM/DIS. IN HIST. ARM/DISARM HIST: SAVED Go to next screen Installer manual AlphaVision ML Rev. 3.60 01-01-2015...
- Page 67 EOL RESISTOR EOL RESISTOR: SAVED 1K – 1K – 12K TOTAL/PARTIAL ARM TOT./PAR. ARM: SAVED KEYSWITCH KEYSWITCH: NO ACTION DISPL. OPEN ZONE SAVED BYPASS+DISPL BATTERY GUARD BATTERY GUARD: SAVED TO PREV. MENU ? Installer manual AlphaVision ML Rev. 3.60 01-01-2015...
-
Page 68: Quick Arming
<*> and <#> keys simultaneously on the keyboard. This option also applies for keyfob transmitters if the AlphaVision ML is equipped with a wireless expansion module, by pushing the partial ( ) and total ( ) arming buttons. Programming options are ON or OFF. (For further explanation, see user manual). -
Page 69: Complete Arming
The following functions are possible: STATUS – request the status of the system (works only if the AlphaVision ML is also equipped with a speech plug-on board and a keypad with integrated speakers, a 4-8 ohm speaker or an external speakerphone is connected), ... -
Page 70: Jamming Detection
SMS text message. If the AlphaVision ML is also equipped with a speech plug-on board (art.code 004162) then the installer can record the “house identity " as a speech text. The “House Identity” as speech text will be reported to Private (mobile) telephone numbers via PSTN or GSM if protocol "Speech"... -
Page 71: Ls On Walktest (V2.00 And Higher)
EOL Resistor (V3.20 and higher) The AlphaVision ML control panel supports various EOL resistor values next to the standard Alphatronics (1k8 / 10K / 39K) resistors. Which EOL resistor configuration is used can be programmed here, the available... -
Page 72: Total/Partial Arming (V3.50 And Higher)
+ 8 o.c. modules and I / O module however the AlphaVision expansion modules must be equipped with eprom V5.2 of higher. For foreign (non Alphatronics) panels were no EOL resistor value is stated for the Anti-mask contact in the above table the Alphatronics 39K resistor may always be used to also have anti-mask detection per zone. -
Page 73: Timers Menu
The time can be programmed from 00 to 99 seconds. Inactivity Each zone can be programmed to function as ‘Activity monitoring’. Activity monitoring is used in situations where people need to be monitored, e.g. elderly people. Inactivity only works when the sections Installer manual AlphaVision ML Rev. 3.60 01-01-2015... -
Page 74: Supervision Alarm
Entry- and Exit delay times Up to 5 entry- and exit delay times can be programmed in the AlphaVision ML. From firmware version 3.30 and higher the delay times can be programmed 3-digits from 0-999 seconds. Zones programmed as Delayed 5 need to be closed when arming the system. - Page 75 When the AlphaVision ML installation is expanded with wired expansion modules (Input + 8 o.c. module and I/O module), the outputs 1 to 4 of the expansion modules are activated simultaneously with outputs 1 to 4 on the control panel.
-
Page 76: Power Failure Reporting Delay (V3.50 And Higher)
I/O modules with power supply (art.code 004312). The time is programmable between 00-99 minutes. DIALER The DIALER menu offers the following three options: PSTN/GSM reporting LAN/GPRS reporting Remote Service Installer manual AlphaVision ML Rev. 3.60 01-01-2015... - Page 77 TO PREV. MENU ? IP CONFIGURATION CONNECT VIA IP: ENABLED SAVED DISABLED REMOTE IP-ADDR. REMOTE IP-ADDR.: SAVED REMOTE PORT REMOTE PORT: SAVED juiste code DOWNLOAD CODE ENTER CODE: RE-ENTER CODE: SAVED TO PREV. MENU ? Installer manual AlphaVision ML Rev. 3.60 01-01-2015...
-
Page 78: Pstn/Gsm Reporting
TO PREV. MENU ? GSM ACTIVE GSM ACTIVE: SAVED GSM AS BACKUP PINCODE SIMCARD SIM PINCODE: SAVED SMS SERVICENR. SERVICENUMBER: SAVED PERMIT ROAMING PERMIT ROAMING SAVED ACCEPTANCE MODE ACCEPTANCE MODE: SINGLE SAVED TO PREV. MENU ? Installer manual AlphaVision ML Rev. 3.60 01-01-2015... -
Page 79: Central Station Reporting 1 / 2
SIA Level 2 and XSIA use the same SIA codes. XSIA also reports the zone names and user names to the monitoring station. Dial attempts In this programming option the numbers of dial attempts (0-9) is programmed. This can be programmed for each telephone number. Installer manual AlphaVision ML Rev. 3.60 01-01-2015... -
Page 80: Private Telephone Settings
10 seconds, the PSTN or GSM dialer hangs up and tries again. Telephone numbers are programmed with the numerical keys, the special characters are programmed using keys. Use to jump to the next digit and press <#/OK> to save. Installer manual AlphaVision ML Rev. 3.60 01-01-2015... -
Page 81: Protocol
This option is programmable for each of the four telephone numbers. With a PSTN or GSM plug-on board, the options Siren and SMS can be selected. When the AlphaVision ML also uses a speech plug-on board, the option ‘Speech’ can be selected. -
Page 82: Private Telephone Messages
Telephone line monitoring When the AlphaVision ML control panel is equipped with a PSTN plug-on board, the system can check if the analog telephone line (PSTN) is present. The voltage of the telephone line is checked every 3 seconds and when the voltage on the line drops below 3VDC for more than 10 seconds, an alarm message will show up in the display and in the event log. -
Page 83: Roaming Allowed
Registration in network refused IP/GPRS REPORTING The AlphaVision ML control panel has an integrated IP dialer for reporting alarms to a central station over a LAN (internet) connection. The AlphaVision ML can also be expanded with a GPRS module for reporting to a monitoring station over the GPRS net. - Page 84 ACCESS POINT/APN USER NAME USER NAME: SAVED PASSWORD PASSWORD: SAVED PERMIT ROAMING : ROAMING SAVED SIM PINCODE: SAVED SIM PINCODE GPRS ALWAYS ACT. GPRS ALWAYS ACT: SAVED TO PREV. MENU? Go to next screen Installer manual AlphaVision ML Rev. 3.60 01-01-2015...
- Page 85 IP CENTR. STAT.: SAVED CENTR.STAT. PORT CENTR.STAT PORT: SAVED ACCOUNT NUMBER ACCOUNT NUMBER: SAVED POLLING INTERV. POLLING INTERV.: SAVED TESTMESS. EVERY: SAVED TEST MESSAGE COMM. METHOD COMM. METHOD: ETHERNET SAVED GPRS Go to next screen Installer manual AlphaVision ML Rev. 3.60 01-01-2015...
- Page 86 GI KEY GI REFRESH TIME: SAVED GI REFRESH TIME DNS PROVIDER: SAVED DNS PROVIDER DNS HOSTNAME: SAVED DNS HOSTNAME DNS USER: SAVED DNS USER DNS PASSWORD: SAVED DNS PASSWORD TO PREV. MENU ? Installer manual AlphaVision ML Rev. 3.60 01-01-2015...
-
Page 87: General Lan Settings
Gateway IP-address When the IP setting of the AlphaVision ML is set to DHCP, the Gateway IP address is provided by the router/DHCP server. If the control panel is set to static IP address, the Gateway IP address needs to be programmed manually. -
Page 88: Ip Configuration
IP addresses (WAN) which make connecting from the outside world (for example using the APP) with the AlphaVision ML insecure due to changing IP addresses. In order to solve this issue it is possible to use a dynamic IP address (DynDNS) for the Alpha Vision ML. DYNDNS ensures that the connection between the dynamic IP address (WAN) of the provider and the Alpha Vision ML panel always exists regardless if the dynamic IP address (WAN) of the provider changes. -
Page 89: Gprs Always Active
This settings is used for programming the IP address of the IP receiver card at the monitoring station. The AlphaVision ML uses the SIA-HS IP (data) protocol and is received on an RC-4001 IP receiver. The correct IP address can be obtained from the monitoring station. -
Page 90: Backup Dialer D2 Settings
To establish a connection between the APP and the AlphaVision ML control panel various data must be verified. Thus it is necessary to program an APP port number both in the APP and in the AlphaVision ML. If the AlphaVision ML control panel must be reachable from outside the protected premises APP portnumber must be forwarded in the modem / router of the customer. -
Page 91: Connecting To The App (V3.00 And Higher)
Under NTP1/2 IP ADDRESS an IP address of a NTP-server can be entered which is used to synchronize the date and time in the AlphaVision ML. From firmware 3.30 and higher DNS support has been added and it is possible to enter a name string, for example ntp.planet.nl. The AlphaVision ML will then be able to connect at regular intervals to the NTP-server to automatically update its own date and time. -
Page 92: Gprs Backup Transmission
The AlphaVision ML can be (remotely) connected to a computer/laptop with the AlphaTool software. This allows the installer to easily program the AlphaVision ML control panel and to gain remote access to the control panel to view log events and view/modify programming. The AlphaVision ML can transmit information via different methods (IP, GPRS, PSTN and GSM), remote service only applies for IP, PSTN and GSM (not GPRS !). -
Page 93: Remote Service Pstn/Gsm
When the AlphaVision ML control panel is approached from a computer (with AlphaTool) from an internal network (LAN) only the ‘Remote Service’ option needs to be set to ON. If the AlphaVision ML is approached from a computer with AlphaTool outside the network (WAN) then it is necessary to program the appropriate firewall settings and port forwarding in the modem/router to which the AlphaVision ML is connected. -
Page 94: Download Code
When the initiative to connect via IP(LAN) is done from the AlphaVision ML control panel, the Remote IP address and Remote port of the installers computer needs to be programmed in the AlphaVision ML control panel. The supervisor of the AlphaVision ML control panel needs to initiate the remote service session from the user menu (Maintenance sub-menu). -
Page 95: Maintenance
When the AlphaVision ML control panel is equipped with both a speech plug-on board as well as a keypad with integrated speaker and microphone or a speakerphone the called party can activate a semi-duplex speech/listen-in session. -
Page 96: View Open Zones
(only applicable to wireless zones, e.g. RF=108). For hardwired components the displayed reception strength has no meaning and will be shown as RF=099. When the AlphaVision ML control panel uses a wireless receiver unit, the measured reception strength is shown. -
Page 97: View Zones
The option is quite self-explanatory, follow the instructions on the display. Test outputs To test the outputs of the AlphaVision ML, use the ‘TEST OUTPUTS’ function. Select the desired output and press <#/OK> to activate the output. Pressing <#/OK> again will deactivate the output. -
Page 98: Reset User Code
3.30 the time blocks of 15 minutes has been changed to hours, the maximum is 99 hours. Once the AlphaVision ML is in the Test Mode the following text '!! TEST MODE !!’ will appear on the top line of the LCD display. -
Page 99: Reset Installer And Supervisor Code
RESET INSTALLER AND SUPERVISOR CODE The installer (and from firmware V2.0 and above also the supervisor) code of the AlphaVision ML can be reset to the default code by performing the following actions: Open the cabinet of the AlphaVision ML and make sure that the tamper switch is open (not depressed). -
Page 100: Firmware Upgrade (Bios Flash) Of The Alphavision Ml
Performing a firmware (bios flash) upgrade remotely It is possible to upgrade the firmware of the AlphaVision ML using a function in AlphaTool. The remote flash function can be found in the ‘Update firmware’ menu in AlphaTool. - Page 101 Power down the AlphaVision ML XL transceiver Connect the serial programming cable between the computer and the ‘boxed header’ J32 on the AlphaVision ML XL board. The boxed header can be found directly next to the relays and under the AL2 output.
- Page 102 Place the jumper on pin header J1. The jumper must be placed over the 2 pins left from the green watchdog LED. Apply power to the AlphaVision ML. When powering-up, the green watchdog LED will turn-on shortly and then turn off again. The other LED’s will react different than described in the LED overview, this is due to the fact that the AlphaVision ML is in the ‘flash’...
- Page 103 The flash software will try to establish a connection with the microprocessor on the AlphaVision ML. Once the connection is established a green text ‘Connection complete’ will appear in the text block: After the connection is established, the software will flash the new firmware into the microprocessor of the AlphaVision ML.
- Page 104 Place the jumper J43 back into the ‘run’ mode. The jumper must be placed over the right and the middle pin of the header. The left pin must stay empty. Power-up the AlphaVision ML. The green watchdog LED must illuminate, this is to indicate that the board is running and the new firmware functions.
-
Page 105: Default Programming Alphavision Ml
DEFAULT PROGRAMMING ALPHAVISION ML The control panel is supplied with the following default programming: Codes Installer code : 123456 Supervisor code (90) : 445566 Codes 1 to 89 : Not programmed Duress code : for all codes, add 1 to the last digit (when allowed in programming) - Page 106 : Not programmed General GPRS : Not programmed Standard D1 : Not programmed Backup D2 : Not programmed Remote Service Pick up : DO NOT PICK UP IP Settings : Not programmed Downloadcode : 000000 Installer manual AlphaVision ML Rev. 3.60 01-01-2015...
-
Page 107: Appendix A: Detector Deployment
APPENDIX A: DETECTOR DEPLOYMENT Detector location or transmitter assignment Zone Zone Zone type charact. ( for social alarm transmitters) Installer manual AlphaVision ML Rev. 3.60 01-01-2015... -
Page 108: Appendix B: Keyfob Transmitter Assignment
APPENDIX B: KEYFOB TRANSMITTER ASSIGNMENT Transmitter AUX button Direct Type User name Status arming APPENDIX C: SOCIAL ALARM TRANSMITTER Tx # Transmitter Zone nr. Zone type User name type Installer manual AlphaVision ML Rev. 3.60 01-01-2015... -
Page 109: Appendix D: Event Codes
For an explanation of the Contact ID codes see the table below. In this table all codes that are used in the AlphaVision ML/XL are explained. There are more Contact ID codes but these are not used in the AlphaVision ML/XL. - Page 110 Telco 2 fault Telco 2 fault Module Partition R 352 Restore telco 2 Restore telco 2 Module Partition Partition A 383 Sensor tamper Sensor tamper Zone Partition R 383 Sensor tamper Sensor tamper Zone Partition Installer manual AlphaVision ML Rev. 3.60 01-01-2015...
- Page 111 ML XL Description 1 .. 90 User 1 .. 90 91 .. 98 Keyfobs 1 .. 8 Keyswitch, panic by pressing * + # 1 .. 500 User 1 .. 500 (PIN-code users) (reserved) Installer manual AlphaVision ML Rev. 3.60 01-01-2015...
- Page 112 ID2 can have the value 0 if the section is not know or not relevant. If there is section information then this is shown as a 2-digit (decimal) number. For the AlphaVision ML the section description lies between 01 and 04.
- Page 113 Sensor Battery Restore Phone Line Restore RF Receiver Tamper Local Program. success Sensor Battery Trouble Phone Line Trouble System Battery Restore Medical Alarm System Battery Trouble Medical Bypass Service Required Medical Restoral Medical Unbypass Installer manual AlphaVision ML Rev. 3.60 01-01-2015...
-
Page 114: Appendix E: Keypad Addressing
APPENDIX F: EXPANSION MODULE ADDRESSING Expansion modules are addressed with the four Adres 1 Adres 7 dipswitches. Adres 2 Adres 8 Adres 3 Adres 9 Adres 10 Adres 4 Adres 5 Adres 11 Adres 6 Installer manual AlphaVision ML Rev. 3.60 01-01-2015... -
Page 115: Appendix G Declaration Of Conformity Telit Gsm/Gprs Module
APPENDIX G Declaration of conformity Telit GSM/GPRS module Installer manual AlphaVision ML Rev. 3.60 01-01-2015... -
Page 116: Appendix H Installing The Flash Program
APPENDIX H Installing the FLASH program To flash new firmware into the AlphaVision ML you need to use a software utility to flash the file into the microprocessor. The software utility is free of charge and is supplied to Alphatronics by the manufacturer of the microprocessor. - Page 117 USB converter, a virtual COM-port will be made by the software driver. Press Next. Ensure that the settings of the AlphaVision ML XL are installed correctly (flash mode) and power-up the AlphaVision ML XL. The green watchdog LED will turn-on shortly and then turn off. Press OK.
- Page 118 If for some reason the connection is not established (the AlphaVision ML XL is not powered up or the programming cable is not connected), press Cancel. If the connection is established the following screen will appear. Press OK. Do not change the 25.00 MHz value, this is the correct value. Press Next.
- Page 119 Press the Finish button. The flash utility will now try to establish a connection with the microprocessor. If the connection is established a green text Connection complete will appear in the text block. Installer manual AlphaVision ML Rev. 3.60 01-01-2015...
- Page 120 Select the User / Data Area option. In the box next to the User / Data Area option is still empty. Use the explorer button to select the correct path and directory were the firmware file is saved on your computer. Installer manual AlphaVision ML Rev. 3.60...
- Page 121 Press the Program Flash button to start the flash procedure. Installer manual AlphaVision ML Rev. 3.60 01-01-2015...
- Page 122 When the new firmware has been flashed successfully into the microprocessor of the AlphaVision ML a green text Image successfully written to device will appear in the text box. Now press Disconnect. Tip: the Disconnect procedure can also be done automatically. Select in the options screen the ‘AutoDisconnect’...
- Page 123 This product can be handed over to your local city council disposal point, shop or supplier. © ALPHATRONICS BV – 2014 No rights can be derived from this document. Installer manual AlphaVision ML Rev.
- Page 124 Installer manual AlphaVision ML Rev. 3.60 01-01-2015...
Need help?
Do you have a question about the AlphaVision ML and is the answer not in the manual?
Questions and answers