Advertisement
Advertisement
Table of Contents

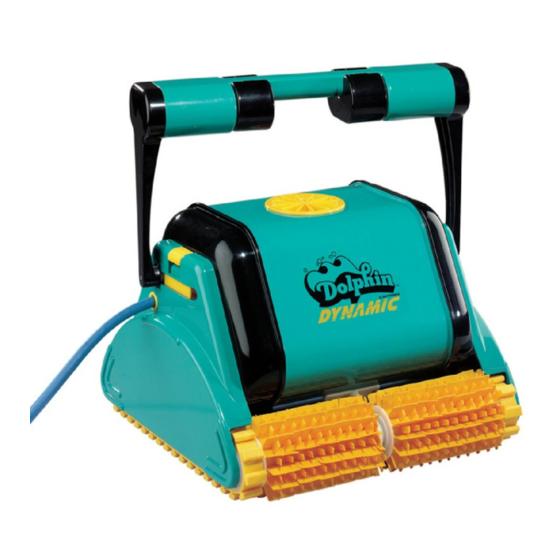
Summary of Contents for Maytronics Dolphin DYNAMIC 2002
- Page 1 Repair instructions for - TOP1...
-
Page 2: Table Of Contents
Table of Contents I. Tools needed for repair Page 3 II. Dismantling the Dolphin Page 4 III. Testing and replacing main components Page 11 – Analyze power supply Page 11 – Analyze cable Page 12 – Repair/replace cable Page 14 –... -
Page 3: I. Tools Needed For Repair
I. Tools needed for repair • Dolphin tester • Dolphin key • Screwdriver or screw gun • Needle nose pliers • Wire cutters • Wire strippers •Cable crimper •1.5 x 50mm hex screwdriver Please note: when repairing any Dolphin cleaner, only hand-tighten screws. -
Page 4: Ii. Dismantling The Dolphin
II. Dismantling the Dolphin Remove screws attaching handle to body. Remove handle. Use gentle pressure from a screwdriver to help pry it away from the body if necessary. - Page 5 II. Dismantling the Dolphin Flip the unit over and remove the bottom plate. Remove the two screws attaching the plastic screen to the body.
- Page 6 II. Dismantling the Dolphin Remove the plastic screen. Use the silver key to remove cable from motor unit.
- Page 7 II. Dismantling the Dolphin Unplug cable by gently pulling upward. Remove the 12 screws (6 per side) that hold the side panels to the chassis.
- Page 8 II. Dismantling the Dolphin Location of screws. 6 per side. Remove the side panels.
- Page 9 II. Dismantling the Dolphin Note that the cable passes through the panel on one side of the unit. The brushes and tracks are now free to be removed.
- Page 10 II. Dismantling the Dolphin Note: the center guide wheel contains a removable slot for the drive shaft. This must be removed to replace the motor. Also, it’s easiest to wind the tracks around the center guide wheel first and then attach to unit.
-
Page 11: Analyze Power Supply
III. Testing the Dolphin Step 1. Analyze power supply Insert round end of Dolphin tester into power supply where cable connects. Plug in power supply and push power button. If you get a green light, power supply is good! If there is no light, the power supply should be replaced. -
Page 12: Analyze Cable
III. Testing the Dolphin Step 2. Analyze cable Plug cable into triangular end of Dolphin tester. Plug other end of cable into power supply and turn the power supply... - Page 13 III. Testing the Dolphin Step 2. Analyze cable A green light indicates the cable is good. If you do not get a green light, and you are sure all connections are secure, replace cable.
- Page 14 III. Testing the Dolphin Step 3. Repairing/replacing cable Cut off the triangle end and pull the cable out through the side plate. Strip off the outer cable casing to expose the internal wires.
- Page 15 III. Testing the Dolphin Step 3. Repairing/replacing cable Strip each wire approx. ¼ inch. Note that some cables may have three wires: white, black and red. Using wire cutters, separate the metal elements, trimming away any excess.
- Page 16 III. Testing the Dolphin Step 3. Repairing/replacing cable Crimp one element onto the end of each wire. This can be done with pliers if necessary. Insert the cable through the pieces of the cable kit in the order shown.
- Page 17 III. Testing the Dolphin Step 3. Repairing/replacing cable Push the wires into the triangle end as pictured. The white wire will always be to the right of the channel in the connector, the black wire to the left, and the red wire (if present) in the back.
- Page 18 III. Testing the Dolphin Step 3. Repairing/replacing cable Insert the cable through the pieces of the cable kit in the order shown. Strip each wire approx. ¼ inch. Note that some cables may have three wires: white, black and red.
- Page 19 III. Testing the Dolphin Step 2. Analyze cable Using the 1.5 x 55mm hex screwdriver, loosen the necessary terminals. • AC = white 1, black 2 • DC = white 2, black 3 • Red = ground Insert the wires into their appropriate terminals and tighten.
- Page 20 III. Testing the Dolphin Step 3. Repairing/replacing cable Re-assemble the Amphenol plug first by screwing “C” into the end, then screwing “A” into “C” with “B” inside. Note: screwing “A” into “C” first will twist the cable inside the connector and may damage the wires!
-
Page 21: Replace Motor Unit
III. Testing the Dolphin Step 4. Replace motor unit Note: If both the power supply and cable are working, by process of elimination, you should replace the motor unit. Remove the two screws holding the motor unit from each side. With center guide wheels removed on both side, lift out the... -
Page 22: Iv. Replacing Brushes
IV. Replacing Brushes Remove spacer at end of brush assembly by pulling it straight out. Remove shaft from brush assembly... - Page 23 IV. Replacing Brushes Remove wheel bearing by pulling it straight out. Foam climbing rings can be removed and replaced by stretching them over the end of the brush assembly. Note: you may have to soak the brush in water for a couple of minutes to soften the rings in order to remove them.
- Page 24 IV. Replacing Brushes PVC brushes can be removed with needle nose pliers by lifting the tabs along the seam PVC brushes can be replaced by pulling the stems at the seam through the holes in the tabs using pliers. Note: A diluted solution of dish soap can help lubricate the stems.
- Page 25 V. Filter Bags Access the filter bag by turning the unit over and sliding the plastic clips to the side. Remove the bottom lid. The filter bag will be attached to the lid on a metal frame.
- Page 26 V. Filter Bags To remove the filter bag, remove black plastic clips (if present) plastic clips (if present) and slide bag off of metal frame.
- Page 27 V. Filter Bags When putting filter bag back in place, ensure that the elastic band is completely down over the lip at the base of the bottom plate to prevent dirt and debris prevent dirt and debris from escaping bag.
Need help?
Do you have a question about the Dolphin DYNAMIC 2002 and is the answer not in the manual?
Questions and answers
Where can I send my Dolphin dynamic 2002 for repair ? It cleans for a short time than stops and does not react to on command … I hate to take it to a dump -it’s looks new. Please, help Larisa
You can send your Maytronics Dolphin Dynamic 2002 to Zavatti Shop for a complete overhaul.
This answer is automatically generated