Advertisement
Quick Links
A A A A A VS ELECTR
VS ELECTR
VS ELECTR
VS ELECTR ONICS
VS ELECTR
BF100 A
BF100 A
BF100 A
BF100 A
BF100 A
Smok
Smok e e e e e
Smok
Smok
Smok
detection
detection
detection
detection
detection
beam
beam
beam
beam
beam
In conformity to EN54 norms
Cur
Curtar
Cur
tar
tarolo (P
tar
olo (Pado
olo (P
olo (P
adov v v v v a) Ital
ado
ado
Cur
Cur
tar
olo (P
ado
www.a .a .a .a .avselectr
www
www
vselectr
vselectr
vselectronics
www
www
vselectr
CERTIFIED
QUALITY SYSTEM
ISO9001
IST0649V1/0
- 1 -
ONICS
ONICS
ONICS
ONICS
a) Italy y y y y
a) Ital
a) Ital
a) Ital
onics
onics.com
onics
.com
.com
.com
onics
.com
IST0649V1/0
Advertisement

Related Manuals for AVS Electronics BF100 A

Summary of Contents for AVS Electronics BF100 A
- Page 1 .a .a .a .avselectr vselectr vselectr vselectronics onics onics onics.com .com .com .com vselectr onics .com BF100 A BF100 A BF100 A BF100 A BF100 A Smok Smok e e e e e Smok Smok Smok detection detection detection...
-
Page 2: General Features
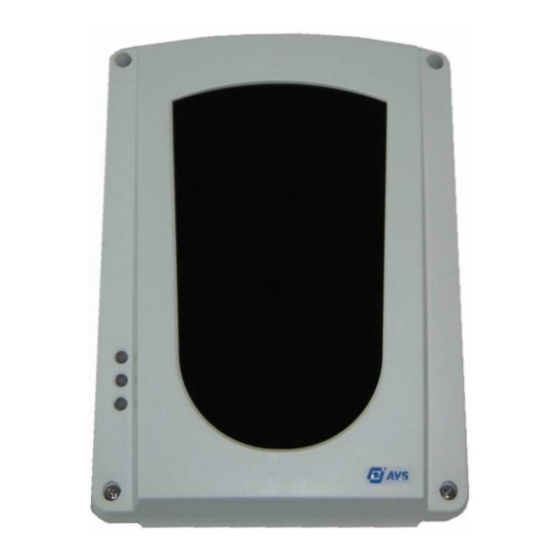
GENERAL FEATURES ALLARME GUASTO +F ROSSO Smoke detection beam made of a Transmitter and a Receiver, capable to detect and determine the quantity of smoke which is present in the protected area. The board is equipped with a view-finder, placed on one side, allowing a rough alignement with the reflector given within. - Page 3 RECEIVER BF TEST LED/DISPLAY NOT GIVEN WITHIN) MODULE COVER BR100 (OPTIONAL) TRASMITTER BF TEST NOT GIVEN WITHIN) COVER - 3 - IST0649V1/0...
- Page 4 RECEIVER The terminal board is made of two separate groups: the one on the left concerns alarm and fault-condition output whilst the one on the right concerns supplying input and ALLARME GUASTO serial door. i t c s ' t i t c i n i .
- Page 5 Jumper 1 2 3 S2 S3 t i s t i s t i s t i s n i l i f l t i n n i l l l a Dip switch 1 2 3 4 v i t y t i v i t y t i...
- Page 6 TRANSMITTER Terminal board i t i i t a It shows the presence of the supplyng Jumper e Dip Switch ROSSO i l a ) f f t t i t t i correct adjustment of the beam signal it is also necessary to set the distance between receiver...
-
Page 7: Installation Rules
INSTALLATION RULES The beam and the reflector must be installed on plane wall, not subject to vibrations or deformation. Please keep in mind these basic rules: In order to obtain total coverage, the distance (D) between more 1/2 D TX/RX couples must not exceed 15 meters. -
Page 8: Installation
INSTALLATION Install the Receiver in the chosen point and keep it in axis to the Transmitter as much as possible Alignment hole Fixing holes Insert the calibration accessory BF TEST (necessary for a correct calibration) in the proper openings, as shown on the drawing on the side, keeping the alignment hole on the top. - Page 9 WORKING MODE “CALIBRATION” - In order to make a first rough alignement, use optical view-finder, visualizing the centre of the concerned reflector in the centre of the framed area. In order to move orientation towards right, rotate the horizontal adjuster clockwise, in order to move orientation towards left, rotate the horizontal adjuster counter-clockwise.
- Page 10 WORKING MODE “NORMAL” Here are the indications given by the three Leds on the left: – during normal working: green Led flashes about every 2 seconds, red Led is off, yellow Led is off. – during alarm: as soon as the beam detects presence of smoke, green Led will flash quickly, red Led and yellow Led will be off.
- Page 11 BR100 In order to obtain signal visualizatioin in real time, it is possible to remote the display/led module of any single beam, locating it in remote panel BR100. Any BR100 remote panel can locate up to 4 display/Led modules. RESET: it makes a reset of alarm condition.
- Page 12 CONNECTIONS TO CONTROL UNITS BF100R beam is equipped with: OUT + F for direct connection to AVS conventional fire control units (charge of 680 ohm during alarm). ALLARME GUASTO In order to reset the beam from alarm condition, simply make a reset operation on control unit (Jumper S9 closed).
- Page 13 - 13 - IST0649V1/0...
- Page 14 - 14 - IST0649V1/0...
- Page 15 Indice GENERAL FEATURES ....................pag. 2 RECEIVER ........................pag. 4 Signalling Led ....................... pag. 4 Jumper ........................pag. 5 Dip switch ......................pag. 5 TRANSMITTER ......................pag. 6 Terminal board...................... pag. 6 Jumper e Dip Switch .................... pag. 6 Trimmer ......................... pag. 6 INSTALLATION RULES ....................
-
Page 16: Technical Features
Assistenza Tecnica: 049 9698 444 Assistenza Tecnica: 049 9698 444 Assistenza Tecnica: 049 9698 444 support@avselectronics.com support@avselectronics.com support@avselectronics.com support@avselectronics.com support@avselectronics.com AVS ELECTRONICS S.p.A. reserves the right to modify the technical and esthetical characteristic of the products at any time. - 16 - IST0649V1/0...
Need help?
Do you have a question about the BF100 A and is the answer not in the manual?
Questions and answers