Table of Contents
Advertisement
Quick Links
OUTDOOR
SECURITY
CAMERA WITH
LED FLOODLIGHT
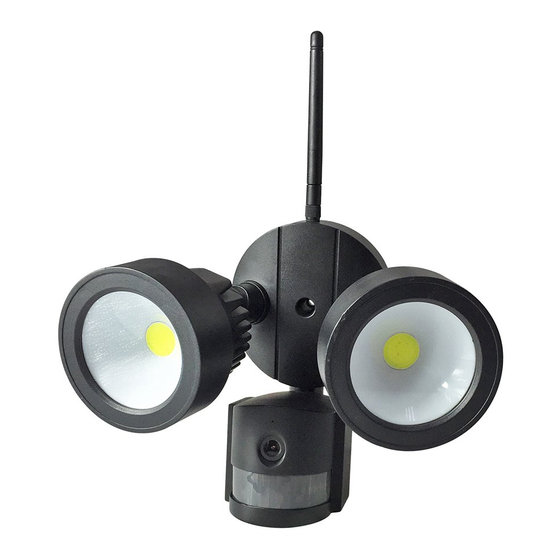
Wifi Security Camera With LED Floodlight
Download
Our App
iSmsee 8.0
HIGH
NIGHT
WEATHER
DEFINITION
VISION
www.ener-j.co.uk
COLOR
MOTION
PROOF
DETECTION
Features
• 20W with 1600 Lumens
• Indoor and Outdoor Wifi IP Camera with LED flood light
• Passive IR and Motion sensor
• Support Memory card storage up to 64GB
• 2 Way Audio so can see and speak to your visitors
• Support Audio and Video recording
• Support 720P (1280*720) live-streaming to your mobile devices
• Motion Detection Push Alert
• Distance of the PIR sensor 20-25 feet
Specification
Image sensor
Max Image Resolution
Day/Night
Video Compression
Light source
Luminous flux
PIR detection range
LED on/off control
Intelligent Alarm
WiFi protocol
Operating Condition
Power Supply
IP grade
SKU
EAN
SHA5209
710336056844
SHA5210
7103354860009
1
1/4, 1 Megapixel Color
CMOS
1280*720
Built-in IR-CUT
H.264 /MPEG dual video
stream
10W high-power LED * 2pcs
1600 lumens
60-70° horizontal, 6-8
meters
Manual or Auto
Motion detection /Sound
detection/PIR detection
802.11/b/g/n
-10°~60°, Humidity ≤90%
(noncondensing)
DC12V 2A
IP65
Color
Black
White
info@ener-j.co.uk
Advertisement
Table of Contents

Related Manuals for ENER-J SHA5209


Summary of Contents for ENER-J SHA5209
- Page 1 Intelligent Alarm Motion detection /Sound detection/PIR detection WiFi protocol 802.11/b/g/n Operating Condition -10°~60°, Humidity ≤90% (noncondensing) iSmsee 8.0 Power Supply DC12V 2A IP grade IP65 Color SHA5209 710336056844 Black HIGH NIGHT WEATHER COLOR MOTION DEFINITION VISION PROOF DETECTION SHA5210 7103354860009 White www.ener-j.co.uk...
- Page 2 (Explained in the part 6) 1. Connect the output of the supplied 12V power adapter into the power socket on the camera. 2. Plug the power adapter into the wall socket. 3. Connect your mobile phone to your home wireless router. Preparation www.ener-j.co.uk info@ener-j.co.uk...
- Page 3 Notice: The camera factory Settings password is empty, so when the first using of the camera, no need to enter the password here and can tap the “Done” directly. (The same below) 7. Tap“ Done” to save. 8. Now the camera is added in the “Devices” list successfully. www.ener-j.co.uk info@ener-j.co.uk...
- Page 4 2. Connect the output of the supplied 12V power adapter into the power socket on the camera. 3. Plug the power adapter into the wall socket. Now the camera is initializing and it will last about 90 seconds then enter normal status. www.ener-j.co.uk info@ener-j.co.uk...
- Page 5 Notice: Both mobile and camera should be connected to the same Wi-Fi router. 3. If search out the DID, can directly Touch the camera then return to “Add device” screen. 4. Enter the camera password. 5. Tap “Done” to save. www.ener-j.co.uk info@ener-j.co.uk...
- Page 6 Quick Start Guide Wireless Network Connection If you want to connect the camera to router with WI-FI, please enter the camera setting—WI-FI setting to set up, steps shown in the figure below: www.ener-j.co.uk info@ener-j.co.uk...
- Page 7 Insert a Micro-SD card for recording If you want to connect the camera to router with WI-FI, please enter the camera setting—WI-FI setting to set up, steps shown in the figure below: Install the Wi-Fi antenna www.ener-j.co.uk info@ener-j.co.uk...
- Page 8 Field of View. They can see a limited area, but objects will Appear larger within the scene area. This is useful if you want to monitor a specific target such as a doorway or entrance. The included camera’s lens is 3.6mm by default. www.ener-j.co.uk info@ener-j.co.uk...
- Page 9 • Do not expose the camera where rain and snow will hit the lens directly. • Cameras geared for cold weather may work in extreme conditions as low as -25° as the camera produces heat when plugged in. Tools Required (not included) www.ener-j.co.uk info@ener-j.co.uk...
- Page 10 (A). crossbar. Tighten the screw properly to on the camera. secure the camera onto the wall. Then plug the power adapter into the wall socket. LED and Camera Angle/Direction Adjustment www.ener-j.co.uk info@ener-j.co.uk...
- Page 11 1. Run the App, on the “Device List” screen, tap the gear shape icon to enter the camera setting screen. 2. Tap “Light Setting” to enter the light setting screen. 3. Tap “Manual Mode Dwell Time” input box. 4. Enter required delay time from 1 to 10 hours. 5. Tap “Done” to save. www.ener-j.co.uk info@ener-j.co.uk...
- Page 12 1. Run the App, on the “Device List” screen, tap the gear shape icon to enter the camera setting screen. 2. Tap “Light Setting” to enter the light setting screen. 3. Slide the LUX bar between icon to set up Day/Night switch threshold. You can adjust it according to your needs. 4. Tap “Done” to save. www.ener-j.co.uk info@ener-j.co.uk...
- Page 13 3. Tap one of the High/Medium/Low button to setup PIR sensor trigger sensitivity. This will adjust how sensitive the camera will be when detecting events. You can adjust it according to your needs. 4. Tap “Done” to save. Notification push setting for PIR trigger www.ener-j.co.uk info@ener-j.co.uk...
- Page 14 Recording to a Memory Card You can insert a micro SD card into card slot (Refer part6 to see how to insert card) for continuous recording. The camera supports Micro-SD memory card of up to 64GB. www.ener-j.co.uk info@ener-j.co.uk...
- Page 15 1. Run the App, on the “Device List” screen, tap “My messages” to enter my messages screen. 2. Tap a selected camera to enter next screen. 3. Tap to view a picture captured when motion or PIR detection event occurred up. 4. Tap to play back video. www.ener-j.co.uk info@ener-j.co.uk...
Need help?
Do you have a question about the SHA5209 and is the answer not in the manual?
Questions and answers