Table of Contents
Advertisement
Advertisement
Table of Contents

Summary of Contents for Neuvana Xen
- Page 1 USER MANUAL NeuvanaLife.com...
-
Page 2: Table Of Contents
• Updating the Neuvana App Neuvana’s logos are trademarks or registered trademarks of Neuvana LLC in the United States and other countries. Apple, the Apple logo, iPhone, iPad, iPod touch, and iOS are registered trademarks of Apple, Inc. in the U.S. and other countries. AppStore is a Service mark of Apple, Inc. Android and Google Play are trademarks of Google, LLC. Bluetooth ®... - Page 3 Your music selection drives the signal itself, syncing to the pace and harmony of each song for stimulation patterns that match your style. In addition, Xen’s signals can sync to ambient sounds, driving optimal vagus nerve stimulation based on the environment around you. ...
-
Page 4: Important Safety Information
Do not place Xen earbuds anywhere in or on the body, other than the ear canal. Do not place Xen earbuds on skin that has open wounds, sores, or rashes; or skin that is swollen, infected, inflamed, or has skin eruptions. If you experience an adverse skin reaction, discontinue use immediately. -
Page 5: Precautions
IMPORTANT SAFETY INFORMATION PRECAUTIONS The left earbud carries the Xen signal and should only be used in the left ear. Use caution if using in an ear canal that lacks normal sensation. Use of accessories not supplied by the manufacturer, Neuvana, may cause harm or injury. -
Page 6: Your Xen Box Set
The items shown here are included in your Xen box set: YOUR XEN BOX SET Xen unit Replacement Quick Start Guide Important Safety headphones earbuds Information Micro-drop USB charging USB wall Display saline sprayer cable adapter stand NeuvanaLife.com... -
Page 7: Your Xen Unit
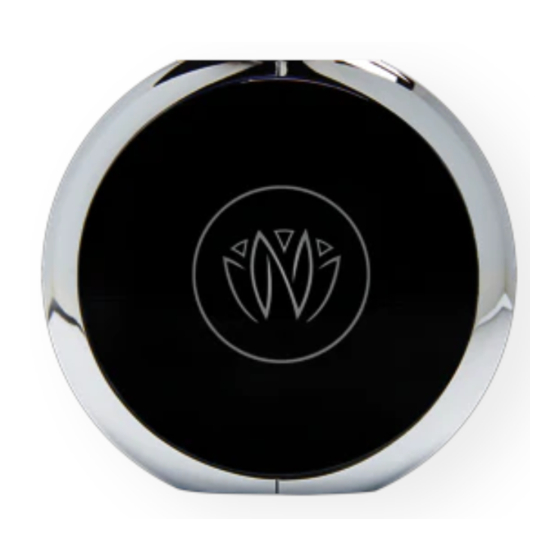
PORTS There is one USB port on the bottom of your Xen unit. This port is where you: Connect your Xen headphones to your Xen unit. Connect the charging cable to your Xen unit. - Page 8 It puts the unit into Bluetooth pairing mode. It turns the Xen unit on or off. The Neuvana logo and surrounding area on the top of your Xen unit are where the LEDs are located. LEDs The LEDs indicate whether your unit is turned on and your unit’s Bluetooth status.
-
Page 9: Powering On/Off
2. Plug the USB wall adapter into a wall outlet. 3. Plug the small end of the USB cable into the USB port on your Xen unit. When your Xen unit is charging, the LEDs turn red if the battery is low. -
Page 10: Your Xen Headphones
At one end of the Xen headphones is the USB connector, which you plug into the Xen unit. At the opposite end are the speaker assemblies, which are installed within the right and left earpieces. -
Page 11: Installing Earbuds
HEADPHONES Your Xen headphones come already assembled with a set of replaceable silicone earbuds. These replaceable earbuds are size Medium (M). Your Xen box set includes three additional pairs of earbuds ranging from size Small (S) to Extra Large (XL). - Page 12 This is VERY IMPORTANT because the electrical signal is intended to be supplied only within the left ear. If the incorrect earbud is placed on the left earpiece, the Xen unit will not work. Use the summary below to identify the right and left earbuds:...
- Page 13 YOUR XEN If the medium size earbuds do not fit snugly, attach a different set of earbuds: HEADPHONES 1. Press and twist the left earbud (which has a white dot) onto the left earpiece. 2. Align the white dot on the left earbud with the “L” on the left earpiece.
- Page 14 INSTALLING THE NEUVANA APP To use the Neuvana app, you must first install the app on the device you want to use with your Xen. The steps vary based on whether you are using an iOS or an Android device.
-
Page 15: Your Neuvana App
4. When the install is complete, tap Open to open the app. Android Devices 1. From the Android device you want to use with your Xen, go to your home screen, tap Apps, and then tap Play Store. 2. Search for the Neuvana app. - Page 16 Your Neuvana App UPDATING THE NEUVANA APP You can expect the Neuvana app to be updated periodically. The steps to install updates vary based on whether you use an iOS or Android device. Follow the appropriate steps below to install the...
-
Page 17: Bluetooth Connections
Devices 1. To enter Bluetooth pairing mode, press the Power button once on your Xen unit. 2. While the LEDs on the front of the Xen unit blink blue, go to your smartphone’s Settings panel and select Bluetooth. 3. Select your Xen headphones. - Page 18 BLUETOOTH CONNECTIONS 5. Open the Neuvana app. 6. Tap the white Bluetooth icon in the upper-right corner and follow any onscreen prompts to scan for your Xen unit. NeuvanaLife.com...
- Page 19 7. Confirm your Bluetooth connections by doing both of the following: Check your smartphone’s Bluetooth Settings to confirm that you see TWO identical connections to Xen-xxxxxx. Confirm that the Bluetooth icon in the upper-right corner of the Neuvana app is green (versus white). NeuvanaLife.com...
- Page 20 2. Tap Pair new device. NOTE: 3. Press the Power button once on your Xen unit. (The LEDs on the front of the Xen unit blink blue.) Your Xen appears as Xen-xxxxxx where xxxxxx is a mix of letters and numbers that are unique to your 4.
- Page 21 BLUETOOTH CONNECTIONS 7. If the Device Info screen appears, follow the onscreen prompts to scan for your Xen unit. When the connection succeeds, the Bluetooth icon turns green. NOTE: If the Bluetooth icon turns red, an error occurred during pairing. Tap the icon again to retry pairing.
-
Page 22: Sessions
SESSIONS After you install the Neuvana app and establish TWO Bluetooth connections, you are ready to set up a session. For each session, you select a mode and settings to personalize your Xen experience. MODES Your mode selection determines what type of audio input your Xen uses to generate a stimulation pattern for your session. -
Page 23: Settings
SESSIONS Your setting selections control your session’s characteristics and enable you to customize the stimulation you experience during your session. The following table provides an overview of the setting options. SETTING DESCRIPTION Waveform Sets the duration and shape of the ultra-short (micro-second) electrical impulses you experience during your session. -
Page 24: Setting Up A Sync Session
SESSIONS SETTING UP A SYNC SESSION In Sync Mode, your Xen unit receives audio input from the media source you choose. The unit adjusts the stimulation to compliment the audio in real time. By matching the stimulation with your favorite... - Page 25 ® To use a streaming app: a. Tap External. b. Leave the Neuvana app, open the streaming app, and select your music in that app. c. Adjust the audio volume to your preferred volume. d. Return to the Neuvana app.
- Page 26 5. Scroll down to see all your options and select a Waveform. NOTE: When your session is in progress and the Xen unit 6. Select the session Duration. is delivering stimulation, the flash icon at the top of the screen turns blue.
-
Page 27: Setting Up A Sensation Pattern Session
Your Xen unitcomes pre-programmed with proprietary stimulation patterns called Sensations. InSensa- tion Mode, you can experience a stimulation signal that is not based on audio input. You can enjoy your Xen in a quiet environment, where only the stimulation will be experienced, or you can play music from TIP: your personal playlist or a streaming app, and the stimulation pattern will be independent of the music. -
Page 28: Setting Up An Ambient Session
SETTING UP AN AMBIENT SESSION In Ambient Mode, the audio input is taken directly from your environment through the microphone on your phone, laptop or tablet. Your Xen unit syncs the stimulation signal to match the ambient audio input it receives from the microphone. -
Page 29: Adjusting Your Session Levels
In Sync mode, be sure to set the volume of your music first, and then adjust the intensity of your 2. Tap or the banner at the bottom of your Neuvana app screen. session, as an increase in volume also increases the intensity of the electrical stimulation. -
Page 30: Saving Your Session
(if you turned on notifications in the Neuvana app). You can turn off your Xen unit during or after a session by pressing the Power button. Turning off your Xen unit also disconnects the Bluetooth connection to your smartphone or compatible device. -
Page 31: Micro-Drop Saline Sprayer
Xen signal. In order to enhance your Xen experience, spray a small amount of saline on the outside surface of the left earbud. This increases the electrical conductivity between the earbud and the left ear canal. An emptymi- cro-drop saline sprayer is included in your Xen box set. -
Page 32: Care And Maintenance
Turn off your Xen unit before cleaning or storing. Do not submerge the Xen headphones or unit in liquids or expose them to large amounts of water. For safe and hygienic use, clean your earbuds regularly to remove earwax and skin residue. To clean the earbuds, you must remove them from the earpieces and then clean them with mild soap and a damp cloth before replacing them on the earpieces. -
Page 33: Helpful Tips
HELPFUL TIPS It is easiest to confirm the Xen signal by actually feeling the electrical pulse in your ear. If you cannot feel the signal on your skin, here are some tips: Clean your ear with a dampened cotton swab. Be careful not to insert the swab into your ear canal. - Page 34 We hope that this UserGuide will help you get the most out of your Xen unit. We are committed to our customers and are available if you have questions. Please contact us at 1.844.NEUVANA(638.8262) or Support@NeuvanaLife.com Neuvana, LLC 2041 Vista Parkway T.
Need help?
Do you have a question about the Xen and is the answer not in the manual?
Questions and answers