Table of Contents
Advertisement
Quick Links
Advertisement
Table of Contents

Summary of Contents for TAC Xenta 555
- Page 1 TAC Xenta 555 Supplement Manual...
- Page 3 TAC Xenta 555 Supplement Manual...
- Page 4 Copyright © 2006 TAC AB. All rights reserved. This document, as well as the product it refers to, is only intended for licensed users. TAC AB owns the copyright of this document and reserves the right to make changes, additions or deletions. TAC AB assumes no responsibility for possible mistakes or errors that might appear in this document.
-
Page 5: Table Of Contents
HTTP and HTTPS...................... 4.1.2 MicroNet Access (VisiSat Port)................. Choosing a Location for the TAC Xenta 555 ............Connecting the TAC Xenta 555 to a MicroNet Controller LAN....... 4.3.1 Connecting to a MicroNet NCP network (MN MI not used)........4.3.2 Connecting to a MicroNet ARCNET network (MN MI used) ........ - Page 6 Linking a Schedule to a Graphic Page ............... Engineering the TAC Xenta 555 in Vista Adding a TAC Xenta Server 555 Object to TAC Vista’s Database......Editing a TAC Xenta Server 555................Verifying a TAC Xenta 555 in TAC Vista Workstation ..........
-
Page 7: Introduction
NTRODUCTION About this Manual About TAC Xenta 555... -
Page 9: About This Manual
TAC representative. Notes • We are continuously improving and correcting our documenta- tion. This manual may have been updated. • Please check our Docnet site at www.tac.com for the latest ver- sion. TAC AB, Oct 2006 9 (82) 04-00054-01-en... -
Page 10: Product Context
TAC Xenta 555, Supplement Manual Product Context The Xenta Server family consists of different products: TAC Xenta 511, TAC Xenta 555, TAC Xenta 527, and TAC Xenta 913. Xenta Servers are equipped with several features; these are defined in the following tables: Table 1.1: Terms and definitions. -
Page 11: Product Capabilities
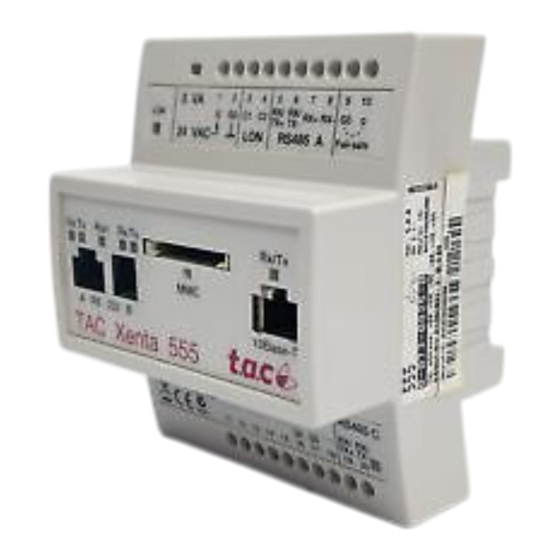
The Xenta 527-NPR, is a feature-enhanced version of the I/NET Net Plus Router. TAC Xenta 555 The TAC Xenta 555 can serve as a Xenta Server for a MicroNet net- work, and/or a LonWorks network in a Vista system serving Vista with all the information available on those networks. -
Page 12: Scope For The Manuals
This manual describes how to engineer different functions such as dis- playing values and graphics, trend logging and displaying alarms and events and so on for the Xenta 511, Xenta 527 and the Xenta 555. This manual also describes how to present the information available in the Xenta Server for an operator of a Vista system. - Page 13 MicroNet network and displaying MicroNet point signals and Micro- Net schedules. Note In most instances within the Xenta 555 Supplement, the term “Micro- Net network” refers to either a MicroNet network or a Satchnet net- work. A MicroNet network may comprise MN50 Series controllers (for example, MN550, MN650) or slightly older MicroNet devices (for example, MN500, MN620) using the ARCNET or NCP protocol.
- Page 14 TAC Xenta 511/527/555/913 This manual describes how to configure a third party protocol using TAC Device Editor, based on an example for a Modbus network. The Xenta 913 is added as a LonWorks Device in Vista. The examples show how to interconnect signals in a Modbus device and signals in a Xenta device on the LonWorks network using the gateway application in the Xenta 913.
-
Page 15: Structure
TAC Xenta 555, Supplement Manual 1 About this Manual Structure The manual is divided into the following parts: • Introduction The Introduction section contains information on how this manual is structured and how it should be used to find information in the most efficient way. -
Page 16: Typographic Conventions
1 About this Manual TAC Xenta 555, Supplement Manual Typographic Conventions Throughout the manual the following specially marked texts may occur. Warning • Alerts you that failure to take, or avoid, a specific action might result in physical harm to you or to the hardware. -
Page 17: Related Documents
TAC Xenta 555, Supplement Manual 1 About this Manual Related Documents • TAC Software, Installation Manual Part No.: 03-00001 • TAC Xenta Server, Technical Manual Part No.: 03-00051 • TAC Xenta 527/527-NPR, Supplement Manual Part No.: 03-00052 • Classic Networks, Technical Manual Part No.: 03-00015... - Page 18 1 About this Manual TAC Xenta 555, Supplement Manual 18 (82) TAC AB, Oct 2006 04-00054-01-en...
-
Page 19: About Tac Xenta 555
MicroNet network via the Internet or a local intranet. Using the Xenta 555, you can create a hardware bridge that integrates MicroNet devices into your LonWorks network. The Xenta 555 pro- vides a web based presentation of a MicroNet system. TAC’s XBuilder is the programming tool you can use to design, generate, and maintain web pages in the Xenta 555. -
Page 20: Communications Ports
Console Connection (RS232 B) This port allows you to directly connect a PC to the Xenta 555. You can then use a program such as Windows HyperTerminal to config- ure and monitor the Xenta 555 through a console window. Refer to TAC Xenta 511/527/555/911/913, Product Manual for more infor- mation. -
Page 21: Getting Started
ETTING TARTED Commissioning the TAC Xenta 555 Connecting the TAC Xenta 555 to Your Network Creating a MicroNet Network in TAC XBuilder Setting Up MicroNet Communica- tions Parameters Creating Web Pages with TAC XBuilder Engineering the TAC Xenta 555 in... -
Page 23: Commissioning The Tac Xenta 555
Connect a PC to the Xenta 555’s serial port. Attach a serial cable from the computer’s COM port to the RS232 B port on the front of the Xenta 555. Refer to TAC Xenta 511/527/555/911/913, Product Manual for complete instructions. - Page 24 3 Commissioning the TAC Xenta 555 TAC Xenta 555, Supplement Manual MicroNet Communications Parameters”, on page 39 for more information. 24 (82) TAC AB, Oct 2006 04-00054-01-en...
-
Page 25: Connecting The Tac Xenta 555 To Your Network
Connecting the TAC Xenta 555 to Your Network Note Before you connect the Xenta 555 to your network, assign it an IP address and load its software. Refer to TAC Xenta Server, Technical Manual for the necessary instructions. The Xenta 555 integrates with your building control system by commu- nicating across the Ethernet using TCP/IP transport protocols. - Page 26 More specifically, the ports required for proper communication with these systems must be open and available to the Xenta 555. The Xenta 555 uses the following communication ports: •...
-
Page 27: Alternative Port Settings
TAC Xenta 555, Supplement Manual 4 Connecting the TAC Xenta 555 to Your Network Alternative Port Settings 4.1.1 HTTP and HTTPS Perhaps you are unable to make the necessary configuration changes to your proxies/firewalls because of restrictions imposed by your com- pany’s network security policies. -
Page 28: Choosing A Location For The Tac Xenta 555
This location requires that both firewalls allow traffic through ports 80 and 443. The other ports are not required to be open on either firewall since the Xenta 555 is installed at a network location that allows it to communicate directly with MicroNet and Vista networks. -
Page 29: Connecting The Tac Xenta 555 To A Micronet Controller Lan
4 Connecting the TAC Xenta 555 to Your Network Connecting the TAC Xenta 555 to a MicroNet Controller LAN The method of connecting the Xenta 555 to a MicroNet controller LAN depends on the MicroNet LAN type. These networks are: •... -
Page 30: Connecting To A Micronet Ncp Network (Mn Mi Not Used)
LAN REF terminal at each MicroNet device (refer to the relevant MicroNet data sheets for details). For the Xenta 555, connect the second twisted pair to Pin 2 (G0). -
Page 31: Connecting To A Micronet Arcnet Network (Mn Mi Used)
MicroNet data sheet DS 10.217A. 4.3.3 Connecting to a Satchnet network (MIU not used) This method applies to Satchnet networks. The Xenta 555 connects to the MicroNet controller network through terminals 5 and 6 of its upper terminal block connector. - Page 32 4 Connecting the TAC Xenta 555 to Your Network TAC Xenta 555, Supplement Manual 32 (82) TAC AB, Oct 2006 04-00054-01-en...
-
Page 33: Creating A Micronet Network In Tac Xbuilder
Creating a MicroNet Network in TAC XBuilder Using TAC XBuilder When you create an XBuilder project that uses the Xenta 555 template, a “Micronet 1” object becomes available. This object provides functions that allow you to add MicroNet related items to your project. -
Page 34: Creating A Micronet Project
5 Creating a MicroNet Network in TAC XBuilder TAC Xenta 555, Supplement Manual The MicroNet network in XBuilder The following figure shows a portion of a MicroNet network that has been created from an XML file. The figure is annotated to describe how an object in the network view represents a portion of the network. - Page 35 TAC Xenta 555, Supplement Manual 5 Creating a MicroNet Network in TAC XBuilder In the project Settings dialog box, enter a description of the project and set the other parameters as necessary. Click OK. In the network pane of XBuilder, expand the IP Backbone item.
-
Page 36: Creating A Micronet Network From An Xml File
VisiSat Points Gallery are carefully selected, and if necessary renamed, so that they accurately reflect the requirements of the Xenta 555 project; it is the data from these points and their names which will eventually be represented in the Xenta Server’s web pages. - Page 37 TAC Xenta 555, Supplement Manual 5 Creating a MicroNet Network in TAC XBuilder Expand the Micronet 1 object (or the renamed object) and verify that your project now contains imported MicroNet network objects (subnets, controllers and so on) and point signals.
-
Page 38: Updating Your Project With A New Micronet Xml File
5 Creating a MicroNet Network in TAC XBuilder TAC Xenta 555, Supplement Manual Updating Your Project with a New MicroNet XML File Modifications within your MicroNet system such as adding or deleting points and point extensions will cause XML files to change. If changes... -
Page 39: Setting Up Micronet Communications Parameters
TAC Xenta 555, Supplement Manual 6 Setting Up MicroNet Communications Parameters Setting Up MicroNet Communications Parameters About MicroNet Communications Parameters All services required to send and receive data to connected MicroNet networks are provided by a Serial Communications Interface (SCI), which defines the communications properties for a MicroNet network. -
Page 40: Defining Micronet Communications Parameters
MN MI to run at 38400 and then switch to the faster speed. Other connections will run at the programmed baud rate. Enter the Subnet Address of the Xenta 555 (any number from 1 to 127 inclusive, default is 1). -
Page 41: Creating Web Pages With Tac Xbuilder
TAC Xenta 555, Supplement Manual 7 Creating Web Pages with TAC XBuilder Creating Web Pages with TAC XBuilder Mapping MicroNet Point Signals to Web Pages Within XBuilder, each imported MicroNet point has an associated sig- nal, termed a “point signal”, which represents the current value of the point. - Page 42 7 Creating Web Pages with TAC XBuilder TAC Xenta 555, Supplement Manual To map MicroNet point information to a values page In the system view, select and right-click a folder, point to New, point to Page, and then click Values Page to add a values page to the project.
- Page 43 TAC Xenta 555, Supplement Manual 7 Creating Web Pages with TAC XBuilder Generate the project and send it to the Xenta 555. Using a Web browser, verify that the values page displays properly. Notes • Changing the name of the point signal in the Name field will not change the name of the point signal in the resulting web page.
-
Page 44: Mapping Micronet Point Signals To Graphic Pages
7 Creating Web Pages with TAC XBuilder TAC Xenta 555, Supplement Manual Tools – Enumerations menu to provide new enumerations. For further information refer to TAC Xenta Server, Technical Manual. Fig. 7.1: 7.1.3 Mapping MicroNet Point Signals to Graphic Pages In the following example, we will map MicroNet point information to a graphic page. - Page 45 TAC Xenta 555, Supplement Manual 7 Creating Web Pages with TAC XBuilder Type a name for the new graphic object. In this example, we will name the object “graphic_Finance”. Right-click the object and click Edit Graphic to open the new graphic in the graphics editor.
- Page 46 7 Creating Web Pages with TAC XBuilder TAC Xenta 555, Supplement Manual In the Properties pane, rename the object and change any other properties as required. On the toolbar, click the Text button, then select and click a posi- tion adjacent to the sensor object and add some text that describes the object.
- Page 47 TAC Xenta 555, Supplement Manual 7 Creating Web Pages with TAC XBuilder Click the word Bind and type a suitable name in the Properties – General box, then select Content from the Target – Attribute drop-down list. 10 Add further text to the graphic if required, using the Text button as previously described.
- Page 48 7 Creating Web Pages with TAC XBuilder TAC Xenta 555, Supplement Manual ing in XBuilder has a question mark icon to show that it is not yet connected to a point signal: 12 Now drag a point signal to the binding.
- Page 49 17 Verify that the graphic page in the system view now has a child item representing the graphic that you just linked to the page. 18 Generate the project and send it to the Xenta 555. Using a Web browser, verify that the graphic page displays properly.
-
Page 50: Using Connection Objects
7 Creating Web Pages with TAC XBuilder TAC Xenta 555, Supplement Manual 7.1.4 Using Connection Objects Connection objects are useful for replicating the properties of a point signal, for instance, you may want to use an outside air temperature input for two buildings using only one sensor. - Page 51 TAC Xenta 555, Supplement Manual 7 Creating Web Pages with TAC XBuilder Drag a signal from the source device to the From connector. Caution Connect signals with similar data ranges; the system will check the ranges of both the source and destination signals and generate a com- pile warning if the ranges are significantly different.
-
Page 52: Mapping Micronet Time And Holiday Schedules
TAC Xenta 555, Supplement Manual At the web browser, verify that the connected point signals have the same value. Refer to TAC Xenta Server, Technical Manual for more information about connection objects. Mapping MicroNet Time and Holiday Schedules In addition to the point signals that are associated with a MicroNet net- work in XBuilder, signals derived from some MicroNet objects are available, that is, time and holiday schedules. -
Page 53: Creating Schedule Link Pages
TAC Xenta 555, Supplement Manual 7 Creating Web Pages with TAC XBuilder 7.2.1 Creating Schedule Link Pages To create a link page for a schedule In the following example, we will create a link page that connects to a MicroNet time schedule. -
Page 54: Linking A Schedule To A Graphic Page
7 Creating Web Pages with TAC XBuilder TAC Xenta 555, Supplement Manual 7.2.2 Linking a Schedule to a Graphic Page To associate a link page with an image on a graphic page In this example, we will import an image to the graphic page and create a link to it so that a time schedule will be displayed when the link is acti- vated in the web browser. - Page 55 TAC Xenta 555, Supplement Manual 7 Creating Web Pages with TAC XBuilder In the Objects pane, click the word Image, and in the Properties pane, rename the image and change any other properties as required. In the Objects pane, right-click the name of the image and add a new link.
- Page 56 MicroNet controller due to a controller fault or a communications failure. • If an existing schedule has never been available to the Xenta 555, an error message will be displayed at the browser for example, “Holiday Schedule read error code 42279”. This is due to a com- munications failure.
-
Page 57: Engineering The Tac Xenta 555 In Vista
TAC Xenta 555, Supplement Manual 8 Engineering the TAC Xenta 555 in Vista Engineering the TAC Xenta 555 in Vista Vista Workstation can interface with the Xenta Server 555 and the MicroNet building control system. By adding Xenta Server 555 objects and their associated XBuilder projects to Vista’s database, you can use... -
Page 58: Verifying A Tac Xenta 555 In Tac Vista Workstation
8 Engineering the TAC Xenta 555 in Vista TAC Xenta 555, Supplement Manual In this case, you can edit the project as necessary. When you finish editing this project and send it to the Xenta Server 555, Vista Server automatically links the XBuilder project to the Xenta Server 555 object in the Vista database. -
Page 59: Displaying Tac Xenta Server 555 Web Pages
TAC Xenta 555, Supplement Manual 8 Engineering the TAC Xenta 555 in Vista To verify a TAC Xenta 555 in TAC Vista Workstation In Vista Workstation, in the folders pane, click TAC Vista and then click Refresh. Expand the Vista Server object. - Page 60 8 Engineering the TAC Xenta 555 in Vista TAC Xenta 555, Supplement Manual 60 (82) TAC AB, Oct 2006 04-00054-01-en...
-
Page 61: Reference
EFERENCE MicroNet Objects in XBuilder VisiSat to XML Conversion VisiSat IP Tunnel Configuration Performance Considerations... -
Page 63: Micronet Objects In Xbuilder
TAC Xenta 555, Supplement Manual 9 MicroNet Objects in XBuilder MicroNet Objects in XBuilder The following figure shows a portion of a MicroNet network (NCP or ARCNET) in XBuilder. The figure is annotated to describe how an object represents a portion of the MicroNet network. The objects are further described below. -
Page 64: Satchnet Networks
9 MicroNet Objects in XBuilder TAC Xenta 555, Supplement Manual The node number specifies the address of a device (node) on a subnet (sub-LAN) and is specified using bit switches in the device or Mainte- nance screen at the touchscreen. -
Page 65: Point Signals
TAC Xenta 555, Supplement Manual 9 MicroNet Objects in XBuilder • MN3x0 – This object represents any of the following: • MN300 series controller or an MN350 series controller. • Unifact 1201 or Unifact 2201. • MN4x0 – This object represents any of the following: •... -
Page 66: Time And Holiday Schedules
Online Status – reports the status of the associated controller (Online or Offline). Although some MicroNet point signals can be changed (writable) from the Xenta 555 web page, none can be overridden (forcible). 9.3.2 Time and Holiday Schedules Along with the signals described above, signals are also available for MicroNet time and holiday schedules. - Page 67 TAC Xenta 555, Supplement Manual 9 MicroNet Objects in XBuilder • Holiday Schedule – The following is an example of a holiday schedule screen as seen in a web browser. TAC AB, Oct 2006 67 (82) 04-00054-01-en...
- Page 68 9 MicroNet Objects in XBuilder TAC Xenta 555, Supplement Manual 68 (82) TAC AB, Oct 2006 04-00054-01-en...
-
Page 69: Visisat To Xml Conversion
MicroNet (.xmlm). Caution Where the Xenta 555 is being added to an existing site that has been upgraded from a VisiSat 1.0 project to a 2.1 project, it will be neces- sary to re-create the points gallery in VisiSat. -
Page 70: Generation Of The Xml File For Xbuilder
VisiSat points gallery are carefully selected, and if necessary renamed, so that they accurately reflect the requirements of the Xenta 555 project; it is the data from these points and their names which will eventually be represented in the Xenta Server’s web pages. -
Page 71: Visisat Ip Tunnel Configuration
VisiSat IP Tunnel Configuration VisiSat IP Tunnel configuration enables you to communicate with MicroNet via Internet/Intranet, using the Xenta 555 as a web server. With XBuilder and the VisiSat Configuration Tool installed on a single PC, you can configure VisiSat objects at a remote site. - Page 72 11 VisiSat IP Tunnel Configuration TAC Xenta 555, Supplement Manual Changing the VisiSat port number Opening the VisiSat Configuration Tool and then double clicking the VisiSat server icon in the system tray produces the VisiSat – Server dialog box. Selecting Settings from the Network menu produces the Config- ure Network Settings dialog box.
- Page 73 TAC Xenta 555, Supplement Manual 11 VisiSat IP Tunnel Configuration The IP address of the Xenta 555 must be typed in the Host Name/ IP Address (localhost) field. The number of the VisiSat port must be typed in the Host Port Number field.
- Page 74 11 VisiSat IP Tunnel Configuration TAC Xenta 555, Supplement Manual If communications become erratic when using VisiSat via the IP Tun- nel, restart the VisiSat server (open the VisiSat – Server dialog box and select Restart from the Network menu option). In the majority of cases communications will be re-established;...
-
Page 75: Ip Tunnel And Satchnet Networks
11 VisiSat IP Tunnel Configuration 11.2 IP Tunnel and Satchnet networks By default the the Xenta 555 is configured to expect an NCP network in the communications parameters for the imported network (refer to Chapter 6, “Setting Up MicroNet Communications Parameters”, on... - Page 76 11 VisiSat IP Tunnel Configuration TAC Xenta 555, Supplement Manual 76 (82) TAC AB, Oct 2006 04-00054-01-en...
-
Page 77: Performance Considerations
The Xenta 555 has a special dynamic poll scheme that is inherent in the controller and needs no configuration. The polling of any signal depends on the signal type and its poll frequency. -
Page 78: Web Page Updates
For this reason it is recommended that the number of web cli- ents is restricted to three for a typical Xenta 555 network as described in the example given earlier. -
Page 79: Index
TAC Xenta 555, Supplement Manual Index attributes 65 Index points, mapping 44 Satchnet 13 addressing, MicroNet devices 63 signals, point 65 ARCNET 29 subnet 64 graphic page 44 – time schedule 54 touchscreen 64 holiday schedule 65 VisiSat 19 VisiSat port 27... - Page 80 Index TAC Xenta 555, Supplement Manual 80 (82) TAC AB, Oct 2006 04-00054-01-en...
-
Page 82: Tac Ab, Oct 2006
Copyright © 2006, TAC AB Europe / Headquarters All brand names, trademarks and registered trademarks are Malmö, Sweden the property of their respective owners. Information con- +46 40 38 68 50 tained within this document is subject to changewithout no- tice.
Need help?
Do you have a question about the Xenta 555 and is the answer not in the manual?
Questions and answers