Advertisement
Quick Links
Advertisement

Subscribe to Our Youtube Channel
Summary of Contents for inVue 940 Series
- Page 1 Series 940 Thin Sensor...
-
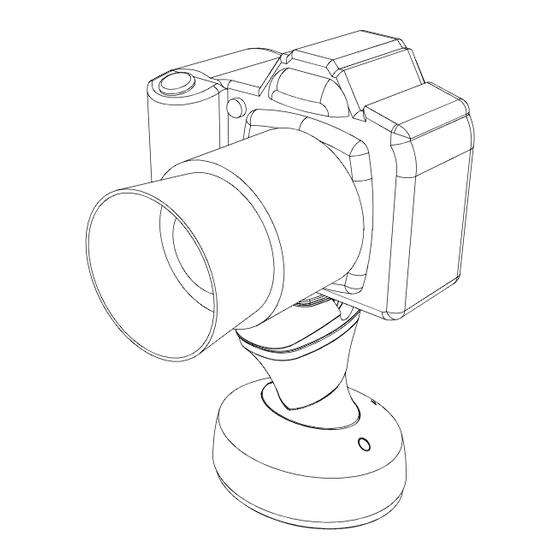
Page 2: System Components
Overview Docking Station Read entire instruction guide before starting installation. Small Digital Camera (4 prongs on bottom) System Components Docking Station 1. Series 940 Camera Puck (EC9100, not included) DSLR (magnet on bottom) 2. Thin Sensor (EC9138 or EC9139) 3. Docking Stations (2 included) 4. - Page 3 DIGITAL CAMERA INSTALLATION Select docking station with 4 prongs on bottom. (Use docking station with 4 prongs on bottom.) Firmly snap docking station into stem. Note: Once docking station is attached to stem, it is permanently attached. 4 Prong Docking Station Stem...
- Page 4 Firmly snap stem into puck. Align anti-theft bracket and camera to sensor. Tighten SECURELY with multi-tool (use T-27 bit). DO NOT strip plastic threads in camera mount. Note: ALWAYS use anti-theft bracket. Anti-Theft Bracket T-27 Bit...
- Page 5 Plug power connector* into camera and sensor. Place sensor onto docking station. Plug sensor cord into puck. *To determine which power connector is needed for the merchandise: 1) visit invuesecurity.com, 2) click on login and login, 3) click on power connector selector.
- Page 6 DSLR CAMERA INSTALLATION Firmly snap stem into puck. (Use docking station with magnet on bottom.)
- Page 7 Select docking station with magnet on bottom. Align anti-theft bracket and camera to sensor. Tighten Firmly snap docking station into sensor. SECURELY with multi-tool (use T-27 bit). Note: Once docking station is attached to sensor, it is Note: ALWAYS use anti-theft bracket. permanently attached.
- Page 8 Plug power connector* into camera and sensor. Wipe merchandise with alcohol wipe provided. Let it dry completely. *To determine which power connector is needed for the merchandise: 1) visit invuesecurity.com, 2) click on login and login, 3) click on power connector selector.
- Page 9 Remove clear film from lens sensor. Press firmly for at Place docking station onto sensor. Plug sensor cord least 10 seconds. Wrap zip tie around lens tightly. into puck.
- Page 11 Corporate Office (North America) // 704.752.6513 • 888.55.INVUE Europe, Middle East & Africa // +31.23.8900150 Asia Pacific // +852.3127.6811 Latin America // +52.55.9000.3957 © 2013 InVue Security Products Inc. All rights reserved. InVue is a registered trademark of InVue Security Products.
Need help?
Do you have a question about the 940 Series and is the answer not in the manual?
Questions and answers