Table of Contents
Advertisement
Advertisement
Table of Contents

Related Manuals for CLIVET ELFODuct MP Series


Summary of Contents for CLIVET ELFODuct MP Series
- Page 1 Installation, use and maintenance manual ELFODuct MP ELFODuct MP 15-71...
- Page 3 Index of contents...
-
Page 4: General Description
General description 1.1 Manual 1.2 Preliminaries 1.3 Risk situations 1.4 Intended use 1.5 Installation 1.6 Maintenance 1.7 Modification 1.8 Breakdown/Malfuction... -
Page 5: User Training
1.9 User training 1.10 Data update 1.11 Indications for the User 1.12 Unit indentification 1.13 Serial number 1.14 Assistance request Series Size Serial number Year of manufacture Electrical wiringdiagram... -
Page 6: Unit Description
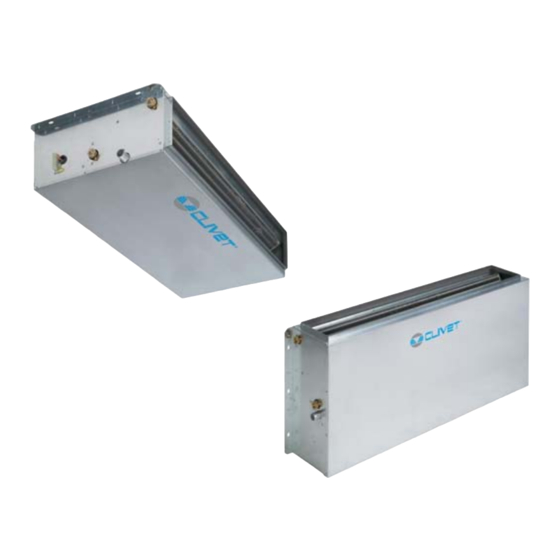
Unit description Built-in horizontal rear intake Standard Built-in horizontal Floor air inlet Built-in vertical Floor air inlet Standard Built-in vertical Front air inlet Water fittings to the right Water fittings to the left Standard supply References for position of fittings: right and left defined by standing in the airflow (with the air blowing on your back). - Page 7 Reception 3.1 Storage 3.2 Handling 3.3 Packaging removing...
- Page 8 Positioning 4.1 Functional spaces 4.2 Positioning...
- Page 9 4.3 Wall room thermostat...
-
Page 10: Water Connections
Water connections 5.1 Components 5.2 Operation sequence 5.3 Condensate drain w the runoff t the runoff... -
Page 11: Risk Of Freezing
5.4 Risk of freezing... -
Page 12: Aeraulic Connections
Aeraulic connections 6.1 Treated air channelling... -
Page 13: Electrical Connections
HIDE2X - Remote control with E/I +3V +on/off for wall installation HIDE3X - Plurifunctional remote control for wall installation HIDE4X - Plurifunctional room control for 0-10V valves 7.5 Clivet Talk Terminal Space HIDT2X - HID-T2 electronic room control HIDT3X - HID-T3 electronic room control HIDTI2X - HID-TI2 flush-mounted electronic room control 7.6 Mini-network... - Page 14 Start-up 8.1 General description 8.2 Preliminary checks o the diff Unit OFF power supply 8.3 Start-up sequence o the diff Unit ON power supply 8.4 Water circuit 8.5 Electric Circuit...
-
Page 15: Remote Controls
8.6 Voltages 8.7 Remote controls 8.8 Start-up report ptions of the diff s of the diff... -
Page 16: Maintenance
Maintenance 9.1 General description 9.2 Inspections frequency 9.3 Unit booklet tion eff 9.4 Standby mode... - Page 17 9.5 Control check list √ intervention frequency (months) presence corrosion panel fixing fan fixing coil cleaning bowl cleaning + sanitisation outflow test air filters cleaning / inspection air flow rate measurement channelling: anti-vibration devices and fastenings check check of the fixing and the insulation of the power lead check of the earthing cable electric panel cleaning termina closing, cable insulation integrity...
-
Page 18: Electric Heaters
9.8 Electric heaters 9.9 Air filter o off... - Page 19 9.10 Anomalies - Remedies Effect Cause Remedy Wrong speed setting on the control panel Select the right speed on the control panel Obstructed air filter Clean the air filter Feeble air discharge Obstruction of the airflow (inlet and/or outlet) Remove the obstruction Air distribution system load loss has been underestimated Increase fan speed Sense of rotation inverted...
- Page 20 10 Decommissioning 10.1 Disconnecting 10.2 Dismantling and disposal 10.3 Directive EC RAEE...
-
Page 21: Residual Risks
11 Residual risks General description Electric parts In this section the most common situations are indicated,as these An incomplete attachment line to the electric network or with incor- cannot be controlled by the manufacturer and could be a source of rectly sized cables and/or unsuitable protective devices can cause risk situations for people or things. -
Page 22: Dimensional Drawings
12 Dimensional drawings 12.1 Horizontal unit concealed - 2 pipe system CC2-INH Size A - Length 1200 1200 1200 1600 1600 B - Width C - Height 1246 1246 1246 1646 1646 Shipping weight Operating weight... - Page 23 12.2 Vertical unit concealed - 2 pipe system CC2-INV Size A - Length 1200 1200 1200 1600 1600 B - Width C - Height 1246 1246 1246 1646 1646 Shipping weight Operating weight...
- Page 24 12.3 Horizontal unit concealed - 4 pipe system CC4-INH Size A - Length 1200 1200 1600 1600 B - Width C - Height 1246 1246 1646 1646 Shipping weight Operating weight...
- Page 25 12.4 Vertical unit concealed - 4 pipe system CC4-INV Size A - Length 1200 1200 1600 1600 B - Width C - Height 1246 1246 1646 1646 Shipping weight Operating weight...
-
Page 26: Technical Information
13 Technical information 13.1 2 pipe system Size Cooling Cooling capacity 6.01 7.48 8.59 10.3 12.9 15.0 17.2 20.2 Sensible capacity 4.57 5.56 6.16 8.10 9.95 11.1 13.3 14.9 Total power input 0.16 0.16 0.16 0.31 0.31 0.31 0.46 0.46 Heating Heating capacity 7.82... -
Page 27: Sound Levels
13.3 Sound levels Minimum speed Sound power level (dB) Sound power Sound pressure level level Size Octave band (Hz) 1000 2000 4000 8000 dB(A) dB(A) Medium speed Sound power level (dB) Sound power Sound pressure level level Size Octave band (Hz) 1000 2000 4000... - Page 28 13.5 4-pipe system Size Cooling Cooling capacity 5.83 7.22 9.96 12.4 13.2 16.6 Sensible capacity 4.42 5.35 7.83 9.53 10.4 12.8 Total power input 0.16 0.16 0.31 0.31 0.46 0.46 Heating Heating capacity 6.61 6.97 11.6 12.2 15.5 16.4 Total power input 0.16 0.16 0.31...
- Page 29 13.7 Sound levels Minimum speed Sound power level (dB) Sound power Sound pressure level level Size Octave band (Hz) 1000 2000 4000 8000 dB(A) dB(A) Medium speed Sound power level (dB) Sound power Sound pressure level level Size Octave band (Hz) 1000 2000 4000...
- Page 30 Auxiliary condensate collection pan (vertical installation) Auxiliary drain pan in galvanized steel with thermal insulation Electric Circuit CTSP1 CLIVET TALK TERMINAL SPACE electronics with RS485 Modbus serial port CPVM Control additional card of 0-10V valve Terminal block with minimum water temperature clickson...
- Page 31 15 Accessories - Electrical connections 15.1 HIDE2X - Remote control with E/I +3V +on/off for wall installation 15.2 HIDE3X - Plurifunctional remote control for wall installation 15.3 HIDE4X - Plurifunctional room control for 0-10V valves...
- Page 32 15.4 HIDT2X - HID-T2 electronic room control 15.5 HIDT3X - HID-T3 electronic room control...
- Page 33 15.6 HIDTI2X - HID-TI2 flush-mounted electronic room control...
-
Page 34: Operation
16 Accessories - Control 16.1 Wall room thermostat HIDT2X - HID-T2 electronic room control HIDT3X - HID-T3 electronic room control 16.2 Display 21.1 Set Point visible with unit in COOLING REMOTE visible if unit managed by NET (if present) visible with unit in HEATING visible in ECO mode Ventilation status AUTO... - Page 35 16.8 ECO 16.9 Manual fan 16.10 Silenced ventilation 16.11 Change of automatic mode – 2-pipe unit Switch the thermostat on Press and hold the ON OFF key for 4 seconds If the function is managed remotely via ModBus, no modification is possible (the word REMOTE starts flashing) Activate / deativate the ANTI-TAMPERING LOCK Press and hold ECO + SWING keys for 5 seconds The lock is shown by three horizontal bars when any key is pressed...
- Page 36 Modify the set-point Pressing on the arrows raises or lowers set-point of the actual operation (heating, ECO heat., cooling, ECO cool.). The difference between the two set-points can not be less than 1°C and this value is automatically maintained. If, for example, the unit is in cooling mode and the summer set point is decreased up to the winter set value, the winter set value is also decreased.
- Page 37 16.12 Alarms visible by the display active resistance alarm active electrostatic filter alarm air probe fault alarm water probe fault alarm fresh air probe fault alarm water temperature alarm not fit active level sensor alarm mode change in progress (for the automatic mode); is not an alarm lack of communication/wrong thermostat connection fault internal to the control module configuration error...
- Page 38 16.14 List of the parameters accessible by the thermostat Description range Def. BandaLavoro: 0 ÷ 15.0 °C Working band MaxH2Ocool: 0 ÷ 30.0 °C 20.0 Water max. temperature for cooling operating MinH2OHeat: 0 ÷ 40.0 °C 30.0 Water min. temperature for heating operating TimeOnPeriodical 0 ÷...
-
Page 39: Operating Modes
16.15 HIDTI2X - HID-TI2 flush-mounted electronic room control 16.16 Keys operating mode selection decrease the selected field increase the selected field ON – OFF \ confirm 16.17 Display REMOTE Management by ELFO CONTROL Ventilation status Enabled ECO Setpoint Active humidification AUTO Unit automatically chooses to cool or heat Unit in HEATING... -
Page 40: Ventilation Mode
16.20 Initial reset amming p. 42 , it will go off 16.21 User programming 16.22 Start-up/shutdown 16.23 Selection of mode of operation Heating Cooling Heating Cooling Ventilation Economic Economic 16.24 Modification of adjustment set point 16.25 Management of fan speed 16.26 Ventilation mode 16.27 Modes: heating, economical heating, cooling, and economical cooling... -
Page 41: Battery Check
16.28 Manual status of the fans is indicated by a flashing bar 16.29 Silenced mode 16.30 Display of ambient temperature 16.31 Swing mode - control of air supply floating shutter 16.32 Battery check 16.33 Signalling of alarms and malfunctions active resistance alarm active electrostatic filter alarm air probe fault alarm water probe fault alarm... -
Page 42: Advanced Programming
16.34 Advanced programming thermostat starting (*) it hides the dirty filters thermostat reset (*) self-addressing Not used access to the configuration parameters Not used keypad lock/unlock reset of the fan fonct. hours 16.35 Cooling 16.36 Heating 16.37 Ventilation o the diff... -
Page 43: Water Valve
16.38 Water valve 16.39 Electric heaters ModeRes integration element (ventilation forced at max.) main element (manual or automatic ventilation) OutResType Single-phase Two-phase 0 – 10 volt 16.40 Outdoor air damper... - Page 44 16.41 Dehumidification 16.42 Keypad lock y eff...
- Page 45 General indications faulty module CLIVET SPA is not responsible for any malfunctioning due to the inobservance of the recommendations of this chapter; moreover, it will not perform any set-ups of the plant (or the warranty conditions will not be valid any longer) until all the above-mentioned conditions are activated.
- Page 46 BUS RS485 SHIELDED CABLE SERIAL LINE INSTALLATION OF THE SERIAL LINE • • • 50-metre spool (optional CBSX) Maximum number of components: 40 Performed by trained and qualified personnel in data communication • • Pair of twisted and shielded conductors Maximum length of every single serial networks line 1000 m...
- Page 47 Stata and parameters Serial terminations The status and the parameters displayed by the thermostat are The termination is necessary to prevent or attenuate the interferences relevant to the Master unit. on the signal. The slave units will display their status and parameters only if they are Perform it by inserting a 120 ohm resistor on the end line, connected equipped with a keyboard.
- Page 48 ONCTION / ARGO CLIVET S.P.A. - Via Camp Lonc, 25 - Z.I. VILLAPAIERA - 32030 FELTRE (BL) – ITALIA Cap.Soc. Eur 20.000.000 i.v. C.F. e Reg.Impr. BL n°.00708410253 – R.E.A. n°.66577 – P.I. /VAT:IT 00708410253 Tel. +39 0439 3131 - Fax +39 0439 313300 –Web: www.clivet.it...
- Page 49 REVERSING THE HYDRAULIC CONNECTIONS Compulsory for vertical units only: Place the electric cables on the opposite side to that of the definitive hydraulic connections. If the terminal board is mounted (or electric board or electronic cards), remove it and mount on the opposite side . Reinstall the component retracing the procedure used for the disassembly.
- Page 50 Insert the coil, inclined as shown in “Q”, and fit the hydraulic connections into the new holes “I” (created in the point no.4). Tighten the 4 Ø 3.9x9.5 screws “F” in the aligned shoulder-coil bracket holes (2 left side + 2 right side). Note: opposite operation of point no.3;...
- Page 52 CLIVET SPA CLIVET UK LTD (Sales) CLIVET AIRCON LTD (Service and Maintenance Division) CLIVET ESPAÑA COMERCIAL S.L. (Sales) CLIVET ESPAÑA S.A.U. (Service and Maintenance Division) CLIVET GmbH CLIVET RUSSIA . 24, offic CLIVET MIDEAST FZCO CLIVET AIRCONDITIONING SYSTEMS PRIVATE LIMITED...
Need help?
Do you have a question about the ELFODuct MP Series and is the answer not in the manual?
Questions and answers