Advertisement
Quick Links
Advertisement

Summary of Contents for Ringmaster HOME GYM 1000
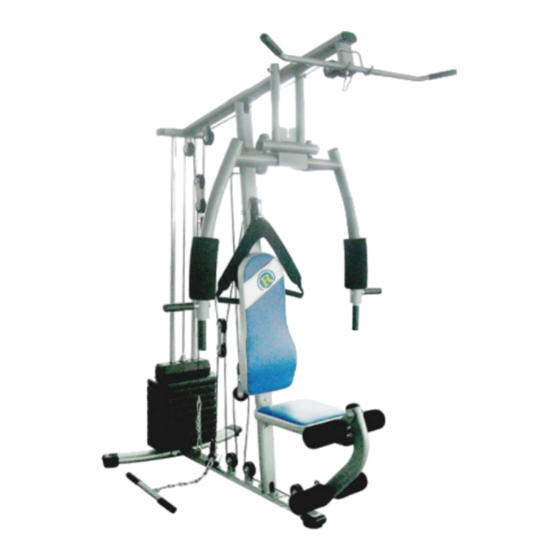
- Page 1 PRODUCT CODE: FRMGEHG1000 HOME GYM 1000 OWNER’S MANUAL...
- Page 2 General Usage Instructions 腊月 13444 Congratulations and thank you for choosing this Ringmaster Fitness Product. Your new equipment is designed to provide a great exercise workout for years to come. It is an excellent example of the quality workmanship and rugged, dependable construction that we put into all Ringmaster Fitness Products.
- Page 3 Important Safety Precautions, Care, and Maintenance In order to avoid injury and/or an accident it is important that you read all safety precautions and instructions in this manual carefully before using this equipment. It is important that you carefully inspect this equipment before each use to ensure that all parts are in proper working order.
- Page 4 Warm-up Stretches It is important that each exercise session begin with at least 5 to 7 minutes of gentle stretching of the muscles of your lower body followed by at least 1 minute of relaxed walking. Listed below are several stretching exercises. Hold each stretch for approximately 20 seconds, relax, then repeat each stretch several times.
-
Page 6: Part List
PART LIST NUMBER DESCRIPTION QUANTITY MAIN BASE BACK BASE MAIN FRAME GUIDE ROD TOP CROSS BEAM SEAT SUPPORT PRESS BAR RIGHT CHEST SUPPORT LEFT CHEST SUPPORT PULLEY BLOCK LEG EXTENSION FOAM TUBE LAT BAR PULL BAR HANDLE BAR SELECTOR SHAFT UPRIGHT PULLEY BLOCK PARALLEL PULLEY BLOCK ROTATIONAL PULLEY BLOCK... - Page 8 PART LIST NUMBER DESCRIPTION QUANTITY BACK CUSHION SEAT CUSHION BIG FOAM ROLLER FOAM ROLLER RUBBER DONUT CABLE WITH NO BALL LONG CABLE WITH ONE BALL SHORT CABLE WITH ONE BALL CABLE WITH BOLT HOOK CHAIN BOLT M12×205 +WASHERS + LOCK NUTS BOLT M6*16 + WASHER BOLT M8×40 + TWO WASHERS + LOCK NUT BOLT M8×55 +WASHER...
- Page 9 STEP 01 1.Attach back base (B) to main base (A) with bolt M10*100 + bend washers + lock nut (28). 2.Attach guide rod (D) to back base (B) with square neck bolt M10*55 (22). 3.Attach main frame (C) to main base (A) with square neck bolt M10*55 + washer + lock nut (23).
- Page 10 STEP 02 1.Attach press bar (G) to top cross beam (E) with bolt M12*205 + washers + lock nut (13). 2.Attach right and left chest support (H&I) to press bar (G) with Allen bolt M10*20 + big washer (18). 3.Push big foam roller (3) onto right and left chest support (H&I). 4.Secure handle bar (O) to right and left chest support (H&I) with bolt M10*20 + bend washer (20).
- Page 11 STEP 03 1.Attach seat support (F) and joint plate (t) to main frame (C) with bolt M10*60 + washers + lock nut (25). 2.Attach seat cushion (2) to seat support (f) with bolt M6*16 + washer (14). 3.Attach back cushion (1) to main frame (C) with bolt M8*55 + washer (16). 4.Attach leg extension (K) to seat support (F) with bolt M10*75 + washers + lock nut (26).
- Page 12 STEP 04...
- Page 13 CABLE ASSEMBLY 1. Assembly of the cable with no ball (6) Connect one end of the cable to one of chest support with bolt M10*20 + lock nut (19). Then thread the other end of the cable over pulley S1, down and round pulley Q1 on upright pulley block (Q), up and over pulley S2, secure cable to chest support with bolt M10*20 + lock nut (19).
- Page 14 EXERCISES CHEST PRESS LEG EXTENSION SEATED MID ROW LEG CURL LAT PULL DOWN UPRIGHT ROW TRICEP PUSH DOWN ARM CURL OUTER THIGH INNER THIGH...
- Page 15 PECTORAL CROSSOVER DELTOID RAISE AB CRUNCH BACK KICK TRICEP EXTENSION SIDE BEND...
- Page 16 MADE IN CHINA, FOR www.ringmasterfitness.com.au...
Need help?
Do you have a question about the HOME GYM 1000 and is the answer not in the manual?
Questions and answers