Sony NEX VG900 Quick Start Manual
Hide thumbs
Also See for NEX VG900:
- Operating manual (151 pages) ,
- Service manual (76 pages) ,
- Specifications (3 pages)
Advertisement
Quick Links
195
390
What's in the Kit •••
•
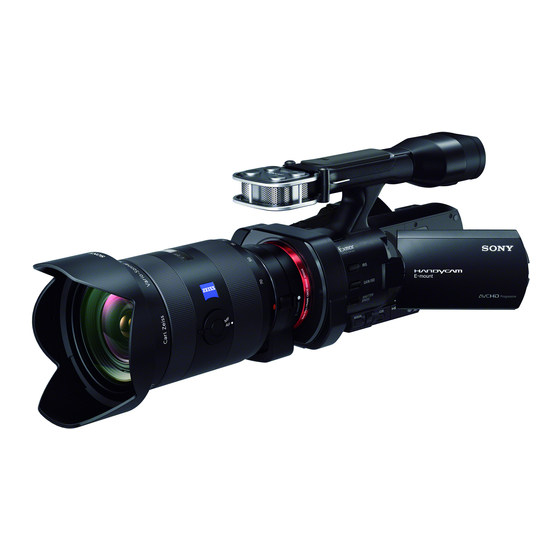
SONY NEX VG900
Step 5: Turning the power on, and setting the
video camera with
date and time
2.8 28-75 Zoom lens
1
) and remove the
Slide the POWER switch to ON while pressing the green button.
• Power up the Camera •••
mode button
Step 7: Inserting a memory card
BATT (battery) release lever
2
Select the desired language, then touch [Next].
• Set Date + Time + Area•••
•
Setup menu > Clock icon
Touch the button on the
LCD screen
•Insert + Format SD card •••
•
3
Setup menu > Format
Select the desired geographical area with
1
•Set Shooting Mode •••
Open the cover, and insert the memory card with the notched edge in the
direction as illustrated until it clicks.
•
press MODE button beside Power switch or
The [Preparing image database file. Please wait.] screen appears if you insert a new
memory card. Wait until the screen disappears.
•
use Shooting Mode menu setting
2
Close the cover.
•Recording Format•••
Notes
If [Failed to create a new Image Database File. It may be possible that there is not enough free space.] is
•
displayed, format the memory card.
Setup menu >Image Quality/Size
To set the date and time again, touch
Confirm the direction of the memory card. If you forcibly insert the memory card in the wrong direction,
the memory card, memory card slot, or image data may be damaged.
•
Frame Rate > 60i, 60p, 24p ( Next )
[Date & Time Setting]
[Date & Time]. When an item is not on the screen, touch
Do not open the cover during recording.
When inserting or ejecting the memory card, be careful so that the memory card does not pop out and
until the item appears.
drop.
•
REC Mode > choose Standard.
To eject the memory card
Open the cover and lightly push the memory card in once.
data
Highest
High
PS
rate
Quality
Quality
US
30
60i
N/A
24MB
17MB
US
60p
28MB
N/A
N/A
24
24p
N/A
24MB
17MB
Power cord (mains lead) (1) (p. 17)
•
lens shade
Getting Started
Step 1: Checking
Component A/V Cable (1) (p. 41)
supplied items
•
rubber eye cup
Make sure that you have following items
supplied with your camcorder.
•
remote control
The numbers in ( ) are the supplied
quantity.
A/V connecting cable (1) (p. 41)
This camcorder (1)
Body cap (attached to the camcorder)
(1) (p. 20)
USB cable (1) (p. 52)
•Deactivating Auto Shut Off •••
US
14
AC Adaptor (1) (p. 17)
•
Setup menu > General Settings>A. Shut Off
• Set Zebra to 100 % white•••
•
Camera / Mic menu > Shooting Assistant
•
Power cord (mains lead) (1) (p. 17)
POWER switch
•
turn Zebra on/off with button
• Set Peaking for Focus Assist•••
Component A/V Cable (1) (p. 41)
•
Camera / Mic menu > Shooting Assistant
•
Access lamp
A/V connecting cable (1) (p. 41)
•
turn Peaking on/off with button
• Turn on Audio Level Display•••
•
USB cable (1) (p. 52)
Camera / Mic menu > Shooting Assistant
/
, then touch [Next].
Note the direction of notched corner.
•
US
14
• Set Digital Zoom Speed•••
•
Camera / Mic menu > Shooting Assistant
•
•
•
(MENU)
[Setup]
[
(
Clock Settings)]
/
•Expanded 4X Focus•••
Long
Std
Time
9MB 5MB
N/A
N/A
N/A
N/A
to assist with manual focus
Wind Screen (1) (p. 16)
Make sure that you have following items
Make sure that you have following items
Make sure that you have following items
supplied with your camcorder.
supplied with your camcorder.
supplied with your camcorder.
The numbers in ( ) are the supplied
The numbers in ( ) are the supplied
The numbers in ( ) are the supplied
quantity.
quantity.
quantity.
This camcorder (1)
This camcorder (1)
This camcorder (1)
Body cap (attached to the camcorder)
Body cap (attached to the camcorder)
Body cap (attached to the camcorder)
•
windscreen
(1) (p. 20)
(1) (p. 20)
(1) (p. 20)
Large eyecup (1) (p. 29)
Power cord (mains lead) (1) (p. 17)
•
AC Adaptor (1) (p. 17)
AC Adaptor (1) (p. 17)
battery ( 3 )
AC Adaptor (1) (p. 17)
Wireless Remote Commander (RMT-
Component A/V Cable (1) (p. 41)
835) (1)
•
Power supply
Power cord (mains lead) (1) (p. 17)
Power cord (mains lead) (1) (p. 17)
Power cord (mains lead) (1) (p. 17)
A/V connecting cable (1) (p. 41)
A button-type lithium battery is already
installed.
Component A/V Cable (1) (p. 41)
Component A/V Cable (1) (p. 41)
Component A/V Cable (1) (p. 41)
Rechargeable battery pack (NP-FV70)
(1) (p. 17)
USB cable (1) (p. 52)
US
14
A/V connecting cable (1) (p. 41)
A/V connecting cable (1) (p. 41)
A/V connecting cable (1) (p. 41)
Wind Screen (1) (p. 16)
USB cable (1) (p. 52)
USB cable (1) (p. 52)
USB cable (1) (p. 52)
choose Zebra > On
US
US
US
14
14
14
•
use + button to set Zebra to 100
Large eyecup (1) (p. 29)
choose Peaking > On
•
set colour and level
choose Audio Level Display > On
choose Digital Zoom > On
choose Zoom Lever > On
choose Zoom Speed > Variable or Fixed
Step 2: Attaching the
supplied accessories
Attaching the Wind Screen
Use the Wind Screen when you want to
reduce the wind noise recorded by the
microphone. Attach the Wind Screen with
the Sony logo facing down.
Wireless Remote Commander (RMT-
Wireless Remote Commander (RMT-
Wireless Remote Commander (RMT-
Wireless Remote Commander (RMT-
Make sure that you have following items
835) (1)
835) (1)
835) (1)
835) (1)
supplied with your camcorder.
The numbers in ( ) are the supplied
Wind Screen (1) (p. 16)
quantity.
This camcorder (1)
•
Power cable
A button-type lithium battery is already
A button-type lithium battery is already
A button-type lithium battery is already
Body cap (attached to the camcorder)
installed.
installed.
installed.
(1) (p. 20)
A button-type lithium battery is already
Rechargeable battery pack (NP-FV70)
Rechargeable battery pack (NP-FV70)
Rechargeable battery pack (NP-FV70)
installed.
(1) (p. 17)
(1) (p. 17)
(1) (p. 17)
Large eyecup (1) (p. 29)
Rechargeable battery pack (NP-FV70)
•
USB cable
(1) (p. 17)
AC Adaptor (1) (p. 17)
Wind Screen (1) (p. 16)
Wind Screen (1) (p. 16)
Wind Screen (1) (p. 16)
•
lapel mic
Wind Screen (1) (p. 16)
Large eyecup (1) (p. 29)
Large eyecup (1) (p. 29)
Large eyecup (1) (p. 29)
Power cord (mains lead) (1) (p. 17)
•How do we use Zebra ?
Large eyecup (1) (p. 29)
A Zebra set at 100% will show that
Component A/V Cable (1) (p. 41)
part of the image that is pure white.
No other part of the image should
have zebra or it is over exposed.
A/V connecting cable (1) (p. 41)
USB cable (1) (p. 52)
US
14
1. Activate Zebra.
2. Place a white piece of paper in
your lighting setup or shot.
3. Adjust the exposure until only
this paper has lines on it.
• Press Shutter: 60 - 125
• Press Gain + adjust max 18dB
• Press Iris + adjust
4. Then reduce the aperture until
the lines disappear.
5. Your image is now a little under
exposed, which is ideal.
•Manual White Balance •••
Press White Balance button.
Wind Screen (1) (p. 16
A/V connecting cable (1) (p. 41)
Power cord (mains lead) (1) (p. 17)
Large eyecup (1) (p. 29
USB cable (1) (p. 52)
Component A/V Cable (1) (p. 41)
US
14
A/V connecting cable (1) (p. 41)
USB cable (1) (p. 52)
US
14
Auto Exposure
Manual Exposure
Advertisement

Related Manuals for Sony NEX VG900


Summary of Contents for Sony NEX VG900
- Page 1 Use the Wind Screen when you want to Press White Balance button. rate Quality Quality Time reduce the wind noise recorded by the microphone. Attach the Wind Screen with the Sony logo facing down. 24MB 17MB 9MB 5MB 28MB 24MB 17MB to assist with manual focus...
- Page 2 MANUAL button ADJUSTING EXPOSURE SONY NEX 900 CAMERA SET UP PUTTING AWAY EQUIPMENT • Remove Tripod plate from ca. • Replace plate on tripod • Insert the camera battery GAIN MANUAL dial • Turn the camera off • Insert the SD card This controls the light sensitivity of •...
Need help?
Do you have a question about the NEX VG900 and is the answer not in the manual?
Questions and answers