Table of Contents
Advertisement
Quick Links
Advertisement
Table of Contents

Subscribe to Our Youtube Channel
Related Manuals for Ringway RS400


Summary of Contents for Ringway RS400
- Page 2 Precaution Thank you for purchasing this digital instrument. For perfec t operation and security, please read the manual carefully and keep it for future reference. Safety Precautions CAUTION RISK OF ELECTRIC SHOCK DO NOT OPEN The lightning flas h with arrowhea d symbol withi n an equilateral triangle is in tended t o alert t he u s er t o t he presenc e of uninsulated dangerous voltage within t he produc t s enclosure that may be of sufficient magnitude t o constitut e a...
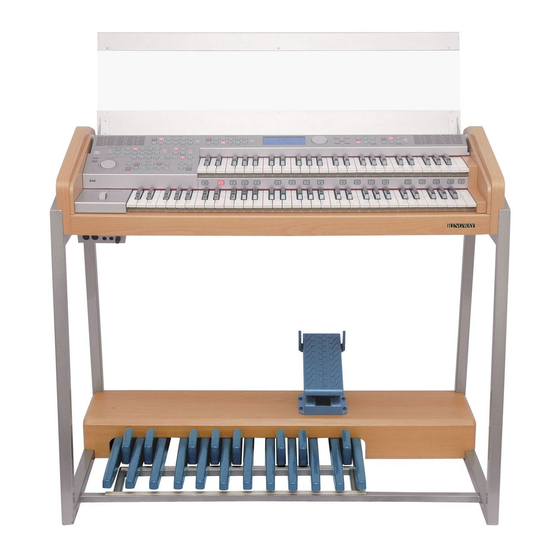
- Page 3 Thank you for purchasing the RS400 electronic organ The RS400 EU is a quality organ with touc h sensitivity key board and combine s the most advanced PCM tone generation technolog y. Large back lit LCD displa y and easy-to- use also greatly enhances the operability of thi s advanced instrument.
-
Page 4: Table Of Contents
Contents ..............Panel Controls ..............2 Chord Volume Percussion ............Main Controller Layout............. Volume ..............Connectors .................5 Bass Volume ............Using AC power...............5 MOC. Harmony .. Headphones.............5 4.Automatic Accompaniment...…………………………25 ............Line Out................6 Fingered Chord ................. Line In.............. -
Page 5: Panel Controls
Panel Controls... - Page 7 LCD display Upper Voice 1 Lead Voice Upper Voice 2 Rhythm Lowe r Voice 1 Page Effect Displa y Lowe r Voice 2 Pedal Voic e 1 Pedal Voic e 2...
-
Page 8: Connectors
Connectors Using AC power Make sure the switch is off before you put the plug into the socket Tip s of Usin g Electrical Safety Please ensure that the instrument is connected to an earthed supply. Must use a separate socket, plug the mains plug into an earthed 3 Pin socket. For your personal safety and the product longevity, please comply with this produc t’s power input and reliable grounding requirements. -
Page 9: Line Out
Line Out Your instrument has two line out jacks, Line out/R(R+L), and Line out/L. Used to send the audio signa l out to an externa l amplifier, mixer console or recording equipment. To connect the instrument in stereo to an externa l amplification system connects both left and right outputs. -
Page 10: Basic Operation
Basic Operation Power Switch Turn the power on by pressing the Power switch, the panel LCD displa y will show: Orla RS400 EU then U1 Flute168 Set the Volume MAIN V O L U M E Set the [MAIN VOLUME ] to appropriate position between the MIN and MAX. -
Page 11: Factory Set
Factory Set Press [SHIFT] button, and hold then press 5 button. Press [CONFIRM] butto n , it can restore current 16 registrations to factory set. -
Page 12: Voice
Voice Upper Keyboard Voices Upper Keyboard Voice 1 and Upper Keyboard Voice 2 can be selected from the panel's Upper Keyboard Voice 1/2 section. Press [VOICE] butto n to turn on the indicato r lamp , you can select Upper Keyboard Voice 2. Press [VOICE] butto n to turn off the indicator lamp , you can select Upper Keyboard Voice 1. -
Page 13: Lower Keyboard Voices
Lower Keyboard Voices Voices for each section can be selected from the panel's Lower Keyboard Voice section. Press [VOICE] butto n to turn on the indicator lamp , you can select Lower Keyboard Voice 2. Press [VOICE] butto n to turn off the indicator lamp , you can select Lowe r Keyboard Voice 1. Press [VOLUME UP/DOWN] buttons to adjus t the current lower voice volume. -
Page 14: Voices Controller
Voices controller Afte r you select the voice, you can adjus t current voice's parameters. Some voices have fixed parameters for either vibrato tremolo or filter and resonance as they are part of the sample. These cannot be modified. 1.Volume Press [ITEM/PAGE +] button, select Volume , then press [DATA +/-] butto n or use the data dial to adjust voice’s volume, Range: 00-127... -
Page 15: Transpose
4.Transpose Press [ITEM/PAGE +] button, select X.Pose , then press [DATA +/-] butto n or use the data dial to change the setting . Range: -6~6 5.Octave Press [ITEM/PAGE +] button, select Octave , then press [DATA +/-] butto n or use the data dial to change the octave value. -
Page 16: Decay
7.Decay Decay time. Time from the final Attack level to the beginning of the Sustain. Press [ITEM/PAGE +] button, select Decay , then press [DATA +/-] butto n or use the data dial to change the setting . Range: 00~127 8.Release Release time during which the sound goes from the sustaining phase, to zero. -
Page 17: Vibrato Depth
10.Vibrato Depth The intensity of the vibrato effect. Press [ITEM/PAGE +] button, select Vib-dpth , then press [DATA +/-] butto n or use the data dial to set vibrato depth. Range: 00~127 11.Vibrato Delay Dela y time from playing a key to the start of the vibrato effect. Press [ITEM/PAGE +] button, select... -
Page 18: Cut.freq
13.Cut.Freq Frequenc y at which the filter begins to have an effect on the waveform s frequency components Press [ITEM/PAGE +] button, select Cut.Freq , then press [DATA +/-] butto n or use change the setting . Range: 00~127 the data dial to... -
Page 19: Effect
Effect This function allows you to perform the overall sound in a realistic style. Afte r powe r on, effect function is open, [EFFECT] butto n s indicator lamp is light, press this butto n to turn on or off [EFFECT] function. 1.Reverb Type Press [ITEM/PAGE +] button, select R.Type , then press [DATA +/-] butto n or use... -
Page 20: Reverb Time
4.Reverb Time Press [ITEM/PAGE +] button, select R.Time , then press [DATA +/-] butto n or use the data dial to set reverb time. Range: 00~127 5.Reverb Delay Feedback Press [ITEM/PAGE +] button, select R.DlyFdk , then press [DATA +/-] button or use the dial to set reverb dela y feedback. -
Page 21: Reverb Send Level-Rhythm
7.Reverb Send Level-Rhythm Press [ITEM/PAGE +] button, select R.R1Levl , then press [DATA +/-] butto n or use the data dial to increase or decrease rhythm's reverb level. Range: -50~50 8.Chorus Type Press [ITEM/PAGE +] button, select C.Type , then press [DATA +/-] butto n or use the data dial set cho rus type : 00Chorus 1, 01Chorus 2, 02Chorus 3, 03Chorus 4, 04Chr Feed, 05Flanger, 06Short Delay, 07Feed Delay 9.Chorus PreLPF... -
Page 22: Chorus Master Level
10.Chorus Master Level Press [ITEM/PAGE +] button, select C.MLeve l , then press [DATA +/-] butto n or use the data dial set chorus master level. Range: 00 ~127 11.Chorus Feedback Press [ITEM/PAGE +] button, select C.Feedbk , then press [DATA +/-] butto n or use the data dial to change setting . -
Page 23: Chorus Rate
13.Chorus Rate Press [ITEM/PAGE +] button, select C.Rate , then press [DATA +/-] butto n or use the data dial to change setting. Range: 00 ~127 14.Chorus Depth Press [ITEM/PAGE +] button, select C.Depth , then press [DATA +/-] butto n or use the data dial to change setting. -
Page 24: Chorus Send Level Rhythm
16.Chorus Send Level Rhythm Press [ITEM/PAGE +] button, select C.R1Levl , then press [DATA +/-] butto n or use the data dial to increase or decrease rhythm's reverb level. Range: -50~50... -
Page 25: Automatic Accompaniment
Automatic Accompaniment 1.Selecting Rhythms with the Rhyth m buttons A total of 100 rhythms can be instantly selected with the 8 rhythm buttons on the panel. Use the data dial to select rhythm that you want. 2.Rhythm Volume Using the Rhythm Volume buttons on to set the rhythm volume. Start The rhythm begins as soon as the [START] butto n is pressed. -
Page 26: Intro/End
Intro/End Pressing the [ SYNC ] followed by [INTRO/END ] button automatically adds a short introduction before starting the actual (Main) rhythm. It is started by playing a chord on the lower keyboard. The Intro is based on the chord played. Pressing [INTRO/END] buttons automatically adds an ending phrase before stopping the rhythm. -
Page 27: Percussion Volume
Percussion Volume Press [ITEM/PAGE +] button, select PercVol , then press [DATA +/-] butto n or use the data dial to change percussion volume . Range: 0 0-127 Bass Volume Press [ITEM/PAGE +] button, select BassVol , then press [DATA +/-] butto n or use the data dial to change bass volume. -
Page 28: Automatic Accompaniment
Automatic Accompaniment 4.Fingered Press [FINGERED] button, the fingered Chord mode automatically produces bass accompaniment for chords played in the Lower keyboard. RHYTHM CONTROL CUSTOM Custom Similar as fingered chord mode, but the bass is changed by on the pedal keyboard. RHYTHM CONTROL FINGERED Single Finger... -
Page 29: Tempo
5. Tempo Press the [TEMPO +/-] butto n to set tempo. Range: 40-280. Press [TEMP O +/-] butto n simultaneously to reset the tempo to default value. Press [SHIFT] butto n and hold, then Press [TEMPO +/-] button to scale the tempo of USB midi playing .this effect rhythm playing also. -
Page 30: Insert Rhythm Number
Insert Rhythm Number Hold down [SHIFT] and [INSERT] button to select position that you want to insert. Delete Sequence number Hold down [SHIFT] button, then press [DELETE] butto n to delete it. DELETE MASTER SHIFT TRANSPOSE Delete all rhythm sequence setting Hold down [SHIFT] butto n ,and then press [CLEAR] butto n to delete al rhythm sequence setting. -
Page 31: Select Percussion Voice
Select Percussion Voice Press [ITEM/PAGE +] button, select first item , then press [DATA +/-] butto n or use the data dial to change percussion voice. DATA CONFIR M ITEM / P A G E Setting Percussion Shift Press [ITEM/PAGE +] button, select second item , then press [DATA +/-] butto n or use the data dial to change percussion shift on the keyboard. -
Page 32: Function
Function 1.Mode Press [MODE] button to select Normal, Mixe r or Reg Shift. Normal Press [MODE] button to select Normal. Mixer Press [MODE] button to select Mixe r. U1Vol ------ upper voice 1's volume U2 Vol ------ upper voice 2's volume LD Vol ------ lead voice's volume L1 Vol ------ lowe r voice 1's volume L2 Vol ------ lowe r voice 2's volume... -
Page 33: Reg Shift
Part1 Vo l Perc Vo l Part2 Vo l Bass Vo l Part3 Vo l Part4 Vo l Rhy Vo l Part5 Vo l Chord Vo l Part6 Vo l Part7 Vo l Part8 Vo l Press [ITEM/PAGE +] butto n to select voices volume and rhythms volume, then press [DATA +/-] button or us e the data dial to change volume value. -
Page 34: Master Transpose
2.Master Transpose Performance Transpose Press [MASTE R TRANSPOSE] button, LCD displa y M.Transp .The n press [ITEM/PAGE +] butto n to select PlayTran , press [DATA +/-] butto n or use the data dial to change transpose value for your performance(including rhythm playing). USB Transpose Press [MASTE R TRANSPOSE] button, then press [ITEM/PAGE +] butto n to select Usb Tran , press [DATA +/-] button or use the data dial to change transpose value for... -
Page 35: F.footsw
F.FootSW Press [OTHERS ] button, then use [SHIFT] button and [ITEM/PAGE +] button to select F.FootSW When LCD displays P02F.FootSW, press [ITEM/PAGE +] butto n to set F.FootSW, then press [DATA +/-] butto n or use the data dial to select the function of the left switch on the expression pedal: Off, Start, Fill, Ending , Damper. -
Page 36: Midi Out
Volume----------lock voices' volume when you select new voice. Default: On Pan-------------- lock voices' pan when you select new voice. Default: Off USB Tempo----lock the tempo of the USB midi file . Default: Off ABC.Oct--------lock accompaniment octave, when off, the octave is decided by your chord octave. -
Page 37: F.other1
F.Other1 Press [OTHERS] button, then use [SHIFT] butto n and [ITEM/PAGE +] button to select P05F.Other1 LDSplit Press [ITEM/PAGE +] button, then press [DATA +/-] butto n or use the data dial to select lead voice spli t mode LDNormal--- LDNormal the whole keyboard can pla y lead voice LDSplit-------... - Page 38 Pedal Split Press [ITEM/PAGE +] button, then press [DATA +/-] button or use the data dial to select pedal split mode PDSplit. Normal: PDNormal Lower keyboard is not split for pedal voice. Split: PDSplit Lower keyboard is split for pedal voice. Press [TO LOWER] button in the pedal voice section, change the pedal voice to the lower keyboard, in split mode, the lower keyboard is split two sections , left...
-
Page 39: F.other2
Rhy. MIDI Press [ITEM/PAGE +] button, select Rhy.MID I , then press [DATA +/-] butto n or use the data dial set On or Off , when off, disable midi out for rhythm playing. USB MIDI Press [ITEM/PAGE +] button, select USB. -
Page 40: Touch
Local Setting Press [ITEM/PAGE +] button, select Ply.Locl , then press [DATA +/-] butto n or use the data dial set On or Off , when off, no sound on the speaker for your keyboard performance. Rhy.Locl Press [ITEM/PAGE +] button, select Rhy.Locl , then press [DATA +/-] butto n or use the data dial set On or Off , when off, no sound on the speaker for your rhythm playing. -
Page 41: Registration Memory
Registration Memory 1.Storing Registration While holding down the [M] (Memory) butto n in the Registration Memory section, press the numbered butto n to which you wish to save your Registration. When the Registration is stored, the indicator lamp above the numbered the numbered butto n flashes momentarily. -
Page 42: Save The Registration Data To The Organ
If you want to save the Registration data into current USB registration file, hold down [SHIFT] button, the n press [M.REG] button. The registration data is saved into the registration file. Use Registratio n Data from USB Insert the USB disk into the USB socket. Use [SELECT+/-] butto n to select REG file, the n press [PLAY] button, displa y shows Update ? , the n press [CONFIRM] button to execute the operation... -
Page 43: Registration Shift
The four internal memory banks cannot be saved to USB. Only the current section that is in use is saved to USB. The internal memory is best thought of as an internal mini USB in which to store your favourite registrations. For safety it is best to back up registrations on USB. 6.Registration Shift The Registration Shift function conveniently allows you to change Registrations without taking your hands from the keyboards. - Page 44 Top---right foot-switch can select Registrations from the first to the last circularly. Stop--- right foot-switch can select Registrations from the first to the last. Then stops. Press [ITEM/PAGE +] button, select RegNum01 , use [DATA +/-] button or use the data dial change the set .there are all 78 registration settings.
-
Page 45: Recorder
Recorder 1.Recording Insert the USB disk into the USB socket. Press [REC] butto n to start recording , the first para will have indicato r beat sound rhythm volume is not min . Whe n you finish recording , press the [REC] again. Recording stops and your performance is writte n to the song. - Page 46 Press [ITEM/PAGE +] button select REC Ch01 REC Ch16, use [DATA +/-] button or use the data dial to turn on/off the recording channel. If turned off, voice of the channel will not be recorded in USB midi file Press [ITEM/PAGE +] butto n selectPLAYCh01 PLAYCh16, use [DATA +/-] button or use the data dial to turn on/off the playing channel.
- Page 47 Press [ITEM/PAGE +] butto n select BeatType , use [DATA +/-] butto n or use the data dial to select beat type. 5.RPT.Off Press [ITEM/PAGE +] butto n select RPT.Off , use [DATA +/-] butto n or use the data dial to change set.
-
Page 48: Usb Control
USB Control Your instrument can support these file types: midi file(*.mid) registration file(*.reg), update file(*.drv).All files can be accessed in root directory of USB disk only. USB File Press [FILE TYPE] button to select file type, the press [select +/-] butto n to select the file. If You want select file faster, you can press [shift] and hold , then press [select +/-] button... -
Page 49: Factory Registrations
RS 400 EU Factory Registrations Preset Registration Style Tempo Number Electronic Organ Swing/Foxtrot Jazz Organ Jazz Club/Quickstep 180 Theatre Organ 6/8 March/Tarantella 110 Church Organ Disco Piano 8 Beat Tenor Sax Jazz Ballad Vibes/ElecPiano Country 8 Beat Scat Voice Stride Piano Steel Guitar Country 2 Beat Jazz Guitar... -
Page 50: Foot.switch
Foot Switch Your instrument has two Foot switches on the expression pedal. The Right Foot-switch is used for the Registration Shift function, while the Left Foot switch can be set to :off, start stop, fill in ,ending, Damper. Detailed descriptions of the Left Foot-switch please refer to page 32.Detailed descriptions of... -
Page 51: Appendix
Appendix Chord List N ame Normal Voicing Chord Display [M ] 1-3-5 1-(3 -5-6 [M7] 1-3-(5)-7 or CM 7 CM 7 1-(3)-5-7 [M7#11] 1-(2)-3- 4-(5)-7 or 11 CM7( 1-2-3- 4-(5)-7 [Madd9] 1-2-3-5 CMadd 9 C(9) 1-2-3-(5)-7 [M9] CM 9 CM7(9) [6 9] 1-2-3-(5)-6 C 6 9... -
Page 52: Voice List
Voice List Upper keyboard Voice1 2 / Lower keyboard Voice1 2 1.Acoustic Grand Piano 10.Celesta 2.Bright Acoustic Piano 11.Glockenspiel 3.Electric Grand Piano 12.Music Box 4.Honky-Tonk Piano 13.Vibraphone PIANO/ 5.Electric Piano 1 14.Marimba 6.Soft EP 15.Xylophone 7.Electric Piano 2 16. Tubular Bells 8.Harpsichord 17.Dulcimer 9.Clavi... - Page 53 79.Soprano S ax 87. Piccolo 80. A l t o S ax 88.Flute 81. Te n or S ax 89.Recorder REED/PIP E 82.Baritone S ax 90. P an Flute 83.Oboe 91.Blown Bottle 84.Englis h Horn 92.Shakuhachi 85.Bassoon 93.Whistl e 86.Clarinet 94.Ocarina 95.Lead 1 (Square) 103.
- Page 54 Uppe r Keyboard Lead Voic e Flute Flut e Recorder P an Flut e Blown Bottle Trumpet Trumpet Trombone Trombone Muted Trumpet 154 Voice Pedal Keyboard Voice1,2 Bass 8 ; Acoustic Bass Finger Bass Pick Bass Acoustic Bass Fretless Bass Slap Bass 1 Slap Bass 2 Synth Bass 1...
-
Page 55: Percussion List
Percussio n List Bank(0 -127) Pc(0-127) Note Standard Set 1 Room Synth Electronic Dance R&B HipHop 13 #C Surdo Mute Surdo Mute BD Rock 2 14 D Surdo Open Surdo Open SD Elec M 15 #D Hi Q Hi Q BD Analog 1H 16 E Whip Slap... - Page 56 Bank(0 -127) Pc(0-127) Note Standard Set 1 Room Synth Electronic Dance R&B HipHop Crash Cymbal2 Cras h Cymbal2 Crash Cymbal2 Crash Cymbal2 Dance Cha 2 R&B Cha 2 HipHop Cha 3 57 A Vibraslap Vibraslap Vibraslap Vibraslap Vibraslap Vibraslap Vibraslap 58 #A Ride Cymbal 2 Ride Cymbal 2 Ride Cymbal 2 Ride Cymbal 2 Ride Cymbal 2 R&B Cha 3...
- Page 57 Bank(0 -127) Pc(0-127) Note Effects Jazz Brush Orchestra Sino Standard Set 2 Rock 13 #C Surdo M ute 14 D Surdo Open 15 #D Hi Q 16 E Whip Slap 17 F Scratch Push 18 #F Scratch Pull 19 G Finger Snap 20 #G Click Noise...
- Page 58 Bank(0 -127) Pc(0-127) Note Jazz Brush Orchcstra Sino Effccts Standard Set 2 Rock Crash Cymbal2 Cras h Cymbal2 Concert Cymb.2 daluo -L o w Footsteps 2 Crash Cymbal 2 Crash Cymbal2 57 A Vibraslap Vibraslap Vibraslap pengling Applause Vibraslap Vibraslap 58 #A Ride Cymbal 2 Ride Cy mbal 2 Concert Cymb.
-
Page 59: Style List
Styl e List 1 8BeatModern 5 60's Rock 2 MerseyBeat 6 HardRoc k 8 BEAT 3 BeachBoy s 7 RockShuffle 4 8Beat 8 80'sRock 9 16Beat 1 13 JazzRoc k 10 16Beat 2 14 Funk 16 BE AT 11 PopShuffle 15 PopRock 12 GuitarPop 16 PianoBallad... - Page 60 60 Country8Beat 64 CountryBallad 61 CountryPop 65 BlueGrass COUNTRY 62 CountrySwing 66 Country Waltz 63 Country2Step 67 Merengue 71 Salsa 68 Bossanova 72 Beguine LATIN 69 PopBoss a 73 Reggae 70 Mambo 74 SwingyReggae 75 DanceBand 86 Rhumba 76 EnglishWalt z 87 VienneseWaltz 77 Foxtrot 88 2/4March...
-
Page 61: Midi Implementation Chart
MIDI Implementation Chart Recognized Function Transmitted Remarks Basic Default 1-16CH 1-16CH Channel Changed 1-16CH 1-16CH Default Mode 3 Mode 1 Mode Messages Altered ********** Note 0-127 0~127 Number :True voice ********** 0~127 Velocity Note ON O 9nH,v=1~127 O 9nH,v=1~127 Note OFF O 9nH,v=0 O 9nH,v=0 or 8nh After... -
Page 62: Specifications
Specifications Keyboard Uppe r Keyborad:4 9 Lowe r Keyboard:6 1 Peda l Keyboard:20 Display Multi-functio n backlit LCD Polyphony Voices Uppe r Voice 1 2 Lower Voice1 2 L e ad Voice Peda l Voice 1 2 U ppe r Voic e 1,2 Reference Voice List L owe r Voic e 1,2 L ea d Voice... -
Page 63: Troubleshooting
Troubleshooting Problem Remedy Is the AC plug connected? Is the Master V olume slider turned up? Are a set of headphones plugged in? No sound at power on Are the cables connected properly? Is the expression pedal turned up? Are the rhythm volumes turned up?(See page29-30) Is No sound when playing rhythm the local control is set to OFF(Page37)? Is the volume of the keyboard voice at minimum level?
Need help?
Do you have a question about the RS400 and is the answer not in the manual?
Questions and answers