
Related Manuals for Smartec STC-IPM3542A/1

Summary of Contents for Smartec STC-IPM3542A/1
- Page 1 1.3 Megapixel WDR IP Camera STC-IPM3542A/1 Thanks for purchasing our product. Before operating the unit, please read the instructions carefully and keep this manual for future reference.
- Page 2 Safety Warning 1. Read this manual carefully before installing the unit Please read this manual first for correct installation and operation. 2. Never install the camera on a ceiling that cannot hold its weight The product may fall down and cause damages. 3.
- Page 3 10. Cleaning Unplug the unit from the outlet before cleaning. Do not use liquid cleaners or aerosol cleaners. Use a damp cloth for cleaning. 11. Never disassemble the camera nor put impurities in it Disassembly or impurities may result in trouble or fire. 12.
-
Page 4: Table Of Contents
Table of Contents 1. CAMERA ....................................1 1.1 F ................................... 1 EATURE 1.2 L ................................1 IST OF ONTENTS 1.3 S ..............................1 YSTEM EQUIREMENTS 1.4 S .................................. 2 PECIFICATION 1.5 D ..................................3 IMENSIONS 1.6 C ................................4 AMERA VERVIEW 1.7 I .................................. -
Page 5: Camera
1. CAMERA 1.1 Feature Sony 1 / 3" 1.3 Megapixel Progressive Exmor™ CMOS Sensor 1280(H)x1024(V) (SXGA); H.264, MPEG4, M-JPEG Color:0.1Lux@F1.2, B/W:0.01Lux@F1.2, Sense-up:0.001Lux@F1.2 2D Noise Reduction & Sense Up Motion Detection & Alarm Trigger Two-way Audio & Support Multicast ... -
Page 6: Specification
1.4 Specification Image Sensor Sony 1 / 3" 1.3 Megapixel Progressive Exmor™ CMOS Sensor VIDEO Highest Resolution 1280(H)x1024(V) (SXGA) Video Resolution 1280x960, 1280x720, 720x480 Video Frame Rate Up to 30fps for All Video Video Compression H.264, MPEG4, M-JPEG Minimum Illumination Color:0.1Lux@F1.2, B/W:0.01Lux@F1.2, Sense-up:0.001Lux@F1.2 Digital Wide Dynamic Range 10 Level (Adjustable Level Settings) -
Page 7: Dimensions
1.5 Dimensions 120621-XE3243EO-0831-V2.1-V2a... -
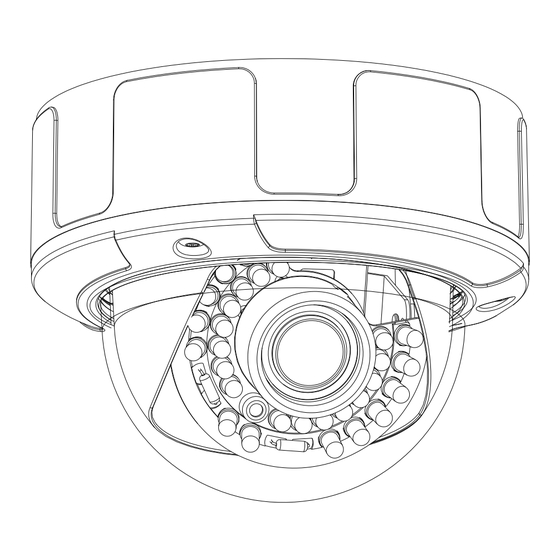
Page 8: Camera Overview
1.6 Camera Overview 1. Switches & Connectors Reset Switch Heater Power 12V DC Audio Out Audio In LAN / PoE (RJ-45) DI / DO Video Out ■ DI / DO Port: (1) IO (2) IO (3) ALM-RST (Alarm Reset): The system will force the alarm input to cancel. (4) ALM-IN (Alarm Input): When activate, the alarm input will be triggered. -
Page 9: Installation
1.7 Installation 1. Installation Flow Chart START Power Type Check the power of PoE Plug the Power Adapter Connect the RJ-45 LAN cable to the IP CAM Turn on the PC/NB and log-in Windows OS IP setting for PC/NB (Please see the suggested IP address) Disable the anti-virus software and firewall Run IE browser (IE 8.0 or above) Type the URL... - Page 10 2. Direct Link Make sure PC installed with JAVA Version 6 Update 30 or above (1) Plug the power adapter to IP CAM. (2) Run the IE browser with http://192.168.1.168 (3) When the log-in window pop-up, please input the User Name and Password. (4) Whenever the connection is ready, the main page (setting window) of IP CAM will show on.
-
Page 11: User Interface
2. USER INTERFACE 2.1 Login 1. Start the browser, and input http://192.168.1.168/ in the address field, then press Enter. 2. Enter User Name and Password In the prompt window, and click OK. The default User Name and Password is admin and 9999. You will need to enter the account and password every time whenever you restart the application or reconnect. -
Page 12: Interface Overview
2.2 Interface Overview After login to the system, the screen will be displayed as below: There are many function buttons on the left side. They are as the table below. All of the function buttons and its details will be shown on the following sections. Live View Video Image... -
Page 13: Live View
1. Live View Main page. Display the image captured by the camera. Language: English / 日本語(Japanese) / 繁中(Traditional Chinese) / 簡中(Simplified Chinese) (Vary by area) Full Screen Snapshot Record & Save Stop Recording Information Motion Detect Upload Audio On Audio Off Zoom in Zoom out Restore... -
Page 14: Video
2. Video IP (Internet Protocol) video settings of the camera. Modify the settings of IP stream type, streams and local display. NOTE: Once the change completed, click Submit to save the settings. Stream Type Video Streams Single / Dual / Tri-stream Codec Profiles H.264 + MPEG4 + MegaPixel JPEG H.264: 720P, H.264: D1, H.264: SXGA, H.264:1080P, H.264:... - Page 15 H.264 Frame rate 1 / 3 / 5 / 10 / 15 / 20 / 25 / 30 fps Bitrate 4000 Kbps Rate Control OFF / VBR / CBR Local Display Local Display OFF / NTSC / PAL / HD720P Rotation OFF / HORIZONTAL / VERTICAL / BOTH Format...
-
Page 16: Image
3. Image Modify the settings of image, OSD and advanced image settings. Image Brightness 0 ~ 255 (Default 128) Contrast 0 ~ 255 (Default 128) Saturation 0 ~ 255 (Default 128) Sharpness 0 ~ 255 (Default 128) DeNoise 0 ~ 255 (Default 128) EV Compensation 0 ~ 255 (Default 128) Load Default... - Page 17 Advanced Settings Auto IRIS Manual / Auto Flicker Control 60hz NTSC / 50hz PAL AUTO_WIDE / AUTO_NORMAL / SUNNY / SHADOW / White Balance INDOOR / LAMP / FL1 / FL2 Back Light Compensation Off / On Back Light Level Min / Mid / Max WDR Enhancement Off / On...
-
Page 18: Audio
4. Audio Modify the settings of audio. Audio Enable Audio Enable / Disable Audio Mode MIC / SPEAKER / BOTH Input volume 0~100 Sample Rate 8KHz / 16KHz Bitrate Auto / 64Kbps Output Volume 0~100 (NOTE: The content may vary by models) 120621-XE3243EO-0831-V2.1-V2a... -
Page 19: Datetime
5. DateTime Modify the settings of date and time. DateTime Set Manual Date Manual set the date and time Sync Current PC Date Synchronization the date and time with current PC Sync with SNTP Server Synchronization the date and time with SNTP Server Date Format / Position Select the format and position of date Time Format / Position... -
Page 20: Network
6. Network Modify the settings of network and IP address. DHCP Use DHCP Use DHCP for connection Static IP Use static IP for connection PPPoE Use PPPoE for connection Multicast Enable Multicast Enable / Disable H264 Main /Sub Port Communication port for H.264 MPEG4 Main / Sub Port Communication port for MPEG4 MJPEG Port... -
Page 21: Alarm
7. Alarm Modify the settings of alarm trigger and actions. Alarm Enable Alarm Enable / Disable Alarm Duration The duration time period of alarm DI1 / DO1 Level Alarm level of DI / DO Alarm Trigger Motion Motion trigger alarm (None support for single M-JPEG) Ethernet Loss Trigger alarm if Ethernet loss DI1 / DO1 Mode... -
Page 22: Storage
8. Storage Modify the settings of storage and files upload. Storage Upload via FTP File format for upload via FTP Local Storage Save File format for save files Schedule Scheduling the storage for every week 120621-XE3243EO-0831-V2.1-V2a... -
Page 23: Maintain
9. Maintain Maintain the user name, password and update the firmware. Maintain Current Version Current version of the firmware Mac Address Mac address assigned by production Firmware Update Update the firmware IP CAM Restart Reboot this IP camera Name / Password Change the login User Name and Password Authority Change the authority level of users... -
Page 24: Ptz/Osd
10. PTZ/OSD Define the commands of PTZ(Pan/Tile/Zoom)/OSD. The default protocol is Pelco D and Pelco P. Use protocols other than Pelco D and Pelco P, define the commands in the field of Customer. General 0~255 Baud 1200 / 2400 / 4800 / 9600 / 19200 / 38400 / 57600 / 115200 Pelco D / Pelco P Zoom 0~63...
Need help?
Do you have a question about the STC-IPM3542A/1 and is the answer not in the manual?
Questions and answers