Table of Contents
Advertisement
Advertisement
Table of Contents

Summary of Contents for daewon SPK+1
-
Page 1: Spk+ | Contents
USER MANUAL SPK+... -
Page 2: Table Of Contents
- Set user level ※ Supervisor manual - Set user level - Supervisor menu - Material mode - Feeder configuration display System configuration - System backup - System restore - Sensor check - Cleaning Check - Program version DAEWON GSI... - Page 3 Ejector - Monitoring - Count - Test ※ Engineer manual - Set user level - Engineer menu - System util Camera configuration - Waveform - Configuration - Select sensitivity - Eject monitoring ※ Installation plan - Installation plan DAEWON GSI...
-
Page 4: Installation, Maintenance And Repairing
Installation, maintenance and repairing SPK+... -
Page 5: Before The Installation
The front of the machine needs clearance for the discharge of sorted material or changing chutes. Main circuit breaker Please use a circuit breaker for the main power. The system is installed with a circuit breaker but use circuit breaker at the main power supplier to ensure safety. DAEWON GSI... -
Page 6: Safety Precaution
Prevent static discharge by anti-static wrist strap in work space or around equipments. - Do not touch power supply terminal without antistatic measures. - Keep the PCBs in anti-static plastic bags. ii) Shut down main power when removing / changing PCBs.. DAEWON GSI... - Page 7 SPK+ | Safety precaution 2 ‘WARNING’ 1. Main switch is also emergency switch. In emergency case, turn off color sorter with this main switch. ‘CAUTION’ 1. Rear door is heavy. Recommend to open rear door with two people. DAEWON GSI...
-
Page 8: Safety Label
-The sky blue color label expresses the general matters to be observed. The mark of "Hazardous voltage" warns to be injured from the electric shock. "Earth mark” The mark of "Burn hazard" warns to be burned. "Acknowledge of manual" Safety label DAEWON GSI... - Page 9 SPK+ | Safety label 2 "Main power" "Crane loop-adhered location" "Compressed air flow direction" DAEWON GSI...
-
Page 10: Product Contents
SPK+ – Product contents Specification Dimension Input to Compressor Model Power(kw) Channel (WxLxH) M/C(ton/hr) Power(HP) SPK+1 1015x1400x1790 SPK+2 EXP 1825x1400x1790 SPK+3 1825x1400x1790 SPK+4 EXP 2615x1400x1790 4~12 SPK+5 2615x1400x1790 5~15 ★ The specifications and designs can be changed without any notice. The capacity depends on impurity ratio... -
Page 11: Product Information
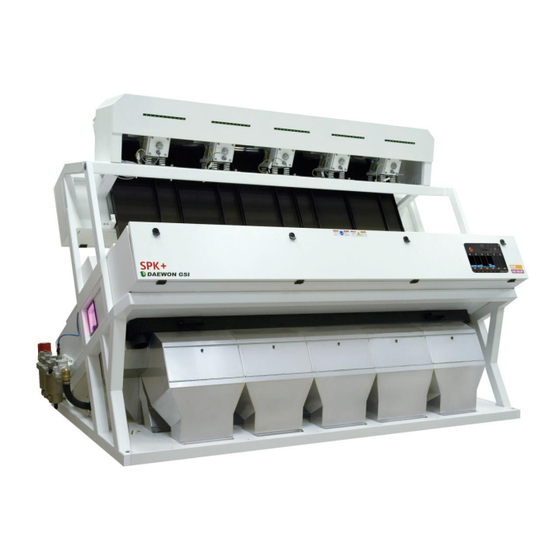
SPK+ | Product information SPK+ SERIES, DAEWON GSI is optical grain color sorter with high capacity and high sorting ability. SPK+ requires minimum installation space with easy moving and keeping. Feeder Front camera Shutes Rear camera Accept/reject receptacle fig 1.1 : Parts description... -
Page 12: Product Installation Information
5. Connect the earth cable. 6. Arrange air-compressor as the system requires compressed air for air-guns. Arrange suitable air compressor, dryer, cooler and filters for optimum performance of the system Refer to the air-compressor manual for the air-compressor management. DAEWON GSI... - Page 13 3. Connect the earth cable from the main power cable to the earth connector. Refer to the earth connection requirement. Connect AC power supply cable to the terminal L1, L2, L3 and L4. 4. Tie the cables firmly with cable tie, then insert in cable ducts. 5. Close the cover. DAEWON GSI...
- Page 14 ※ SPK+ Is installed with quick connectors so there will be air leakage under the condition below. 『When the cutting plane of the tube is not the perfect circular shape』 『When the tube is not pushed to the end』 『When the ‘O-ring’ is missing』 DAEWON GSI...
- Page 15 The system requires higher air pressure when the size of the sorting target increases. Attention – Never set the pressure value over / below engineer’s set value as it will damage ejector. No one removes the air-gun except Daewon GSI‘s engineers as it is sophisticatedly assembled and tested by Daewon GSI.
- Page 16 The sorting ability will be deteriorated without regular cleaning. The cleaning procedure is shown below. Turn off the power. Wipe the bran or any impurities out with a smooth piece of cloth Clean the camera cooling system with a smooth piece of cloth to avoid scratch DAEWON GSI...
- Page 17 Clean the surface of the system with a piece of smooth cleaning cloth to prevent any scratches. Clean the windows of the system with a piece of smooth cleaning cloth to prevent any scratches. DAEWON GSI...
-
Page 18: Regular Cleaning
Check the windows and remove any water collected in the unit on a regular basis. Attention : Air in the compressor must be discharged after the system stopped. Inspection window Let the air out by opening the valve DAEWON GSI... -
Page 19: Maintenance
Attention : Turn off the power and close the air-unit valve before the replacement 1. Turn off the power and close the air-unit valve to stop the air flow. 2. Open the rear camera door with a key provided together. 3. Open the inner door DAEWON GSI... - Page 20 5. Remove the air-guns by pressing the upper part of air- guns. 6. The procedure for installing new air-guns is the other way around. ※ Attention Daewon GSI is not responsible for any result occurred by replacing air-guns without permission DAEWON GSI...
-
Page 21: Troubleshooting
3. Is the timing setting correct? 4. Isn’t the window on the imaging unit dirty? 5. Is the vibration rate of the vibrator constant? 6. Is the air pressure ranging 4.0㎏/㎠ - 6.0kg/ ㎠ (may variable according to material) DAEWON GSI... -
Page 22: Operation
OPERATION SPK+... - Page 23 5. Turn on the power switch as the Pic 1.1. 6. The loading massage will appear on the screen as Pic 1.2 when the power is on. The main display appears after loading Pic 1.2 : System Loading DAEWON GSI...
-
Page 24: Basic Operation 2
Pic 1.4.2 : RGB Sensitivity Main Screen Pic 1.4 : Main Screen 8. Touch the ‘Eject’ switch (Right One) on the task bar Pic 1.4 9. Touch the ‘Feeder’ switch (Left One) on the task bar Pic 1.4 DAEWON GSI... -
Page 25: To Finish
Pic 2.2 : configuration menu 4. Touch the ‘System off button’ when the pop-up Configuration Menu appears. A message box will appear when clicking button Pic. 2.2 then Press button. 5. Turn off the power switch when the machine stopped. DAEWON GSI... -
Page 26: User Manual
USER MANUAL SPK+... -
Page 27: Main Display Information 1
The main display presents system information such as sorting mode, feed amount, accumulated ejection number and sensitivity. The configuration menu, feeder and eject button stays on continuously Pic 3.1 : Main Screen (2D Sensitivity, RGB Sensitivity) The system is ready to operate if the ‘ Main Screen’ appeared DAEWON GSI... - Page 28 2. Set Feeding – Double click letter in the red box of ‘①’ , you will see arrow like ‘②’. Press amount of feeding will be increase, press amount of feeding will be decrease. Feeding will be adjusted by sorting material. DAEWON GSI...
- Page 29 1. Setting name in the full color graph, it is appeared once camera sensitivity is set. 4) Way to modify sorting sensitivity ① ② 1. Set sensitivity – Change sensitivity and press SEND button picture ② will be appeared. Once picture changed sensitivity is applied complete, this image is disappeared. DAEWON GSI...
- Page 30 7) Eject (Air gun) button Eject operation button – This button is used to start ejecting for removing impurities Button Grey color means do not run ejector, even though camera sees impurity – Amber color means run ejector when camera sees impurity. DAEWON GSI...
- Page 31 1. Alert – Feeder is running when eject is off, all impurities go to accept. This alert is to prevent it. 2. Button – “No” - Press ‘NO’ feeder will be OFF automatically. “Yes” - Press ‘YES’ feeder will run even though ejector is off. DAEWON GSI...
- Page 32 – Button to enter Supervisor mode. (This engineer mode is different from Supervisor mode which operator sees when color sorter is on.) 2. Description 1. Supervisor - Supervisor menu (Enter more detailed to Camera, Eject etc) 2. Engineer - Allowed to engineer from DAEWON GSI only. DAEWON GSI...
- Page 33 Main display information 7 11) Phone Number. Phone number of DAEWON GSI We put phone number of DAEWON GSI in this screen. – You can call when color sorter has problem Changing information (*Available in Supervisor mode). – You can put other name or phone number in this screen.
- Page 34 Main display information 8 12) System Error Press system check bar which is blinking, you can see sensor check screen. – (Please check description of Sensor check.) DAEWON GSI...
-
Page 35: Set User Level
- Press password to change to Supervisor mode or engineer mode 3. Power off - turn off the system. 4. UI version checking screen – UI version what is running is showed at left-button side of screen. (SPK-3 Version 2.0) DAEWON GSI... -
Page 36: Supervisor Manual
Supervisor Manual SPK+... -
Page 37: Set User Level
2. Touch the “supervisor” button, then a key pad will appear as Pic 5.2. 3. Put a pin code and click enter button, then Change to Supervisor mode 4. Supervisor - More authorization than general operator. SUPERVISOR mode is allowed to authorized Supervisor only ※ DAEWON GSI... -
Page 38: Supervisor Menu
(Set system, ejector, and camera) ※ Description of Supervisor menu Press menu button. Appear menu for Supervisor in the Pic 6.1. - Set ejector, sorting mode, User, System, Feeding, Camera, System off Pic 6.1 : Supervisor menu screen DAEWON GSI... -
Page 39: Material Mode
- MODE COPY The data can be copied from the current mode to the target mode. - RENAME The name of the selected mode can be changed. 3. Mode operation - Append additional mode creation with new name DAEWON GSI... - Page 40 Select mode 2 Pic 7.2 : Mode Append DAEWON GSI...
-
Page 41: Feeder Configuration Display
Pic 8.1 is control button for each feeder. 4. Press icon shown as above, then Pic 8.2 will be appeared. 5. Set 1st feeding according to previous machine capacity. Set 2nd feeding according to amount of 1st rejection. DAEWON GSI... - Page 42 Pic 8.2 feeding will be increased. Press in the Pic 8.2 feeding will be decreased. 1 .Feed Number – Number of chute 2. Feed Input - Set speed of feeder vibration 3. ON/OFF button - ON or OFF of each chute’s feeder. DAEWON GSI...
-
Page 43: System Backup
※ System backup is a mode to save the changed data in the current mode. The backup is not allowed except for the engineer of Daewon GSI DAEWON GSI... -
Page 44: System Restore
- Restore when error from operator/engineer or data changing by system error 2. How to use system restore Press ‘System Restore’ button. Press PASSWORD and press ‘ENT’. Press ‘Confirm’ button for mode you want to restore. System loading and then finish to restore. DAEWON GSI... -
Page 45: Sensor Check
- When off this function, color sorter is operating even error message is appear. 3. Error check of DIO input - When ejector has error, you can see eject error check screen. - Front LED : Show error of front LED. - Rear LED : Show error of rear LED DAEWON GSI... -
Page 46: Cleaning Check
- Usually ejector is off while cleaning, but if on this button, ejector is on while cleaning. 2. Cleaning time - Set interval of cleaning time. (Set by minute) 3. WIPER TIME (WIPER) Set time of waiting to operate feeder again after cleaning. (Set by second) 4. Clean Test - Operate wiper by manual. DAEWON GSI... -
Page 47: Program Version
※ Pic 12.1 : Description on the Program Version screen - CAMERA : AVR, FPGA VERSION OF EACH CAMERA - EJECTOR : PSOC, FPGA VERSION OF EACH EJECTOR - LED : LED DRIVER BOARD VERSION - FEEDR & SYSTEM : FEEDER, DIO, UI VERSION DAEWON GSI... -
Page 48: Reject Count
1. Press ejector counter in the Pic 6.1, Pic 13.1 will be appeared. CLICK ① Pic 13.1 : Real time count Display count of all the ejects ※ Select camera 2. Display real time counter of 84 ejectors by graph. DAEWON GSI... - Page 49 - Select(click) camera, then real time counter of 84 ejectors is displayed. 1. Press ① in the Pic 13.1, Pic 14.1 will be appeared. Pic 14.1 : Ejector counter by camera Display real time counter of 84 ejectors of selected camera. DAEWON GSI...
-
Page 50: Set Camera Sensitivity (2D)
- Preview: Hide the displayed image. - Replay: Sorting result can be checked by LED display and ejector without more feeding through image replaying. - Image Processing result : Displays original image or the image according to sensitivity value. DAEWON GSI... - Page 51 - Send, Copy: Send/Copy region of the list shown above. - Rename, Delete : Rename / Delete selected region in the list. 3. Save : Save created area. 4. Displays the value of area (Good, bad) on Red/Green, Green/Blue, Blue/Red graph DAEWON GSI...
- Page 52 2. It indicates that the graph type is used. 3. Area list – open and display saved area. • “COPY” button pops up, if area list wasn’t selected. If area was selected, rename, on/off, delete, copy buttons pop up. CLICK DAEWON GSI...
- Page 53 If some area of Product mode and Defect mode is crossed then decrease the crossed defect mode area sensitivity and touch “SEND” Or capture one more image though falling related acceptable material and add one more graph for product DAEWON GSI...
-
Page 54: Set Camera Sensitivity (Rgb)
2. Preview, Replay, CH Line, Source - Preview: Hide the displayed image. - Replay: Sorting result can be checked by LED display and ejector without more feeding through image replaying. Pic 15.2 : The list of saved image DAEWON GSI... - Page 55 Set camera sensitivity (Set RGB sensitivity) - CH Line : Possible to check captured image will be on the chute. 3. Zoom in,/out, Move - Zoom in/out: Draw your two fingers outward/inward on screen to zoom in/out. - Move : Quickly draw your finger vertically or horizontally across screen. 대원...
- Page 56 Set camera sensitivity (Set RGB sensitivity) ※ Capture image - Capture image of sorting material from the current camera module 1. Press ejector counter in the Pic 15.1, Pic 15.3 will be appeared. Pic 15.3 : Capture image. 1. Capture ‐...
- Page 57 1. Great, Less, Acceptable Size, Minimum Size Limit - Great/Less : Sort the material that have greater/lesser than the threshold. The range varies from 0 to 1023. - Acceptable Size : Set acceptable size. - Minimum Size Limit : Set minimum size limit. DAEWON GSI...
- Page 58 2. The Value of Color1~3 sensitivity is 0.0 to 99.9, and the value of spot1~3 Sensitivity is 0 to 99. 3. The options for color channel in the color1~3 and spot1~3 sensitivity are Red, Green, and blue. And depending on the selected color channel, the values of red, green, and blue are displayed as above image. DAEWON GSI...
-
Page 59: Ejector Monitoring 1
Ejector monitoring 1 ※ EJECTOR MONITORING - Eject board status, voltage etc 1. Touch EJECTOR MONITORING from Pic 6.1 then you can see following screen. Pic 16.1 : EJECTOR MONITORING DAEWON GSI... - Page 60 - EJECT POWER : Display Power status of all eject board. - EJECT ERROR : Display error of eject board. 5. Error Reset - Refresh error status of eject board. 6. Ejector error check - Display error(red color) on each module DAEWON GSI...
-
Page 61: Count
- Display of count of each module. 4. Maximum – Display the highest of accumulate count of ejector among 84 ejectors in one module. 5. Display accumulate counter by graph – Display accumulate counter of 84 ejectors in module by graph DAEWON GSI... -
Page 62: Test
- It selects the operation range of the air gun. (768us ~ 1024us) 6. Eject width - It selects the object for emitting the air gun test signal. - It is inactivated in case of selecting the camera mode on the Eject test button DAEWON GSI... -
Page 63: Engineer Manual
Engineer Manual SPK+... -
Page 64: Set User Level
Pic 19.1 : User configuration 2. Select Engineer from Pic 19.1 then pops password up. 3. Engineer class - you can see additional menu with engineer class. 4. Change password – Available to change administrator password ※ Only for engineer. DAEWON GSI... -
Page 65: Engineer Menu
1. Select Menu from Main. 2. You can see Engineer class menu as Pic 20.1. - all menu available with engineer class Pic 20.1 : Menu ※ All menu for commissioning by engineer Only for authorized DAEWON GSI ENGINEERS. DAEWON GSI... -
Page 66: System Util
1. Language selection – The combo box is displayed when the language selection button is selected and it is applied immediately when the country and language are selected. 2. Correction of setting file – IniEdit program is executed when “Confirm” is pressed. 3. Program termination – Not the system but the UI can be terminated. DAEWON GSI... -
Page 67: Waveform
6. MIN/MAX/AVR : MIN/MAX/AVR value of camera background 7. BASE LINE VALUE : RANGE : 0~ 255 8. BASE LINE : ENAVLE/DISAVLE BASE LINE. 9. READ SIGNAL: READING CAMERA SIGNAL. 10. Displays camera signal of 0~1344 pixel range. DAEWON GSI... -
Page 68: Configuration
6. Graph Mode : Choose among of PRODUCT/DEFECT, PRODUCT1/PRODUCT2, DEFECT1/DEFECT2 7. Calibration Starts calibration- Automatically calibration of camera signal - ON : apply calibrated value - OFF : off calibrated value - Restore : Send calibration parameters to the current camera. DAEWON GSI... - Page 69 3. You can see Auto Gain screen as Pic 23.3 when you select “Auto Gain” on Pic 23.1. Pic 23.3 : Auto Gain Screen. : Begin auto gain procedure for each color channel such as Red, Green, Blue. DAEWON GSI...
- Page 70 6. You can see camera calibration screen(2/2) as Pic 23.6 when popup of Pic 23.5 is closed. Pic 23.6 : Camera calibration screen(2/2) 7. You can see the progress of camera calibration as Pic 23.5 When you turned on all LEDs and pressed “Confirm” on Pic 23.6. DAEWON GSI...
-
Page 71: Select Sensitivity
Select camera sensitivity screen is changed in engineer by which mode engineer selects. Pic 24.2 : Screen of select camera sensitivity ※ Pic 24.2 : Description of select camera sensitivity When operator change camera sensitivity mode, screen in the Pic 24.2 is appeared and then mode is changed. DAEWON GSI... -
Page 72: Eject Monitoring
1. Press “Eject monitoring” button in Pic 20.1 and Eject monitoring screen appear. ① Pic 24.1 : Eject monitoring screen 1. Front/Rear CAMERA - Output trouble signal from Front/Rear Camera Enable/Disable button Enable : Output ejector running signal from Camera Disable : Do not output ejector running signal from Camera. DAEWON GSI... -
Page 73: Installation Plan
Installation plan DAEWON GSI... - Page 90 TEL : 82-31-921-2062, FAX : 82-31-921-2064 Headquarter / Factory 990-2, Geumsan-ri, Waegwan-eup, Chilgok-gun, Gyeongbuk, Korea TEL : (054)973-2221(代) FAX : (054)973-2230 Office for capital region business B-134, Dongbu Sun Plaza, Jooyeup 2-dong, Ilsan-gu, Goyang City, Gyeonggi-do, Korea http://www.daewon.com E-mail : trade@daewon.com...
Need help?
Do you have a question about the SPK+1 and is the answer not in the manual?
Questions and answers