Advertisement
YESK
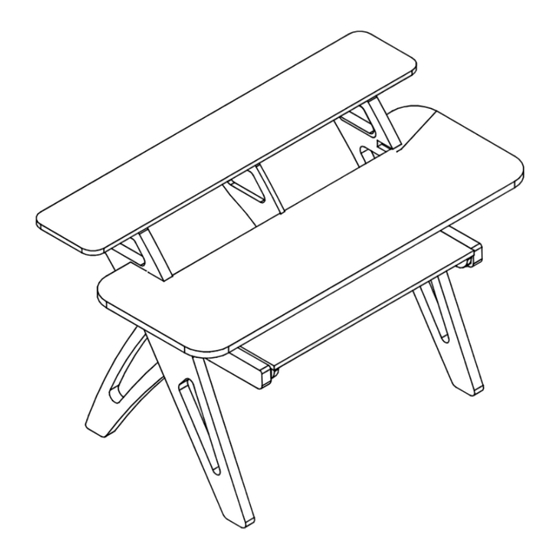
Materials used:
Solid wood (Linden) brushed
and melaminated chip board
Packing list
10 wooden arts
? pcs
50 screws
? assembly kits
We recommend being two people when assembling.
Instructions for use and cleaning
- clean with a soft cloth, slightly humid or specific products
for wood or lacquer
- avoid the use of abrasive cleaners!
Advertisement
Table of Contents

Summary of Contents for Zaor Yesk
- Page 1 YESK Packing list Instructions for use and cleaning Materials used: 10 wooden arts - clean with a soft cloth, slightly humid or specific products Solid wood (Linden) brushed ? pcs 50 screws for wood or lacquer and melaminated chip board...
- Page 2 Thank you for choosing a piece of Zaor studio furniture, which will hopefully make your life easier, more ergonomic and improve the looks of your workspace. Before you can enjoy the comfort of your new acquisition you need to assemble it.
- Page 3 Part Left foot Part Left foot back part Part Part rack divider Part Right foot Crossbar/stabiliser Part Right foot back part Part Part Part drawer Part...
- Page 4 Step 3 Step 4 Lower down the assembled parts nto part and attach using the assembly kits in a similar manner as Complete the structure of your Yesk fixing rack divider to shown in page 2 crossbar using assembly kits...
- Page 5 M6x50 Step 8 Step 7 Slide the into the cut outs provided for that Complete the assembly of your Yesk by adding the top pannel purpose on arts and 3 (see image) using assembly kits to parts , and Using pre-drilled holes in part 1,3 and 5 (see image) fixate the table top...
Need help?
Do you have a question about the Yesk and is the answer not in the manual?
Questions and answers