Advertisement
Quick Links
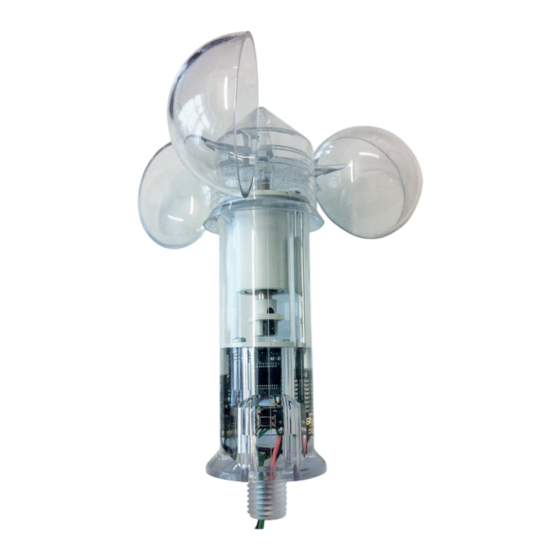
Radio controlled weather station with integrated wind / lux sensor
Compatible with all Vestamatic motors of VRS-Line VL-ME-WISO-35/45
The weather station is ready mounted on a mounting bracket.
– Contact a professional electrician to install the control sys-
tem, because the control system requires a power supply of
230VAC, 50 Hz.
– Check the control system for signs of mechanical damage
after unpacking. If you notice any shipping damage, do not start
up the control system and notify your supplier immediately.
– The control system should only be used for the purpose spec-
ified by the manufacturer (refer to the operating instructions).
Any changes or modifications thereof are not permissible and
will result in loss of all warranty claims.
– If the control unit or the connected sunshade cannot be oper-
ated without presenting a hazard, it must be switched off and
prevented from being switched on unintentionally.
– When performing work on the windows, controls or connected
shades, protect them against unauthorised or unintentional
operation.
1 × VRS WISO Crystal Control
1 × power supply 230VAC / 12VDC, 1 A
1 × surface-mount housing for power supply
1 × magnet
6 × dowel including screws
6 × chandelier terminals
Power supply:
Impulse voltage withstand level: 2.5 kV
Radio frequency:
Wind speed sensor:
Measuring range:
Lux sensor:
Measuring range:
Range:
Operating temperature:
Connectable VRS motors:
Protection degree:
Material (plastic parts):
Conformity:
This product conforms to the basic requirements of the R&TTE Directive
1999/5/EC. The declaration of conformity can be found on the web page:
www.vestamatic.com
© Vestamatic GmbH
G
VRS WISO
Crystal Control
Art.-no.:
01180002
Short description
Safety precautions
Scope of delivery
Technical data
12 VDC, 25 mA, 0.3 W
868 MHz
3 ... 17 m/s
0 ... 40 kLux
max. 30 m
-15 °C (+5 °F) to +60 °C (140 °F)
max. 10 (VL-ME-WISO-35/45)
IP 44
UV-stabilised polycarbonate
p
Conformity
VRS WISO Crystal Control
Radio controlled weather station with integrated wind/lux sensor
and incl. mounting bracket.
Installation and Operating Instructions
Assembly and installation
The sensor unit must be installed and connected by a professional elec-
trician.
1. When deciding where to install the sensor unit, ensure that the wind
speed and sun intensity readings, taken at the mounting location, are
similar to those, taken on the shading device.
WARNING!
Do not mount the sensor unit in the shade, or shelter, of the
extended shading device. The wall mount should be at-
tached with the sensor unit column pointing upwards as
shown in figure 1.
2. Attach the wall mount using the supplied installation kit.
3. Connect the power supply cable to the sensor cable according to the
wiring diagram.
4. If necessary, adjust the sensor unit (a) so, that together with the lux
sensor (b), it captures maximum sun intensity.
Figure 1
WARNING!
Risk of injury due to improper installation and commissioning.
Improper installation and commissioning may lead to per-
sonal injury or property damage.
Therefore:
– When connecting the device, observe the currently valid
VDE standards (in particular DIN VDE 0100/0700), your local
power company's regulations and the current accident pre-
vention regula tions.
– Connect the control in accordance with the wiring diagram.
Wiring diagram
1/4
G
VRS WISO Crystal Control
Art.-no.: 01180002
Subject to modifications.
Advertisement

Related Manuals for Vestamatic VRS WISO Crystal Control

Summary of Contents for Vestamatic VRS WISO Crystal Control
- Page 1 The sensor unit must be installed and connected by a professional elec- trician. Compatible with all Vestamatic motors of VRS-Line VL-ME-WISO-35/45 1. When deciding where to install the sensor unit, ensure that the wind The weather station is ready mounted on a mounting bracket.
- Page 2 The control includes a wind sensor and a lux sensor, and is paired to one The control contains different visible LEDs. or max. 10 Vestamatic VRS motors. The motor can also be paired with 8 green LEDs show the sun intensity and threshold.
- Page 3 If a VRS WISO Transmitter 5 is not available, the motor can be turned If you switch off the power of the VRS WISO Crystal Control, the OFF / ON to enter “learn” mode for 60 seconds. This will also allow the user to motor will be locked by the security time-out after some minutes.
- Page 4 VRS WISO Crystal Control Programming mode: Programming mode Wind threshold The sensor has a magnetic switch described as PROG POINT to enter (Default is 8 m/s). Wind threshold is adjusted with the second programming mode. One half turn (180°) increase 1 m/s, and one whole turn (360°) in- the programming mode.
Need help?
Do you have a question about the VRS WISO Crystal Control and is the answer not in the manual?
Questions and answers