Table of Contents
Advertisement
Quick Links
Advertisement
Table of Contents

Summary of Contents for ORBECO SP600
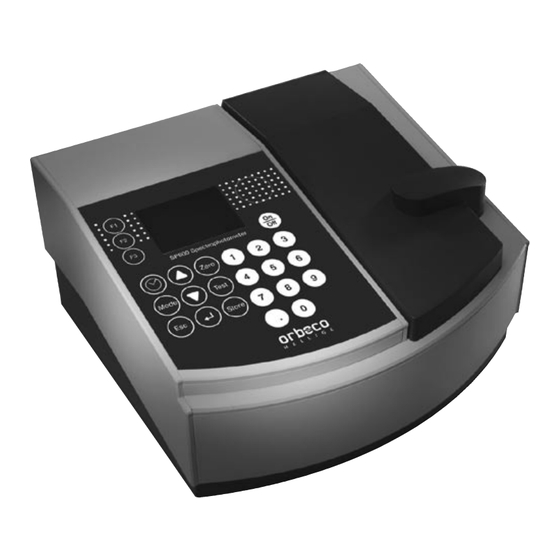
- Page 1 SP600 Spectrophotometer Instruction Manual...
- Page 3 Be aware of the risks of using the required reagents by reading the MSDS (Material Safety Data Sheets). Failure could result in serious injury to the operator or damage to the instrument. MSDS: www.orbeco.com SP600 Spectrophotometer_Revision 1 01/2008 SP600 Spectrophotometer 01/2008...
-
Page 4: Table Of Contents
Chlorine dioxide, in absence of Chlorine ................72 Chlorine dioxide .......................74 in presence of Chlorine ....................76 in absence of Chlorine ....................79 Chromium (Powder Pack) ....................80 differentiated determination ..................82, 86 Chromium (VI) .......................84, 88 total (Cr(III) + Cr(VI)) ....................85, 89 SP600 Spectrophotometer 01/2008... - Page 5 Manganese HR (Powder Packs) ..................164 Molybdate with Tablets ....................166 Molybdate HR (Powder Packs) ..................168 Nickel ........................170, 172 Nitrate ...........................174 Nitrate LR ........................176 Nitrite with Tablets ......................178 Nitrite LR (Powder Packs) ....................180 Nitrite LR ........................182 Nitrite HR ........................184 SP600 Spectrophotometer 01/2008...
- Page 6 Urea ..........................256 Zinc ..........................258 Important notes ...................260 1.2.1 Correct use of reagents ..................260 1.2.2 Cleaning vials and accessories for analysis ............261 1.2.3 Guidelines for photometric measurements ............262 1.2.4 Sample dilution teqniques ................263 1.2.5 Correcting for volume additions ..............263 SP600 Spectrophotometer 01/2008...
- Page 7 Printing of stored results ..................282 2.4.4 Recall / delete stored results ................287 2.4.5 Calibration ......................291 2.4.6 Lab function ....................296 2.4.7 User operations ....................304 2.4.8 Special functions .....................314 2.4.9 Instrument basic settings 2 ................316 2.4.10 Instrument special functions /service ..............317 SP600 Spectrophotometer 01/2008...
- Page 8 Operating messages in the display / error display ..........324 3.6.2 General problems ....................326 3.6.3 Service / Maintenance ..................327 3.6.3.1 Handling & Cleaning ..................327 3.6.3.2 Changing the light source ................327 3.6.3.3 blank because of technical requirements 3.6.3.4 Changing the batteries ..................329 Declaration of CE-Conformity ................330 SP600 Spectrophotometer 01/2008...
-
Page 9: Part 1 Methods
Part 1 Methods SP600 Spectrophotometer 01/2008... -
Page 10: Table Of Methods
510 74, 76 1, 2 dioxide T * = free, combined, total; PP = powder pack; T = tablet; L = liquid; TT = tube test; LR = low range; MR = middle range; HR = high range; SP600 Spectrophotometer 01/2008... - Page 11 N 4-(Dimethylamino)- 455 134 benzaldehyde * = free, combined, total; PP = powder pack; T = tablet; L = liquid; TT = tube test; LR = low range; MR = middle range; HR = high range; SP600 Spectrophotometer 01/2008...
- Page 12 0.01-0.3 mg/l N Diazotization * = free, combined, total; PP = powder pack; T = tablet; L = liquid; TT = tube test; LR = low range; MR = middle range; HR = high range; SP600 Spectrophotometer 01/2008...
- Page 13 PO Vanadomolybdate 212, ortho (VM) TT * = free, combined, total; PP = powder pack; T = tablet; L = liquid; TT = tube test; LR = low range; MR = middle range; HR = high range; SP600 Spectrophotometer 01/2008...
- Page 14 0.02-0.5 mg/l Zn Zincon 616 258 * = free, combined, total; PP = powder pack; T = tablet; L = liquid; TT = tube test; LR = low range; MR = middle range; HR = high range; SP600 Spectrophotometer 01/2008...
- Page 15 Hazen or Spectral Absorption Coefficient (S Abs) Total Hardness -> Hardness, total m-Value -> Alkalinity, total p-Value -> Alkalinity-p Phosphate, reactive -> Phosphate, ortho Silicon dioxide -> Silica Langelier Saturation -> Mode function 70 Index (Water Balance) SP600 Spectrophotometer 01/2008...
-
Page 16: Acid Demand To Ph 4.3
7. Place the vial in the sample chamber making sure that marks are aligned. Zero accepted prepare Test 8. Press TEST key. press TEST The result is shown in the display as Acid demand to pH 4.3 in mmol/l. SP600 Spectrophotometer 01/2008... - Page 17 1.1 Methods Notes: 1. The terms total Alkalinity, Alkalinity-m, m-Value and Acid demand to pH 4.3 are identical. 2. For accurate results exactly 10 ml of water sample must be taken for the test. SP600 Spectrophotometer 01/2008...
-
Page 18: Alkalinity-P (P-Value)
7. Place the vial in the sample chamber making sure that marks are aligned. Zero accepted prepare Test 8. Press TEST key. press TEST The result is shown in the display as Alkalinity-p. SP600 Spectrophotometer 01/2008... - Page 19 Case 2: Alkalinity-p > 0 and Alkalinity-m > 2p Hydrogen carbonate = m – 2p Carbonate = 2p Hydroxide = 0 Case 3: Alkalinity-p > 0 and Alkalinity-m < 2p Hydrogen carbonate = 0 Carbonate = 2m – 2p Hydroxide = 2p – m SP600 Spectrophotometer 01/2008...
-
Page 20: Alkalinity-Total (Alkalinity-M, M-Value)
7. Place the vial in the sample chamber making sure that marks are aligned. Zero accepted prepare Test 8. Press TEST key. press TEST The result is shown in the display as total Alkalinity. SP600 Spectrophotometer 01/2008... - Page 21 0.02 0.056 0.07 *Carbonate hardness (reference = Hydrogencarbonate-anions) Example: 10 mg/l CaCO = 10 mg/l x 0.056 = 0.56 mg/l °dH 10 mg/l CaCO = 10 mg/l x 0.02 = 0.2 mmol/l CaCO °dH °eH °fH °aH SP600 Spectrophotometer 01/2008...
-
Page 22: Aluminum With Tablets
Test 9. Press TEST key. press TEST Wait for a reaction period of 5 minutes. Countdown 5:00 After the reaction period is finished the measurement starts automatically. The result is shown in the display in mg/l Aluminium. SP600 Spectrophotometer 01/2008... - Page 23 0.45 0.09 0.20 0.29 0.37 0.48 Example: If the result of Aluminium determination is 0.15 mg/l Al and the Fluoride concentration is known to be 0.4 mg/l F, the true concentration of Aluminium is 0.17 mg/l Al. SP600 Spectrophotometer 01/2008...
-
Page 24: Aluminum (Powder Pack)
(this is the sample). 10. Close the vials tightly and swirl several times to mix the contents. Countdown 2 11. Press [ ] key. 5:00 Wait for a reaction period of 5 minutes. start: SP600 Spectrophotometer 01/2008... - Page 25 0.45 0.09 0.20 0.29 0.37 0.48 Example: If the result of Aluminium determination is 0.15 mg/l Al and the Fluoride concentration is known to be 0.4 mg/l F, the true concentration of Aluminium is 0.17 mg/l Al. SP600 Spectrophotometer 01/2008...
-
Page 26: Ammonium With Tablets
Test 9. Press TEST key. press TEST Wait for a reaction period of 10 minutes. Countdown 10:00 After the reaction period is finished the measurement starts automatically. The result is shown in the display in mg/l Ammonium. SP600 Spectrophotometer 01/2008... - Page 27 Fill the test tube with the sample to the 10 ml mark and add one level spoonful of Conditioning Powder. Mix to dissolve, then continue as described in the test instructions. 5. Conversion: mg/l NH = mg/l N x 1.29 mg/l NH = mg/l N x 1.22 SP600 Spectrophotometer 01/2008...
-
Page 28: Ammonium (Powder Pack)
12. Place the vial (the sample) in the sample chamber making sure that the marks are aligned. Zero accepted prepare Test 13. Press TEST key. press TEST The result is shown in the display in mg/l Ammonium. SP600 Spectrophotometer 01/2008... - Page 29 Glycine, Hydrazine, Less common interferences such as Hydrazine and Colour, Turbidity Glycine will cause intensified colours in the prepared sample. Turbidity and colour will give erroneous high values. Samples with severe interferences require distillation. SP600 Spectrophotometer 01/2008...
-
Page 30: Ammonium Lr
10. Place the vial (the sample) in the sample chamber making sure that the marks are aligned. Zero accepted 11. Press TEST key. prepare Test press TEST The result is shown in the display in mg/l Ammonium. SP600 Spectrophotometer 01/2008... - Page 31 Determine the amount of total iron present in the water sample. To produce the blank add an iron standard solution with the same iron concentration to the vial (point 1) instead of deionized water 4. Conversion: mg/l NH = mg/l N x 1.29 mg/l NH = mg/l N x 1.22 SP600 Spectrophotometer 01/2008...
-
Page 32: Ammonium Hr
10. Place the vial (the sample) in the sample chamber making sure that the marks are aligned. Zero accepted prepare Test 11. Press TEST key. press TEST The result is shown in the display in mg/l Ammonium. SP600 Spectrophotometer 01/2008... - Page 33 Determine the amount of total iron present in the water sample. Add an iron standard solution with the same concentration to the vial (point 1) instead of deionized water to produce the blank. 4. Conversion: mg/l NH = mg/l N x 1.29 mg/l NH = mg/l N x 1.22 SP600 Spectrophotometer 01/2008...
-
Page 34: Arsenic
1 hour and filtrate to get a clear solution. Notes: • use only dry glass vessels • stored in a dark glass bottle at max. 20°C the absorp- tion solution can be used for about 1 week • store Silver diethyldithiocarbamate at 4°C. Part list for glass apparatus: • 100 ml Erlenmeyer flask (NS29/32) Order code: 37 05 01 • glass stopper (NS29/32) Order code: 37 05 02 • absorption tube (NS29,2/32) Order code: 37 05 03 Assembling of apparatus: SP600 Spectrophotometer 01/2008... - Page 35 13. Fill the cell with the colored absorption solution. (see picture 14. Place the cell in the sample chamber making sure that the marks are aligned. Zero accepted 15. Press TEST key. prepare Test press TEST The result is shown in the display in mg/l Arsenic. SP600 Spectrophotometer 01/2008...
- Page 36 Positioning: insert cell on the left side in the sample chamber (c = clip). 4. According to literature (G. Ackermann, J. Köthe: Fresenius Z. Anal. Chem. 323 (1986), 135) Sb, Se and Te interfere due to the same reaction; Thiosulfate interferes differently. SP600 Spectrophotometer 01/2008...
- Page 37 SP600 Spectrophotometer 01/2008...
-
Page 38: Boron
Test 9. Press TEST key. press TEST Countdown Wait for a reaction period of 20 minutes. 20:00 After the reaction period is finished the measurement starts automatically. The result is shown in the display in mg/l Boron. SP600 Spectrophotometer 01/2008... - Page 39 2. The sample solution should have a pH value between 6 and 7. 3. Interferences are prevented by the presence of EDTA in the tablets. 4. The rate of colour development depends on the temperature. The temperature of the sample must be 20°C ± 1°C. SP600 Spectrophotometer 01/2008...
-
Page 40: Bromine
8. Fill the 10 mm cell with the colored test solution. 9. Place the cell in the sample chamber making sure that the positioning is correct. Zero accepted 10. Press TEST key. prepare Test press TEST The result is shown in the display in mg/l Bromine. SP600 Spectrophotometer 01/2008... - Page 41 0 mg/l. In this event, the water must be diluted with water free of Bromine. 10 ml of the diluted sample will be mixed with the reagent and the measurement repeated. Oxidizing agents such as Chlorine, Ozone etc. interfere as they react like Bromine. SP600 Spectrophotometer 01/2008...
- Page 42 8. Fill the 50 mm cell with the colored test solution. 9. Place the cell in the sample chamber making sure that the positioning is correct. Zero accepted 10. Press TEST key. prepare Test press TEST The result is shown in the display in mg/l Bromine. SP600 Spectrophotometer 01/2008...
- Page 43 0 mg/l. In this event, the water must be diluted with water free of Bromine. 10 ml of the diluted sample will be mixed with the reagent and the measurement repeated. Oxidizing agents such as Chlorine, Ozone etc. interfere as they react like Bromine. SP600 Spectrophotometer 01/2008...
- Page 44 8. Place the vial in the sample chamber making sure that marks are aligned. Zero accepted 9. Press TEST key. prepare Test press TEST The result is shown in the display in mg/l Bromine. SP600 Spectrophotometer 01/2008...
- Page 45 0 mg/l. In this event, the water sample must be diluted with water free of Bromine. 10 ml of the diluted sample will be mixed with the reagent and the measurement repeated. Oxidizing agents such as Chlorine, Ozone etc. interfere as they react like Bromine. SP600 Spectrophotometer 01/2008...
-
Page 46: Cadmium
Test 11. Press TEST key. press TEST Countdown Wait for a reaction period of 2 minutes. 2:00 After the reaction period is finished the measurement starts automatically. The result is shown in the display as Cadmium. SP600 Spectrophotometer 01/2008... - Page 47 6. Sample and reagent volumes should always metered by using volumetric pipettes (class A). 7. This test determines only Cd -ions. Samples must be pre-treated or decomposed by digestion before colloidal, undissolved and complex-bounded cadmium can be mea- sured. mg/l μg/l SP600 Spectrophotometer 01/2008...
-
Page 48: Chloride With Tablets
Test 9. Press TEST key. press TEST Wait for a reaction period of 2 minutes. Countdown After the reaction period is finished the measurement starts 2:00 automatically. The result is shown in the display in mg/l Chloride. SP600 Spectrophotometer 01/2008... - Page 49 3. Ions which also form deposits with Silver nitrate in acidic media, such as Bromides, Iodides and Thiocyanates, interfere with the analysis. 4. Highly alkaline water should – if necessary – be neutralised using Nitric acid before analysis. SP600 Spectrophotometer 01/2008...
-
Page 50: Chloride
11. Place the vial (the sample) in the sample chamber ma- king sure that the marks are aligned. Zero accepted 12. Press TEST key. prepare Test press TEST The result is shown in the display in mg/l Chloride. SP600 Spectrophotometer 01/2008... - Page 51 2. The test sample should have a pH of between 3 and 9. 3. Store the reagent bottles in a cool, dry place ideally at between 4°C and 8°C. 4. Interferences: Thiocyanate, Sulfide, Thiosulfate, Bromide and Iodide interfere because they react like Chloride. SP600 Spectrophotometer 01/2008...
-
Page 52: Chlorine
Chlorine >> free for the determination of free Chlorine for the determination of total Chlorine >> total Select the desired determination with the arrow keys [ ] and [ ]. Confirm with [ ] key. SP600 Spectrophotometer 01/2008... - Page 53 * it is not possible to give exactly values, because the development of turbidity depends on nature and ingredients of the sample. 7. If ??? is displayed at a differenciated test result see page 325. Oxidizing agents such as Bromine, Ozone etc. interfere as they react like Chlorine. SP600 Spectrophotometer 01/2008...
- Page 54 After the reaction period is finished the measurement 2:00 starts automatically. The result is shown in the display in: *,** mg/l free Cl mg/l free Chlorine *,** mg/l comb Cl mg/l combined Chlorine *,** mg/l tot Cl mg/l total Chlorine SP600 Spectrophotometer 01/2008...
- Page 55 9. Place the cell in the sample chamber making sure that the positioning is correct. Zero accepted prepare Test 10. Press TEST key. press TEST The result is shown in the display in mg/l free Chlorine. Notes: see page 51 SP600 Spectrophotometer 01/2008...
- Page 56 TEST Wait for a reaction period of 2 minutes. Countdown 2:00 After the reaction period is finished the measurement starts automatically. The result is shown in the display in mg/l total Chlorine. Notes: see page 51 SP600 Spectrophotometer 01/2008...
-
Page 57: Differentiated Determination (Free, Combined, Total)
After the reaction period is finished the measurement 2:00 starts automatically. The result is shown in the display in: *,** mg/l free Cl mg/l free Chlorine *,** mg/l comb Cl mg/l combined Chlorine *,** mg/l tot Cl mg/l total Chlorine SP600 Spectrophotometer 01/2008... -
Page 58: Free Chlorine
9. Place the cell in the sample chamber making sure that the positioning is correct. Zero accepted prepare Test 10. Press TEST key. press TEST The result is shown in the display in mg/l free Chlorine. Notes: see page 51 SP600 Spectrophotometer 01/2008... - Page 59 10. Press TEST key. press TEST Wait for a reaction period of 2 minutes. Countdown 2:00 After the reaction period is finished the measurement starts automatically. The result is shown in the display in mg/l total Chlorine. SP600 Spectrophotometer 01/2008...
- Page 60 11. Add one DPD No. 3 tablet straight from the foil to the same water sample and crush the tablet using a clean stirring rod. 12. Close the vial tightly with the cap and swirl several times until the tablet is dissolved. SP600 Spectrophotometer 01/2008...
- Page 61 After the reaction period is finished the measurement starts automatically. The result is shown in the display in: *,** mg/l free Cl mg/l free Chlorine *,** mg/l comb Cl mg/l combined Chlorine *,** mg/l total Cl mg/l total Chlorine Notes: see page 51 SP600 Spectrophotometer 01/2008...
- Page 62 8. Place the vial in the sample chamber making sure that marks are aligned. Zero accepted prepare Test 9. Press TEST key. press TEST The result is shown in the display in mg/l free Chlorine. Notes: see page 51 SP600 Spectrophotometer 01/2008...
- Page 63 TEST Wait for a reaction period of 2 minutes. Countdown 2:00 After the reaction period is finished the measurement starts automatically. The result is shown in the display in mg/l total Chlorine. Notes: see page 51 SP600 Spectrophotometer 01/2008...
-
Page 64: Chlorine With Liquid Reagent
10. Remove the vial from the sample chamber. 11. Add 3 drops of DPD 3 solution to the same water sample. 12. Close the vial tightly with the cap and swirl several times to mix the contents. SP600 Spectrophotometer 01/2008... - Page 65 *,** mg/l total Cl mg/l total Chlorine Notes: 1. After use replace the bottle caps securely noting the colour coding. 2. Store the reagent bottles in a cool, dry place ideally between 6°C and 10°C. 3. Also see page 51. SP600 Spectrophotometer 01/2008...
-
Page 66: Free Chlorine
Notes (free and total Chlorine): 1. After use replace the bottle caps securely noting the colour coding. 2. Store the reagent bottles in a cool, dry place ideally between 6°C and 10°C. 3. Also see page 51. SP600 Spectrophotometer 01/2008... -
Page 67: Total Chlorine
Zero accepted prepare Test Wait for a reaction period of 2 minutes. press TEST Countdown After the reaction period is finished the measurement starts 2:00 automatically. The result is shown in the display in mg/l total Chlorine. SP600 Spectrophotometer 01/2008... -
Page 68: Differentiated Determination (Free, Combined, Total)
10. Add one VARIO Chlorine TOTAL-DPD / F10 powder pack straight from the foil to the water sample. 11. Close the vial tightly with the cap and swirl several times to mix the contents (approx. 20 seconds). SP600 Spectrophotometer 01/2008... - Page 69 After the reaction period is finished the measurement starts automatically. The result is shown in the display in: *,** mg/l free Cl mg/l free Chlorine *,** mg/l comb. Cl mg/l combined Chlorine *,** mg/l total Cl mg/l total Chlorine Notes: see page 51 SP600 Spectrophotometer 01/2008...
-
Page 70: Free Chlorine
7. Place the vial in the sample chamber making sure that marks are aligned. 8. Press TEST key. Zero accepted prepare Test press TEST The result is shown in the display in mg/l free Chlorine. Notes: see page 51 SP600 Spectrophotometer 01/2008... -
Page 71: Total Chlorine
Wait for a reaction period of 3 minutes. press TEST Countdown After the reaction period is finished the measurement starts 3:00 automatically. The result is shown in the display in mg/l total Chlorine. Notes: see page 51 SP600 Spectrophotometer 01/2008... -
Page 72: Chlorine Hr (Kl)
8. Place the vial in the sample chamber making sure that the marks are aligned. Zero accepted 9. Press TEST key. prepare Test press TEST The result is shown in the display in mg/l Chlorine. SP600 Spectrophotometer 01/2008... - Page 73 1.1 Methods Notes: 1. Oxidizing agents interfere as they react like Chlorine. SP600 Spectrophotometer 01/2008...
-
Page 74: Chlorine Dioxide In Absence Of Chlorine
8. Fill the 50 mm cell with the colored test solution. 9. Place the cell in the sample chamber making sure that the positioning is correct. Zero accepted prepare Test 10. Press TEST key. press TEST The result is shown in the display in mg/l Chlorine dioxide. SP600 Spectrophotometer 01/2008... - Page 75 0 mg/l. In this event, the water sample must be diluted with water free of Chlorine dioxide. 10 ml of the diluted sample will be mixed with the reagent and the measurement repeated. 6. Oxidizing agents such as Chlorine, Ozone etc. interfere as they react like Chlorine dioxide. SP600 Spectrophotometer 01/2008...
-
Page 76: Chlorine Dioxide
>> with Cl of Chlorine. for the determination of Chlorine dioxide in the absence >> without Cl of Chlorine. Select the desired determination with the arrow keys [ ] and [ ]. Confirm with [ ] key. SP600 Spectrophotometer 01/2008... - Page 77 Chlorine dioxide. 10 ml of the diluted sample will be mixed with the reagent and the measurement repeated. 5. If ??? is displayed at a differentiated test result see page 325. Oxidizing agents such as Chlorine, Ozone etc. interfere as they react like Chlorine dioxide. SP600 Spectrophotometer 01/2008...
-
Page 78: In Presence Of Chlorine
10. Close the vial tightly with the cap and swirl several times until the tablet is dissolved. 11. Place the vial in the sample chamber making sure that marks are aligned. Zero accepted 12. Press TEST key. prepare T1 press TEST SP600 Spectrophotometer 01/2008... - Page 79 Chlorine dioxide in mg/l Chlorine, *,** mg/l ClO as Chlorine dioxide in mg/l ClO mg/l free Chlorine *,** mg/l free Cl mg/l combined Chlorine *,** mg/l comb. Cl mg/l total Chlorine *,** mg/l total Cl Notes: See next page. SP600 Spectrophotometer 01/2008...
- Page 80 2. The total Chlorine result given includes the contribution by the Chlorine dioxide (as Chlorine) reading. For true total Chlorine value subtract the Chlorine dioxide (as Chlorine) reading from the quoted total Chlorine reading. 3. Also see page 75. SP600 Spectrophotometer 01/2008...
-
Page 81: In Absence Of Chlorine
Test 9. Press TEST key. press TEST The result is shown in the display *,** mg/l ClO [Cl] as Chlorine dioxide in mg/l Chlorine, *,** mg/l ClO as Chlorine dioxide in mg/l ClO Notes: see page 75 SP600 Spectrophotometer 01/2008... -
Page 82: Chromium (Powder Pack)
Chromium (VI) for the determination of total Chromium (sum Cr (III) + >> Cr (III + VI) Cr (VI)) Select the desired determination with the arrow keys [ ] and [ ]. Confirm with the [ ] key. SP600 Spectrophotometer 01/2008... - Page 83 SP600 Spectrophotometer 01/2008...
-
Page 84: Differentiated Determination
13. Place the cell in the sample chamber making sure that the positioning is correct. Zero accepted prepare T1 14. Press TEST key. press TEST Wait for a reaction period of 5 minutes. Countdown After the reaction period is finished the measurement 5:00 starts automatically. SP600 Spectrophotometer 01/2008... - Page 85 3. For information about interferences especially in waste water and chemical waste water through metals and reductive or oxidic agents see DIN 38 405 – D 24 and Standard Methods of Water and Wastewater, 20th Edition; 1998. mg/l μg/l SP600 Spectrophotometer 01/2008...
- Page 86 Test press TEST Wait for a reaction period of 5 minutes. Countdown 5:00 After the reaction period is finished the measurement starts automatically. The result is shown in the display as Chromium (Vl). Notes: see previous page SP600 Spectrophotometer 01/2008...
-
Page 87: Total (Cr(Iii) + Cr(Vi))
Test 14. Press TEST key. press TEST Wait for a reaction period of 5 minutes. Countdown After the reaction period is finished the measurement 5:00 starts automatically. The result is shown in the display as total Chromium. SP600 Spectrophotometer 01/2008... - Page 88 11. Place the vial in the sample chamber making sure that the marks are aligned. Zero accepted prepare T1 12. Press TEST key. press TEST Wait for a reaction period of 5 minutes. Countdown 5:00 After the reaction period is finished the measurement starts automatically. SP600 Spectrophotometer 01/2008...
- Page 89 3. For information about interferences especially in waste water and chemical waste water through metals and reductive or oxidic agents see DIN 38 405 – D 24 and Standard Methods of Water and Wastewater, 20th Edition; 1998. SP600 Spectrophotometer 01/2008...
- Page 90 TEST Countdown Wait for a reaction period of 5 minutes. 5:00 After the reaction period is finished the measurement starts automatically. The result is shown in the display in mg/l Chromium (Vl). Notes: see previous page SP600 Spectrophotometer 01/2008...
-
Page 91: Chromium (Vi)
12. Press TEST key. press TEST Wait for a reaction period of 5 minutes. Countdown After the reaction period is finished the measurement 5:00 starts automatically. The result is shown in the display in mg/l total Chromium. SP600 Spectrophotometer 01/2008... -
Page 92: Cod Lr
9. Place the vial (the sample (Note 3, 4)) in the sample chamber making sure that the marks are aligned. Zero accepted prepare Test 10. Press TEST key. press TEST The result is shown in the display in mg/l COD. SP600 Spectrophotometer 01/2008... - Page 93 5. Samples can be measured when the Chloride contents does not exceed 1000 mg/l. 6. In exceptional cases, compounds contained in the water cannot be oxidized adequate, what results in minimum findings, compared with the reference method. SP600 Spectrophotometer 01/2008...
-
Page 94: Cod Mr
9. Place the vial (the sample (Note 3, 4)) in the sample chamber making sure that the marks are aligned. Zero accepted 10. Press TEST key. prepare Test press TEST The result is shown in the display in mg/l COD. SP600 Spectrophotometer 01/2008... - Page 95 6. In exceptional cases, compounds contained in the water cannot be oxidized adequate, what results in minimum findings, compared with the reference method. 7. For samples under 100 mg/l COD it is recommendable to repeat the test with the tube test for COD LR. SP600 Spectrophotometer 01/2008...
-
Page 96: Cod Hr
9. Place the vial (the sample (Note 3, 4)) in the sample chamber making sure that the marks are aligned. Zero accepted 10. Press TEST key. prepare Test press TEST The result is shown in the display in g/l COD. SP600 Spectrophotometer 01/2008... - Page 97 7. For samples under 1 g/l COD it is recommendable to repeat the test with the test kit for COD MR or for samples under 0.1 g/l COD with the tube test COD LR. SP600 Spectrophotometer 01/2008...
-
Page 98: Copper With Tablet
Copper. >> free for the determination of free Copper. for the determination of total Copper. >> total Select the desired determination with the arrow keys [ ] and [ ]. Confirm with [ ] key. SP600 Spectrophotometer 01/2008... - Page 99 1.1 Methods Note: 1. If ??? is displayed at the diffentiated test result see page 325. SP600 Spectrophotometer 01/2008...
-
Page 100: Differentiated Determination (Free, Combined, Total)
12. Add one COPPER No. 2 tablet straight from the foil to the same water sample and crush the tablet using a clean stirring rod. Dissolve the tablet. SP600 Spectrophotometer 01/2008... - Page 101 14. Press TEST key. prepare T2 press TEST The result is shown in the display in: *,** mg/l free Cu mg/l free Copper *,** mg/l comb Cu mg/l combined Copper *,** mg/l tot Cu mg/l total Copper SP600 Spectrophotometer 01/2008...
- Page 102 7. Fill the 50 mm cell with the colored test solution. 8. Place the cell in the sample chamber making sure that the positioning is correct. Zero accepted prepare Test 9. Press TEST key. press TEST The result is shown in the display in mg/l Copper. SP600 Spectrophotometer 01/2008...
- Page 103 7. Fill the 50 mm cell with the colored test solution. 8. Place the cell in the sample chamber making sure that the positioning is correct. Zero accepted 9. Press TEST key. prepare Test press TEST The result is shown in the display in mg/l total Copper. SP600 Spectrophotometer 01/2008...
- Page 104 10. Add one COPPER No. 2 tablet straight from the foil to the same water sample and crush the tablet using a clean stirring rod. 11. Close the vial tightly with the cap and swirl several times until the tablet is dissolved. SP600 Spectrophotometer 01/2008...
- Page 105 13. Press TEST key. prepare T2 press TEST The result is shown in the display in: *,** mg/l free Cu mg/l free Copper *,** mg/l comb Cu mg/l combined Copper *,** mg/l total Cu mg/l total Copper SP600 Spectrophotometer 01/2008...
- Page 106 7. Place the vial in the sample chamber making sure that marks are aligned. Zero accepted prepare Test 8. Press TEST key. press TEST The result is shown in the display in mg/l free Copper. SP600 Spectrophotometer 01/2008...
- Page 107 7. Place the vial in the sample chamber making sure that marks are aligned. Zero accepted 8. Press TEST key. prepare Test press TEST The result is shown in the display in mg/l total Copper. SP600 Spectrophotometer 01/2008...
-
Page 108: Copper Pp
8. Press TEST key. prepare Test press TEST Wait for a reaction period of 2 minutes. Countdown 2:00 After the reaction period is finished the measurement starts automatically. The result is shown in the display in mg/l Copper. SP600 Spectrophotometer 01/2008... - Page 109 If a turbidity remains and turns black, silver interferences is likely. Add 10 drops of saturated Potassium chloride solution to 75 ml of water sample. Filtrate through a fine filter. Use 10 ml of the filtered water sample to perform test. SP600 Spectrophotometer 01/2008...
-
Page 110: Cyanide
Test 11. Press TEST key. press TEST Wait for a reaction period of 10 minutes. Countdown 10:00 After the reaction period is finished the measurement starts automatically. The result is shown in the display as Cyanide. SP600 Spectrophotometer 01/2008... - Page 111 2. In the present of Thiocyanate, heavy metal complexes, colorants or aromatic amines, the cyanide must be separated out by distillation before analysis is performed. 3. Store the reagents in closed containers at a temperature of + 15°C to + 25°C. mg/l μg/l SP600 Spectrophotometer 01/2008...
- Page 112 Test 10. Press TEST key. press TEST Wait for a reaction period of 10 minutes. Countdown After the reaction period is finished the measurement 10:00 starts automatically. The result is shown in the display in mg/l Cyanide. SP600 Spectrophotometer 01/2008...
- Page 113 2. In the present of Thiocyanate, heavy metal complexes, colorants or aromatic amines, the cyanide must be separated out by distillation before analysis is performed. 3. Store the reagents in closed containers at a temperature of + 15°C to + 25°C. SP600 Spectrophotometer 01/2008...
-
Page 114: Cyanuric Acid
(Note 2, 3). 7. Place the vial in the sample chamber making sure that marks are aligned. Zero accepted 8. Press TEST key. prepare Test press TEST The result is shown in the display in mg/l Cyanuric acid. SP600 Spectrophotometer 01/2008... - Page 115 2. If Cyanuric acid is present a cloudy solution will be given. Single particles are uncaused necessarily by Cyanuric acid. 3. Dissolve the tablet completely (therefore swirl the vial approx. 1 minute). Not dissolved particles of the tablet can cause too high results. SP600 Spectrophotometer 01/2008...
-
Page 116: Deha T
Test 10. Press TEST key. press TEST Wait for a reaction period of 10 minutes. Countdown After the reaction period is finished the measurement 10:00 starts automatically. The result is shown in the display as DEHA. SP600 Spectrophotometer 01/2008... - Page 117 10 mg/l Sulfate 1000 mg/l Zinc 50 mg/l 6. There is an option to change the unit from mg/l to μg/l. The unit mg/l is rounded, e.g.: 25 μg/l = 0.025 mg/l display 0.03 mg/l. mg/l μg/l SP600 Spectrophotometer 01/2008...
-
Page 118: Deha Pp
11. Place the vial (the sample) in the sample chamber ma- king sure that the marks are aligned. Zero accepted prepare Test 12. Press TEST key. press TEST The result is shown in the display as DEHA. SP600 Spectrophotometer 01/2008... - Page 119 10 mg/l Sulfate 1000 mg/l Zinc 50 mg/l 7. There is an option to change the unit from mg/l to μg/l. The unit mg/l is rounded, e.g.: 25 μg/l = 0.025 mg/l display 0.03 mg/l. mg/l μg/l SP600 Spectrophotometer 01/2008...
-
Page 120: Fluoride
7. Place the vial in the sample chamber making sure that marks are aligned. Zero accepted prepare Test 8. Press TEST key. press TEST The result is shown in the display in mg/l Fluoride. SP600 Spectrophotometer 01/2008... - Page 121 2. 6. SPADNS reagent solution contains Arsenite. Chlorine concentrations up to 5 mg/l do not interfere. 7. Seawater and wastewater samples must be distilled. 8. It is convenient to use special vials with larger volume. SP600 Spectrophotometer 01/2008...
-
Page 122: Formaldehyde
12. Fill the 10 mm cell with the test solution. 13. Place the cell in the sample chamber making sure that the positioning is correct. Zero accepted 14. Press TEST key. prepare Test press TEST The result is shown in the display in mg/l Form- aldehyde. SP600 Spectrophotometer 01/2008... - Page 123 4. Appropriate safety precautions and good lab technique should be used during the whole procedure. 5. Because reaction depends on temperature, sample and tube temperature must be between 20 and 25°C. 6. Sample volume should always metered by using volumetric pipette (class A). SP600 Spectrophotometer 01/2008...
- Page 124 12. Fill the 50 mm cell with the test solution. 13. Place the cell in the sample chamber making sure that the positioning is correct. Zero accepted prepare Test 14. Press TEST key. press TEST The result is shown in the display in mg/l Form- aldehyde. SP600 Spectrophotometer 01/2008...
- Page 125 4. Appropriate safety precautions and good lab technique should be used during the whole procedure. 5. Because reaction depends on temperature, sample and tube temperature must be between 20 and 25°C. 6. Sample volume should always metered by using volumetric pipette (class A). SP600 Spectrophotometer 01/2008...
- Page 126 After reaction period is finished proceed as follows: 9. Place the vial in the sample chamber making sure that the marks are aligned. Zero accepted 10. Press TEST key. prepare Test press TEST The result is shown in the display in mg/l Form- aldehyde. SP600 Spectrophotometer 01/2008...
- Page 127 4. Appropriate safety precautions and good lab technique should be used during the whole procedure. 5. Because reaction depends on temperature, sample and tube temperature must be between 20 and 25°C. 6. Sample volume should always metered by using volumetric pipette (class A). SP600 Spectrophotometer 01/2008...
-
Page 128: Hardness, Total
8. Press TEST key. prepare Test press TEST Wait for a reaction period of 5 minutes. Countdown 5:00 After the reaction period is finished the measurement starts automatically. The result is shown in the display as total Hardness. SP600 Spectrophotometer 01/2008... - Page 129 2. Conversion table: mg/l CaCO °dH °fH °eH 1 mg/l CaCO ---- 0.056 0.10 0.07 1 °dH 17.8 ---- 1.78 1.25 1 °fH 10.0 0.56 ---- 0.70 1 °eH 14.3 0.80 1.43 ---- CaCO °dH °eH °fH °aH SP600 Spectrophotometer 01/2008...
-
Page 130: Hardness, Total Hr
8. Press TEST key. prepare Test press TEST Wait for a reaction period of 5 minutes. Countdown 5:00 After the reaction period is finished the measurement starts automatically. The result is shown in the display as total Hardness. SP600 Spectrophotometer 01/2008... - Page 131 2. Conversion table: mg/l CaCO °dH °fH °eH 1 mg/l CaCO ---- 0.056 0.10 0.07 1 °dH 17.8 ---- 1.78 1.25 1 °fH 10.0 0.56 ---- 0.70 1 °eH 14.3 0.80 1.43 ---- CaCO °dH °eH °fH °aH SP600 Spectrophotometer 01/2008...
-
Page 132: Hazen
7. Place the cell in the sample chamber making sure that the positioning is correct. Zero accepted 8. Press TEST key. prepare Test press TEST The result is shown in the display in mg/l Pt-Co-units. SP600 Spectrophotometer 01/2008... - Page 133 Do not stir the sample; avoid lengthy contact with the air. The sample may be stored in a dark place at a temperature of 4°C for 24 hours. Before performing measurements, the water sample must be brought up to room temperature. SP600 Spectrophotometer 01/2008...
-
Page 134: Hydrazine
(Note 4). 9. Place the vial in the sample chamber making sure that marks are aligned. Zero accepted prepare Test 10. Press TEST key. press TEST The result is shown in the display as Hydrazine. SP600 Spectrophotometer 01/2008... - Page 135 0.05 mg/l, you should only use the reagent with reservations (major result deviation). 6. There is an option to change the unit from mg/l to μg/l. The unit mg/l is rounded, e.g.: 25 μg/l = 0.025 mg/l display 0.03 mg/l. mg/l μg/l SP600 Spectrophotometer 01/2008...
-
Page 136: Hydrazine With Liquid Reagent
11. Press TEST key. prepare Test Wait for a reaction period of 12 minutes. press TEST Countdown After the reaction period is finished the measurement 12:00 starts automatically. The result is shown in the display as Hydrazine. SP600 Spectrophotometer 01/2008... - Page 137 Principle: Hydrazine is oxidised by the household bleach. The interference by colour will eliminated by zeroing. 5. There is an option to change the unit from mg/l to μg/l. The unit mg/l is rounded, e.g.: 25 μg/l = 0.025 mg/l display 0.03 mg/l. mg/l μg/l SP600 Spectrophotometer 01/2008...
-
Page 138: Hydrogen Peroxide
10. Press TEST key. press TEST Wait for a reaction period of 2 minutes. Countdown 2:00 After the reaction period is finished the measurement starts automatically. The result is shown in the display in mg/l Hydrogen peroxide. SP600 Spectrophotometer 01/2008... - Page 139 0 mg/l. In this event, the water must be diluted with water free of Bromine. 10 ml of the diluted sample will be mixed with the reagent and the measurement repeated. Oxidizing agents such as Chlorine, Ozone etc. interfere as they react like Hydrogen peroxide. SP600 Spectrophotometer 01/2008...
- Page 140 9. Press TEST key. prepare Test press TEST Wait for a reaction period of 2 minutes. Countdown 2:00 After the reaction period is finished the measurement starts automatically. The result is shown in the display in mg/l Hydrogen peroxide. SP600 Spectrophotometer 01/2008...
- Page 141 0 mg/l. In this event, the water sample must be diluted with water free of Hydrogen peroxide. 10 ml of the diluted sample will be mixed with the reagent and the measurement repeated. Oxidizing agents such as Chlorine, Ozone etc. interfere as they react like Hydrogen peroxide. SP600 Spectrophotometer 01/2008...
-
Page 142: Iodine
8. Place the vial in the sample chamber making sure that marks are aligned. Zero accepted prepare Test 9. Press TEST key. press TEST The result is shown in the display in mg/l Iodine. SP600 Spectrophotometer 01/2008... - Page 143 1.1 Methods Notes: 1. Oxidising reagents, such as Chlorine, Bromine, etc. interfere as they react like Iodine. SP600 Spectrophotometer 01/2008...
-
Page 144: Iron
*Determination of all soluble iron and most insoluble forms of iron; most insoluble iron oxides are recovered by the reagent. * This information refer to analysis of the water sample without digestion. Further information you will find at the method notes. SP600 Spectrophotometer 01/2008... - Page 145 Therefore add 1 ml concentrated sulfuric acid and 1 ml concentrated nitric acid to 100 ml of water sample and boil to approx. half volume. After cooling down proceed as described above. SP600 Spectrophotometer 01/2008...
- Page 146 9. Press TEST key. prepare Test Wait for a reaction period of 5 minutes. press TEST Countdown 5:00 After the reaction period is finished the measurement starts automatically. The result is shown in the display in mg/l Iron. SP600 Spectrophotometer 01/2008...
- Page 147 IRON (II) LR tablet is used, as described above, instead of the IRON LR tablet. 3. For the determination of total dissolved and undissolved iron digestion is required. An example is described on page 143. SP600 Spectrophotometer 01/2008...
- Page 148 9. Press TEST key. prepare Test press TEST Wait for a reaction period of 5 minutes. Countdown 5:00 After the reaction period is finished the measurement starts automatically. The result is shown in the display in mg/l Iron. SP600 Spectrophotometer 01/2008...
- Page 149 IRON (II) LR tablet is used, as described above, instead of the IRON LR tablet. 3. For the determination of total dissolved and undissolved iron digestion is required. An example is described on page 143. SP600 Spectrophotometer 01/2008...
- Page 150 Test 8. Press TEST key. press TEST Wait for a reaction period of 5 minutes. Countdown 5:00 After the reaction period is finished the measurement starts automatically. The result is shown in the display in mg/l Iron. SP600 Spectrophotometer 01/2008...
- Page 151 IRON (II) LR tablet is used, as described above, instead of the IRON LR tablet. 3. For the determination of total dissolved and undissolved iron digestion is required. An example is described on page 143. SP600 Spectrophotometer 01/2008...
-
Page 152: Iron (Powder Packs)
8. Press TEST key. press TEST Wait for a reaction period of 3 minutes (Note 5). Countdown 3:00 After the reaction period is finished the measurement starts automatically. The result is shown in the display in mg/l Iron. SP600 Spectrophotometer 01/2008... - Page 153 3. Very strong alkaline or acidic water samples must be adjusted to a ph-Value between 3 and 5 before analysis. 4. Accuracy is not affected by undissolved powder. 5. Water samples containing visible rust should be allowed to react at least five minutes. SP600 Spectrophotometer 01/2008...
-
Page 154: Iron (Tptz) (Powder Packs)
9. Place the vial (the sample) in the sample chamber ma- king sure that the marks are aligned. Zero accepted prepare Test 10. Press TEST key. press TEST The result is shown in the display in mg/l Iron. SP600 Spectrophotometer 01/2008... - Page 155 Cadmium 4.0 mg/l Chromium (3+) 0.25 mg/l Chromium 1.2 mg/l (6+) Cobalt 0.05 mg/l Copper 0.6 mg/l Cyanide 2.8 mg/l Manganese 50 mg/l Mercury 0.4 mg/l Molybdenum 4.0 mg/l Nickel 1.0 mg/l Nitrite Ion 0.8 mg/l SP600 Spectrophotometer 01/2008...
-
Page 156: Lead
8. Fill the 10 mm cell with the colored test solution. 9. Place the cell in the sample chamber making sure that the positioning is correct. Zero accepted prepare Test 10. Press TEST key. press TEST The result is shown in the display in mg/l Lead. SP600 Spectrophotometer 01/2008... - Page 157 5. Volumes for sample and reagent should always metered by using volumetric pipettes (class A). 6. The test determines only Pb -ions. Samples must be pre-treated or decomposed by digestion before colloidal, undissolved and complex-bounded lead can be measured. SP600 Spectrophotometer 01/2008...
-
Page 158: Lead, Procedure A
70 mg/l (approx. 10°d). Procedure B Select this test for the determination of lead in hard to very hard waters with a Ca contents between 70 mg/l and 500 mg/l (approx. 10°d to 70°d). SP600 Spectrophotometer 01/2008... - Page 159 6. Sample volume should always metered by using volumetric pipette (class A). 7. The test determines only Pb -ions. Samples must be pre-treated or decomposed by digestion before colloidal, undissolved and complex-bounded lead can be measured. Test performance: see next page SP600 Spectrophotometer 01/2008...
- Page 160 8. Place the vial in the sample chamber making sure that the marks are aligned. Zero accepted 9. Press TEST key. prepare Test press TEST The result is shown in the display in mg/l Lead. Notes: see previous page SP600 Spectrophotometer 01/2008...
- Page 161 13. Place the vial in the sample chamber making sure that the marks are aligned. T1 accepted prepare T2 14. Press TEST key. press TEST The result is shown in the display in mg/l Lead. SP600 Spectrophotometer 01/2008...
-
Page 162: Mangenese With Tablet
Test 9. Press TEST key. press TEST Wait for a reaction period of 5 minutes. Countdown After the reaction period is finished the measurement starts 5:00 automatically. The result is shown in the display in mg/l Manganese. SP600 Spectrophotometer 01/2008... - Page 163 1.1 Methods Note: KMnO SP600 Spectrophotometer 01/2008...
-
Page 164: Manganese Lr (Powder Packs)
13. Place the vial (the sample) in the sample chamber making sure that the marks are aligned. Zero accepted prepare Test 14. Press TEST key. press TEST The result is shown in the display in mg/l Manganese. SP600 Spectrophotometer 01/2008... - Page 165 The turbidity should disappear after point 7. 4. Water samples containing more than 5 mg/l iron should be allowed to react at least 10 minutes. 5. Conversion: mg/l MnO = mg/l Mn x 2.17 KMnO SP600 Spectrophotometer 01/2008...
-
Page 166: Manganese Hr (Powder Packs)
Test 10. Press TEST key. press TEST Wait for a reaction period of 2 minutes. Countdown 2:00 After the reaction period is finished the measurement starts automatically. The result is shown in the display in mg/l Mangan. SP600 Spectrophotometer 01/2008... - Page 167 Sodium hydroxide before test. Do not exceed pH 5, as manganese may precipitate. 3. Interferences: Interfering substance Interference level Calcium greater than 700 mg/l Chloride greater than 70 000 mg/l Iron greater than 5 mg/l Magnesium greater than 100 000 mg/l KMnO SP600 Spectrophotometer 01/2008...
-
Page 168: Molybdate With Tablets
10. Close the vial tightly with the cap. 11. Place the vial in the sample chamber making sure that marks are aligned. Zero accepted 12. Press TEST key. prepare Test press TEST The result is shown in the display in mg/l Molybdate / Molybdenum. SP600 Spectrophotometer 01/2008... - Page 169 2. Under test conditions (pH 3.8 – 3.9) iron does not interfere nor do other metals at levels likely to be found in industrial water systems. 3. Conversions: mg/l Mo = mg/l MoO x 0.6 mg/l Na = mg/l MoO x 1.3 SP600 Spectrophotometer 01/2008...
-
Page 170: Molybdate Hr (Powder Packs)
12. Press TEST key. prepare Test Wait for a reaction period of 5 minutes. press TEST Countdown After reaction period is finished the measurement starts 5:00 automatically. The result is shown in the display in mg/l Molybdate / Molybdenum. SP600 Spectrophotometer 01/2008... - Page 171 5 minutes is increased. So it is very important to perform the test procedure continuously. 4. Substances who may interfere when present in concentrations at: Aluminium 50 mg/l Chromium 1000 mg/l Iron 50 mg/l Nickel 50 mg/l Nitrite all levels SP600 Spectrophotometer 01/2008...
-
Page 172: Nickel
10. Press TEST key. prepare Test press TEST Wait for a reaction period of 3 minutes. Countdown 3:00 After the reaction period is finished the measurement starts automatically. The result is shown in the display in mg/l Nickel. SP600 Spectrophotometer 01/2008... - Page 173 1.1 Methods Notes: 1. The test sample and the reagents should have room temperature for test performance. 2. The test sample should have a pH of between 3 and 9. SP600 Spectrophotometer 01/2008...
-
Page 174: Nickel
10. Press TEST key. prepare Test press TEST Wait for a reaction period of 3 minutes. Countdown 3:00 After the reaction period is finished the measurement starts automatically. The result is shown in the display in mg/l Nickel. SP600 Spectrophotometer 01/2008... - Page 175 1.1 Methods Notes: 1. The test sample and the reagents should have room temperature for test performance. 2. The test sample should have a pH of between 3 and 9. SP600 Spectrophotometer 01/2008...
-
Page 176: Nitrate
10. Place the vial (the sample) in the sample chamber making sure that the marks are aligned. Zero accepted prepare Test 11. Press TEST key. press TEST The result is shown in the display in mg/l Nitrate. SP600 Spectrophotometer 01/2008... - Page 177 1.1 Methods Notes: 1. Some solids may not dissolve. 2. Conversion: mg/l NO = mg/l N x 4.43 SP600 Spectrophotometer 01/2008...
-
Page 178: Nitrate Lr
Test 9. Press TEST key. press TEST Wait for a reaction period of 15 minutes. Countdown 15:00 After the reaction period is finished the measurement starts automatically. The result is shown in the display in mg/l Nitrate. SP600 Spectrophotometer 01/2008... - Page 179 1.1 Methods Notes: – 1. Nitrite concentrations greater than 2 mg/L NO lead to higher test results. 2. Great quantities of COD lead to higher test results. SP600 Spectrophotometer 01/2008...
-
Page 180: Nitrite With Tablets
Test press TEST 8. Press TEST key. Wait for a reaction period of 10 minutes. Countdown 10:00 After the reaction period is finished the measurement starts automatically. The result is shown in the display in mg/l Nitrite. SP600 Spectrophotometer 01/2008... - Page 181 Copper (II)-ions may cause lower test results as they accelerate the decomposition of the Diazonium salt. It is improbable in practice that theses interfering ions will occur in such high concentrations that they cause significant reading errors. 2. Conversion: mg/l NO = mg/l N x 3.29 SP600 Spectrophotometer 01/2008...
-
Page 182: Nitrite Lr (Powder Packs)
8. Press TEST key. prepare Test press TEST Wait for a reaction period of 20 minutes. Countdown 20:00 After the reaction period is finished the measurement starts automatically. The result is shown in the display in mg/l Nitrite. SP600 Spectrophotometer 01/2008... - Page 183 Silver ions interfere by causing precipitation. • In samples with very high concentrations of Nitrate (> 100 mg/l N) a small amount of Nitrite will be found. Such high levels of Nitrate appear to undergo a slight amount of reduction to Nitrite, either spontaneously or during the reaction time of the test. SP600 Spectrophotometer 01/2008...
-
Page 184: Nitrite Lr
9. Press TEST key. prepare Test press TEST Wait for a reaction period of 10 minutes. Countdown 10:00 After the reaction period is finished the measurement starts automatically. The result is shown in the display in mg/l Nitrite. SP600 Spectrophotometer 01/2008... - Page 185 1.1 Methods Notes: 1. Store the reagents in closed containers at a temperature of + 4°C to + 8°C. 2. The test sample and the reagents should have room temperature for test performance. SP600 Spectrophotometer 01/2008...
-
Page 186: Nitrite Hr
Test 9. Press TEST key. press TEST Wait for a reaction period of 10 minutes. Countdown 10:00 After the reaction period is finished the measurement starts automatically. The result is shown in the display in mg/l Nitrite. SP600 Spectrophotometer 01/2008... - Page 187 1.1 Methods Notes: 1. Store the reagents in closed containers at a temperature of + 4°C to + 8°C. 2. The test sample and the reagents should have room temperature for test performance. SP600 Spectrophotometer 01/2008...
-
Page 188: Nitrogen, Total Lr
14. Add 2 ml of the digested, treated water sample to the other TN Acid LR/HR vial (this is the sample). 15. Close the vials with the caps and swirl the vials gently several times to mix the contents (10 x, Note 9). (CAUTION: Vials warm up). SP600 Spectrophotometer 01/2008... - Page 189 12. Application: for water, wastewater and seawater 13. Interferences: Interfering substances that resulted in a concentration change of 10%: Bromide more than 60 mg/l and Chloride more than 1000 mg/l produce positive interferences. TN = Total Nitrogen SP600 Spectrophotometer 01/2008...
-
Page 190: Nitrogen, Total Hr
14. Add 2 ml of the digested, treated water sample to the other TN Acid LR/HR vial (this is the sample). 15. Close the vials with the caps and swirl the vials gently several times to mix the contents (10 x, Note 9). (CAUTION: Vials warm up). SP600 Spectrophotometer 01/2008... - Page 191 12. Application: for water, wastewater and seawater 13. Interferences: Interfering substances that resulted in a concentration change of 10%: Bromide more than 60 mg/l and Chloride more than 1000 mg/l produce positive interferences. TN = Total Nitrogen SP600 Spectrophotometer 01/2008...
-
Page 192: Nitrogen, Total Lr 2
11. Remove the vial from the sample chamber. 12. Open one reagent tube and add 0.5 ml of the pre- treated sample (step 8). 13. Close the vial tightly with the cap and invert several times to mix the contents. (Caution: Vial becomes warm!) SP600 Spectrophotometer 01/2008... - Page 193 1. This test determines the inorganic compounds Ammonium, Nitrate and Nitrite, as well as organic compounds like amino acid, urea, complexing agents etc. 2. Nitrogen compounds which are hardly to oxidise, as may be found in industrial sewage, are not digested or only partially. SP600 Spectrophotometer 01/2008...
-
Page 194: Nitrogen, Total Hr 2
11. Remove the vial from the sample chamber. 12. Open one reagent tube and add 0.5 ml of the pre- treated sample (step 8). 13. Close the vial tightly with the cap and invert several times to mix the contents. (Caution: Vial becomes warm!) SP600 Spectrophotometer 01/2008... - Page 195 1. This test determines the inorganic compounds Ammonium, Nitrate and Nitrite, as well as organic compounds like amino acid, urea, complexing agents etc. 2. Nitrogen compounds which are hardly to oxidise, as may be found in industrial sewage, are not digested or only partially. SP600 Spectrophotometer 01/2008...
-
Page 196: Oxygen, Active
8. Press TEST key. prepare Test press TEST Wait for a reaction period of 2 minutes. Countdown 2:00 After the reaction period is finished the measurement starts automatically. The result is shown in the display in mg/l active Oxygen. SP600 Spectrophotometer 01/2008... - Page 197 * Active Oxygen is a synonym for a common disinfectant (based on “Oxygen”) in Swimming Pool Treatment. 1. When preparing the sample, the escape of Oxygen gases, e.g. by pipetting or shaking, must be avoided. 2. The analysis must take place immediately after taking the sample. SP600 Spectrophotometer 01/2008...
-
Page 198: Ozone
Ozone in the presence of Chlorine. >> with Cl for the determination of Ozone in the absence of Chlorine. >> without Cl Select the desired method with the arrow keys [ ] and [ ]. Confirm with [ ] key. SP600 Spectrophotometer 01/2008... - Page 199 10 ml of the diluted sample will be mixed with the reagent and the measurement repeated. 6. If ??? is displayed at the diffentiated test result see page 325. Oxidizing agents such as Bromine, Chlorine etc. interfere as they react like Ozone. SP600 Spectrophotometer 01/2008...
-
Page 200: In Presence Of Chlorine
14. Fill a second beaker with 10 ml of water sample. Add one Glycine tablet straight from the foil and crush the tablet using a clean stirring rod. Dissolve the tablet. SP600 Spectrophotometer 01/2008... - Page 201 Wait for a reaction period of 2 minutes. Countdown 2:00 After the reaction period is finished the measurement starts automatically. The result is shown in the display in: *,** mg/l O mg/l Ozone *,** mg/l tot Cl mg/l total Chlorine Notes: see page 197 SP600 Spectrophotometer 01/2008...
-
Page 202: In Absence Of Chlorine
Test press TEST Wait for a reaction period of 2 minutes. Countdown 2:00 After the reaction period is finished the measurement starts automatically. The result is shown in the display in mg/l Ozone. Notes: see page 197 SP600 Spectrophotometer 01/2008... - Page 203 SP600 Spectrophotometer 01/2008...
- Page 204 2-3 drops of water sample. 11. Add one DPD No. 1 tablet and one DPD No. 3 tablet straight from the foil and crush the tablets using a clean stirring rod. SP600 Spectrophotometer 01/2008...
- Page 205 Wait for a reaction period of 2 minutes. Countdown 2:00 After the reaction period is finished the measurement starts automatically. The result is shown in the display in: *,** mg/l O mg/l Ozone *,** mg/l total Cl mg/l total Chlorine Notes: see page 197 SP600 Spectrophotometer 01/2008...
- Page 206 Test press TEST Wait for a reaction period of 2 minutes. Countdown 2:00 After the reaction period is finished the measurement starts automatically. The result is shown in the display in mg/l Ozone. Notes: see page 197 SP600 Spectrophotometer 01/2008...
- Page 207 SP600 Spectrophotometer 01/2008...
-
Page 208: Ph-Value With Tablet
7. Place the vial in the sample chamber making sure that marks are aligned. Zero accepted 8. Press TEST key. prepare Test press TEST The result is shown in the display as pH-value. SP600 Spectrophotometer 01/2008... - Page 209 1 molar 2 molar 3 molar - 0.21 - 0.26 - 0.29 The values of Parson and Douglas (1926) are based on the use of Clark and Lubs buffers. 1 Mol NaCl = 58.4 g/l = 5.8 % SP600 Spectrophotometer 01/2008...
-
Page 210: Ph-Value With Liquid Reagent
7. Place the vial in the sample chamber making sure that marks are aligned. Zero accepted 8. Press TEST key. prepare TEST press Test The result is shown in the display as pH-value. SP600 Spectrophotometer 01/2008... - Page 211 This can be minimised by using a pipette (0.18 ml PHENOL RED solution is equivalent to 6 drops). 3. After use replace the bottle cap securely. 4. Store the reagent in a cool, dry place ideally at between 6°C and 10°C. SP600 Spectrophotometer 01/2008...
-
Page 212: Phenol With Tablets
9. Press TEST key. prepare Test press TEST Wait for a reaction period of 5 minutes. Countdown 5:00 After the reaction period is finished the measurement starts automatically. The result is shown in the display in mg/l Phenol. SP600 Spectrophotometer 01/2008... - Page 213 3. Interferences can be caused in the presence of reducing agents, oxidising reagents, sulphides or suspended solids. Distillation of the sample is necessary then (see: “Standard Methods for Examination of Water and Wastewater, 20 Edition, 4-40 f.”). 4. Wastewater and seawater samples may also require a distillation. SP600 Spectrophotometer 01/2008...
-
Page 214: Phosphate
Tube Test, 3 – 60 mg/l PO Determination of ortho-Phosphate ions Phosphate, acid hydrolyzable with Tube Test, 0.02 – 1.6 mg/l P Determination of ortho-Phosphate ions + condensed inorganic Phosphates More information you can find in the notes according to the methods. SP600 Spectrophotometer 01/2008... - Page 215 10 mg/l Iron greater than 100 mg/l Nickel greater than 300 mg/l Silica (Silicium dioxide) greater than 50 mg/l Silicate greater than 10 mg/l Sulfide at any level Zinc greater than 80 mg/l Phosphate, ortho = Phosphorus, reactive SP600 Spectrophotometer 01/2008...
-
Page 216: Phosphate, Total (Tube Test)
14. Press TEST key. prepare Test press TEST Wait for a reaction period of 2 minutes. Countdown After the reaction period is finished the measurement 2:00 starts automatically. The result is shown in the display in mg/l total Phos- phate. SP600 Spectrophotometer 01/2008... - Page 217 2. Use a funnel to add the reagent. 3. The reagent dissolves not completely. 4. See also page 213. 5. Conversions: mg/l PO = mg/l P x 3.07 mg/l P = mg/l P x 2.29 SP600 Spectrophotometer 01/2008...
-
Page 218: Phosphate, Total Lr (Tube Test)
14. Press TEST key. prepare Test press TEST Wait for a reaction period of 10 minutes. Countdown After the reaction period is finished the measurement 10:00 starts automatically. The result is shown in the display in mg/l total Phos- phate. SP600 Spectrophotometer 01/2008... - Page 219 1.1 Methods Notes: 1. If the analysis is performed without digestion only ortho-Phosphate ions are determined. 2. See also page 213. SP600 Spectrophotometer 01/2008...
-
Page 220: Phosphate, Total Hr (Tube Test)
14. Press TEST key. prepare Test press TEST Wait for a reaction period of 10 minutes. Countdown After the reaction period is finished the measurement 10:00 starts automatically. The result is shown in the display in mg/l total Phos- phate. SP600 Spectrophotometer 01/2008... - Page 221 1.1 Methods Notes: 1. If the analysis is performed without digestion only ortho-Phosphate ions are determined. 2. See also page 213. SP600 Spectrophotometer 01/2008...
-
Page 222: Phosphate, Ortho Lr With Tablets
9. Press TEST key. prepare Test press TEST Wait for a reaction period of 10 minutes. Countdown 10:00 After the reaction period is finished the measurement starts automatically. The result is shown in the display in mg/l ortho- Phosphate. SP600 Spectrophotometer 01/2008... - Page 223 Higher concentrations of Cu, Ni, Cr (III), V (V) and W (VI) interfere due to their colour. Silicates doe not interfere (masked by Citric acid in the tablets). 5. See also page 213. 6. Conversion: mg/l P = mg/l PO x 0.33 mg/l P = mg/l PO x 0.75 SP600 Spectrophotometer 01/2008...
-
Page 224: Phosphate, Ortho Hr With Tablets
9. Press TEST key. prepare Test press TEST Wait for a reaction period of 10 minutes. Countdown After the reaction period is finished the measurement 10:00 starts automatically. The result is shown in the display in mg/l ortho-Phos- phate. SP600 Spectrophotometer 01/2008... - Page 225 320 ”Posphate LR, ortho with Tablet“. 2. Only ortho-Phosphate ions react. 3. See also page 213. 4. Conversions: mg/l P = mg/l PO x 0.33 mg/l P = mg/l PO x 0.75 SP600 Spectrophotometer 01/2008...
-
Page 226: Phosphate, Ortho (Powder Packs)
8. Press TEST key. press TEST Wait for a reaction period of 2 minutes. Countdown 2:00 After the reaction period is finished the measurement starts automatically. The result is shown in the display in mg/l ortho-Phos- phate. SP600 Spectrophotometer 01/2008... - Page 227 1.1 Methods Notes: 1. The reagent dissolves not completely. 2. See also page 213. 3. Conversions: mg/l P = mg/l PO x 0.33 mg/l P = mg/l PO x 0.75 SP600 Spectrophotometer 01/2008...
-
Page 228: Phosphate, Ortho (Tube Test)
8. Press TEST key. prepare Test press TEST Wait for a reaction period of 2 minutes. Countdown 2:00 After the reaction period is finished the measurement starts automatically. The result is shown in the display in mg/l ortho-Phos- phate. SP600 Spectrophotometer 01/2008... - Page 229 1.1 Methods Notes: 1. Use a funnel to add the reagent. 2. The reagent dissolves not completely. 3. See also page 213. 4. Conversions: mg/l P = mg/l PO x 0.33 mg/l P = mg/l PO x 0.75 SP600 Spectrophotometer 01/2008...
-
Page 230: Phosphate, Ortho (Tube Test)
7. Press TEST key. prepare Test press TEST Wait for a reaction period of 3 minutes. Countdown 3:00 After the reaction period is finished the measurement starts automatically. The result is shown in the display in mg/l ortho-Phos- phate. SP600 Spectrophotometer 01/2008... - Page 231 1.1 Methods Notes: 1. Only ortho-Phosphate ions react. SP600 Spectrophotometer 01/2008...
-
Page 232: Phosphate, Hydrolysable (Tube Test)
Test press TEST Wait for a reaction period of 2 minutes. Countdown After the reaction period is finished the measurement 2:00 starts automatically. The result is shown in the display in mg/l acid hydroly- zable Phosphate. SP600 Spectrophotometer 01/2008... - Page 233 2. Use a funnel to add the reagent. 3. The reagent dissolves not completely. 4. See also page 213. 5. Conversions: mg/l PO = mg/l P x 3.07 mg/l P = mg/l P x 2.29 SP600 Spectrophotometer 01/2008...
-
Page 234: Potassium
7. Place the vial in the sample chamber making sure that marks are aligned. Zero accepted prepare Test 8. Press TEST key. press TEST The result is shown in the display in mg/l Potassium. SP600 Spectrophotometer 01/2008... - Page 235 1.1 Methods Notes: 1. If Potassium is present a cloudy solution will be given. Single particles are uncaused necessarily by Potassium. SP600 Spectrophotometer 01/2008...
-
Page 236: S Abs, Spectral Absorption Coefficient
7. Immediately place the cell in the sample chamber ma- king sure that the positioning is correct. Zero accepted 8. Press TEST key. prepare Test press TEST The result is shown in the display in (m SP600 Spectrophotometer 01/2008... - Page 237 525 nm and 620 nm. In case of doubt, you should perform a wavelength scan from 330 to 780 nm using the spectrum function (mode 53). SP600 Spectrophotometer 01/2008...
-
Page 238: Silica
Test 12. Press TEST key. press TEST Wait for a reaction period of 1 minute. Countdown After the reaction period is finished the measurement 1:00 starts automatically. The result is shown in the display in mg/l Silica. SP600 Spectrophotometer 01/2008... - Page 239 2. Phosphate ions does not interfere under the given reaction conditions. 3. If Phosphate is known to be absent, the addition of the SILICA PR tablet may be omitted. 4. Conversion: mg/l Si = mg/l SiO x 0.47 SP600 Spectrophotometer 01/2008...
-
Page 240: Silica Lr Pp
9. Add one Vario LR Silica Amino Acid F F10 Powder Pack straight from the foil into the vial (the sample). 10. Close the vial tightly with the cap and swirl several times to mix the contents. SP600 Spectrophotometer 01/2008... - Page 241 The nature of these forms is not known. A pre-treatment with Sodium hydrogencarbonate and then with Sulfuric Acid will make these forms reactive to Molybdate (pre-treatment is given in “Standard methods for the Examination of Water and Wastewater” under “Silica-Digestion with Sodium Bicarbonate”). SP600 Spectrophotometer 01/2008...
-
Page 242: Silica Hr Pp
Test 13. Press TEST key. press TEST Wait for a reaction period of 2 minutes. Countdown After reaction period is finished the measurement starts 2:00 automatically. The result is shown in the display in mg/l Silica. SP600 Spectrophotometer 01/2008... - Page 243 The nature of these forms is not known. A pre-treatment with Sodium hydrogencarbonate and then with Sulfuric Acid will make these forms reactive to Molybdate (pre-treatment is given in “Standard methods for the Examination of Water and Wastewater” under “Silica-Digestion with Sodium Bicarbonate”). SP600 Spectrophotometer 01/2008...
-
Page 244: Sulfate (Powder Pack)
8. Press TEST key. prepare Test press TEST Wait for a reaction period of 5 minutes. Countdown 5:00 After the reaction period is finished the measurement starts automatically. The result is shown in the display in mg/l Sulfate. SP600 Spectrophotometer 01/2008... - Page 245 1.1 Methods Note: 1. If Sulfate ions are present a cloudy solution will be given. SP600 Spectrophotometer 01/2008...
-
Page 246: Sulfide
9. Press TEST key. prepare Test press TEST Wait for a reaction period of 10 minutes. Countdown 10:00 After the reaction period is finished the measurement starts automatically. The result is shown in the display in mg/l Sulfide. SP600 Spectrophotometer 01/2008... - Page 247 3. To avoid loss of Sulfide collect the sample carefully with a minimum of aeration. It is essential to test the sample immediately after collection. 4. The temperature of test performance should be 20°C. Difference to this temperature can lead to higher or lower results. 5. Conversion: S = mg/l S x 1.06 SP600 Spectrophotometer 01/2008...
-
Page 248: Sulfite
9. Press TEST key. prepare Test press TEST Wait for a reaction period of 5 minutes. Countdown 5:00 After the reaction period is finished the measurement starts automatically. The result is shown in the display in mg/l Sulfite. SP600 Spectrophotometer 01/2008... - Page 249 1.1 Methods Notes: SP600 Spectrophotometer 01/2008...
- Page 250 Test 8. Press TEST key. press TEST Wait for a reaction period of 5 minutes. Countdown 5:00 After the reaction period is finished the measurement starts automatically. The result is shown in the display in mg/l Sulfite. SP600 Spectrophotometer 01/2008...
- Page 251 SP600 Spectrophotometer 01/2008...
-
Page 252: Surfactants, Anionic
Swirl the vial and than place the vial in the sample chamber making sure that the marks are aligned. Zero accepted 9. Press TEST key. prepare Test press TEST The result is shown in the display in mg/l MBAS. SP600 Spectrophotometer 01/2008... - Page 253 5. Because reaction depends on temperature, sample and tube temperature must be between 10 and 20°C. 6. Sample volume should always metered by using volumetric pipette (class A). 7. MBAS = Methylene Blue Active Substances, calculated as sodium 1-dodecanesulfonate SP600 Spectrophotometer 01/2008...
-
Page 254: Toc Hr
14. Place the cooled down vial in the sample chamber ma- king sure that the marks are aligned. Zero accepted 15. Press TEST key. prepare Test press TEST The result is shown in the display in mg/l TOC. SP600 Spectrophotometer 01/2008... - Page 255 MERCK KGaA. ® 4. Appropriate safety precautions and good lab technique should be used during the whole procedure. 5. Sample volume should always metered by using volumetric pipette (class A). 6. TOC = Total Organic Carbon SP600 Spectrophotometer 01/2008...
-
Page 256: Turbidity
6. Place the cell in the sample chamber making sure that the positioning is correct. Zero accepted prepare Test 7. Press TEST key. press TEST The result is shown in the display in FAU. SP600 Spectrophotometer 01/2008... - Page 257 3. Collect water samples in clean glass bottles and analyse the water sample as soon as possible. It is possible to store the sample at 4°C for 48 hours. Before measurement warm up the sample to temperature at collection time. SP600 Spectrophotometer 01/2008...
-
Page 258: Urea
11. Add one AMMONIA No. 2 tablet straight from the foil to the same water sample and mix to dissolve with a clean stirring rod. SP600 Spectrophotometer 01/2008... -
Page 259: Place The Vial In The Sample Chamber Making Sure That The Marks Are Aligned
7. Before analysing seawater samples, a measuring spoon of Ammonia Conditioning Powder must be added to the sample and swirled to dissolve before AMMONIA No. 1 tablet is added. 8. Fill the vial with the same size drops by holding the bottle vertically and squeeze slowly. SP600 Spectrophotometer 01/2008... -
Page 260: Zinc
9. Place the vial in the sample chamber making sure that marks are aligned. Zero accepted press ZERO 10. Press TEST key. press TEST The result is shown in the display in mg/l Zinc. SP600 Spectrophotometer 01/2008... - Page 261 To dechlorinate add one DECHLOR tablet to the water sample (point 1). Crush and mix to dissolve the tablet. Then add the COPPER / ZINC LR tablet (point 2) and continue with the test procedure as described above. SP600 Spectrophotometer 01/2008...
-
Page 262: Important Notes
Add the same size drops to the water sample by holding the bottle vertically and squeezing slowly. After use replace the bottle caps securely noting the colour coding. Note recommendation for storage (e.g. cool and dry). Powder Packs: SP600 Spectrophotometer 01/2008... -
Page 263: Cleaning Vials And Accessories For Analysis
MA 03 (alkaline, phosphate-free) ® ® from Merck KGaA). b. Rinse with tap water thoroughly. c. On demand (see Notes) perform special cleaning at this point, e.g.: rinse with diluted Hydrochloric acid solution. d. Rinse with deionized water thoroughly. SP600 Spectrophotometer 01/2008... -
Page 264: Guidelines For Photometric Measurements
– e.g. due to the formation of condensation in the area of the lens or on the vial. 10. To avoid errors caused by stray-light do not use the instrument in bright sunlight. Correct filling of the vial: SP600 Spectrophotometer 01/2008... -
Page 265: Sample Dilution Teqniques
The corresponding displayed result is 10 mg/l. Total volume = 100 ml + 5 ml = 105 ml Correction factor = 105 ml / 100 ml = 1.05 Corrected result = 10 mg/l x 1.05 = 10.5 mg/l SP600 Spectrophotometer 01/2008... - Page 266 SP600 Spectrophotometer 01/2008...
-
Page 267: Part 2 Operating Manual
Part 2 Operating manual SP600 Spectrophotometer 01/2008... -
Page 268: Operating
2.1 Operating 2.1.1 Start Up Before using the photometer SP600 it is necessary to insert two batteries. Then select language (mode 10) and perform “Delete Data” (mode 34). Following set date and time (see chapter 2.4 Photometer settings). 2.1.2 Batteries Saving data –... -
Page 269: Cell Chamber And Cells
• 50 mm cells: no cell holder required. Cylindric cells (16 and 24 mm diameter): Note: Cylindric cells are called “vials” in the test instructions. Vials are placed as indicated in the cell holder, the 2 marks matching each other. SP600 Spectrophotometer 01/2008... -
Page 270: Overview Of Function Keys
Displaying date and time / user-countdown 2.2.2 Displaying time and date: Press [“clock”] key. 19:30:22 2006-06-15 The display shows: After 15 seconds the photometer reverts to the previous display automatically or press [ ] key or [ESC]. SP600 Spectrophotometer 01/2008... -
Page 271: User-Countdown
2 minutes, 0 seconds = [0][2][0][0]. Confirm with [ ] key. The display shows: Countdown 02:00 Start count down with [ ] key. Start: After countdown has finished the photometer reverts to the previous display automatically. SP600 Spectrophotometer 01/2008... -
Page 272: Operation Mode
• function of the tungsten halogen lamp • function of the step motor • accuracy of wavelength with internal Didymium filter and if necessary adjustment (in this case the selftest can be taken up to 5 minutes) • function of data storage When selftest is passed the list for method selection is dis- played. SP600 Spectrophotometer 01/2008... -
Page 273: Selecting A Method
Line 2: Range with chemical species 1 0.05-4 mg/l PO Line 3: Range with chemical species 2 0.02-1.3 mg/l P Line 4: Range with chemical species 3 0.04-3 mg/l P Chemical Species Method Information Methodlist Information Information Method SP600 Spectrophotometer 01/2008... -
Page 274: Differentiation
ZERO Prepare a clean vial as described in “Method” and place the vial in the sample chamber making sure that the marks are aligned. Zero Press ZERO key. Zero accepted prepare Test The display shows: press TEST SP600 Spectrophotometer 01/2008... -
Page 275: Performing Test
In this case the operator is responsible for ensuring the necessary reaction period by himself. Non-compliance with reaction periods lead to incorrect test results. 2. The time remaining is displayed continuously. The beeper indicates the last 10 seconds. SP600 Spectrophotometer 01/2008... -
Page 276: Changing Chemical Species
[ ] directly. (The assignment for the Code-No. is then 0 automatically.) The entire data set is stored with date, time, Code-No., method and test result. Stored! The display shows: The test result is then shown again. SP600 Spectrophotometer 01/2008... -
Page 277: Printing Results
0.02-6 mg/l Cl Profi-Mode: no 2006-07-01 14:53:09 Test No.: 1 Code-Nr.: 007 4.80 mg/l Cl The test No. is an internal number that is set automatically if a test result is stored. It appears only at the print out. SP600 Spectrophotometer 01/2008... -
Page 278: Perform Additional Measurements
The display shows: press ZERO 2.3.11 Selecting a new method Press ESC key to return to method selection. Or enter the required method number directly, e.g. [1] [6] [0] for Cyanuric acid. Confirm with [ ] key. SP600 Spectrophotometer 01/2008... -
Page 279: Photometer Settings
Switching the acoustic signal on/off to indicate end of reading Spectrum (Scan) Absorption scanning about a max. range between 300 and 900 nm Storage Displaying all stored results Stor., code Displaying only results of a selected Code-No. range SP600 Spectrophotometer 01/2008... -
Page 280: Blank Because Of Technical Requirements
Press [MODE] [1] [0] keys. Mode Confirm with [ ] key. The display shows: <Language> Deutsch >> English Press arrow key [ ] or [ ] to select the required language Francais from the displayed list. Confirm with [ ] key. SP600 Spectrophotometer 01/2008... - Page 281 14. May 2006 = [0][6][0][5][1][4] Enter hours and minutes yy-mm-dd hh:mm e.g.: 3.07 p.m. = [1][5][0][7] 06-05-14 15:07 Confirm with [ ] key. Note: While conforming date and time with [ ] key the seconds are adjusted to zero automatically. SP600 Spectrophotometer 01/2008...
- Page 282 The “user-countdown” is also available if the countdown is switched off. 2. If the countdown function is switched off, the operator is responsible for ensuring the necessary reaction period by himself. Non-compliance with reaction periods lead to incorrect test results. SP600 Spectrophotometer 01/2008...
- Page 283 • Press [0] key to switch the signal-beep off. • Press [1] key to switch the signal-beep on. Confirm with [ ] key. Note: In the case of methods with reaction periods, an acoustic signal still sounds during the last 10 seconds of the countdown even if the key-beep is switched off. SP600 Spectrophotometer 01/2008...
-
Page 284: Printing Of Stored Results
Press [ ] key for printing out all stored test results. Test No.: The display shows e.g.: After printing the photometer goes back to mode menu automatically. Note: It is possible to cancel the entering by [ESC]. All stored data are printed out. SP600 Spectrophotometer 01/2008... - Page 285 After printing the photometer goes back to mode menu automatically. Note: It is possible to cancel the entering by [ESC]. If you want to print only results of one day enter the same date twice to characterise the period. SP600 Spectrophotometer 01/2008...
- Page 286 It is possible to cancel the entering by [ESC]. If you want to print only results of one Code-Number enter the same Code-Number twice. If you want to print all results without Code-No. (Code-Nr. is 0) enter Zero [0] twice. SP600 Spectrophotometer 01/2008...
- Page 287 [ ] key. <Print> The display shows: method 30 Alkalinity-total Start: Press [ ] key and all stored results of the selected method cancel: ESC are printed. After printing the photometer goes back to mode menu automatically. SP600 Spectrophotometer 01/2008...
- Page 288 Confirm with [ ] key. Finish with ESC key. Flow Control will be set to the selection displayed at “is”. Press [2] key to select “Baud rate”. <Baud rate> is: 19200 The display shows: select: [ ] [ ] save: cancel: SP600 Spectrophotometer 01/2008...
-
Page 289: Recall / Delete Stored Results
• Press [F3] key to print the displayed result. • Press [F2] key to print all results. • End with [ESC]. • Press arrow key [ ] to display the following test result. • Press arrow key [ ] to display the previous test result. no data If there are no test results in memory the display shows: SP600 Spectrophotometer 01/2008... - Page 290 F2 • Press [F3] key to print the displayed result. • Press [F2] key to print all selected results. • End with [ESC]. Note: It is possible to cancel the entering by [ESC]. If you want to recall only results of one day enter the same date twice to characterise the time period. SP600 Spectrophotometer 01/2008...
- Page 291 It is possible to cancel the entering by [ESC]. If you want to recall only results of one Code-Number enter the same Code-Number twice. If you want to recall all results without Code-No. (Code-Nr. is 0) enter Zero [0] twice. SP600 Spectrophotometer 01/2008...
- Page 292 [ ] key. The display shows: <Storage> method • Press [ ] key and all stored results of the selected 30 Alkalinity-total method are displayed. Start: cancel: ESC print: F3 • Press [F3] key to print the displayed result. print all: F2 • Press [F2] key to print all selected results. • End with [ESC]. SP600 Spectrophotometer 01/2008...
-
Page 293: Calibration
1. Fill a clean vial (24 mm Ø) with exact 10 ml of deionized Zero: deionised water water, close tightly with the cap. press ZERO 2. Place the vial in the sample chamber making sure that the marks are aligned. SP600 Spectrophotometer 01/2008... - Page 294 As the test result is highly dependent on exact sample and reagent volumes, the sample and reagent volumes should always be metered by using a 10 ml resp. 2 ml volumetric pipette (class A). Error, absorbance T2>T1 If there appears an error message please repeat adjust- ment. SP600 Spectrophotometer 01/2008...
- Page 295 If the user calibration is deleted the factory calibration is automatically activated. Remarks: The method “Fluoride” cannot be calibrated with mode 45 since the test requires a calibration related to the batch of the liquid reagent (SPADNS) (mode 40, chapter calibration (fluoride)”). SP600 Spectrophotometer 01/2008...
- Page 296 Cancel user calibration by pressing [ESC] key. Jus Factor The display shows: saved Chlorine T Now the method name is displayed inverse and the test 0.02-6 mg/l Cl2 result is calculated with the new calibration factor. 1.00 mg/l free Cl2 SP600 Spectrophotometer 01/2008...
- Page 297 The display shows: <user calibration> Chlorine T 0.02-6 mg/l Cl2 clear user calibration? YES: 1, NO: 0 Press [1] key to delete user-calibration. Press [0] key to keep the valid user-calibration. The instrument goes back to Zero-query automatically. SP600 Spectrophotometer 01/2008...
-
Page 298: Lab Function
Storage of test results is possible. In case of stored test results the display shows “Profi-Mode” additionally. The selected settings are kept by the photometer also after it was switched off. To change photometer setting a new setting is required. SP600 Spectrophotometer 01/2008... - Page 299 Test chamber. press TEST Test Press TEST key. < Abs / Trans > The result is shown in the display as Extinction (in Abs) and wavelength: 540 nm Transmission (in %). E: 0.596 T: 25, 3 % SP600 Spectrophotometer 01/2008...
- Page 300 Place a filled cell (the blank) into the sample chamber (Note 1). Zero Press ZERO to start null balance (the baseline). Zero accepted prepare Test The display shows: press TEST Place the cell with the test solution into the sample cham- ber. Press TEST key. Test SP600 Spectrophotometer 01/2008...
- Page 301 1. It is possible to perform the baseline against air. For the measurement of water samples it is recommend to use a cell filled with deionized water. 2. 1000 mAbs = 1.000 E (or Abs) 1 mAbs = 0.001 E (or Abs) SP600 Spectrophotometer 01/2008...
- Page 302 [6] [0]. Confirm with [ ] key. Time delay: _ _ _ s Enter the interval time in the range from 6 to 999 sec., Interval tine: e.g. [2] [0]. Confirm with [ ] key. _ _ _ s SP600 Spectrophotometer 01/2008...
- Page 303 E + _ _ • Press [ ] or [ ] key to change between plus- and minus-sign. • Enter the exponent value, e.g. – 1 Confirm with [ ] key. After confirmation the sample measurement starts automa- tically (see ‘Flow of Standard/Sample Measurement’). SP600 Spectrophotometer 01/2008...
- Page 304 If the same zero shall be used press [Test] key. To measure a new Zero press [Zero] key. Time delay: 28 s The remaining time delay is displayed as count-down. After expiration the first measurement takes place. SP600 Spectrophotometer 01/2008...
- Page 305 121.3673 = 1.213567 E+02. All displayed values are limited to 9.999 E ± 09. This value is an error-indicator, there is no additional error message. standard: conc. will be displayed during the If a standard measuring is performed measurement. SP600 Spectrophotometer 01/2008...
-
Page 306: User Operations
If only a few methods are required it is recommendable to perform Mode 62 first, followed by Mode 60. All user-Polynomials (1-25) and -Concentrations (1-10) are displayed in the method list, although they are not programmed by the user. Non-programmed user-methods can’t be activated! SP600 Spectrophotometer 01/2008... - Page 307 Press [MODE] [6] [2] keys. Confirm with [ ] key. <Mlist all off> The display shows: switch off all methods YES: 1, NO: 0 • Press [1] key to display only one method in the method selection list. • Press [0] key to keep the valid method selection list. The instrument goes back to mode menu automatically. SP600 Spectrophotometer 01/2008...
- Page 308 Enter the required wavelength in the range from 330 to 900 nm, e.g.: 550 nm. Confirm with [ ] key. choose unit: >> mg/l Press [ ] or [ ] keys to select the required unit. mmol/l mAbs µg/l SP600 Spectrophotometer 01/2008...
- Page 309 Confirm with [ ] key. S1: 0.05 mg/l 0.012 Enter the concentration of the second standard; e.g.: 0.1 S1 accepted • One step back with [ESC]. S2: +________ | ESC | F1 • Press [F1] key to reset numerical input. Confirm with [ ] key. SP600 Spectrophotometer 01/2008...
- Page 310 Entering a User-Polynomial: Press [MODE] [6] [5] keys. Mode Confirm with [ ] key. The display shows: <User polynoms> choose no.: ____ (800-824) Enter a method-number in the range from 800 to 824, e.g.: [8] [0] [0] SP600 Spectrophotometer 01/2008...
- Page 311 • Press [ ] or [ ] key to change between plus and minus Min E: +________ sign. Max E: +________ • Enter the values in Absorbance (E = extinction) for the upper limit (Max) and the lower limit (Min). Confirm every input with [ ] key. SP600 Spectrophotometer 01/2008...
- Page 312 Save all your polynomial data in a written form because in case of power outage (e.g. changing the battery) all polynomial data will be lost and must be entered again. You might want to use Mode 67 to transfer all polynomial data to a PC. SP600 Spectrophotometer 01/2008...
- Page 313 (in the range from 800 to 824 or 850 to 859), e.g.: 800 Confirm with [ ] key. M800 There is displayed the query: delete? YES: 1, NO: 0 • Press [1] key to delete the selected User-Method. • Press [0] key to keep the valid User-Method. The instrument goes back to mode menu automatically. SP600 Spectrophotometer 01/2008...
- Page 314 The display shows: Start: Press [ ] key to print out the data (e.g. wavelength, unit, ...) of all stored User-Methods. M800 The display shows e.g.: M803 After data transfer the photometer goes back to mode menu automatically. SP600 Spectrophotometer 01/2008...
- Page 315 Confirm with [ ] key. The display shows: <User m. init> Start: Confirm with [ ] key. There is displayed the query: Initialising? YES: 1, NO: 0 • Press [1] key to start initialisation. • Press [0] key to to cancel without initialisation. The instrument goes back to mode menu automatically. SP600 Spectrophotometer 01/2008...
-
Page 316: Special Functions
5 and 800 mg/l CaCO total dissol. solids 0<=TDS<=6000 The display shows: +_ _ _ _ Enter the value for TDS (Total Dissolved Solids) in the range between 0 und 6000 mg/l and confirm with [ ] key. SP600 Spectrophotometer 01/2008... - Page 317 Press [MODE] [7] [1] keys. Confirm with [ ] key. <temperature> The display shows: 1: °C 2: °F Press [1] key to select degree Celsius. Press [2] key to select degree Fahrenheit. The instrument goes back to mode menu automatically. SP600 Spectrophotometer 01/2008...
-
Page 318: Instrument Basic Settings 2
Press arrow key [Test] to decrease brightness of the display Zero Test about ten units. 0...254 : 200 The display shows: The brightness can be selected between 0 and 254 units, e.g.: 200. Confirm with [ ] key. SP600 Spectrophotometer 01/2008... -
Page 319: Instrument Special Functions /Service
, cancel: Esc Press arrow key [ ] to display the number of performed tests and free memory capacity. <System-Info> Number of Tests: free records left Finish with [ESC] key. cancel: Esc SP600 Spectrophotometer 01/2008... -
Page 320: Data Transfer
RS232 interface SP600 There are two RS 232 interfaces at the photometer: Interface (F) is for factory use only. Interface (D) the operator needs to transfer data to a PC or printer or to perform an Update. SP600 Spectrophotometer 01/2008... -
Page 321: Connection To A Printer
Caution: Adjust printing parameter in Mode 29. See chapter 2.4.3 Printing Parameter. 2.5.2 Data transfer to a personal computer Transferring test results from the photometer to a personal computer requires a transfer program, e.g. HyperTerminal. Please find detailed information at our homepage on the download-area. SP600 Spectrophotometer 01/2008... -
Page 322: Internet-Updates
The magnet part of the delivery content is needed for updating the instrument! Remark: To prevent loss of stored test results store or print out them before performing an Update. SP600 Spectrophotometer 01/2008... -
Page 323: Part 3 Enclosure
1 Photometer 2 batteries AA/LR6 1 Power adapter, 100 – 240 V, 50 – 60 Hz 1 Cable for connection to PC 1 Magnet (for updating SP600) 1 Instruction manual 1 Manufacturer‘s Test Certificate M 1 Guarantee declaration Reagent sets and cells are not part of the standard scope of delivery. -
Page 324: Technical Data
5 – 40 °C at max. 30 –90 % relative humidity (without condensation) Specific accuracy of the photometer only applies at 20 to 25°C Language options English, German, French, Spanish, Italian, Portugese; further languages via Internet-Update Storage capacity approx. 1000 data sets Subject to technical modification! SP600 Spectrophotometer 01/2008... -
Page 325: Abbreviations
German DIN 38409 demand. Total Dissolved Solids Low Range Medium Range High Range Reagents of Chemetrics © Liquid reagent Powder (-reagent) Powder Pack Tablet Tube Test DEHA N,N-Diethylhydroxylamine Diethyl-p-phenylendiamine DTNB Ellmans reagent 1-(2-Pyridylazo)-2-napthol PDMAB Paradimethylaminobenzaldehyde PPST 3-(2-Pyridyl)-5,6-bis(4-phenylsulfonic acid)1,2,4-triazine TPTZ 2,4,6-Tri-(2-Pyridyl)-1,3,5-triazine SP600 Spectrophotometer 01/2008... -
Page 326: Troubleshooting
Underrange for a test result a of higher/lower concentration. not possible user calibration is not possible Zero not Light absorption Refer to chapter 2.3.4 accepted is too great or too low Performing Zero (page 272) Clean sample chamber. Repeat zeroing. SP600 Spectrophotometer 01/2008... - Page 327 Chlorine. The test should be repeated with a diluted sample. Error absorbance calibration of Fluoride was Repeat calibration e.g.: T2>T1 not correct Printer “timeout” printer switched off; Connect printer no connection Check connections Switch printer on SP600 Spectrophotometer 01/2008...
-
Page 328: General Problems
Profi-Mode off with Mode 50. It seems that a method is Method is not activated in Activate the required method not available. the user method list. in the user method list with Mode 60. SP600 Spectrophotometer 01/2008... -
Page 329: Service / Maintenance
4) Take the new pre-adjusted halogen lamp module out of the packing an fix it. 5) Fix the screws and put the metal plate back into position. 6) Connect the instrument to the AC power and start selftest. SP600 Spectrophotometer 01/2008... -
Page 330: Blank Because Of Technical Requirements
3.6.3.3 blank because of technical requirements SP600 Spectrophotometer 01/2008... -
Page 331: Changing The Batteries
3. Remove the old batteries. 4. Place the new batteries into the holder with the correct polarity. 5. Put the cover back into position and lock it into place. Caution: Dispose batteries according to the local regulations. SP600 Spectrophotometer 01/2008... -
Page 332: Declaration Of Ce-Conformity
Electromagnetic interference with field strength greater than 3V/m may increase the specified tolerances. For data transfer and update use the cable delivered with the instrument only. Dortmund, 26. Februar 2007 Cay-Peter Voss, Managing Director SP600 Spectrophotometer 01/2008... - Page 333 SP600 Spectrophotometer 01/2008...
- Page 334 Orbeco-Hellige Inc. 185 Marine Street, Farmingdale, NY 11735 Phone: 631-293-4110, Fax: 631-293-8258 service@orbeco.com, www.orbeco.com...
Need help?
Do you have a question about the SP600 and is the answer not in the manual?
Questions and answers