Table of Contents
Advertisement
Advertisement
Table of Contents

Related Manuals for IME-DC iDia

Summary of Contents for IME-DC iDia
- Page 1 TABLE OF CONTENTS NO CODING USER GUIDE BLOOD GLUCOSE MONITORING SYSTEM...
-
Page 3: Table Of Contents
TABLE OF CONTENTS TABLE OF CONTENTS INTRODUCTION ���������������������������������������������������������������������������5 DESCRIPTION OF SYSTEM COMPONENTS �������������������������������������7 ■ User interface ■ Light button and data port ■ Battery compartment ■ Test strips CONFIGURATION �����������������������������������������������������������������������11 ■ Configuration ■ Date and time ■ Test reminder SYMBOL DEFINITIONS����������������������������������������������������������������16 ■... - Page 4 TABLE OF CONTENTS TABLE OF CONTENTS LANCING DEVICE������������������������������������������������������������������������30 BLOOD LANCET �������������������������������������������������������������������������31 USING THE LANCING DEVICE ������������������������������������������������������32 DETERMINATION OF BLOOD GLUCOSE LEVEL �����������������������������34 BLOOD GLUCOSE VALUES FOR ADULTS ��������������������������������������36 SYMPTOMS OF LOW BLOOD SUGAR ��������������������������������������������37 SYMPTOMS OF HIGH BLOOD SUGAR �������������������������������������������38 POTENTIAL INFLUENCES ON THE MEASUREMENT READINGS �����39 TECHNICAL SPECIFICATIONS –...
-
Page 5: Introduction
Blood glucose meter and following accessories: iDia Blood glucose test strips 1 IME-DC Lancing device 10 IME-DC UNIVERSAL Blood lancets 1 Kit-Case The scope of supply of the blood glucose monitoring system (see outer package) can vary depending on state. - Page 6 INTRODUCTION Before taking your first measurement, please take note of the following important information. iDia ■ The blood glucose monitoring system is an in vitro diagnos- tic tool that is suitable for self-testing. It enables people with diabetes and specialist medical staff to determine blood glucose values.
-
Page 7: Description Of System Components
DESCRIPTION OF SYSTEM COMPONENTS USER INTERFACE Test strip slot Display Main button... -
Page 8: Light Button And Data Port
DESCRIPTION OF SYSTEM COMPONENTS LIGHT BUTTON AND DATA PORT Light button Data port Pressing the light button when the blood glucose monitoring system is switched on will activate the display's blue background lighting. This makes it possible to take and read measurements correctly even in low light conditions. -
Page 9: Battery Compartment
DESCRIPTION OF SYSTEM COMPONENTS BATTERY COMPARTMENT Battery Set button Battery... -
Page 10: Test Strips
Measurement contacts Insert the test strip into the test strip slot, with the measurement contacts first. NOTE iDia You can touch the measurement field of the test strips freely with clean, dry hands. The test result will not be affected. -
Page 11: Configuration
CONFIGURATION CONFIGURATION Set button First remove the battery cover and check that the required 3 V lith- ium batteries (type CR 2032) have been inserted. If this is not the case, you will need new batteries (see page 46). Then set the current date and correct time. To do this, press the set button (using a pen, for example), and then press the main button (this changes the flashing value on the display). -
Page 12: Date And Time
CONFIGURATION DATE AND TIME NOTE The figures needing adjustment flash on and off (shown in white in the illustrations). Set button pressed once: The blood glucose meter switches itself on. ‘Year’ setting Set button pressed second time: ‘Month’ setting Set button pressed third time: ‘Day’... -
Page 13: Test Reminder
CONFIGURATION TEST REMINDER – Set button pressed sixth to tenth times: ‘Test reminder’ setting: up to five different test reminder times can be set (see page 14). Set button pressed eleventh time: The blood glucose meter switches itself off. Finally, place the battery cover on the device. NOTE If you change settings using the set button and main button, you will need to go through all of the settings until the blood glucose... - Page 14 (after pressing the set button for the last time). Your changes will only be saved after this step. iDia Your blood glucose monitoring system can issue an alarm tone five times a day to remind you to check your blood glucose level.
- Page 15 CONFIGURATION When the test reminder function is activated, you will be prompted to enter the first of your preferred times. Press the set button and then use the main button to set the desired hour ( ) and minute ( and confirm by pressing the set button again.
-
Page 16: Symbol Definitions
SYMBOL DEFINITIONS ‘INSERT TEST STRIP’ NOTIFICATION iDia After the blood glucose monitoring system has been switched on with the main button, the test strip symbol will appear in the display. You should now insert the test strip into the device’s test strip slot. Correct insertion of the test strip will be confirmed by an audio signal. -
Page 17: Measurement Period
SYMBOL DEFINITIONS MEASUREMENT PERIOD Measurement begins once the test area of the test strip is sufficiently filled with blood, and lasts only 7 seconds. During the measurement, an hourglass animation is visible on the display. -
Page 18: Test Result
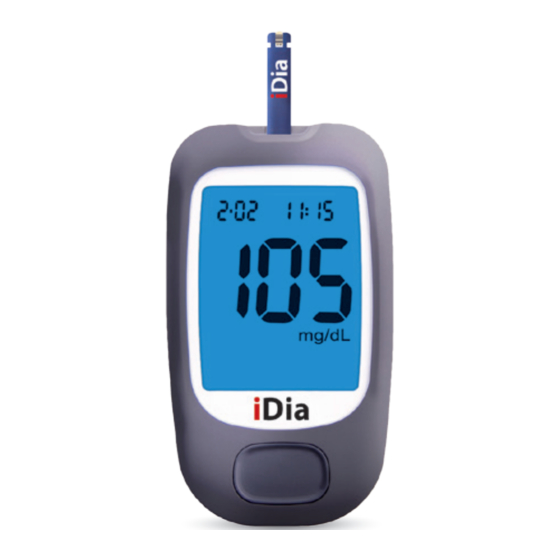
SYMBOL DEFINITIONS TEST RESULT 7 seconds after the start of the measurement, the blood glucose value will be displayed and automatically saved, together with the date and time ( MEASUREMENT UNIT This will be displayed together with the measurement reading... -
Page 19: Hi' Notification
SYMBOL DEFINITIONS ‘HI’ NOTIFICATION This will appear if the measured blood glucose value exceeds 600 mg/dL or 33.3 mmol/L ( ‘LO’ NOTIFICATION This will appear if the measured blood glucose value is below 10 mg/dL or 0.6 mmol/L ( NOTE If you receive a ‘HI‘... -
Page 20: Memory Display
SYMBOL DEFINITIONS MEMORY DISPLAY iDia blood glucose meter can save up to 900 blood glucose measurements, along with the date and time of each. Blood glu- cose measurements and control solution measurements are stored separately. If the user exceeds the memory capacity, each addi- tional measurement will automatically overwrite the oldest saved blood glucose value. -
Page 21: Test Reminder
SYMBOL DEFINITIONS TEST REMINDER If the test reminder function is activated, this will be indicated by an alarm symbol on the display when the blood glucose moni- toring system is switched on (see also page 15). KETONE NOTIFICATION If the measured blood glucose value exceeds 300 mg/dL or 16.7 mmol/L, the ketone notification will be automatically dis- played, which warns you of a potential ketoacidosis. -
Page 22: Error Definitions And Rectification
ERROR DEFINITIONS AND RECTIFICATION The following errors will be shown on the display with an ‘Err‘ or ‘EEE‘ notification: Err + battery symbol ■ Not enough battery power Change the battery (see page 46 onwards). Err + thermometer symbol ■ The ambient temperature is outside the acceptable temperature range. - Page 23 ERROR DEFINITIONS AND RECTIFICATION ■ Electronic error In this case, please contact IME-DC customer service. Service hotline: +49 9281 | 85 01 6-0 Err + test strip symbol ■ Test strip malfunction ■ Used test strip ■ Not enough blood absorbed ■...
-
Page 24: Average Calculation Of Measurements
AVERAGE CALCULATION OF MEASUREMENTS iDia Your blood glucose meter allows you to call up and display the average values of the last 24 hours and the past 7, 14, 21, 28, 60 and 90 days. To do this, please activate the memory display ( ) (see page 20). - Page 25 AVERAGE CALCULATION OF MEASUREMENTS...
-
Page 26: Control Solution
CONTROL SOLUTION USING THE CONTROL SOLUTION Test measurement with the iDia control solution is used to check that the blood glucose monitoring system is functioning correctly. This procedure is recommended in the following cases: ■ For teaching and training purposes ■... -
Page 27: Testing With The Control Solution
CONTROL SOLUTION TESTING WITH THE CONTROL SOLUTION iDia Insert an test strip into the test strip slot. The blood glucose monitoring system will switch itself on automatically. The display will now prompt you to take a blood sample. Press the main button and hold it for approximately 2 seconds until the control solution symbol appears in the display. - Page 28 CONTROL SOLUTION Next, rotate the control solution bottle 3 – 4 times. Please don’t shake it! After opening the bottle, put a drop of control solution on a clean, dry surface (for example, the lid of the test strip contain- er), at a distance of approximately 2 cm.
- Page 29 (as shown on the test strip container), repeat the measurement. If an error message ap- pears again or if the measurement is again outside the target range, please contact IME-DC customer service. Service hotline: +49 9281 | 85 01 6-0...
-
Page 30: Device
TABLE OF CONTENTS LANCING DEVICE Lancing device cap Lancing device regulator (can be adjusted individually) Slot Activation button Spring clip... -
Page 31: Blood Lancet
TABLE OF CONTENTS BLOOD LANCET Protective cap Lancet Lancet body... -
Page 32: Using The Lancing Device
USING THE LANCING DEVICE Unscrew the lancing device cap. Insert the lancet into the slot. Twist off the lancet protection cap. Screw the lancing device cap back on. Set your personal puncture depth (minimum 1, maximum 5). Load the lancing device by pulling the spring clip back. - Page 33 USING THE LANCING DEVICE Press the tip of the lancing device against your finger and press the activation button. The blood drop obtained can be used for the measurement procedure. Unscrew the lancing device cap. Press the lancet into the protective cap. Slide the spring clip forward sharply, to eject the lancet.
-
Page 34: Determination Of Blood Glucose Level
TABLE OF CONTENTS DETERMINATION OF BLOOD GLUCOSE LEVEL iDia iDia Only use test strips for the blood glucose meter� Wash your hands with warm water and dry them well before taking a measurement. iDia Insert the test strip into the test strip slot on the blood glucose meter. - Page 35 DETERMINATION OF BLOOD GLUCOSE LEVEL TABLE OF CONTENTS iDia Position the application area of the test strip to the blood drop ). The blood will be absorbed automatically. An audio signal will confirm that measurement has started. After 7 seconds, the measurement reading will be displayed and...
-
Page 36: Blood Glucose Values For Adults
TABLE OF CONTENTS BLOOD GLUCOSE VALUES FOR ADULTS Blood glucose values for adults (Reference sample type: venous plasma) without diabetes with diabetes ≤ 100 mg/dL ≥ 126 mg/dL Empty stomach ≤ 5.6 mmol/L ≤ 7.0 mmol/L ≤ 140 mg/dL ≥ 200 mg/dL 2 hours after a meal ≤... -
Page 37: Symptoms Of Low Blood Sugar
SYMPTOMS OF LOW BLOOD SUGAR TABLE OF CONTENTS If possible, take an immediate measurement of your blood glucose value if any of the following symptoms occur (possible high or low blood sugar). Contact your specialist physician immediately (or have somebody contact them for you) for instructions on what actions to take. -
Page 38: Symptoms Of High Blood Sugar
TABLE OF CONTENTS SYMPTOMS OF HIGH BLOOD SUGAR Symptoms of high blood sugar (hyperglycaemia): ■ Fatigue ■ Listlessness ■ Frequent urination and thirst ■ Weight loss ■ Weak muscles, leg cramps ■ Itchiness ■ Dizziness, vomiting, stomach ache ■ Acetone odour (like nail polish remover) in exhaled air ■... -
Page 39: Potential Influences On The Measurement Readings
Endogenous substances in the human body such as bilirubin, uric acid, glutathione, triacylglycerol and cholesterol, in addition to the medical substances shown in the table, do not have a significant iDia effect on the blood glucose monitoring results from the blood glucose meter if they do not exceed normal concentrations orth- erapeutic dosages. - Page 40 If haematocrit values are more than 70 %, it is possible that an inaccurately low blood glucose value is displayed. iDia When measuring EDTA-treated blood samples with the blood glucose meter, the blood glucose values recorded may differ from those of an untreated blood sample.
- Page 41 POTENTIAL INFLUENCES ON THE MEASUREMENT READINGS TABLE OF CONTENTS NOTE Our IME-DC customer service department is happy to answer any questions you may have. Other information ■ Please do not make any medically significant decisions without consulting your specialist physician first.
-
Page 42: Technical Specifications - Blood Glucose Meter
90 × 52 × 15 mm Weight: 58 g Power supply: 2 × 3 V lithium battery (CR 2032) iDia blood glucose meter is suitable for Device type: long-term use Measurement range: 10 – 600 mg/dL or 0.6 – 33.3 mmol/L... -
Page 43: Technical Specifications - Test Strips
TECHNICAL SPECIFICATIONS – TEST STRIPS Dimensions: 30 × 6 mm Material: Measurement method: Electrochemical/dynamic Enzyme: GDH-FAD Required blood volume: 0.7 µL Fresh capillary blood, venous blood, Sample type: arterial blood or neonatal blood Calibration: Plasma equivalent 20 ‒ 70 % Haematocrit range: Measurement temperature: +10 °C to +40 °C... -
Page 44: Data Transfer
If the blood glucose meter is not yet listed there, please contact IME-DC customer service. If data transfer is still not possible e ven when your computer does recognise your device, this could be due to missing drivers. -
Page 45: List Of Items | Quality Standards
LIST OF ITEMS | QUALITY STANDARDS TABLE OF CONTENTS List of items EAN code iDia IME-DC blood glucose monitoring system set (mg/dL) 4260155930171 iDia IME-DC blood glucose monitoring system set (mmo/L) 4260155930201 iDia IME-DC blood glucose test strips 4260155930188 iDia... -
Page 46: Battery Replacement
BATTERY REPLACEMENT If the display shows the error message ‘Err + Battery symbol’, or if the device no longer switches itself on, the battery needs to be changed ( Remove the battery cover. To remove the battery, lightly press it towards the right until the battery is no longer held by the two plastic tabs on the left-hand side. - Page 47 BATTERY REPLACEMENT TABLE OF CONTENTS To fit a new battery, first slide it (plus icon up) underneath the metal brackets (from left to right). Using your thumb, insert the battery with light pressure towards the left. The battery should now be held by all four tabs. Close the battery cover.
-
Page 48: Cleaning And Maintenance
TABLE OF CONTENTS CLEANING AND MAINTENANCE ■ Use a soft cloth to clean the blood glucose monitoring system. ■ Do not use any strong cleaning agents for cleaning the device. ■ The outer surfaces of the blood glucose monitoring system may be disinfected using standard disinfectant wipes. -
Page 49: Safety And Disposal
SAFETY AND DISPOSAL TABLE OF CONTENTS BLOOD GLUCOSE METER ■ Do not use the blood glucose meter in close proximity to other electrical devices, in order to avoid possible electromagnetic interference. ■ Used blood glucose meters may have traces of blood on them and therefore potentially represent infectious hazard. -
Page 50: Warranty
5-YEAR WARRANTY iDia IME-DC GmbH hereby guarantees correct functioning of the blood glucose meter for a period of 5 years, starting from the date the device is activated. If any faults occur during this warranty period, you will be provided with a new device at no extra cost. -
Page 51: Explanation Of Symbols
EXPLANATION OF SYMBOLS Article number Lot number Serial number In vitro diagnostic tool Follow user instructions Can be used until Manufacturer Date of manufacture Do not reuse Temperature limits Keep dry Keep away from sunlight Important: read product documentation This product meets the requirements of the IVD Directive in accordance with 98/79/EC Class II device in accordance with Standard 60601-1 Applied Part Type B... -
Page 52: Personal Notes
TABLE OF CONTENTS PERSONAL NOTES... - Page 53 TABLE OF CONTENTS PERSONAL NOTES...
- Page 54 TABLE OF CONTENTS PERSONAL NOTES...
- Page 56 IME-DC GmbH International Medical Equipment - Diabetes Care Fuhrmannstrasse 11 95030 Hof | Germany Tel.: +49 9281 | 85 01 6-0 Fax: +49 9281 | 85 01 6-100 E-mail: info@imedc.de Website: www.imedc.de...
Need help?
Do you have a question about the iDia and is the answer not in the manual?
Questions and answers