Advertisement
Advertisement
Table of Contents

Summary of Contents for Tykma Zetalase
- Page 1 L A S E R S F O R M A R K I N G General Manual...
- Page 2 Microsoft Corporation. They are only used in this document for editorial purposes. All information and contents in this document are property of TYKMA Inc. and cannot be shown, distributed, modified and/or reproduced through electronic, mechanical or any other way, without written consent from TYKMA Inc.
-
Page 3: Table Of Contents
L A S E R S F O R M A R K I N G Contents Page Contents Technical Specifications Laser Safety Introduction Machine Overview System Setup Operator Pendant System Operation Maintenance Zetalase™ General Manual SE 1... -
Page 4: Technical Specifications
L A S E R S F O R M A R K I N G Technical Specifications Your Zetalase™ Laser Marking System is available in different laser models, options, and accessories depending on marking application and customer specifications. Please reference your Sales Order for system details. -
Page 5: Laser Safety
L A S E R S F O R M A R K I N G Laser Safety The Zetalase™ is a Class 1 laser marking system designed, developed, and manufactured in accordance with EC directives, DIN EN 60825-1, ANSI Z136.1, and Complies with FDA Performance Standards for Laser Products. - Page 6 While specular reflections are more hazardous, they are much less common. Most laser marking systems can be designed to eliminate specular reflective surfaces in the beam path. Zetalase™ General Manual SE 1...
- Page 7 Since the energy is concentrated by the eye's lens, the strength of the laser beam that is required to damage the eye is significantly less. Figure 2. shows various laser wavelengths and their effect on the eye. Figure 2. Zetalase™ General Manual SE 1...
- Page 8 MPE. The purpose of a NHZ is to define an area in which control measures are required. The Laser Safety Officer should determine the NHZ and the control measures to protect the laser worker from exposure to radiation above the MPE. Zetalase™ General Manual SE 1...
- Page 9 Occupational Safety and Health Administration (OSHA), the National Electric Code and related state and local regulations. Individuals who repair or maintain lasers may require specialized electric safety-related work practices training. Zetalase™ General Manual SE 1...
- Page 10 Table 2. Optical Densities for Protective Eyewear for Q-Switched Nd:Yag Laser Type/ Wavelength OD for OD for Power (? m) 0.25 10 seconds 600 seconds 30,000 seconds seconds Nd:YAG 1.064 (Q-switch) Zetalase™ General Manual SE 1...
- Page 11 Collecting Optics Totally Open Beam Path Limited Open Beam Path Enclosed Beam Path None required if protective housing in place Remote Interlock Connector Beam Stop or Attenuator Activation Warning Systems Emission Delay Temporary Laser Controlled Area Zetalase™ General Manual SE 1...
- Page 12 Curtains Skin Protection LEGEND X = shall ? = should -- = no requirement NHZ = NHZ analysis required ? = shall if enclosed Class 3b or 4 MPE = shall if MPE is exceeded Zetalase™ General Manual SE 1...
- Page 13 The above material has been produced as guide for your company. It is the responsibility of each company to develop a laser safety program that complies with the national standard. Zetalase™ General Manual SE 1...
-
Page 14: Introduction
First, unscrew the crate side panels and packing. Using a pallet jack or fork lift, raise the pallet carefully and move it to the work area. Zetalase™ is a tabletop or workbench system, so you will need a sturdy 40” wide x 26” deep workbench with the following access area: at least 70”... -
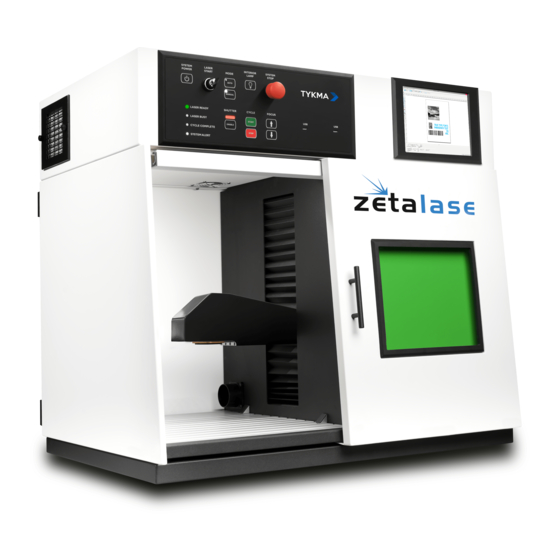
Page 15: Machine Overview
L A S E R S F O R M A R K I N G Machine Overview Your Zetalase™ comes configured as a Class I Laser Marking System ready for marking right out of the box. Each system is configurable based on application and laser type so please check your order confirmation for exact system configuration. -
Page 16: System Setup
L A S E R S F O R M A R K I N G System Setup STEP 1: After Zetalase™ is secure on a worktable, check the front sliding access door for smooth operation, making sure there are no obstructions in the upper or lower door channels. - Page 17 ***If you purchased a Fume Extraction Unit do not plug into this port! STEP 4: Your Zetalase™ comes with a “Network” port to connect the embedded PC of the laser to your work network. It is recommended to network your PC for online service and support capability with one of TYKMA’s experienced technicians.
-
Page 18: Operator Pendant
L A S E R S F O R M A R K I N G Operator Pendant Reference the figure below for Operator Pendant layout and descriptions on Zetalase Fiber models. System Power Manual Start/Stop Laser Enable Key Switch... - Page 19 Start/Stop - Starting or stopping the laser process in Manual mode. Axis Control - On standard Zetalase models this will move laser Z-Axis UP/Down. On optional Automatic Z-Axis models this is an overtravel bypass button. USB Ports - Provides access to embedded PC for transfer of files VIA removeable...
-
Page 20: System Operation
***Should you wish to protect the system from unauthorized operation, simply remove the “Laser Enable Key” and store in a safe location when not in use. Step 1 & 2 : Power ON & Laser Enable Zetalase™ General Manual SE 1... - Page 21 Should the laser not be connected the software will state “No Laser System Present”. If you have no connection contact TYKMA Service & Support (1-877-318-9562). STEP 5 Focus the Laser - For a “Power Z-axis”, press the up and down arrows on the Operator Pendant until the focusing beams converge.
- Page 22 “Trace” function to align your mark to your part. Click the button that says “Trace”. You will see a red outline simulation in the Zetalase machine. Move your part or move the mark to align to the desired location. When completed with alignment click “Stop”...
- Page 23 Laser will be marking. “Laser Busy” will be indicated on the operator pendant and “Cycle Complete” will illuminate when the marking is finished. Click “Stop” only if there is something wrong with your marking. Zetalase™ General Manual SE 1...
-
Page 24: Maintenance
L A S E R S F O R M A R K I N G Maintenance Schedule Your Zetalase™ system requires little maintenance since it is air cooled and has very few mechanical or moving parts. Maintenance Schedule: Below is the recommended maintenance schedule for the Zetalase. - Page 25 Push down and out on the fan cover to gain access to the replaceable filter media. See picture below. Step 1 Removeable Fan Filter Step 2 Filter PN: 11720003055 Manufacturer: pfannenberg Order from TYKMA or direct Zetalase™ General Manual SE 1...
- Page 26 Maintenance Procedures Laser Lens The laser focusing lens on the Zetalase should be cleaned once every 3 months (shorter intervals may be required in dirty / oily environments). Use a mixture of 90% water 10% Acetone to clean the lens using a lint free cloth. Visually inspect the lens for cleanliness and scratches or cracks.
- Page 27 The Motor Driven BiSlide Z-Axis should be lubricated with Velmex BL-1 oil a minimum of once a year. To access the Z-Axis you must remove the right service panel of the Zetalase by removing the 4 bolts shown below. Remove the side access panel and set aside. See Velmex lubrication illustration for details on lubricating the Z-Axis below.
- Page 28 L A S E R S F O R M A R K I N G TYKMA Technologies P.O. Box 917 931 E Water Street Chillicothe, OH 45601 Toll Free: 877-318-9562 Fax: 740-779-9910...
Need help?
Do you have a question about the Zetalase and is the answer not in the manual?
Questions and answers