Table of Contents
Advertisement
Advertisement
Table of Contents

Summary of Contents for ABORjet QUIK-jet AIR
- Page 1 QUIK ® Micro-Injection System...
-
Page 2: Table Of Contents
Air Tank Assembly ....................4 Connecting the Device..................... 5 Regulator Components ................... 6 Part 2: Micro-Injection Prime the QUIK-jet Air and Ready for Micro-Injection ........... 7 Selecting Arborplugs and Drill bits ................. 8 Setting the Arborplugs .................... 9 Procedure: Conifers vs. Deciduous ............... 10 Part 3: Maintenance Three step clean out .................... -
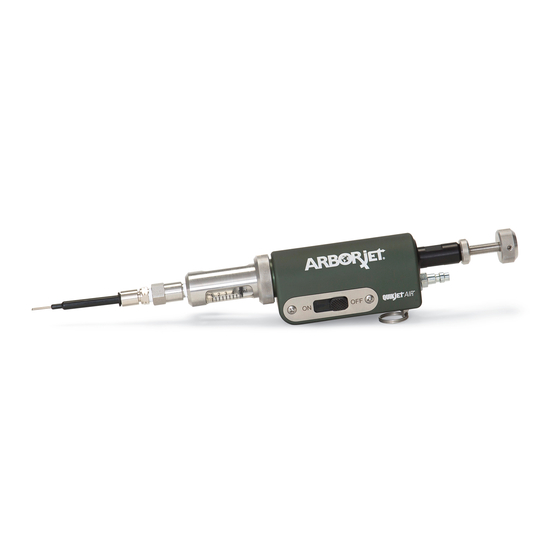
Page 3: Parts Of The Quik-Jet Air Device
PaRTs of The QUiK-jeT aiR deviCe Glass Cylinder Case Stop Nut Dosesizer 975-1009 Cylinder Case Nut 975-1005 975-1006 Piston Rod Main Body 975-1010 Housing Plug 1/8” NPT x Piston Rod 975-1001 PTC Fitting 975-1003 #10-32 Adapter 975-1004 1/4” PTC 975-1124... -
Page 4: Parts Of The Quik-Jet Air Kit
PaRTs of The QUiK-jeT aiR KiT Kit Includes: • 1 QUIK-jet Air device (070-2355) • 1 Liter supply bottle (010-9022) • 1 Air tank (975-00183) • 1 Carrying bag with shoulder strap (975-1123) • 1 Arborplug setter (070-0120 sold in 2-pack) •... -
Page 5: Air Tank Assembly
You can fill your air tank if you have a personal compressed air tank of your own, all you’ll need is part #975-00039N Fill station open/close knob Scuba open/close knob QUIK-jet Air air tank fits here for filling Bleed Valve IMPORTANT •... -
Page 6: Connecting The Device
ConneCTing The deviCe PTC Fitting Attach pressure supply line and product tubing: 1. Pull back outer sleeve. 2. Push to connect. 3. Flip device body over so on/off switch faces down. 4. Feed product tubing through channel in body until it passes the front of the body. -
Page 7: Regulator Components
RegUlaToR ComPonenTs Side View Top View A. Primary Regulator & Gauge D. Open/Close Valve B. Pressure Release Valve E. Pressure Supply Gauge C. Air Tank RegUlaToR Regulator Gauge (Counter Clockwise) (Clockwise) To adjust the air pressure, insert a 3/16” Allen wrench into end of primary regulator. Turn counter-clockwise slowly to increase pressure to system. -
Page 8: Prime The Quik-Jet Air And Ready For Micro-Injection
NOTE: Be careful when pointing the needle; some air bubbles may occur. QUIK-jet Air is now primed and ready to use! Ready foR miCRo-injeCTion System is assembled, pressurized, primed, and ready for micro- injection. -
Page 9: Selecting Arborplugs And Drill Bits
seleCTing aRboRPlUgs and dRill biTs Select Arborplugs based on tress size and type: • For trees of small to medium size and density use #3 (9/32”) Arborplugs. • For large or dense-wooded trees and conifers use #4 (3/8”) Arborplugs. Arborplug Size Drill Bit Size 9/32”... -
Page 10: Setting The Arborplugs
seTTing The aRboRPlUgs 1. Set Arborplugs into drilled holes using Set Tool (from kit) and hammer. 2. Make sure the barbs on the Too Deep Too Shallow Arborplug make a seal between the xylem and the inner bark as illustrated. -
Page 11: Procedure: Conifers Vs. Deciduous
Important Note For Conifer Injections: Sap flows out of conifers as a protective response to drilling. For best results, make sure the QUIK-jet Air is inserted and the mi- cro-injection occurs immediatly after the Arborplug is set. Drill, plug, and inject one site at a time. If too much time has passed between Arborplug setting and QUIK-jet Air application, sap may flow into your injection site and make your uptake slower. -
Page 12: Three Step Clean Out
ThRee sTeP Clean-oUT IMPORTANT: Prior to switching to another product, or storing the QUIK-jet Air, it is essential to clean and rinse out the device and product tubing to maintain proper function and to avoid clog- ging the internal components of the system. - Page 13 4. Dispose of waste according to local and state regulations. 5. System is now ready to be loaded with another product or may now be lubricated and stored. IMPORTANT: Always follow Daily Maintenance before storing the QUIK-jet Air System.
-
Page 14: Regular Maintenance
• Product supply line switch is closed (OFF). • That Daily Maintenance is completed. Please Follow these steps when storing the QUIK-jet Air for a prolonged period of time to prevent corrosion to the QUIK-jet Air body, manifold and tools: •... -
Page 15: Lubricating The Device
lUbRiCaTing The deviCe Add a few drops of 3-in-1 oil to the device Pressure Apply 3-in-1 oil to the Pressure Supply Line Quick- Inlet on the injector. Disconnect, then pull the metal sleeve back and release. Apply grease to o-ring on Piston. Whenever changing pressure supply tanks, apply grease to o-ring on supply bottle’s neck. -
Page 16: Breaking It Down
bReaKing iT doWn Remove Input Valve by taking a 7/16 wrench and Unscrew case ring by turning it counter-clockwise to turn the screw counter-clockwise. free Glass Barrel Case from main body. Remove the Glass Barrel case to reveal the Glass Pull Glass Barrel away from Piston. -
Page 17: Putting It Back Together
PUTTing iT baCK TogeTheR Piston O-ring may need replacement over time. See troubleshooting section. If device gets stuck, replace. Push the Glass Barrel back onto the Piston. Ensure Push against the Internal Piston Sleeve with Housing that grease is applied to Piston after each use. Plug. -
Page 18: Replacement Parts/ Internal Parts
RePlaCemenT PaRTs A. Main Body (975-1001) G. Stop Nut (975-1005) B. Trigger Bezel (975-1012) H. Adjustable Knob Dosesizer (975-1006) C. Trigger Slider (975-1011) I. Housing Plug (975-1003) D. Trigger Plate Screws (975-1114) J. Set Screw (sold with adjustable knob) E. Plug (975-1109) K. -
Page 19: Additional Parts/ Parts For Air Tank
E. Stud Stopper (975-1004) C. Trigger Valve (998-00048) F. Housing Plug Seal (975-1104) addiTional PaRTs A. QUIK-jet Air Rebuild Kit (070-2360) B. Bottle Assembly (070-2200) PaRTs foR aiR TanK A. Scuba Fill Station (975-00039N) D. Low Pressure Regulator Assembly w/ coil (070-2370) B. -
Page 20: Troubleshooting
The Arborjet QUIK-jet Air System device utilizes 2 check valves: • Inlet check valve • Exit check valve If there is a problem with flow of product, replace check valves. Note which valve seems to have problems– the two check valves on the QUIK-jet Air are not interchangeable. - Page 21 99 Blueberry Hill Road • Woburn, MA 01801 For customer service, call 781-935-9070 or visit us online at www.arborjet.com.
Need help?
Do you have a question about the QUIK-jet AIR and is the answer not in the manual?
Questions and answers