Advertisement
Quick Links
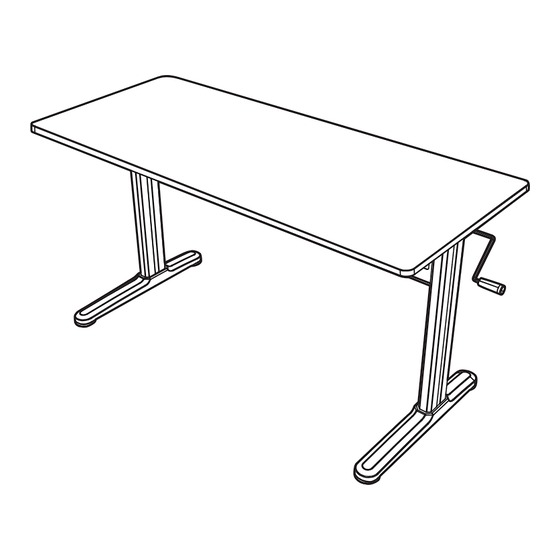
Low P rofile A djustment
1 .
Insert t he c rank into t he c orresponding h oles s upported b y b oth left a nd r ight
c olumns , t hen a djust t o t he d esired p osition.
2.
Remove t he c rank a nd i nsert into t he h oles a s s hown for s torage.
3.
There a re a djustable foot p ads u nder e ach foot. If t he f loor isn't e ven , s imply
turn the p ad t o a djust t he h eight t o m ake t he d esk s table.
4.Tip: Use a b ubble l evel t o c heck if t he d esktop i s e ven.
11
1
2
E
4
Bubble L evel
Manual height adjustable desk frame
Instruction Manual
MANUAL
STANDING DESK
www.facebook.com/EleTabus
EleTab_service@outlook.com
Advertisement

Summary of Contents for eletab MANUAL STANDING DESK
- Page 1 Low P rofile A djustment Manual height adjustable desk frame Insert t he c rank into t he c orresponding h oles s upported b y b oth left a nd r ight c olumns , t hen a djust t o t he d esired p osition. Remove t he c rank a nd i nsert into t he h oles a s s hown for s torage.
- Page 2 Preface Other Safety Instructions: CAUTION This manual height adjustable standing desk consists of a heavy-duty steel desk frame, a desktop and a manual height • Clear up all obstacles within the height adjustment range. adjustment system. Please read and completely understand this manual before installation in order to make sure the safe and correct use of the system and maintain the longevity of the overall construction.
- Page 3 Preparation Checklist and Installation What are the specifications you need to know? Weight Capacity Operation Temperature 40kg (88lbs) °C 40°C What are the tools you require while installation? A (x1) B (x1) Desk Board Sync Rod Bubble Level Allen Wrench Phillips Screwdriver (Included) What's the thing you'd...
- Page 4 Assembling One Lifting Column S-A (x4) S-B (x6) S-C (x1) Hex Head Screw Phillips Head Screw Allen Wrench Phillips • Please prepare a spacious area for installation, and put a Screwdriver shipping blanket on the area to prevent scratches on the floor and the desk.
- Page 5 Inserting the Sync Rod • Place the right column on the back of the desk board. • Insert one end of the sync rod into the left column. • Make sure another end of the sync rod inserted into the right column.
- Page 6 Assembling a nother Lifting C olumn Assembling t he C rossbar ・ Align holes o n the r ight c olumn w ith the p ilot holes o n the d esk b oard. ・ Attach the c rossbar t o t he c olumns u sing 4 s crews S -A S -A a nd t ighten the...
-
Page 7: Warranty & Service
EleTab. review sharing your experierience. If you have any issues, please don't hesitate to contact us. Send your name and order ID to EleTab_service@outlook.com Scan the qr code below for more products from EleTab For further services: EleTab_service@outlook.com www.facebook.com/EleTabus...
Need help?
Do you have a question about the MANUAL STANDING DESK and is the answer not in the manual?
Questions and answers