Table of Contents
Advertisement
FOUR ASHES MACHINERY LTD
Operator's Instruction Manual
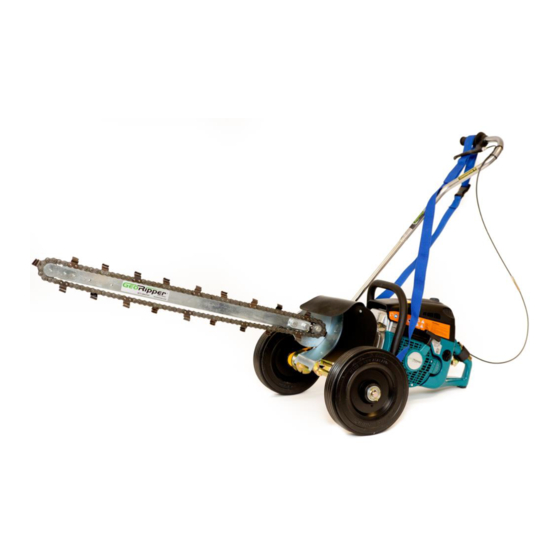
GeoRipper Mini Trencher
Models GR16M, GR16H, GR20M, GR20H, GR20S, GR27M,
GR27H, GR27S
These are the original English instructions. IMPORTANT: read this instruction manual carefully before operating the
GeoRipper® Mini Trencher and strictly observe the safety regulations. Keep this instruction manual!
May 2019
Version 1.1
1
www.georipper.co.uk
Advertisement
Table of Contents

Related Manuals for GeoRipper GR16H


Summary of Contents for GeoRipper GR16H
- Page 1 Models GR16M, GR16H, GR20M, GR20H, GR20S, GR27M, GR27H, GR27S These are the original English instructions. IMPORTANT: read this instruction manual carefully before operating the GeoRipper® Mini Trencher and strictly observe the safety regulations. Keep this instruction manual! May 2019 Version 1.1...
- Page 2 For permission requests, write to the publisher at the address below. Four Ashes Machinery Ltd, Four Ashes, Ashwicke Road, Marshfield SN14 8AD, United Kingdom Tel: +44 1225 891158, www.georipper.co.uk TRADEMARKS Four Ashes Machinery Ltd has made every effort to supply trademark information about company names, products and services mentioned in this manual.
- Page 3 FOUR ASHES MACHINERY LTD Product Modifications Year Type Modifications 2016 GeoRipper Original model Document Revisions Date Version Number Document Changes 25-05-2019 1.10 Initial document Approvals This document requires following approvals: Name Title Notes www.georipper.co.uk...
-
Page 4: Table Of Contents
1.5.3 Other languages ............................9 1.5.4 Documentation Feedback ........................9 1.5.5 Support and service ..........................9 Description of the GeoRipper® .....................10 2.1 ..Intended Use and Reasonably Foreseeable Misuse ...............10 2.2 ..Product Overview ..........................10 2.3 ..Technical Data ..........................11 2.4 .. - Page 5 3.2.2 Progressive Failure of wear parts ......................18 3.3 ..Potential Health Consequences .....................18 Assembly Instructions ........................19 4.1 ..Assembly of the GeoRipper® Mini Trencher ..................19 4.1.1 Content ..............................19 4.1.2 Assemble the GeoRipper® bar and chain ....................19 4.2 ..Assembly of the EZ Kart® ......................22 4.2.1 Content ..............................
- Page 6 6.4.1 Troubleshooting and repair by the operator ..................34 6.4.2 Troubleshooting by Service Centre ......................34 6.5 ..Frequently Asked Questions ......................35 6.6 ..Spare Parts, Wear Parts and Optional Accessories ...............35 Disposal............................37 Related Documentation & Illustrations ..................38 Declaration of Conformity for Machinery ..................39 www.georipper.co.uk...
-
Page 7: Preface
GeoRipper® This document is intended solely for the authorised user of the GeoRipper® and is an essential part of the machine. This document is intended to help familiarise the user with the operation and safe handling of the GeoRipper®. -
Page 8: Retaining Instructions
The manufacturer is not liable for cases of material damage or personal injury caused by incorrect handling or non-compliance with the safety instructions. In such cases, the warranty will be void. www.georipper.co.uk... -
Page 9: Obtaining Documentation And Information
FOUR ASHES MACHINERY LTD 1.5 Obtaining Documentation and Information 1.5.1 Internet The latest version of the documentation is available at the following address: http://www.georipper.co.uk/safety- instructions 1.5.2 Ordering documentation Documentation, user instructions and technical information can be ordered by emailing Four Ashes Machinery Ltd. -
Page 10: Description Of The Georipper
The GeoRipper® shall not be used as a forestry tool to cut or fell trees or branches. The GeoRipper® must not be used in extremely stony grounds, solid rocks, tarmac concrete or any other unsuitable ground conditions which do not allow trenching. -
Page 11: Technical Data
FOUR ASHES MACHINERY LTD Technical Data Specifications GR16M, GR20M, GR20S, Model GR16M, GR20M GR16M, GR20M GR16H, GR20H GR20H, GR27H GR27M GR27S GR-M Makita GR-M Makita GR-H Husqvarna GR-H GR-S Stihl Power Head Variations GR-M Makita EK6101 EK7650H EK8100 K770 Husqvarna K970... -
Page 12: Product Compliance
• EN ISO 12100 2010 Design / Risk Assessment & Risk Reduction • EN ISO 14121-2 2012 Machine Safety & Risk Assessment 2.4 GeoRipper® Elements Fig.1 1. 3mm hardened steel cutting teeth 2. Heavy duty chain and bar 3. Cutting bar bolts x2 and mounting plate 4. -
Page 13: Understanding The User Interface
2.5 Understanding the User Interface The GeoRipper® mini trencher is made of a cutting chain and bar (2 Fig.1) mounted on a power unit. The power unit, or engine (9 Fig.1), is an integral part of the product. The GeoRipper® can be operated hand held using the two handles (7 &... -
Page 14: Components Function
Location of the manufacturer’s serial number (4 Fig.1). The serial number is unique and identifies the model, bar size and power head manufacturer for each GeoRipper®. The serial number is stamped in the GeoRipper® mounting plate just above the bar securing bolts. -
Page 15: Description Of Working Environment
The GeoRipper® is intended for outdoor used on flat or gently sloping ground suitable for digging trenches. The GeoRipper® is not to be used indoor or in other enclosed spaces or on any type of ground deemed unsuitable for the digging of trenches such as extreme slopes, solid ground or extremely rocky ground. -
Page 16: Safety Instructions
Technical life span The GeoRipper® is made of wear parts which can be replaced as many times as required. The machine will come to the end of its lifespan when it is judged no longer economically viable to repair the power unit. -
Page 17: Personal Protective Equipment
Do not use if the plastic / rubber stone guard is not present (Fig.1 item 5) When possible always use the GeoRipper® mounted on the EZ Kart® to limit exposure to vibration Do not operate if feeling tired or if under the influence of substances 3.1.8... -
Page 18: Safe Disposal
Failing to wear the recommended PPE my cause serious injury. Hand Arm Vibration syndrome HAVs may result after long periods using the GeoRipper®. To reduce the risk of HAVs always use the mini trencher mounted on its EZ Kart® or limit the daily usage per operator. Individuals with poor circulation who are exposed to excessive vibration may experience injury to blood vessels or the nervous system. -
Page 19: Assembly Instructions
Four Ashes Machinery Ltd. by emailing contact@four-ashes.com 4.1.1 Content Inside your GeoRipper® box you will find the following: 1. GeoRipper® unit 2. Trenching bar 3. Two chains 4. - Page 20 Fig.10 4. Install the chain over the bar and loop over the drive sprocket (Fig.10) 5. Double check the chain is facing in the right direction (Fig.8). A pictogram is also showing on the box for the chains www.georipper.co.uk...
- Page 21 18mm spanner. Tighten securing nut on bar tensioner to keep tensioning bolt in place Chain tension guideline: Type of Soil Chain Tension from Middle of Bar Clay 25mm Hard / Compacted 25mm Stony 38mm Soft Top Soil 25mm Sand 38mm www.georipper.co.uk...
-
Page 22: Assembly Of The Ez Kart
3. Wheel securing washers and clips x2 4. Handle assembly (2 parts) with cable 5. Tube 6. Belt 4.2.2 Assembly Fig.13 1. Lay all the components on the floor Fig.14 2. Slide the metal plates of the strap over the axle ends www.georipper.co.uk... - Page 23 Fig.17 4. Insert the bottom part of the tube into the bar of the axle and secure with linch pin Fig.18 5. Fit the handle assembly part onto the tube and secure with lynch pin to finish the assembly www.georipper.co.uk...
- Page 24 FOUR ASHES MACHINERY LTD Fig.19, 20 & 21 6. Engage the GeoRipper® tab into the slot on the axle and lock into position with the bar Fig.22 & 23 7. Fit the throttle cable latch over the throttle lock on the machine handle. Secure tightly with Velcro.
- Page 25 The EZ Kart® is provided as standard with all G27 models and is an optional extra for GR16 and GR20 models. The EZ Kart® fits any models of GeoRipper® and only the throttle latch assembly varies depending on the power head type: EK6101 and EK8100 Gold latch, EK7650H Silver latch, K770 and K970 Orange latch and TS700 Red latch.
-
Page 26: Operation
Fig.27 Do not attempt to lift the GeoRipper® when mounted on the EZ Kart®. Simply use the handle of the cart to pull or push the machine. When transporting in a vehicle ensure that the machine is upright, securely tied down and that the petrol cap is properly closed so no fuel can leak out. -
Page 27: Fuelling
Use a quality fuel stabilizer if using gas with ethanol. FUELS WITH MORE THAN 10% ETHANOL ARE NOT APPROVED FOR USE IN GEORIPPER 2-STROKE AND 4-STROKE ENGINES! Use of alternative fuels, such as E-20 (20% ethanol), E-85 (85% ethanol) or any fuels not meeting GR MANUFACTURING, LTD requirements are not approved for use in GEORIPPER®... -
Page 28: How To Use The Georipper
The EZ Kart® is provided as standard with all G27 models and is an optional extra for GR16 and GR20 models. Secure the GeoRipper® on the EZ Kart® and start the machine as described in paragraphs 4.2.2 and 5.3.2. Fit the belt around the waist and adjust accordingly. -
Page 29: Trenching With The Georipper® Hand Held
Trenching with the GeoRipper® hand held 1. Place the GeoRipper® on the ground and slowly engage the bar into the soil as parallel as possible and using mid-range engine speed. Hold the machine firmly as some manageable kick back may be experienced. -
Page 30: Ground Conditon And Tips
JAMMED WILL CAUSE SEVERE CLUTCH AND/OR BELT DAMAGE. If GeoRipper® mini trencher has an adjustment screw for the belt tension, the tension must be readjusted after the first hour of operation to prolong belt life. See power head Operator’s Manual for further instruction on belt tensioning. -
Page 31: Vibration Information For Portable Hand-Held And Hand Guided Machinery
Variation in soil condition would alter this reading, and in stony soil condition, the reading is likely to be higher. — GeoRipper® handheld: time of operation before reaching ELV of 5m/s² is 25mns — GeoRipper® mounted on its EZ Kart®: time of operation before reaching ELV of 5m/s² is 6h16mns www.georipper.co.uk... -
Page 32: Maintenance, Servicing And Warranty
4-Cycle Engines: Change oil for the first time after 20 hours of use. After initial oil change, oil shall be changed every 30-40 hours of operation. When storing the GeoRipper® minitrencher, drain fuel from tank, run machine dry, and oil digging chain. Follow storage instructions in power head Owner’s Manual. -
Page 33: Replacing The Drive Sprocket
6.2 Servicing The GeoRipper® must be serviced regularly to ensure good operation. Every 500 hours of use or once a year a full service must be carried out. Please return your GeoRipper® to your local dealer for a full service including full check and cleaning of the machine, replacement filter paper and gauze, new spark plug, replacement fuel filter and replacement V belt. -
Page 34: How To Identify And Solve Problems
Chain runs in idle V Belt or replace Clutch Check clutch is not blocked Trench with difficulty or very Chain Replace narrow 6.4.2 Troubleshooting by Service Centre For any other issues with your GeoRipper® contact your local service centre. www.georipper.co.uk... -
Page 35: Frequently Asked Questions
Return to your point of sale for repair wrong? 6.6 Spare Parts, Wear Parts and Optional Accessories Only use genuine GeoRipper® parts and accessories. Do NOT modify parts as this may cause serious injury to the operator or bystanders Description Nose plate assembly fits all models and sizes Nose sprocket 6 tooth. - Page 36 Axle Extender to use in conjunction with wide chains GRPEZ-28 Rock Shield GeoRipper® spare parts and accessories can be purchased for your local dealer or on the online shop (www.georipper.co.uk). For any parts relating to the power head, please contact the power head manufacturer www.georipper.co.uk...
-
Page 37: Disposal
FOUR ASHES MACHINERY LTD 7 Disposal At the end of its life, take your GeoRipper® to an approved recycling centre. Wear parts such as chains, sprockets and bars can be recycled in metal section facilities. The symbol on the product, the accessories or packaging indicates that this device must not be... -
Page 38: Related Documentation & Illustrations
Husqvarna K970 III Operator’s Manual www.husqvarnacp.com Construction Products TS700 / 800 Fig. Illustration Description Page GeoRipper® Elements EZ Kart® Elements Serial Number Location Warning Sticker CE Marking Sticker 6 to 12 Bar and Chain Assembly Procedure 19-21 13 to 26 EZ Kart®... -
Page 39: Declaration Of Conformity For Machinery
Four Ashes Machinery Ltd. Place of issue: Warkworth United Kingdom Date of issue: 20-10-2016 30-05-2019 Name: Michael Sylvester Smith Eric Gadras Position: Director Managing Director Signature: The technical documentation for the machinery is available from: Name: DOC-EUPOINT Address: www.doceupoint.com www.georipper.co.uk... - Page 40 Imported in the UK by: Four Ashes Machinery Ltd. Company Registered in England and Wales no. 9811885 www.georipper.co.uk...
Need help?
Do you have a question about the GR16H and is the answer not in the manual?
Questions and answers