
Summary of Contents for Remootio Remootio
-
Page 1: Installation Guide
Installation Guide v3.3 (28.06.2019) Thank you for choosing Remootio! Step 1: Unboxing Unbox the Remootio device and the Remootio power adapter. page 1... - Page 2 - *Sensor (with cable) Control output cable - - *Sensor (wireless part) Brief instruction manual - - *Adhesive for sensors Bottom part of the box - - Adhesive for Remootio Upper part of the box - *: optional extras page 2...
- Page 3 Step 4: Applying the adhesive tapes to Remootio Remove the release liner on one side of the adhesive tape (E) and apply to the back side of Remootio (A). Do not remove the release liner on the other side yet.
- Page 4 Step 6: Removing the screw Turn Remootio (A) around and remove the screw (A10) and the top part (A9) of Remootio. Step 7: Removing the jumper Remove the jumper (A7) from the reset pins (A6). Keep the jumper as you might need it later when you want to reset the device.
- Page 5 Step 9: Connecting the sensor and other extras (optional) Connect the sensor (B) to the status sensor terminal block (A4) of Remootio. (Order of the wires does not matter). If you wish to add a manual control button to Remootio, please connect it to the manual control terminal (A1) of Remootio.
- Page 6 Step 11: Connecting the power supply If you have purchased the Remootio power adapter (K), plug it into Remootio’s power input socket (A3) and then into the wall socket. If you don’t have the Remootio power adapter, find the correct terminals on...
- Page 7 Step 12: Sensor installation (optional) Remove the protective liner from the adhesive of the wireless part of the sensor (C) and apply it on the moving part of your gate in such a way that either in fully closed or in fully open position it has to come close (within 12mm) to the wired part of the sensor (B).
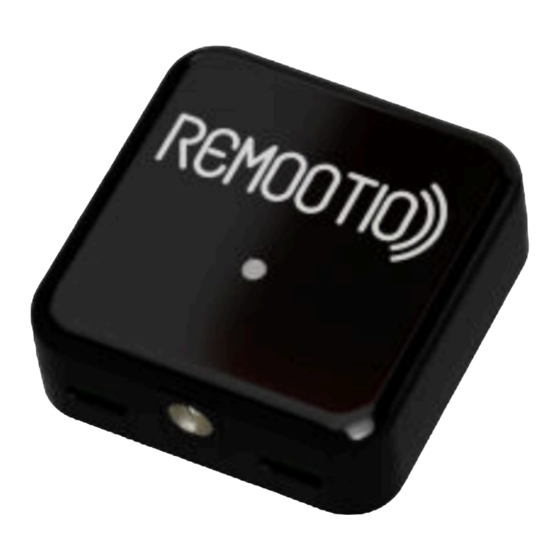
- Page 8 Step 13: Mounting Remootio Remove the protective liner from the adhesive of the Remootio (A) and mount it on a clean, flat surface. Make sure Remootio is facing outwar- ds (see image below for reference) so that Remootio has good signal reception even if you are connecting to it via Bluetooth from outside your garage.
- Page 9 (LED on the front is flashing quickly) and your smartphone’s Bluetooth is turned on. During the setup process keep your phone as close as possible to Remootio but not further than 3 meters. Start the Remootio app and click on ”Set up new device”. Do not close the app or go out of Bluetooth range until the setup process finishes.
- Page 10 Step 16: Testing and customizing It’s time to test if your Remootio is connec- ted correctly. After a successful setup, you will see a big white button in the middle of the screen. After making sure that there are no objects in the way of your gate or garage door, tap the ”Remootio”...
- Page 11 Step 18: Setting up Wi-Fi connection (optional) Make sure your Wi-Fi signals are available where Remootio is installed. Swipe up four pages in the app and click on the Wi-Fi icon. Accept the terms and conditions and click on ”Scan for Wi-Fi network”. When promp-...
- Page 12 Click on the confirmation link to activate your ac- count. Go to your smart home settings again within the Remootio app and tap on ”Login” and enter the e-mail address and password. After successfully logging in, tap on ”Link device”.
- Page 13 (at the fully closed or fully open po- sition), you might have to tap on the ”Flip logic” button so that the Remootio app shows the correct status of your gate. If you wish to get notifications when you left your gate open for more than 5 minutes, tap on ”Notify if left open”.
- Page 14 Step 23: Sharing keys Go down to the second page from above. You have unlimited Guest keys, which you can manage (revoke, set access rights) tog- ether. By default, you also have 20 unique keys, which you can manage one by one. To share the guest key, simply tap on the ”Guest key”...
- Page 15 If there is a newer version avai- lable and you wish to update, tap on ”Update firmware”. If you would like to reset Remootio’s firmware to the factory default software, tap on ”Advanced options” and select ”Reset to default software”.
- Page 16 Re- mootio device via Bluetooth and tap on the ”Reset setup” icon By resetting the setup, your Remootio can be set up again by you or someone who is within Bluetooth range of your Remootio device.
- Page 17 Appendix 1: Remootio Pinout Diagram page 17...
-
Page 18: Troubleshooting
Some features not General Make sure that you are using the latest version of the smartphone app and that your Remootio working properly device also runs the latest software. You can update Remootio's software version by clicking on the icon in the device software menu. - Page 19 Try setting up the Internet access again. Admin phone lost Lost admin phone Remove the screw from the back of Remootio and remove the top part. Place the jumper on pin header "A6" page 19...
- Page 20 6 Assembly and power supply page 7 Sensor installation page 8 Mounting Remootio page 9 Setting up Remootio page 10 Customizing the app page 11 Setting up Wi-Fi and Internet connection page 12 Setting up smart home access and auto-open...
Need help?
Do you have a question about the Remootio and is the answer not in the manual?
Questions and answers