Table of Contents
Advertisement
Quick Links
Advertisement
Table of Contents

Subscribe to Our Youtube Channel
Related Manuals for hologruf Holo-65X

Summary of Contents for hologruf Holo-65X
- Page 1 ENTERPRISE 3d HOLOGRAM...
-
Page 2: Safety Warnings
SAFETY WARNINGS DO NOT TOUCH THIS DEVICE WHEN IT IS IN OPERATION! YOU WILL BE INJURED DUE TO QUICKLY MOVING PARTS! 3D Hologram Display Solutions Hologruf, Inc. Cary, North Carolina, USA... - Page 3 ATTENTION: DO NOT disassemble the device, nor remove the SD/TF card at anytime! Any violation will void manufacturer’s warranty. For safety and protection purposes during the transportation, please use the following recommended couriers:...
-
Page 4: Product Description
PRODUCT DESCRIPTION The Holo-65X is one of Hologruf displays empowered by a fully-patented Persistence of Vision (POV) technology that rotates images or videos through one belt of ultra-high-density LED lights and presents in 3D hologram visual effects. This device comes with the characters of ultra-thin exterior design, ultra-low power consumption, ultra-high attractiveness, and design for portable. -
Page 5: Product Connection
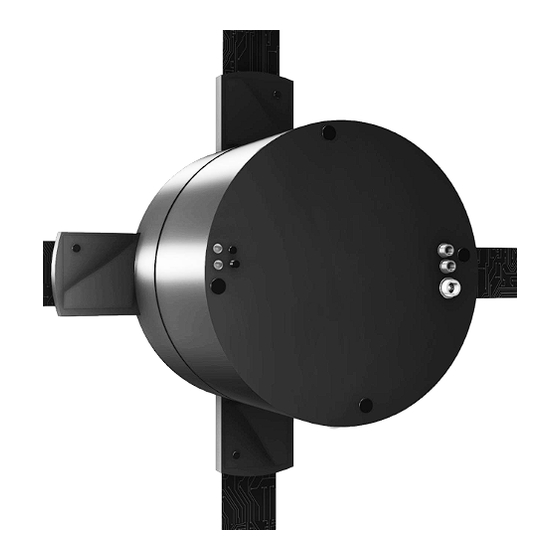
PRODUCT CONNECTION Indicator Light Reset Link Cable In/Out Settings button Power interface Indicator light: Indicates the power, ON/OFF, Mode-switching and so on. Reset button: Switching Mode, Pairing remote control . Setting Button: Switching Mode, Pairing remote control Multi-Link interface: Used in slave mode (See "Slave mode") Power Interface: Plug in the power adapter. -
Page 6: Connect Power
WIFI SETUP Please note: Verify funtionality from the device before launching the application. Power interface Power on the unit and note the units WiFi SSID. Go to the enabled WiFi settings of your mobile device. Link to the units exact SSID. (Case sensitive) Enter the password to connect the device. - Page 7 When indicator light is on in blue, cloud mode. 2. Networking To set up a ‘networking’ using multiple Hologruf displays, connect these displays as follows: Link-cable/out of display #1 (in host mode) is connected to Link-cable/in of display #2 (in slave mode).
- Page 8 Four displays networking example host mode slave mode slave mode slave mode Hologruf Mobile App The “Hologruf’ mobile app (iPhone and Android apps) is dedicated for controlling (turn on/off) the Hologruf displays and managing content playing (content uploading, deletion, playlist, and etc.).
-
Page 9: Mount Installation
MOUNT INSTALLATION Holo-65X displays can be installed on wall. Wall-hung fixing part Installation diagram Mounting parts You need expansion screws or common screws to install the mounting parts on the wall first prior to mounting the display to the wall. You need three gaskets between the wall and mounting parts to minimize any potential movement of the mounting part after the installation of the display. - Page 10 PC APPLICATION PC applicaiton for device control & content management...
-
Page 11: Download Software
Download software Download the PC software from our official website! Download link available at www.hologruf.com/software Install software Download the software package, unzip file “Hologruf-Win-Installer”, double click “POV.exe” to run the schedule manager, and it will prompt you to check network connection. -
Page 12: Connect The Device
PC APP OPERATION Connect the device PC needs to be connected to the Hologruf device via WiFi. Select the device model to connect the device,if it displays “connection failed”, click the button “Inquire malfunction” to check the error. ON/OFF Click the power ON button, the device will be turned on and start to rotate. - Page 13 PC APP OPERATION Playlist Edit: Select the corresponding playback file, click the Edit button, modify the repeat times. Add: Click the Add button, you will see the select option, select the content you want to play. Up: Select the corresponding play file, click the Up button, move the play file Down:...
-
Page 14: Screen Brightness
PC APP OPERATION Screen brightness Move the bar indicator to adjust the brightness. Timing Enter your schedule to turn on or turn off the Hologruf display. -
Page 15: Mobile App
MOBILE APP CONTROL The Hologruf Mobile APP for device control & content management... - Page 16 Google Play app store. Wifi connection Power on the Hologruf device, and wait no longer than 3 mintues, you should be able see the device shows up on the Wi-Fi list, being listed as e.g. Hologruf-xxxx. Type in the Wi-Fi password to connect securely.
-
Page 17: Delete Single File
MOBILE APP CONTROL Delete single file: Left slide the corresponding file, the Delete button will appear, click the button to complete Setting repeat times of playing the file Left slide the corresponding file, the Edit button will appear, click to edit dialog box (Note: 0 stands for a single file loop) - Page 18 FCC Statement This equipment has been tested and found to comply with the limits for a Class B digital device, pursuant to part 15 of the FCC rules. These limits are designed to provide reasonable protection against harmful interference in a residential installation.
Need help?
Do you have a question about the Holo-65X and is the answer not in the manual?
Questions and answers