Advertisement
Advertisement
Table of Contents

Summary of Contents for MaxxOne Kite
- Page 1 USER MANUAL KITE ALARM SYSTEM...
-
Page 2: Table Of Contents
Table of Contents ● Introduction ● Important Notes for Users ● About Safety ● Requirements ● System Status & User Authorities ● The Outlook ● Quick Setting Up ● Operating by App ● ● Specifications... -
Page 3: Introduction
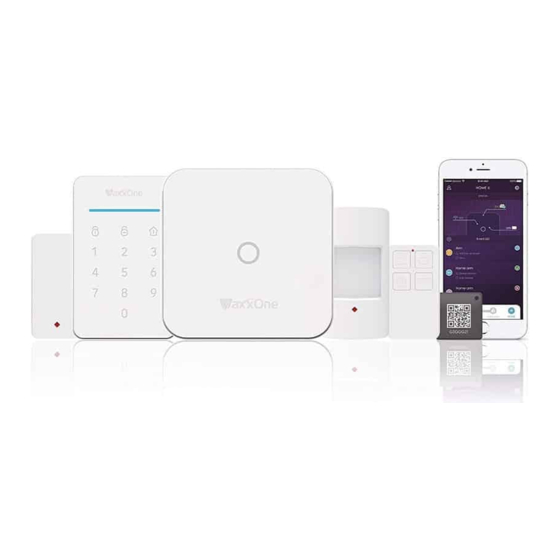
Introduction • Thank you for purchasing the MaxxOne® Kite Smart Alarm System. Kite will give you complete control over your home’s security and home automation via your smartphone, tablets or web clients. This manual will guide you through the setup procedures and highlight some key features. -
Page 4: About Safety
About Safety • This system does not offer any guarantee of protection against burglary, robbery, theft, or any type of emergency. It is a DIY product and does not come with a traditional monitoring service. However, most of the risks have been considered in our design to make your home safer. -
Page 5: System Status & User Authorities
System Status & User Authorities • The Kite system does not support any wired sensors. The main box communicates with all sensors via wireless RF signal protocols. • Most of the sensors have a low-battery warning mechanism. Users will receive notifications via the app before the battery runs out to allow time to change them. -
Page 6: The Outlook
The Outlook • Front View • Top View 5V2A Power Adapter Louvre RJ45 100M Ethernet SIM Slot LED Indicator STATUS MEANING Normal Status Light ON ARM/DISARM/HOME ARM/SOS Etc. Networking Configure Setting Status Fast Blinking Resetting Updating Low Battery Errors Slow Blinking Networking Errors Other Errors... - Page 7 • Back View Wall Mounting Bracket Siren Hole Battery Cover Networking Configure System Reset Power Switch...
-
Page 8: Quick Setting Up
Quick Setting Up • Install the Latest App - Please search My Kite in App Store or Google Play, or scan the QR code printed on the package to visit the download page directly. • Prepare the Internet Networking - Please ensure the router you are using has already been connected to the Internet with DHCP mode enabled. Kite supports IPV4 protocol only. - Page 9 • Setting Networking - Hold the Networking Setting Button in the battery cover until the LED indicator starts flashing. - Launch the App - [Start to add a main panel] - [Quick Config Mode], and follow the guidelines to finish the networking process. •...
-
Page 10: Operating By App
Operating by App • Introducing the Main User Interface Device List Switch between all main boxes of User Settings current user. Add/Remove main boxes. The entry for all account settings. System & App Settings - Bind Devices - Phone/Email/Password etc. Access the system settings and App settings. - Page 11 • Arming & Other Operations - Press the buttons listed on the toolbar. - You would hear a feedback sound in App when the operation is complete. - It is recommended to add SOS button by customising the toolbar for convenience.
- Page 12 • Pairing New Accessories Scan QR Code Recommended Tap [Scan QR Code] Code is printed on every accessory. Follow the guideline in App.
- Page 13 • Emergency Contacts Settings • All App users would be listed in Emergency Contact list automatically. • Users can add mobile phone numbers in [Other Contacts] list. • For the App users, the [Push Notification] option would be enabled by default, while the [SMS Notification] would be disabled by default.
- Page 14 • Emergency Contacts Settings • When users are at home and only want to keep some sensors working, they could turn to Home Arm status in the App. • When users tapping [Home Arm] button at the first time, the system would guide you to setup.
- Page 15 • App Settings In this area, users can adjust the following settings: - Change App Language: It supports multi-languages which can be easily switched in the App. - Passcode Lock: By enabling this feature, you would be asked to enter the passcode every time when App is activated from the background.
-
Page 16: Faq
Q: When operating in App, why is it slow to react/lagging? To better solving your problem, please do the following before asking for help from MaxxOne or a distributor. - Use LAN cable instead of WiFi for the main box. -
Page 17: Specifications
Specifications Core Preferences Environmental ARM Cortex-A7 Working Temp. -20°C~60°C Electrical Physical Auxiliary power DC 5V 2A Installation Desktop, Wall Mounted Backup batteries Rechargeable Lithium Polymer battery 2200mAh Shell Material ABS/PC Key Features Stand-by time 8 hours (fully charged) Radio receiver Max. - Page 18 Support If you find a bug or have additional questions not covered by this guide, then please visit www.maxxone.com for further support. Warranty www.maxxone.com Please visit for details of the manufacturers' warranty for this product.
- Page 19 The material in this document is the intellectual property of MaxxOne • No part of this manual may be reproduced, copied, translated, transmitted, or published in any form or by any means without our prior permission. • Our products are under continual improvement and we reserve the right to make changes without notice.
- Page 20 www.maxxone.com...
Need help?
Do you have a question about the Kite and is the answer not in the manual?
Questions and answers