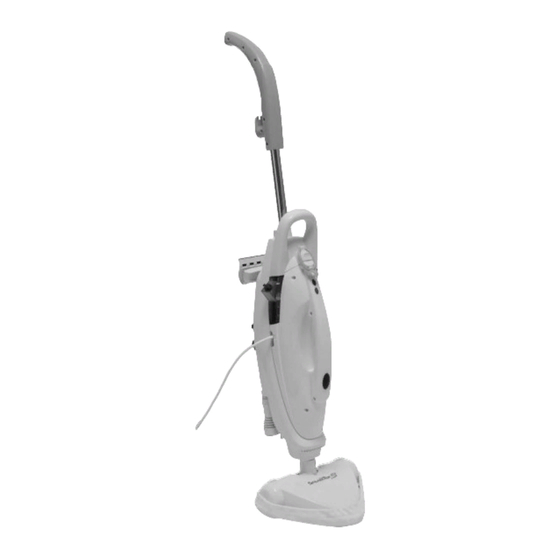
Summary of Contents for SuperTek SteamTek 3
- Page 1 USER’S GUIDE OPERATING INSTRUCTIONS & IMPORTANT SAFETY INFORMATION Please read all the instructions carefully prior using SteamTek3 Mop for the first time. Keep this manual in a safe place for future reference.
- Page 2 Congratulations for choosing the 3 – in – 1 Steam Mop It cleans, shines, sanitizes and deodorizes hard floor surfaces, carpets, and now features a detachable, hand-held steamer for tough to reach areas, even fabric. The powerful SteamTek3 releases 1500W of high pressure steam at 90 –...
-
Page 3: Important Safety Cautions
IMPORTANT SAFETY CAUTIONS PLEASE READ ALL INSTRUCTIONS BEFORE USING THE STEAMTEK3 WARNING - DANGER OF SCALDING CAUTION: 1. Make sure to connect unit to a grounded outlet only which corresponds to these voltage specifications: - 110-120V, 60HZ, 1500W - 220-230V, 50/60HZ, 1500W 2. - Page 4 25. Always make sure that the steam outlets are kept clear. DO NOT insert any objects into steam openings. DO NOT use unit with any blocked openings. 26. DO NOT aim steam directly at people or pets. 27. Use mop only as directed in this manual and use only with the included accessories. Use of other attachments may cause fire, electric shock or injury.
- Page 5 PARTS: 1. Microfiber Mop Pads (2) 12. Hand-held Steamer Release Tab 2. Microfiber Cleaning Pads For Fabric Tool 13. Swivel Joint (Acc. Caddy) (2) 14. Carpet Glider 3. Mop Head 15. Cord Holder 4. Mop Handle 16. ON/OFF Mop Trigger 5.
- Page 6 ASSEMBLY: 1. Lift up the Hand-held Steamer lock (11) (Illust.1) then push the Hand-Held Steamer release tab (12) up. (Illust. 2) to detach the Hand-Held Steamer (7) from the mop body (8). 2. Attach Mop Head (3) to Mop Body (8) by inserting the Swivel Joint (13) into the hole in the Mop Body.
-
Page 7: Filling The Water Tank
INSTRUCTIONS FOR USE: For Use on Hard Floor Surfaces: Put the Microfiber Pad (1) onto the Mop Head (3). (Illust. 9), then pull the toggle cord to secure it in place. (Illust. 10). NOTE: DO NOT use the Carpet Glider (14) on hard floor surfaces as it could cause damage. - Page 8 Filling directly from tap: 1. Detach the Hand-Held Steamer by releasing the Lock (11) by lifting it up. (Illust.16) 2. Push Hand-Held Steamer Release tab (12) up. (Illust. 17) 3. Remove Hand-Held Steamer from Steamer Body by lifting upwards and away from Steamer Body.
-
Page 9: Operation
When it stops emitting steam, unplug the unit, remove the water tank (or fill with cup), refill, replace tank, plug unit in, and resume cleaning. CAUTION: NEVER USE THE STEAMTEK 3 MOP WITHOUT WATER! Illust.23 6. When finished cleaning, unplug unit from outlet (by holding the... -
Page 10: Hand-Held Steamer
• The Green Indicator Light (20) will go on and off during use. This is a normal function which happens as the heater heats up or has reached its optimal temperature. This will not affect cleaning performance and you can continue cleaning as usual. •... - Page 11 5. Make sure the water tank is full before turning unit on. 6. When the Ready-To-Use Indicator Light (20) turns green, push the ON/OFF switch (19) once to turn unit on. The Hand-Held Steamer will emit continuous steam. To turn unit off, press the ON/OFF switch once again.
- Page 12 Remove the Squeegee attachment and put a small Micofiber Cleaning Pad (2- Main parts photo) on it as shown. (Illust. 30A & 30B). Use this attachment to steam out wrinkles and deodorize fabrics. For steaming clothing, upholstery and draperies, we recommend that you attach the Fabric Tool to the Extension Hose (G) for easier maneuverability.
-
Page 13: Accessory Instructions
ACCESSORY INSTRUCTIONS Extension Hose (G) & Jet Nozzle (F) Attachments 1. Pull the adaptor (23) out of the Hand-Held Steamer channel. (Illust. 40) 2. Turn the adaptor (23) to access the channel opening. (Illust. 41) 3. Align the Jet Nozzle (F) or the Extension Hose (G) with the corresponding slots inside the channel. - Page 14 In the event that this occurs, use a little vinegar to clean the area. IMPORTANT! : Always empty the water tank after using your SteamTek 3 Steam Mop! If there are any deposits remaining in the tank, add a little water to the tank, close the cap,...
-
Page 15: Cleaning And Maintenance
CLEANING AND MAINTENANCE WARNING! MAKE SURE THAT THE UNIT IS DISCONNECTED FROM THE POWER OUTLET BEFORE FOLLOWING THE PROCEDURES BELOW. How to decalcify the water tank interior: To clean and decalcify the water tank, add 1 – 2 tablespoons of white vinegar to a FULL water tank, close the cap, then shake. - Page 16 NOTE: After removing limescale, test on an isolated area to ensure that all debris has been removed from the unit before resuming use. CAUTION: DO NOT LEAVE THE STEAMER UNATTENDED DURING LIMESCALE REMOVAL AND/OR WHILE IN USE. Cleaning Steamer Attachments that are Blocked: If you live in an area that has a high mineral content in the tap water you may notice that less steam comes out from certain accessories.
-
Page 17: Troubleshooting
TROUBLESHOOTING PROBLEM The unit does not turn on (No Power) POSSIBLE CAUSE Unit is not properly plugged in SOLUTION Make sure unit is properly plugged into a proper electrical outlet and the switch is in the ON position. PROBLEM Unit emits limited steam or emits no steam POSSIBLE CAUSE •... - Page 18 Allow cloth the cool, then wring it out and re-attach. CAUTION: TO REDUCE THE RISK OF FIRE, ELECTRIC SHOCK OR INJURY, ALWAYS UNPLUG UNIT FROM OUTLET BEFORE SERVICING. Distributed by: Supertek Canada Inc. 8605 Darnley Mont-Royal, Qc H4T 1X2 client@supertek.ca Customer Service: 1-800-304-8354...

Need help?
Do you have a question about the SteamTek 3 and is the answer not in the manual?
Questions and answers