
Subscribe to Our Youtube Channel
Related Manuals for TAG MCLAREN AUDIO DVD32R

Summary of Contents for TAG MCLAREN AUDIO DVD32R
-
Page 1: Table Of Contents
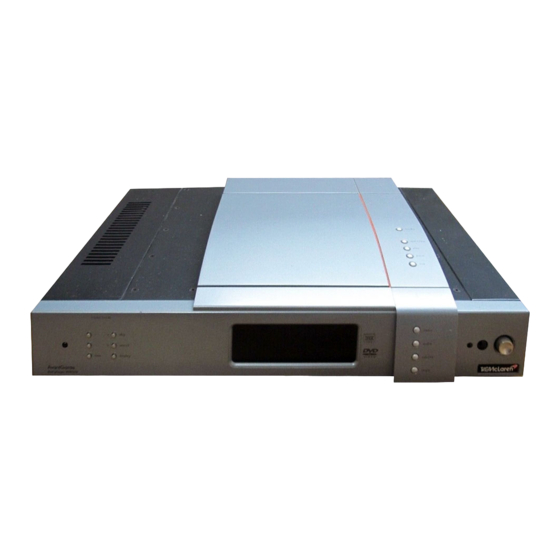
09/02 controls welcome key features regional coding getting started connecting door mechanism controlling the DVD32R the first time setup (setup wizard) display configuration playing a DVD (CD) special functions TAGtronic Communications Bus test patterns Progressive Scan Module PSM192 (option) - Page 2 DVD32R shown with PSM192 option installed...
-
Page 3: 4 Welcome
TAG McLaren Audio exists with one aim in mind: to produce the very best audio and Dr. Udo Zucker Chief Executive Officer audio-visual equipment. TAG McLaren Audio Like many people, I often have my best ideas when relaxing to a piece of music or watching a movie. - Page 4 – a rare combination in hi-fi the material science of Formula One motor but one which TAG McLaren Audio is racing: multi-layer printed circuits, fast already delivering. digital signal processing, electronic noise...
- Page 5 The DVD32R is an ideal partner to the range of TAG McLaren Audio AV processors but also complements many other high- performance audio-visual processors.
-
Page 6: 7 Key Features
There are many outstanding features included in this high- performance DVD player DVD32R. Within this manual we focus on the operation of the DVD32R. If you want to know more about the technical background, which led to this outstanding player, then... - Page 7 key features • Heavy, mass loaded, suspended DVD mechanism to minimise the effects of external key building vibration on the rotating disc blocks • DVD mechanism for optimum performance when playing DVDs and CDs • Mediamatics/National Semiconductor’s 32 bit RISC processor for best audio and video quality •...
- Page 8 key features • Mixed technology construction, leaded and surface mount for optimum construction results • Multi-layer printed circuit board for best signal to noise ratio • Vibration damping of chassis panels for best sound and picture quality • Sorbothane mounting feet for best vibration isolation The TAGtronic Communications Bus allows for ‘near perfect’...
-
Page 9: 0 Regional Coding
Simply press menu, then 5 and a screen similar to the one shown below will appear: player information _____________________________________________ model : DVD32R serial number : DVD-..region code : software version : V3.70/S58 In the example above, the DVD32R is set to region code 2. Press menu to resume normal operation. -
Page 10: 1 Getting Started
We know that you are keen to get your DVD32R working. This section describes the connections required to make your DVD32R fully functional and have you viewing your favourite movies as quickly as possible. Refer to page 2 for diagrams to help you find... - Page 11 Now remove the four screws (F), using the tool (G) supplied with before you start your DVD32R, Please make sure you don’t lose any of the (cont’d) washers (E). Make sure also that you don’t twist the transport card (D) whilst removing the screws.
-
Page 12: 3 Connecting
DVD32R to an AC supply outlet. The connection of the DVD32R to your system will depend on the capabilities of your display device and the availability of the optional Progressive Scan Module PSM192 If your DVD32R doesn’t contain the Progressive Scan PSM192 option... - Page 13 The picture will show black and white if the wrong setting is used Don’t forget, you need to press the REMOTE SELECTION button dvd to switch the DVD32R’s remote into the DVD control mode, as described on page 20...
- Page 14 If the Progressive Scan Module PSM192 is installed in your DVD32R, some of the connections, located at the rear panel of your DVD32R change their functionality. COMPONENT VIDEO RCA connectors interlaced, i.e. normal video, as before BNC connectors Progressive Scan video...
- Page 15 1. For details see the AV processor’s operating manual 2. If the DVD32R is linked with a TAG McLaren AV processor via the TAGtronic Communications Bus, and its Blue LED State When Display Off setting is set to Off, the Blue LED will switch off when the display is switched off, so reducing stray light levels when watching a movie.
-
Page 16: 7 Door Mechanism
‘perfect’ movement. If the movement was too fast the DVD32R will slow down the next one, if it was too slow it will accelerate it. Sometimes the prediction for the next movement might not be... - Page 17 DVD32R door will flash. If the DVD32R is switched off for a longer period or is started from after long a low temperature the grease between the precision bearings and switch-off polished steel bar, holding the door, might be ‘sticky’.
-
Page 18: 9 Controlling The Dvd32R
LED will be dimmed and the display switched off. Normal operation may be resumed by pressing any button on the front panel or the remote. You can keep the DVD32R in standby for long periods of time without penalty of a high electricity bill, as the DVD32R includes its own low-current standby circuitry. - Page 19 DVD32R Before you can control the DVD32R with the remote you must first controlling the select it as the device to control. This is done by pressing the dvd DVD32R R E M O T E S E L E C T I O N key in the REMOTE SELECTION area at the top of the remote.
- Page 20 What might sound initially confusing is very intuitive. Just do what you instinctively would do and you can control the DVD32R with very few keys - a perfect solution for operating a hi-performance home cinema in the dark.
- Page 21 DVD is within the DVD disc menu. Some DVDs do not allow the DVD32R to detect the presence of the DVD disc menu automatically. In this case pressing menu for more than two seconds...
-
Page 22: 3 The First Time Setup (Setup Wizard)
When the player is in setup mode many control buttons, such as open/close are temporarily de-activated. setup cannot be invoked when the DVD32R’s door is open or a disc is playing. To maximise the performance from your DVD32R, it is essential to configure it correctly;... - Page 23 (setup wizard) Depending on the software version loaded in your DVD32R, the setup wizard player might support several languages for the player setup (cont’d) menus and on-screen display information. It is recommended that you select your preferred language before commencing with the setup wizard.
-
Page 24: 5 Display Configuration
(AV30R) needs to be on software version v3.70 (v3.60) or higher 2. The DVD32R can also be configured to override the processor’s settings. If both products are configured to define the display brightness, then the last change (either from the DVD32R or the processor) will take precedence... -
Page 25: 6 Playing A Dvd (Cd)
2. The drive turntable is the part of the mechanism on which a disc sits, located in the centre of the tray 3. If the play key is pressed, when the player is in standby, the DVD32R will wake up from standby and will, after the initialisation is over, start playing a disc (if... - Page 26 2. In the DVD disc menu stop will be interpreted as cursor down unless held for > 1 second 3. Some DVDs do not allow the DVD32R to detect the presence of the DVD disc menu automatically. In this case pressing menu for more than two seconds will force the switch over from the transport function keys rew, ffw, stop, and pause to the cursor control keys .
- Page 27 playing a DVD (CD) Press time while a disc is playing to cycle through the four time time display display modes: 1. chapter (track) time elapsed 2. chapter (track) time remaining 3. title (disc) time elapsed 4. title (disc) time remaining The skip + / - buttons provide the ability to move forwards (skip skip +) and backwards (skip -) through the chapters (tracks) on the...
- Page 28 DVD if a DVD is menu . Pressing menu again will resume play from where it playing was interrupted. 1. If no disc is playing menu will bring up the DVD32R’s setup menu...
- Page 29 The title of a DVD, if available, can be accessed pressing the title record/LFE or 0/title key. The 0/title key will only be interpreted as title if the DVD32R isn’t in any number editing mode. A second press will resume play from where it was interrupted by the first press...
-
Page 30: 1 Special Functions
>repeat.. random.. goto The function selected, in the example above repeat.., will also be repeated in the DVD32R front display, allowing you to select special functions without a display device or when playing a CD. Dots after a menu item, e.g. repeat.., indicate a related sub-menu. You can switch between... - Page 31 (only for CD) indicator in the front display will light up (only visible on the DVD32R front display as a CD will switch off video) random play is deactivated pressing stop twice or selecting random.., followed by random play off and then pressing ok.
- Page 32 special functions Selecting goto while playing a DVD activates go to title: _ _. special function Type in the title you want to go to using the numeric keys of the goto remote. Pressing ok or waiting for a few seconds will start the selected title , if available.
-
Page 33: 4 Tagtronic Communications Bus
Rather than having to individually control the display brightness of synchronise each piece of your TAG McLaren Audio system, it is possible to display synchronise their brightness to match the display on your DVD32R. - Page 34 1. This requires AV32R bp-192 software version 3.70 or higher 2. Auto-standby puts the DVD32R into standby if it ‘idles’ for a user selectable time. See first time setup in the DVD32R setup menu for details (on-screen)
-
Page 35: 6 Test Patterns
The DVD32R is the world’s first DVD player with an in-built test pattern test patterns generator to assist you in adjusting your picture, PAL or NTSC, for best performance. Many display devices are wrongly adjusted when leaving the factory because they need to overcome the bright lighting in the show rooms from which they are usually selected. - Page 36 1. The DVD32R will not display the blacker than black test signals recorded on some test discs as it will remove those ‘out of spec’ signal levels. Some video...
- Page 37 test patterns From the test-patterns menu press 2 to select black level (PLUGE). pluge 1 Press 1 to select PLUGE 1. The PLUGE 1 signal will look like this with black level (brightness) set too high. black PLUGE dark grey Turn the brightness up until you can clearly see the PLUGE bar.
- Page 38 test patterns Press 2 to select PLUGE 2 from the test-patterns: black level menu. pluge 2 The PLUGE 2 signal will look like this with the black level (brightness) set too high. black dark PLUGE white grey PLUGE 1 has low average intensity, whilst PLUGE 2 includes a white bar.
- Page 39 Press 3 to select cross-hatch from the test-patterns menu. cross-hatch The cross-hatch included in the DVD32R is a multi-purpose test pattern which will allow adjustment of contrast and sharpness. cross hatch shown on a 4:3 display device The test pattern includes a series of black lines on a white background.
- Page 40 test patterns On some display devices the black lines will have a second or even multiple lines beside them, usually shown in a light grey. They can be caused by many reasons, for example poor cables between the DVD player and the display device or - usually only available in NTSC - a wrongly adjusted sharpness control.
- Page 41 test patterns Press 4 to select colour from the test-patterns menu. colour The colour test pattern allows you to adjust Colour (and Tint in NTSC) . Adjust those two parameters until yellow looks yellow (without including too much red) and Red is not over-saturated. Your might use filters, available from specialist suppliers, which will allow you to more objectively adjust colour.
- Page 42 These test patterns output a cross hatch of white lines on a black background, including several perfect circles. If the geometry of your display device or the output format of the DVD32R aren’t correctly set these circles will look distorted. Make sure your display device is switched to the correct aspect ratio and you have set the DVD32R correctly (see setup ->...
- Page 43 test patterns Many display devices form white by generating a mixture of the convergence primary colours red, green and blue which our eyes add to white. If these colours aren’t hitting exactly the same spot they won't form perfect white. This is called imperfect ‘convergence’ Convergence of some display devices, primarily projectors, can be user adjusted, others will need a service engineer or aren’t adjustable at all.
-
Page 44: 5 Progressive Scan Module Psm192 (Option)
Progressive Scan Module PSM192 (option) Your DVD32R may optionally be fitted with a Progressive Scan video processing board, the Progressive Scan Module PSM192 (option) Module PSM192. PSM192 generates analog and digital progressively scanned video outputs from interlaced video inputs. This applies to the video signal from DVDs played by the DVD32R, and also to external composite and S-Video sources. - Page 45 The analog outputs are available on the player’s BNC COMPONENT VIDEO connections. The normal interlaced component video signals remain available on the RCA COMPONENT VIDEO connections. For best quality the DVD32R should be configured for change setup COMPONENT output. This is done in the >...
- Page 46 (i.e. they expect a 4:3 input by default), press shift then display to turn the bars off if the input signal is 16:9. This function can be automated if your DVD32R is connected to an bp-192...
- Page 47 Progressive Scan Module PSM192 (option) The PSM192 has advanced options if your DVD32R is connected to picture the AV32R bp-192 calibration with the AV32R allows, on a per video input basis, control of Black Level The AV32R bp-192 bp-192 (1)
-
Page 48: 9 Software Upgrades
TAGtronic Programming Cable (optional - not included with the DVD32R). Details of future upgrades are published on www.tagmclaren.com. In order to upgrade your DVD32R with the latest software you need to have the following items: A suitably equipped PC to interface with the DVD32R. - Page 49 If the TAGtronic Programming Cable has been connected correctly, the DVD32R will not switch on - it will simply wait to be re-programmed! Run the TAGtronic Upgrade Wizard from Microsoft Windows by selecting Start > Programs > TAGMcLaren Audio >...
- Page 50 Remove the TAGtronic Programming Cable from the DVD32R, unplug its mains cable and after about 10 seconds, reconnect it. This will reset the DVD32R. Leaving the power amplifiers until last, reconnect and switch on all components. Problems? In case you experience a problem, just try the above sequence again. Should the problem persist, please send an e-mail to helpdesk@tagmclaren.com for further...
-
Page 51: 2 Running In And Warming Up
TAG McLaren Audio equipment is designed to give optimum performance for many years. Just like a high-quality car, the performance of DVD32R will running in improve during the first few weeks of operation. The electronic components will then have reached and settled down to near- perfect specification. -
Page 52: 3 Care And Maintenance
There is a fuse in the power socket on the back of your DVD32R. fuses To change the fuse, unplug the power cable and pull out the fuse carrier drawer. The fuse carrier contains a spare fuse. This is the first one you see when you open the carrier. - Page 53 If service is required, please contact your authorised TAG McLaren Audio retailer or arrange it directly via our website www.tagmclaren.com. If your DVD32R is still under guarantee, please refer to the guarantee card which gives you details on how to claim against the guarantee.
-
Page 54: 5 Programming The Remote
The remote comes pre-programmed and ready to use for the the remote following TAG McLaren Audio products: • our range of AV processors • our range of home cinema amplifiers • our range of DVD players Other devices which are not pre-programmed to work with the remote will need to be ‘learnt’. - Page 55 programming the remote To ‘learn’ new commands: learning new 1. Select the device you wish to program by pressing the commands R E M O T E S E L E C T I O N appropriate REMOTE SELECTION key on the remote. 2.
- Page 56 programming the remote 7. Once you have finished teaching the remote all the desired commands from the original remote, you must store them by simultaneously pressing the appropriate REMOTE SELECTION key and the ok key for about four seconds. Once you have stored the ‘learnt’ functions, test the keys you have taught to make sure that they are programmed correctly.
- Page 57 programming the remote When using the macro functions, it can take up to 10 seconds to transmit a 10-key sequence. You should keep the remote pointing towards the appropriate unit while the commands are being transmitted to ensure they are received correctly. To program in a macro function: programming a R E M O T E S E L E C T I O N...
- Page 58 programming the remote To erase a learnt command from a key: erasing single commands 1. Simultaneously press the REMOTE SELECTION key for the R E M O T E S E L E C T I O N appropriate device and the ok key until the status LED turns yellow and the chosen REMOTE SELECTION key is lit.
- Page 59 programming the remote To erase ALL learnt commands for one device: erasing all commands for 1. Press the REMOTE SELECTION key for the appropriate device one device and the ok key simultaneously until the status LED turns yellow and chosen REMOTE SELECTION key is lit. 2.
-
Page 60: 1 Technical Data
This section is for those of you who really want to know the ‘insides’ of your DVD32R. You will not miss out on any of the functions or performance of your DVD32R if you choose not to read any further. - Page 61 technical data video outputs S-Video and Composite outputs PAL-B/D/G/H/I supported output PAL M television standards NTSC-M output levels 1 V p-p (75 Ohm load, negative sync.) composite Y-signal: 1 Vp-p (75 Ohm load, negative sync.) C-signal: PAL: 300 mVp-p (75 Ohm load) S-Video NTSC: 286 mVp-p (75 Ohm load) Y-signal:...
- Page 62 technical data 445 x 320 x 100 mm dimensions 9.6 kg (approx.) weight 5 – 35 ˚C operating temperature...
-
Page 63: 4 Acknowledgements
acknowledgements This product incorporates copyright protection technology that is acknowledgements protected by method claims of certain U.S. patents and other intellectual property rights owned by Macrovision Corporation and other rights owners. Use of this copyright protection technology must be authorised by Macrovision Corporation, and is intended for home and other limited viewing uses only unless otherwise authorised by Macrovision Corporation.
Need help?
Do you have a question about the DVD32R and is the answer not in the manual?
Questions and answers